
 Become a TechRadar Insider


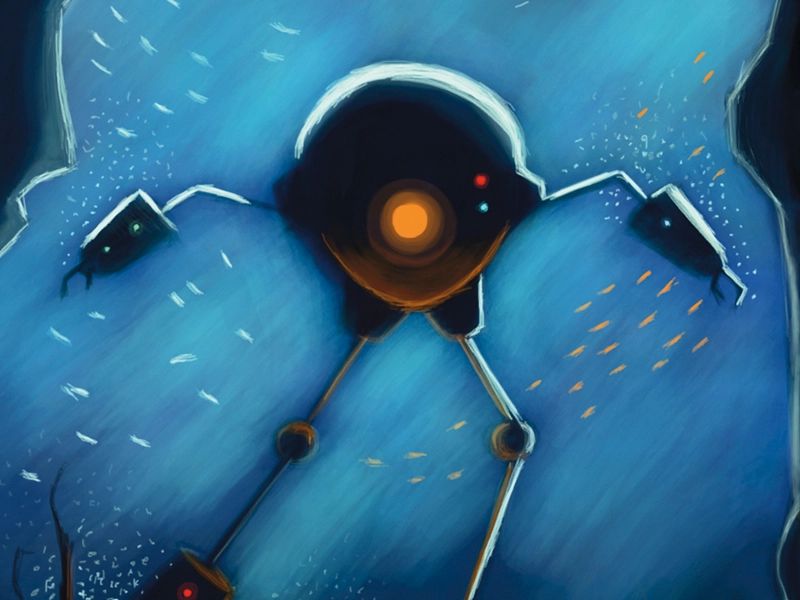
For this tutorial, we'll be creating an underwater scene using the iPhone application Brushes (iTunes link).
This app consists of four basic painting tools: a Paint Bucket, Brush Selector, Eyedropper and Colour Picker.
Since I'll be painting on a 3.5-inch display, these tools will provide a fast workflow for this particular medium. Think of Brushes as a mini version of Photoshop and Painter, without the many windows full of options for each feature.
The user interface for Brushes makes it easy to decide on colour selections and placement of objects in the scene you paint. I'll begin by creating a background, then work my way up to a robot before going on to choose which techniques are needed to create the illusion that our scene is underwater.
The creative decisions made in relation to the placement of lights and shadows are extremely important for creating the mood of the scene.
Don't be afraid to make a mess with your brushstrokes – Brushes has an Undo/Redo button in case you want to remove specific ones.
The application works extremely well with the iPhone's Pinch Zoom feature to zoom in and out when you want to add fine detail. Also remember to take the battery life of your iPhone into consideration: you don't want it unexpectedly turning off when you're in the middle of a masterpiece.
When your painting is finished, you'll have the option of exporting your image at high resolution using the Brushes Viewer (Mac only). Before you start you'll need to download this zip file of source images. Let's throw on some tunes and begin to paint on the iPhone!
1. Blue gradient
I begin by filling in the background with a medium shade of blue using the Paint Bucket tool. I then use a wide brush size and select the third Brush option. I make a gradient of dark-to-light transparent blues, gradually changing blue values with each brush stroke. It doesn't have to be perfect, so I don't worry if my values are slightly off. Then I tap Done at the top-right corner, click the icon in the bottom-left and select Duplicate Painting when prompted.

2. Creating the robot
Starting with the head, I paint a sphere with a mid-sized brush, using a dark blue. I change my brush to the smallest size, and adjust the transparency setting to just past the halfway mark. I Pinch Zoom in to about 300 per cent and draw the basic shapes of the robot body with the blue I used for the head.

3. Blocking colour
Since the scene takes place underwater, the colour scheme should be relative to the mood of the painting. So the colours for my underwater setting will consist of dark and light blue hues. I always start with my darkest values and work my way up to mid-tones, then highlights. I begin blocking in the arms and legs of the robot with a dark blue value, and then use the same dark blue to create the cave around the robot.

4. Illusion of light
To sell the story of this underwater scene, the strongest light source should come from behind the robot. The robot appears to be entering the cave, so the light source shouldn't affect its frontal view. This can be achieved by selecting light blue values to paint the background. I'm not worried if my brushstrokes graze the edges of the robot, because I'll paint over them eventually. Using a small brush size and a bright blue tint, I zoom in and paint highlights just above the edge of the right arm and leg joints.

5. Robot highlights
Using a small brush size, I apply a few more highlights onto the head of the robot, along with some on the left arm. My cave will also need highlights just around the edges of the entrance, to make its walls more distinct and to be consistent with the highlights on the robot, so I begin to apply those as well. My lines don't have to be perfect: I'm painting on my iPhone rather than a tablet, so clean brush strokes shouldn't matter. That's the beauty of working on this device. The workflow and thought process can be applied faster than when using desktop applications like Photoshop and Painter, so be sure to use this to your benefit, rather than thinking of it as a restriction.

6. Light of the eye
Little detail is needed for the eye, short of the light it's emitting and the objects it affects. I first paint the ground with a small brush size and a tint of orange matching the eye colour. I paint the ground first to get an overall view of how the light will reflect on the robot. I zoom in to 800 per cent and apply my brushstrokes, changing transparency as I paint from the robot. I then apply a dark shade of orange to the right leg and joint.

7. Blending colours
The Brush tool palette has no blending brush, but this doesn't stop me from creating smooth colour transitions with the tools provided. The blue hue is already on the robot, so I need an orange semitransparent shade to create a blend between both colours. I move the tint selection just below the halfway mark and zoom in before applying the orange brush strokes on the robot's foot. Using the same semitransparent tint selection in blue, I soften any sharp lines between both colours.

8. Cave lighting
Now I work on shaping the cave edges that will be affected by the external light source. The inside of the cave will have to be darkened to make the background light source more intense. Zooming in to 800 per cent, I paint my highlights on the cave by selecting the smallest brush and applying strokes just above the outer cave edges. I then use the darkest blue value in the cave and increase the value slightly to create my midtones.
