Portrait retouching: 7 tricks for giving your portraits a professional finish
Remove unwanted blemishes, soften skin and boost eyes
Sign up for breaking news, reviews, opinion, top tech deals, and more.
You are now subscribed
Your newsletter sign-up was successful
Essential portrait sharpening advice
There are many sharpening techniques. Here’s a trick that works really well for women…
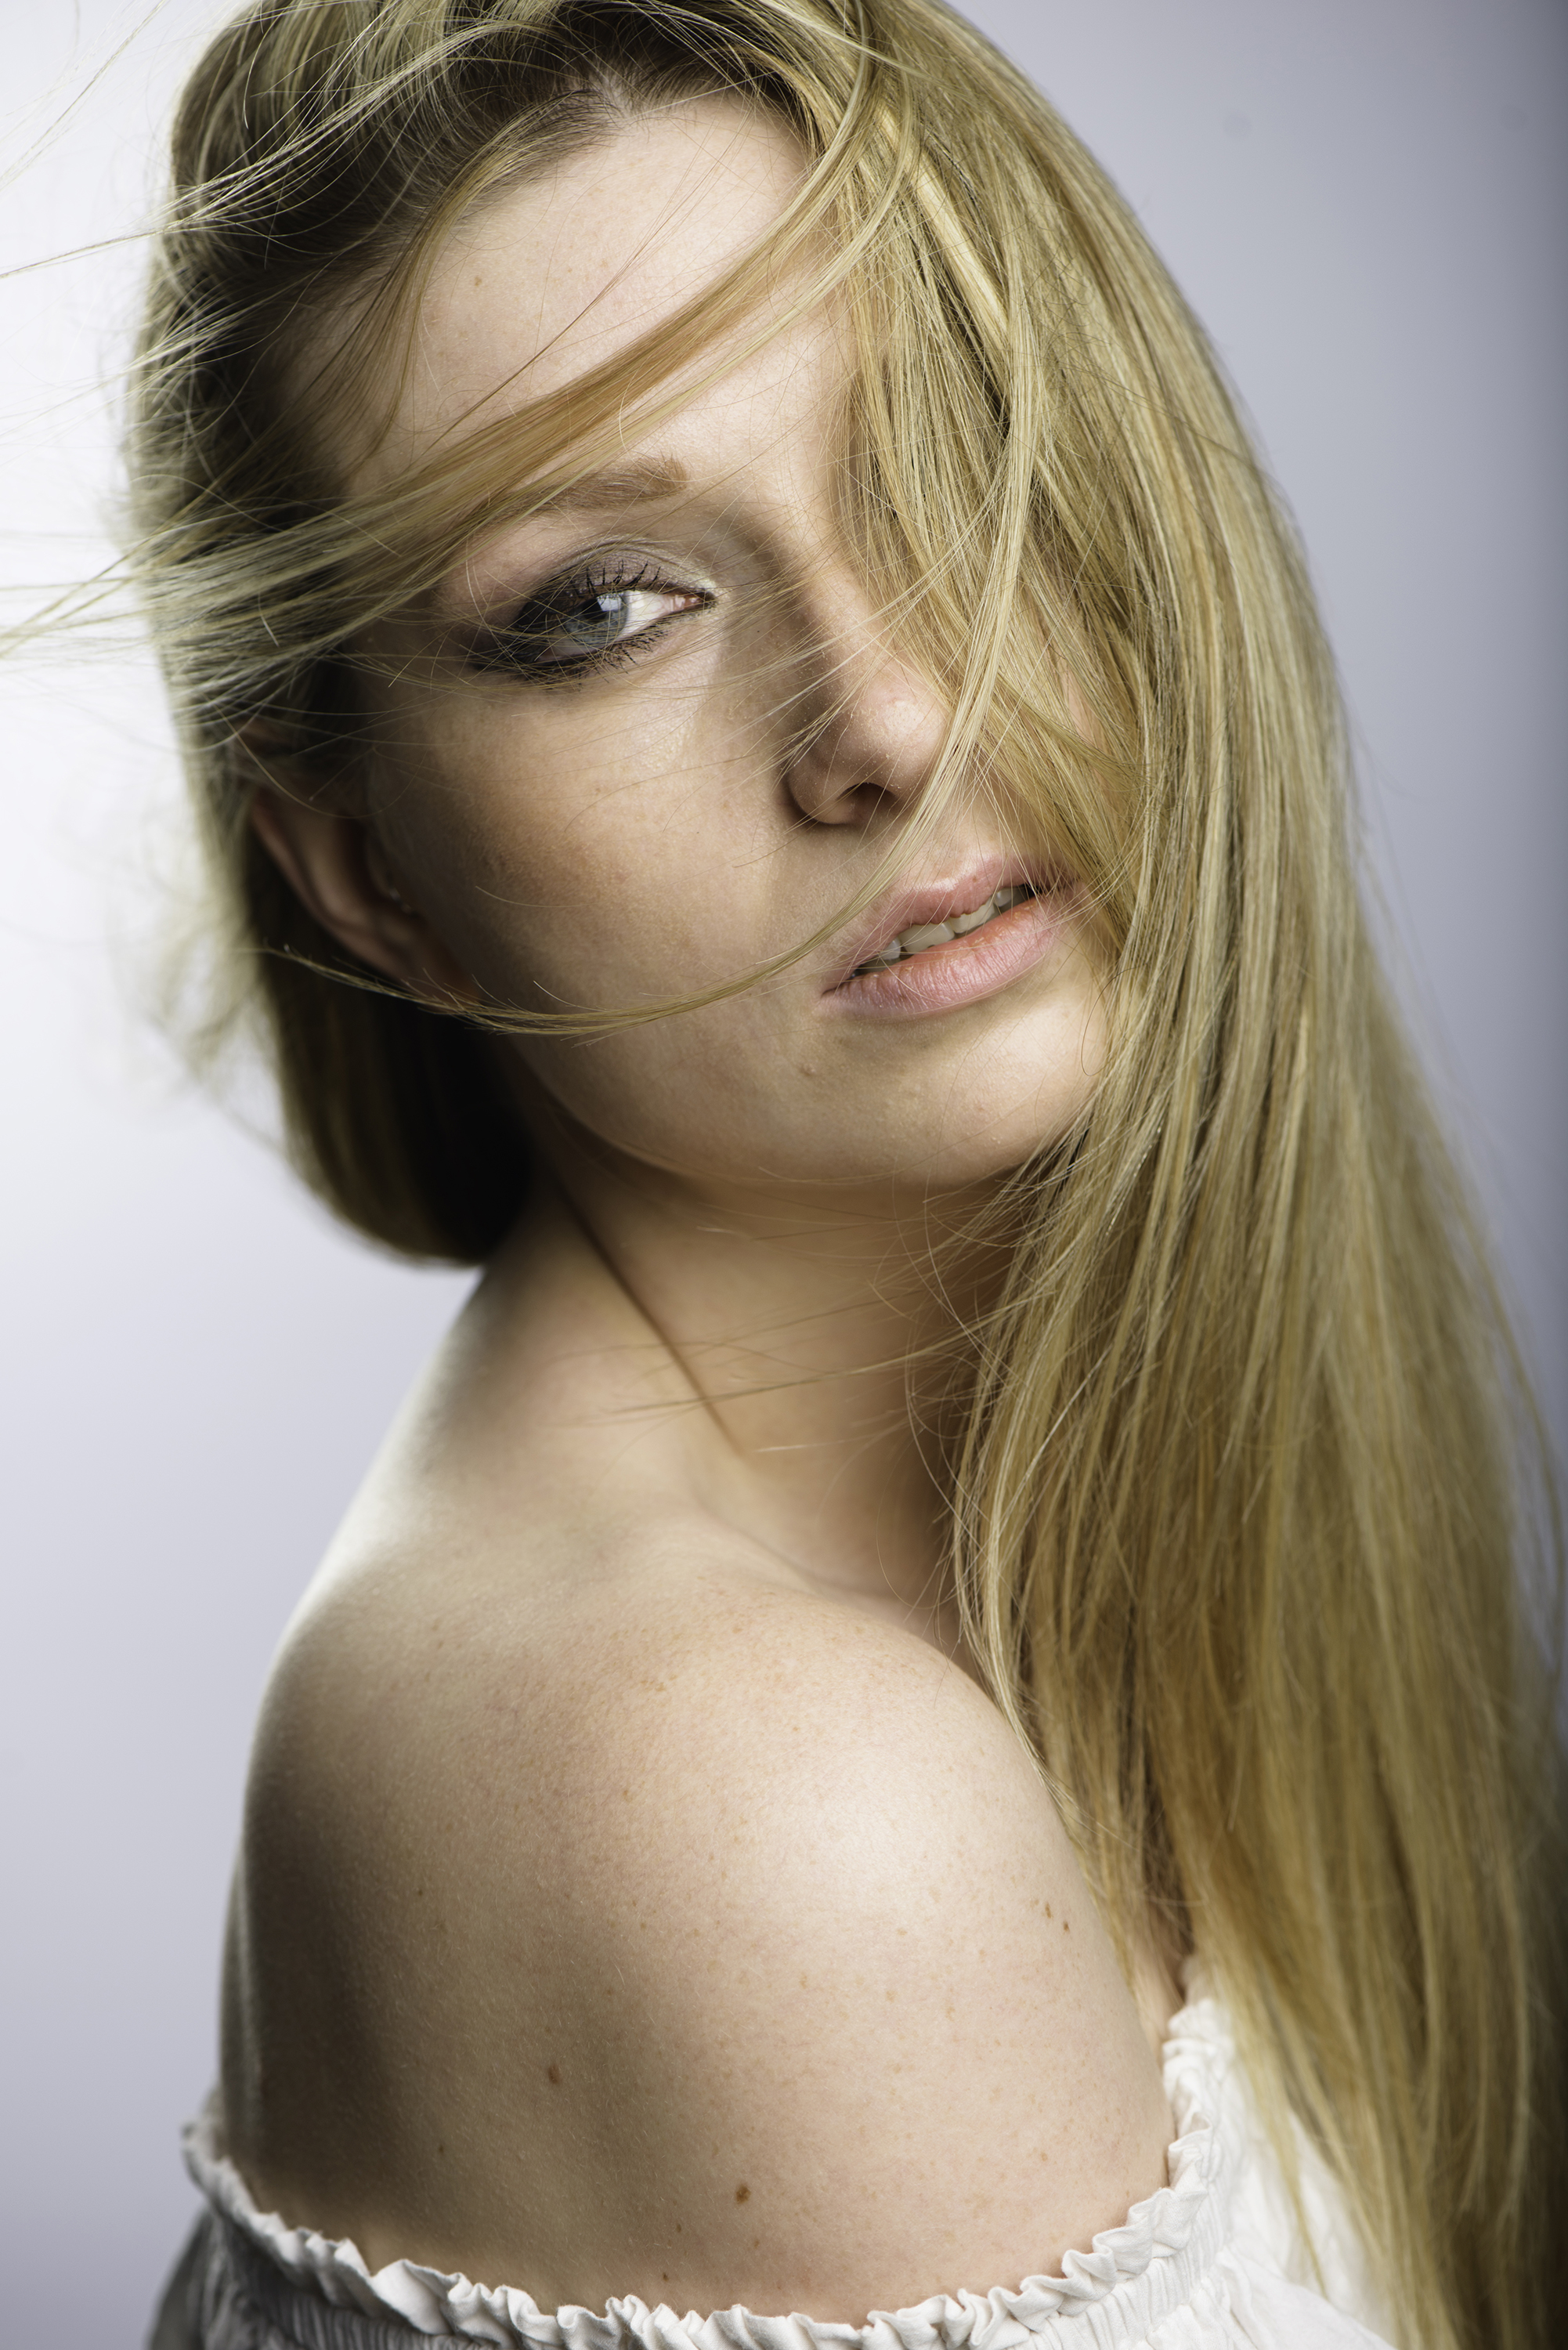
Before
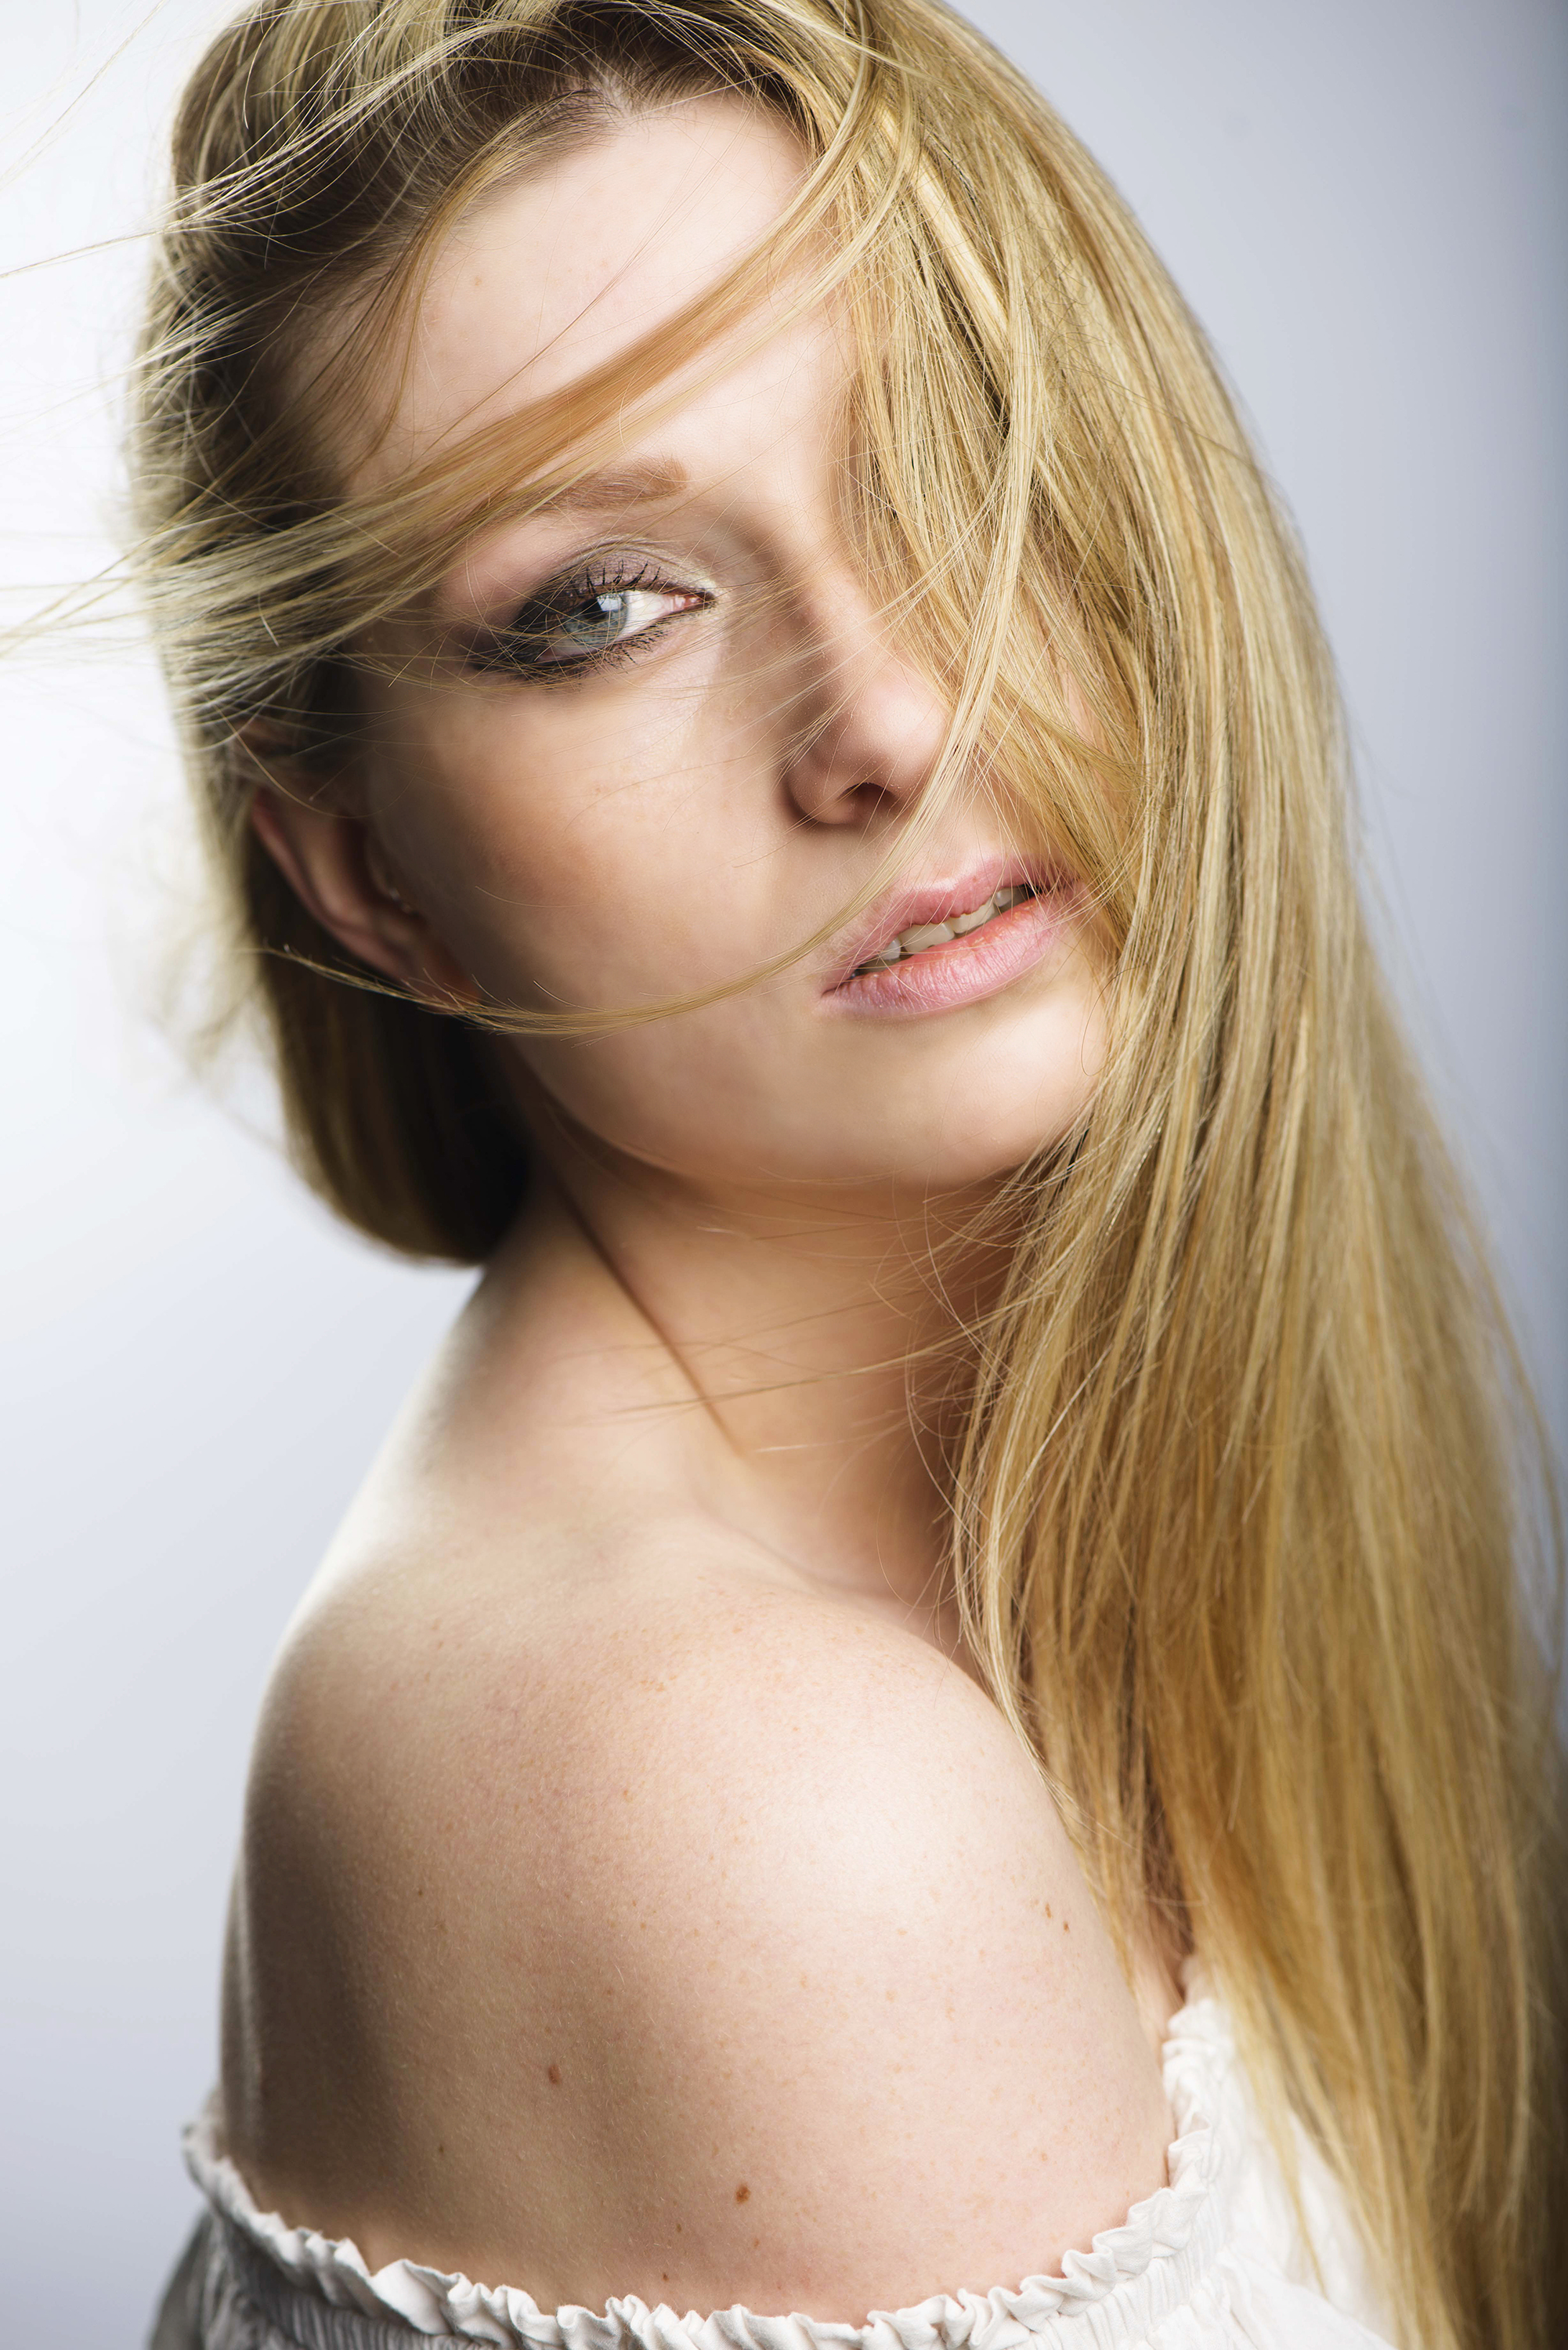
After
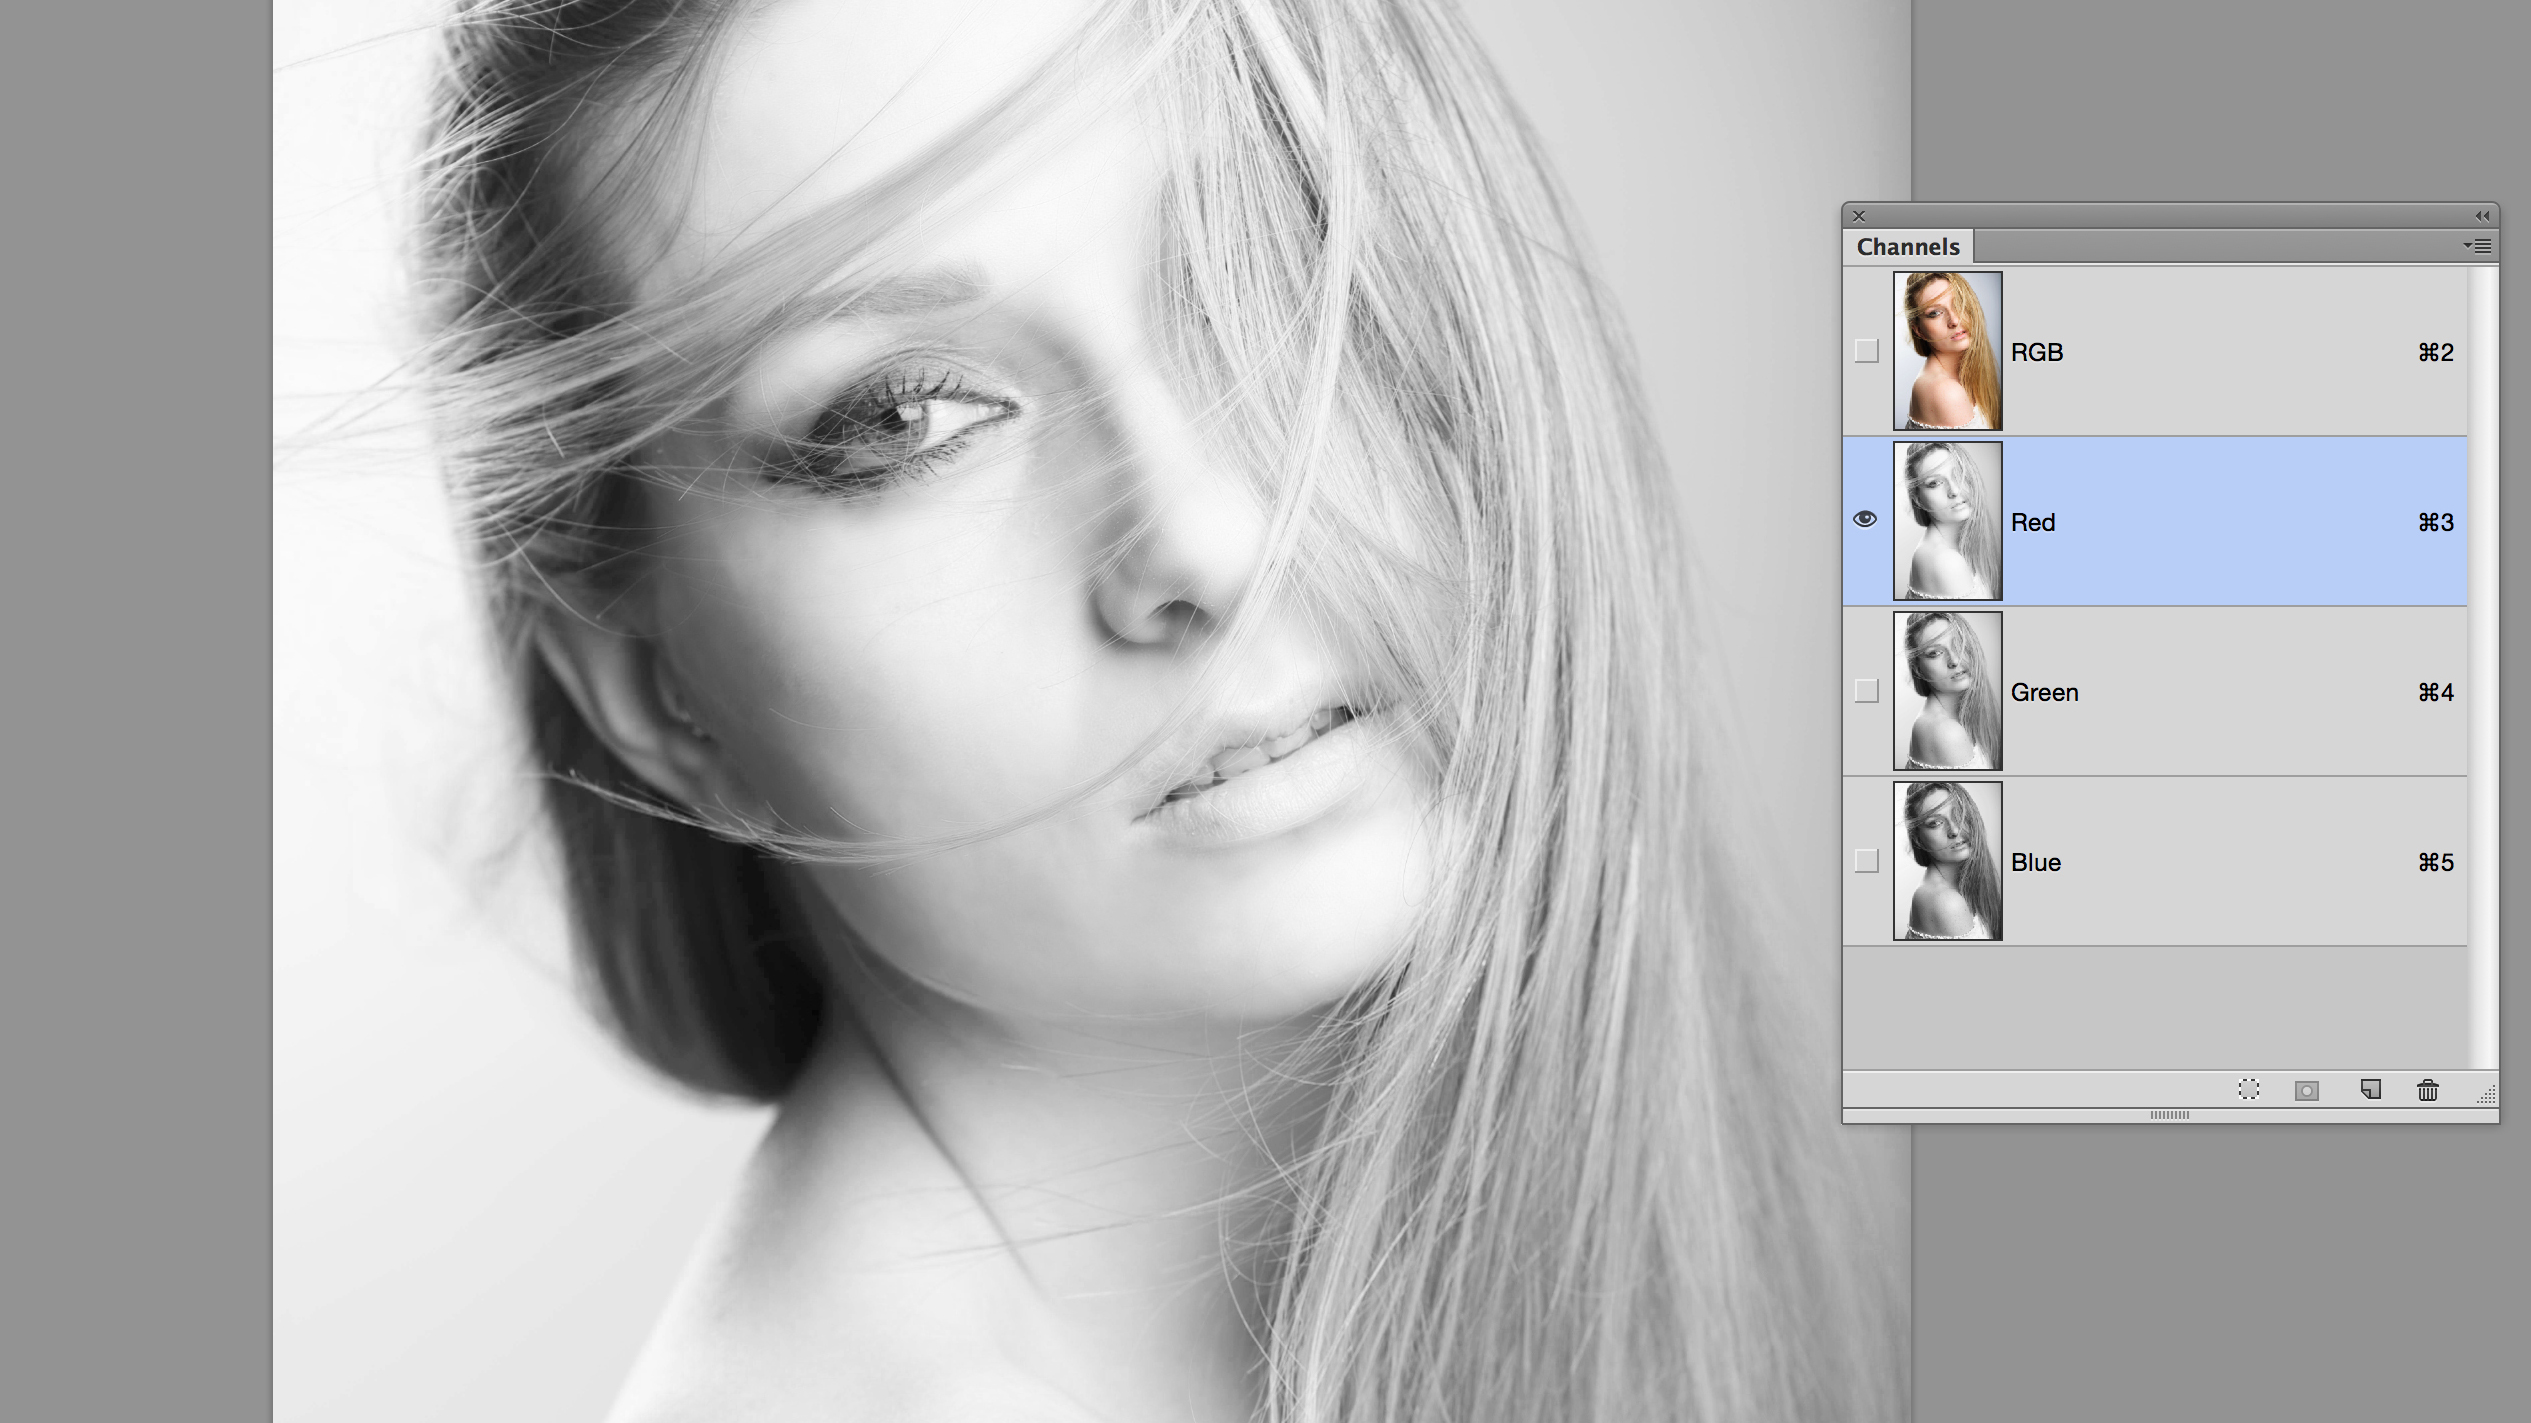
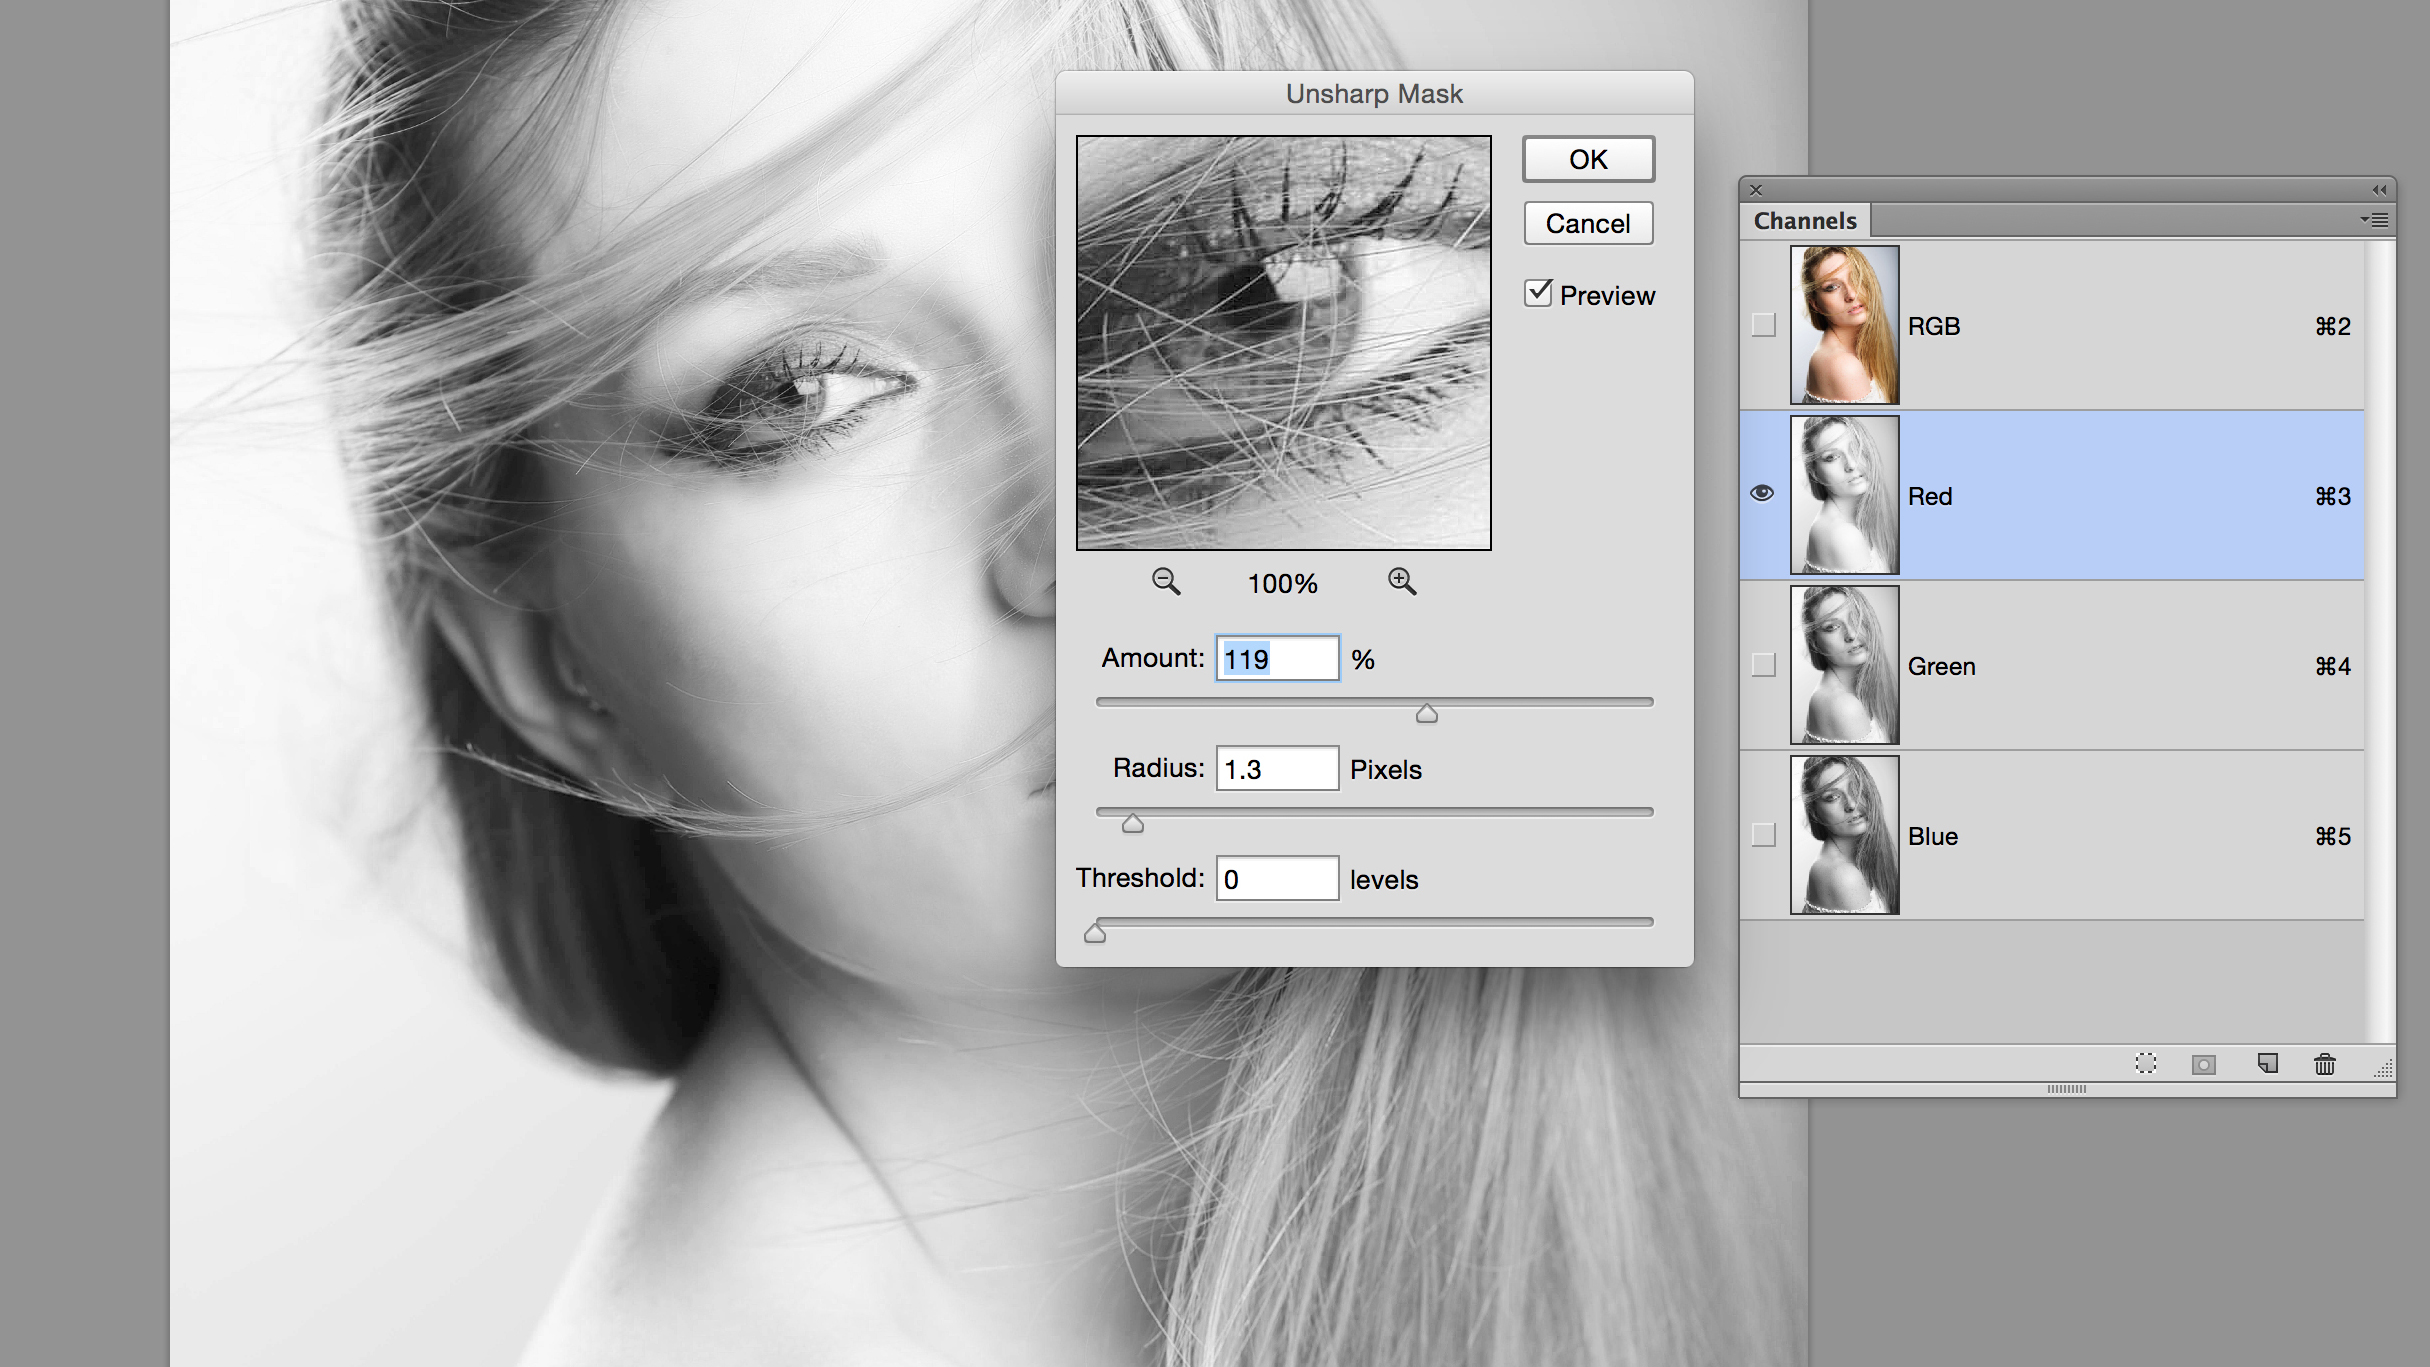
Sharpening on just the red channel is great for portraits, because the red channel contains very little skin texture. So you can sharpen the facial details without losing the softness of the skin.
First go to the Channels panel (Window > Channels) and click the Red channel. Next, go to Filter > Sharpen > Unsharp Mask. The ideal Unsharp Mask settings will vary depending on the resolution of your image, but somewhere around here is a good place to start: Amount 100-130, Radius 1.0-1.4, Threshold 0. Click back on the RGB channel to see the results of your sharpening. You should see lovely crisp details, without over-sharpened skin texture.
Top workflow tip: record an action
With retouching you’ll find that you perform monotonous tasks like sharpening time and again, so it makes perfect sense to record an Action. Open the Action panel, make a new Action, click Record and carry out the job once, then click Stop and you’ll never have to do it again.
Dodge & burn the face
A little selective lightening and darkening of the face can really help to add depth
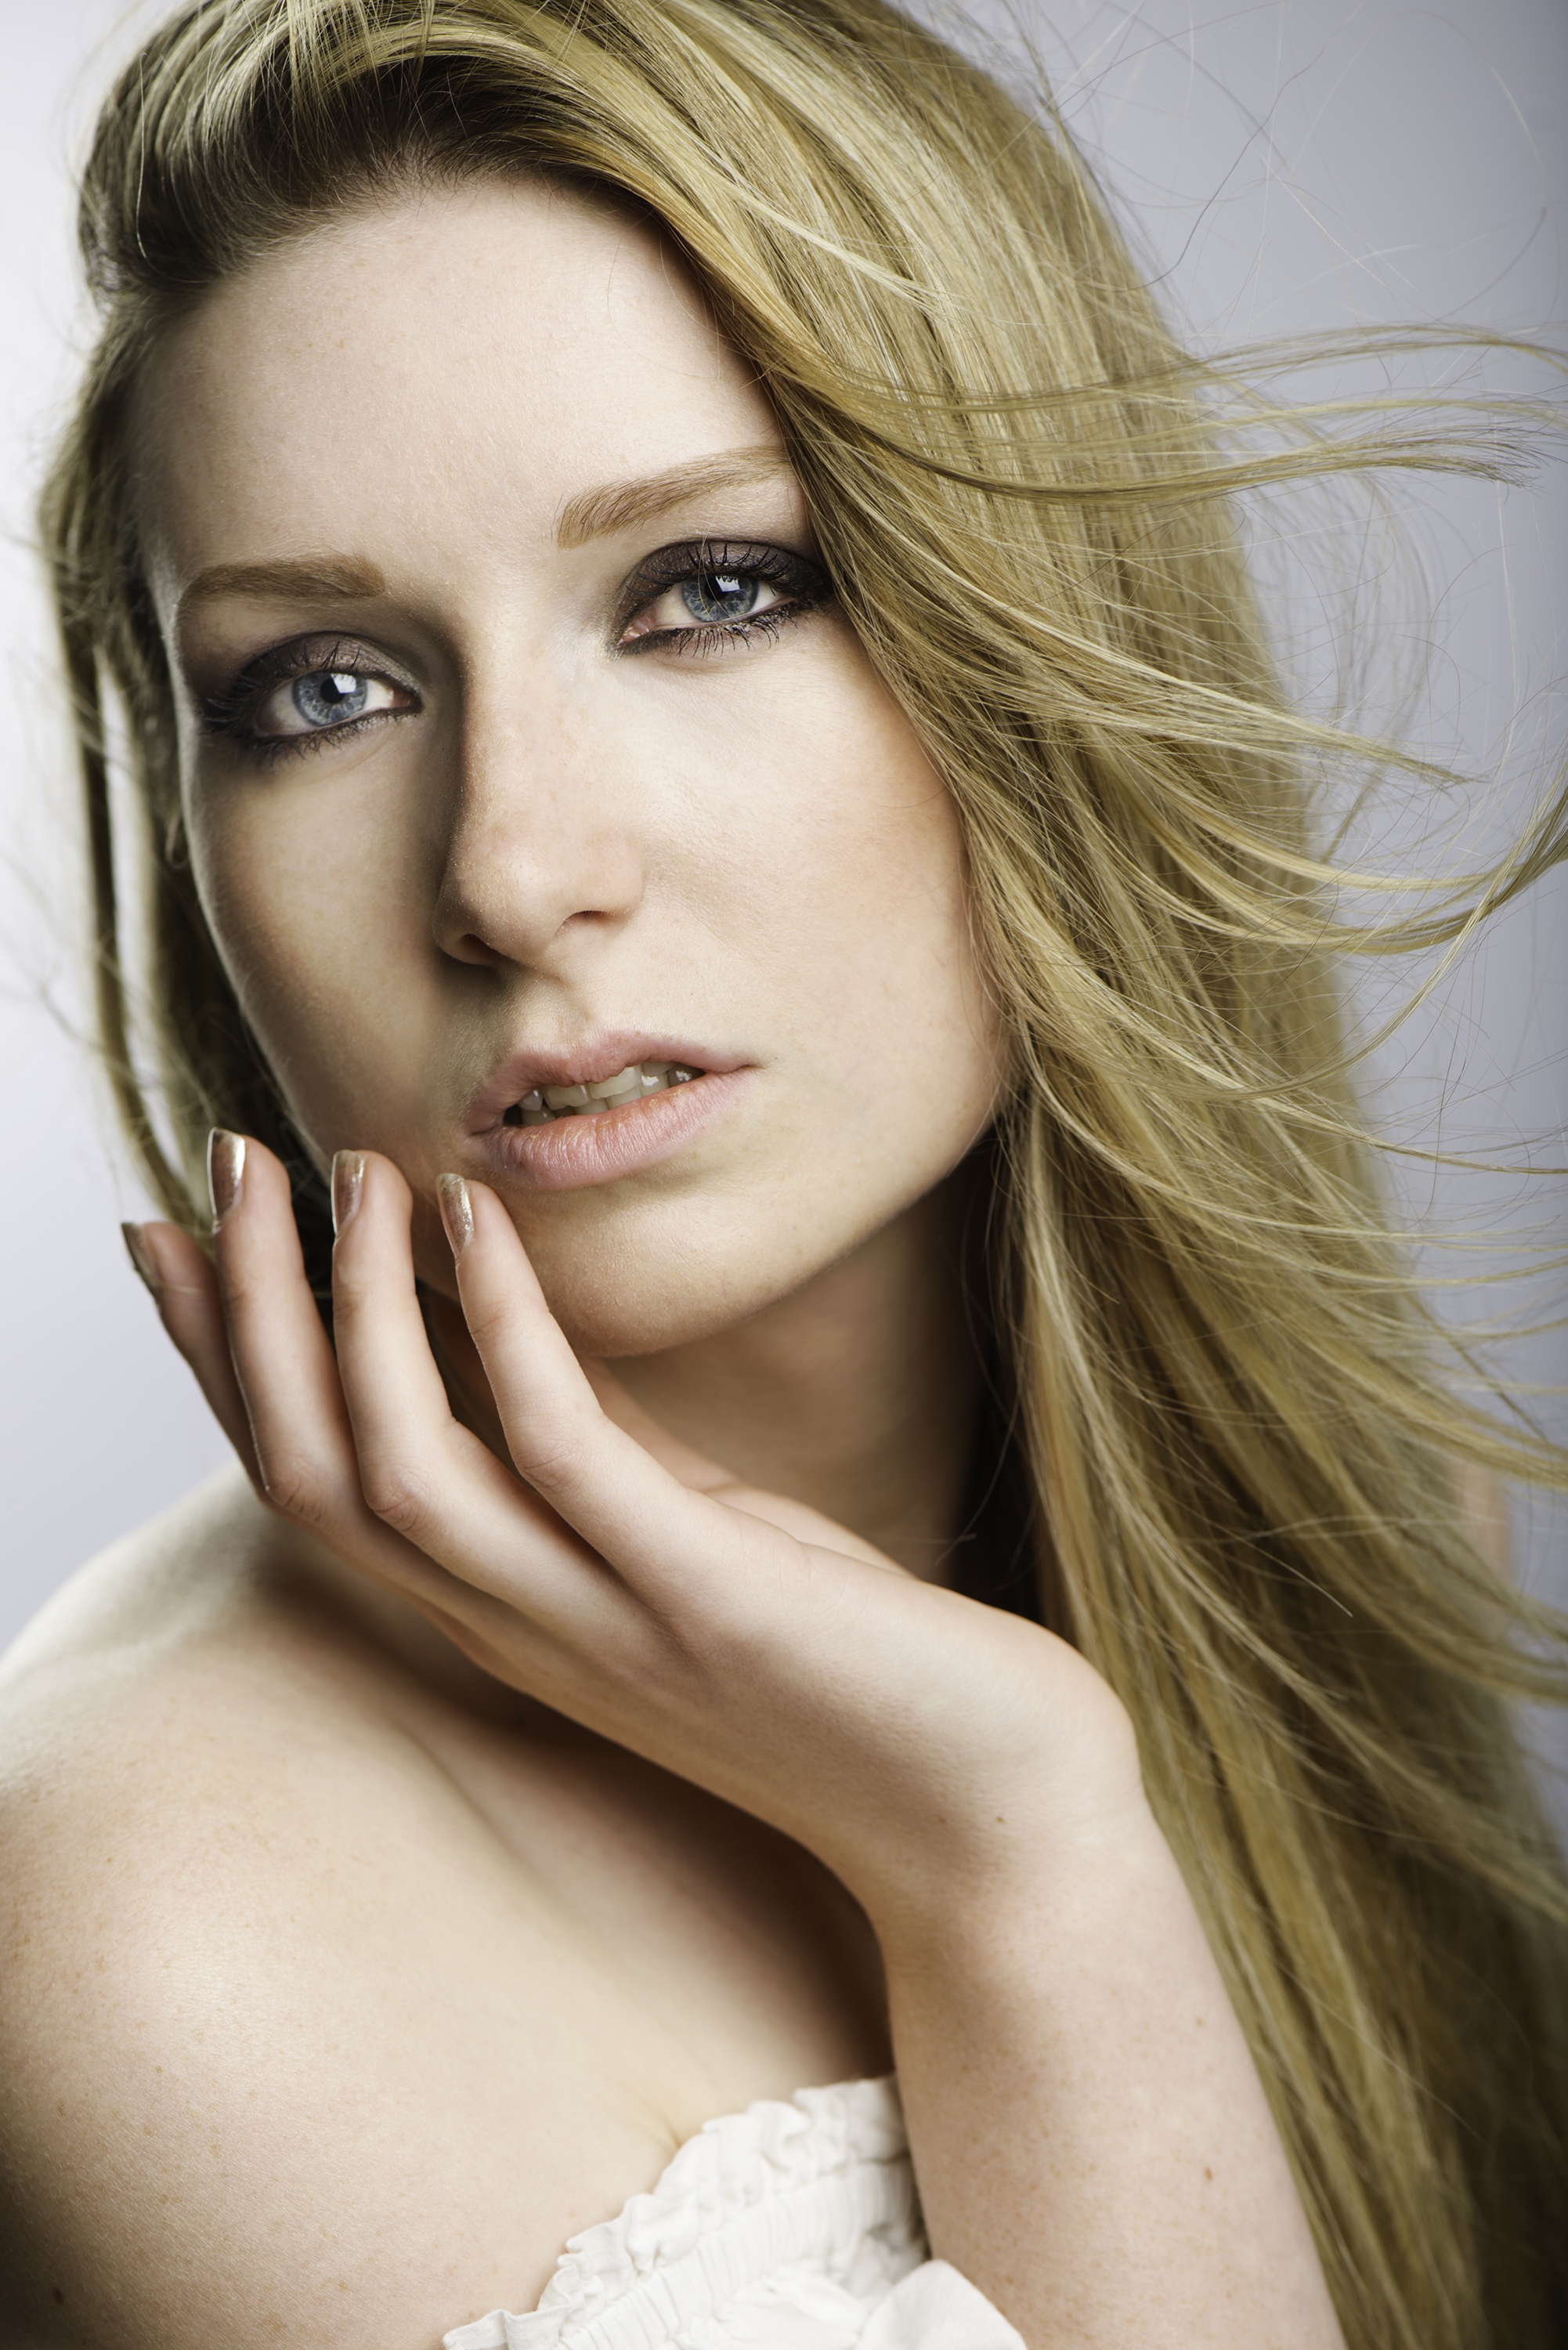
Before
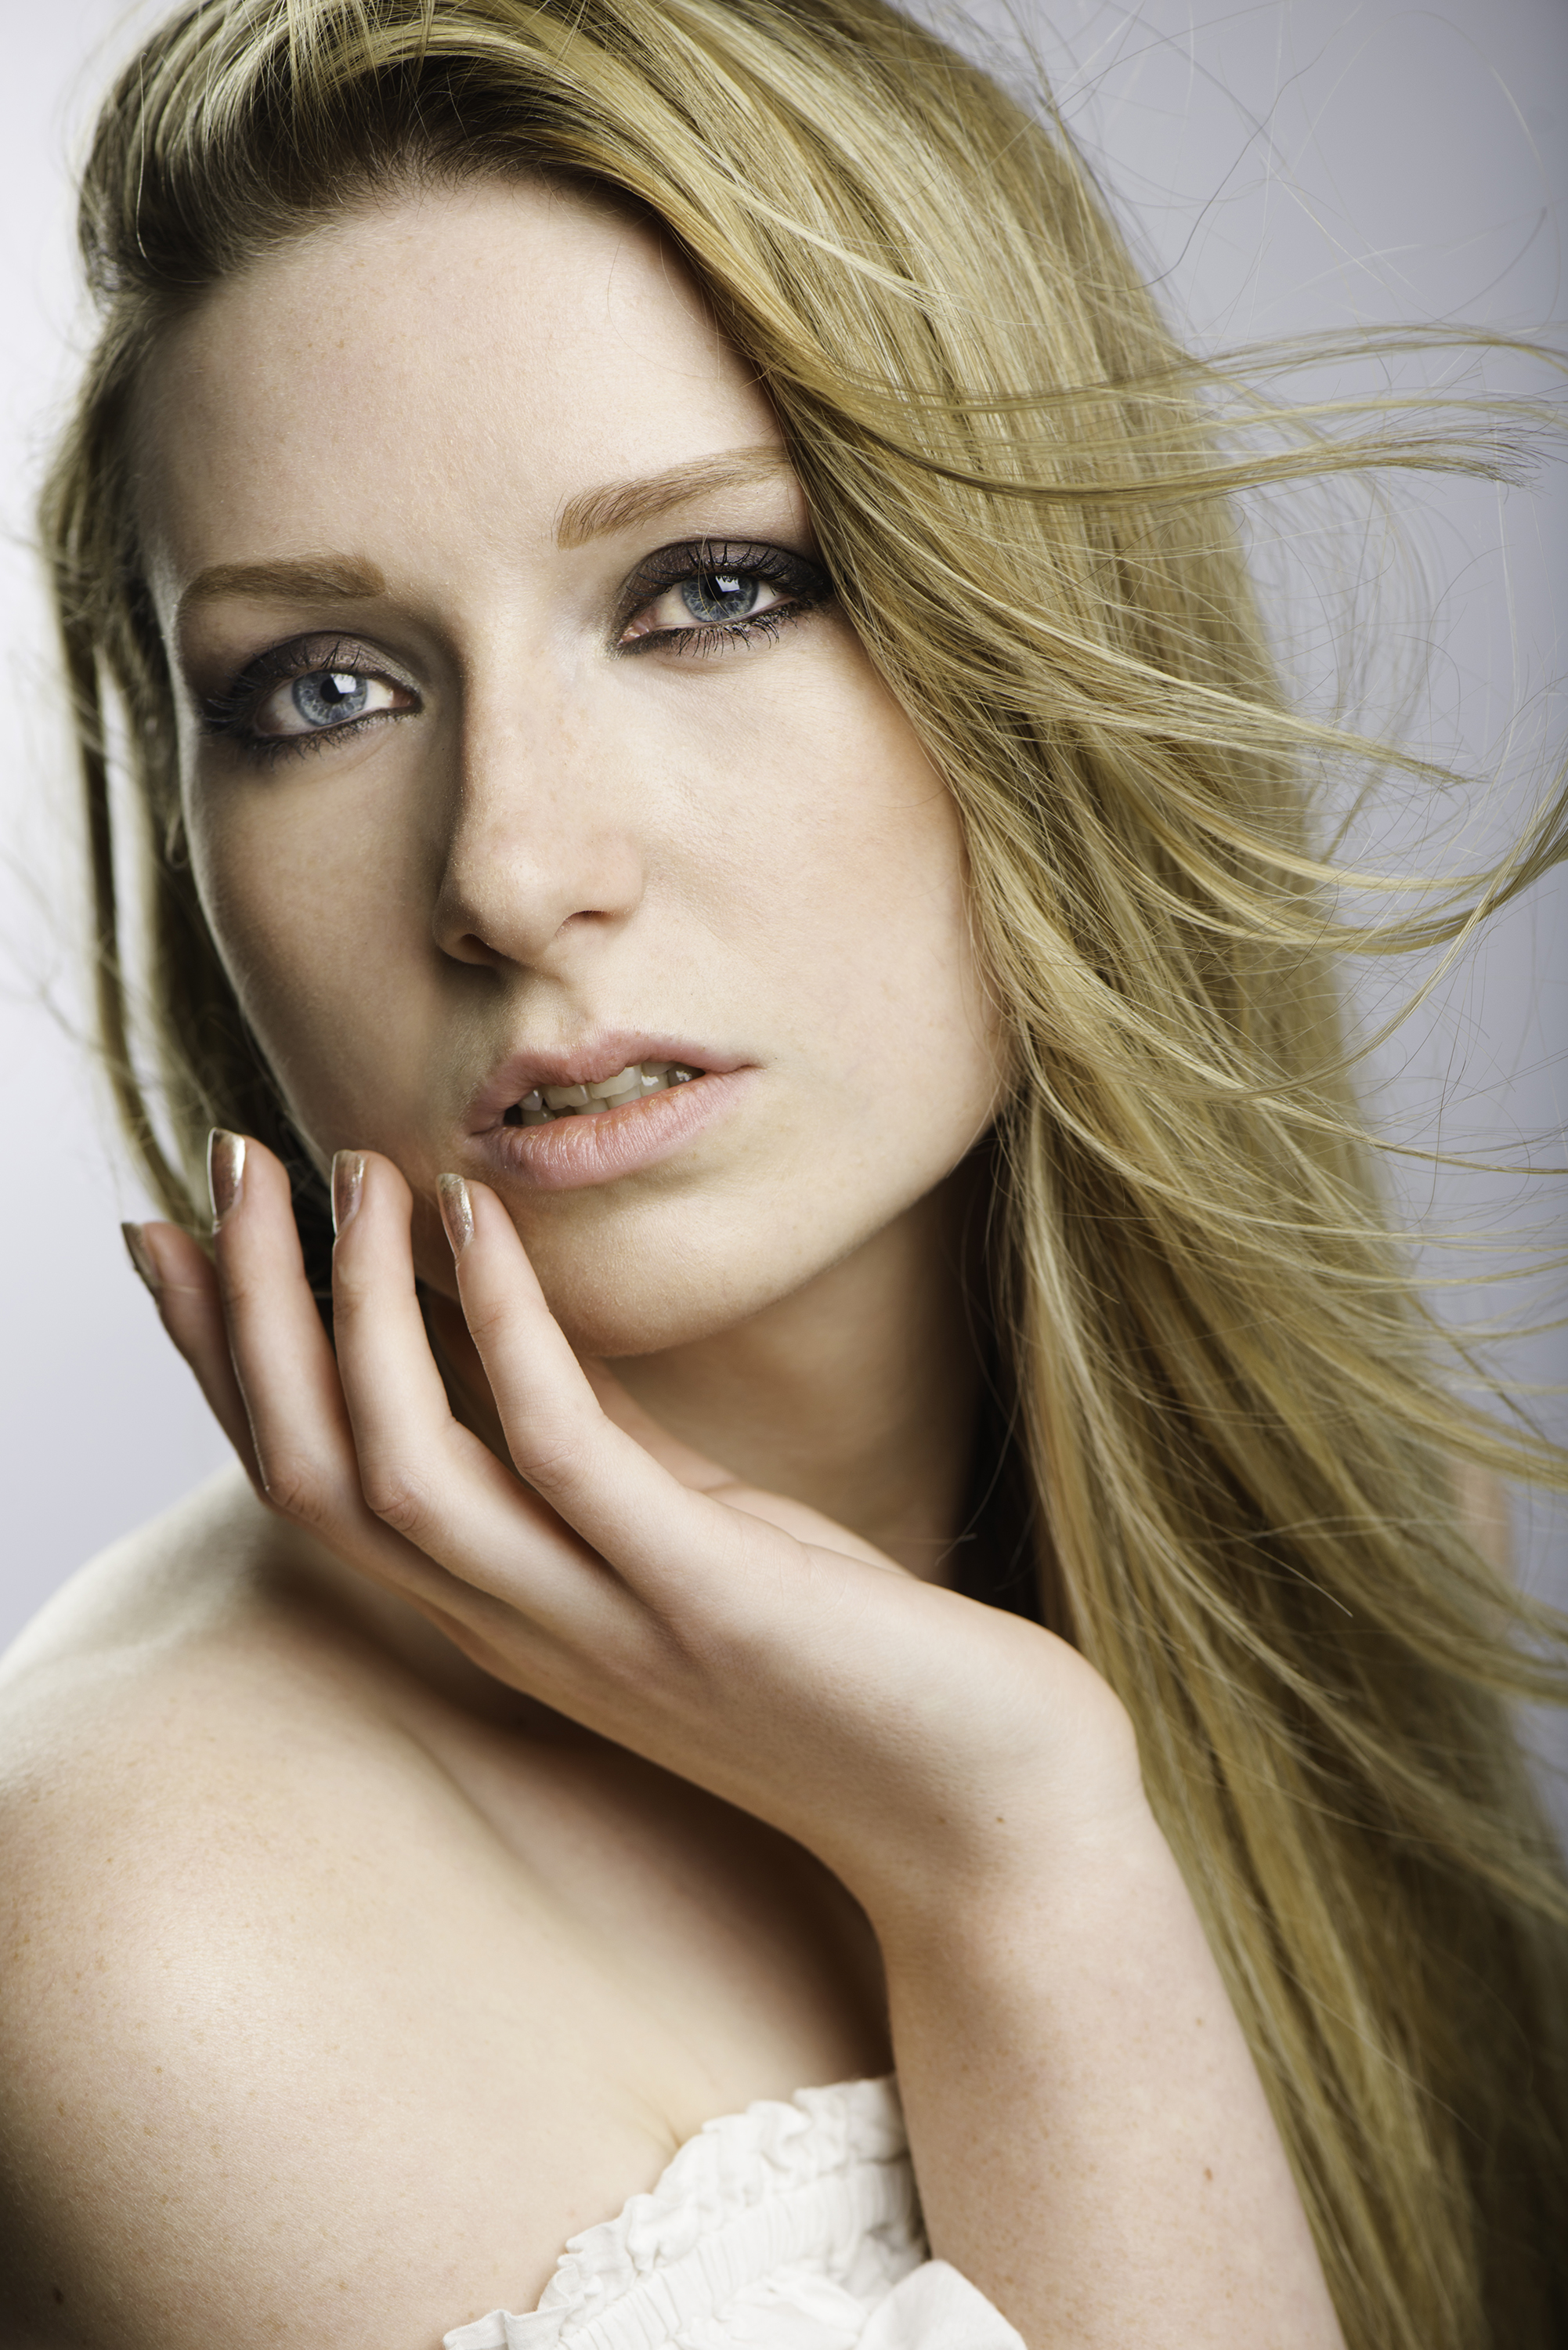
After
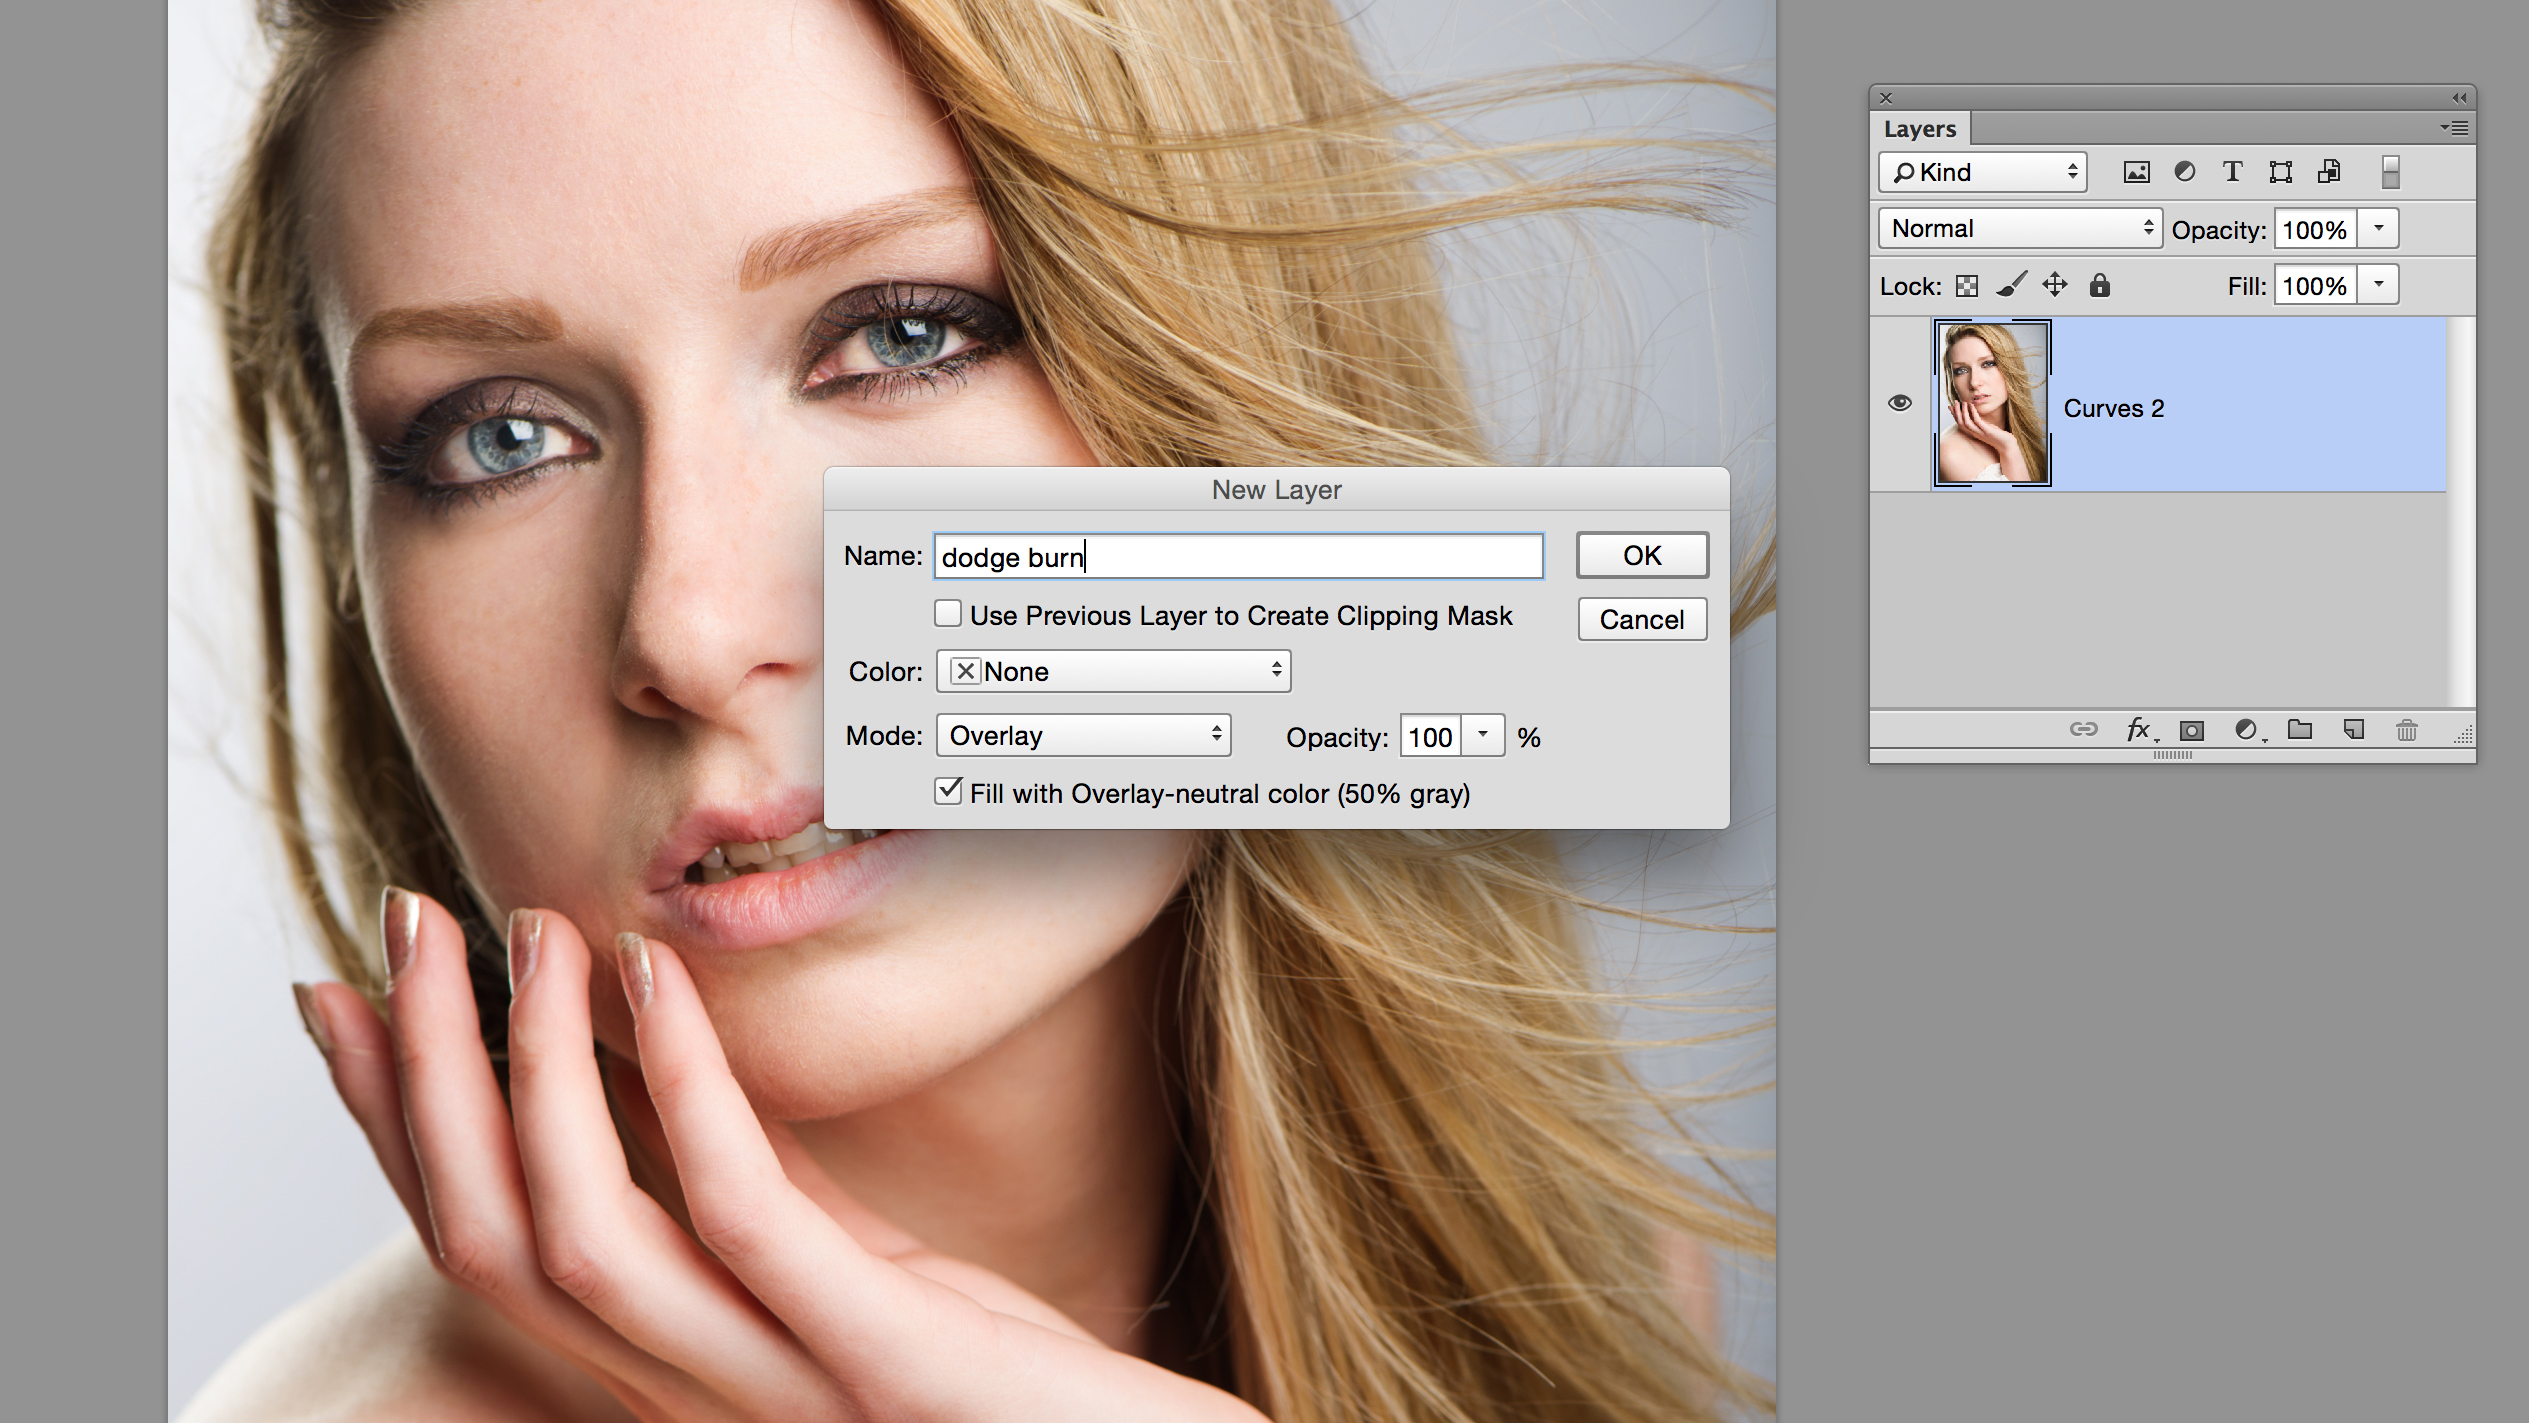
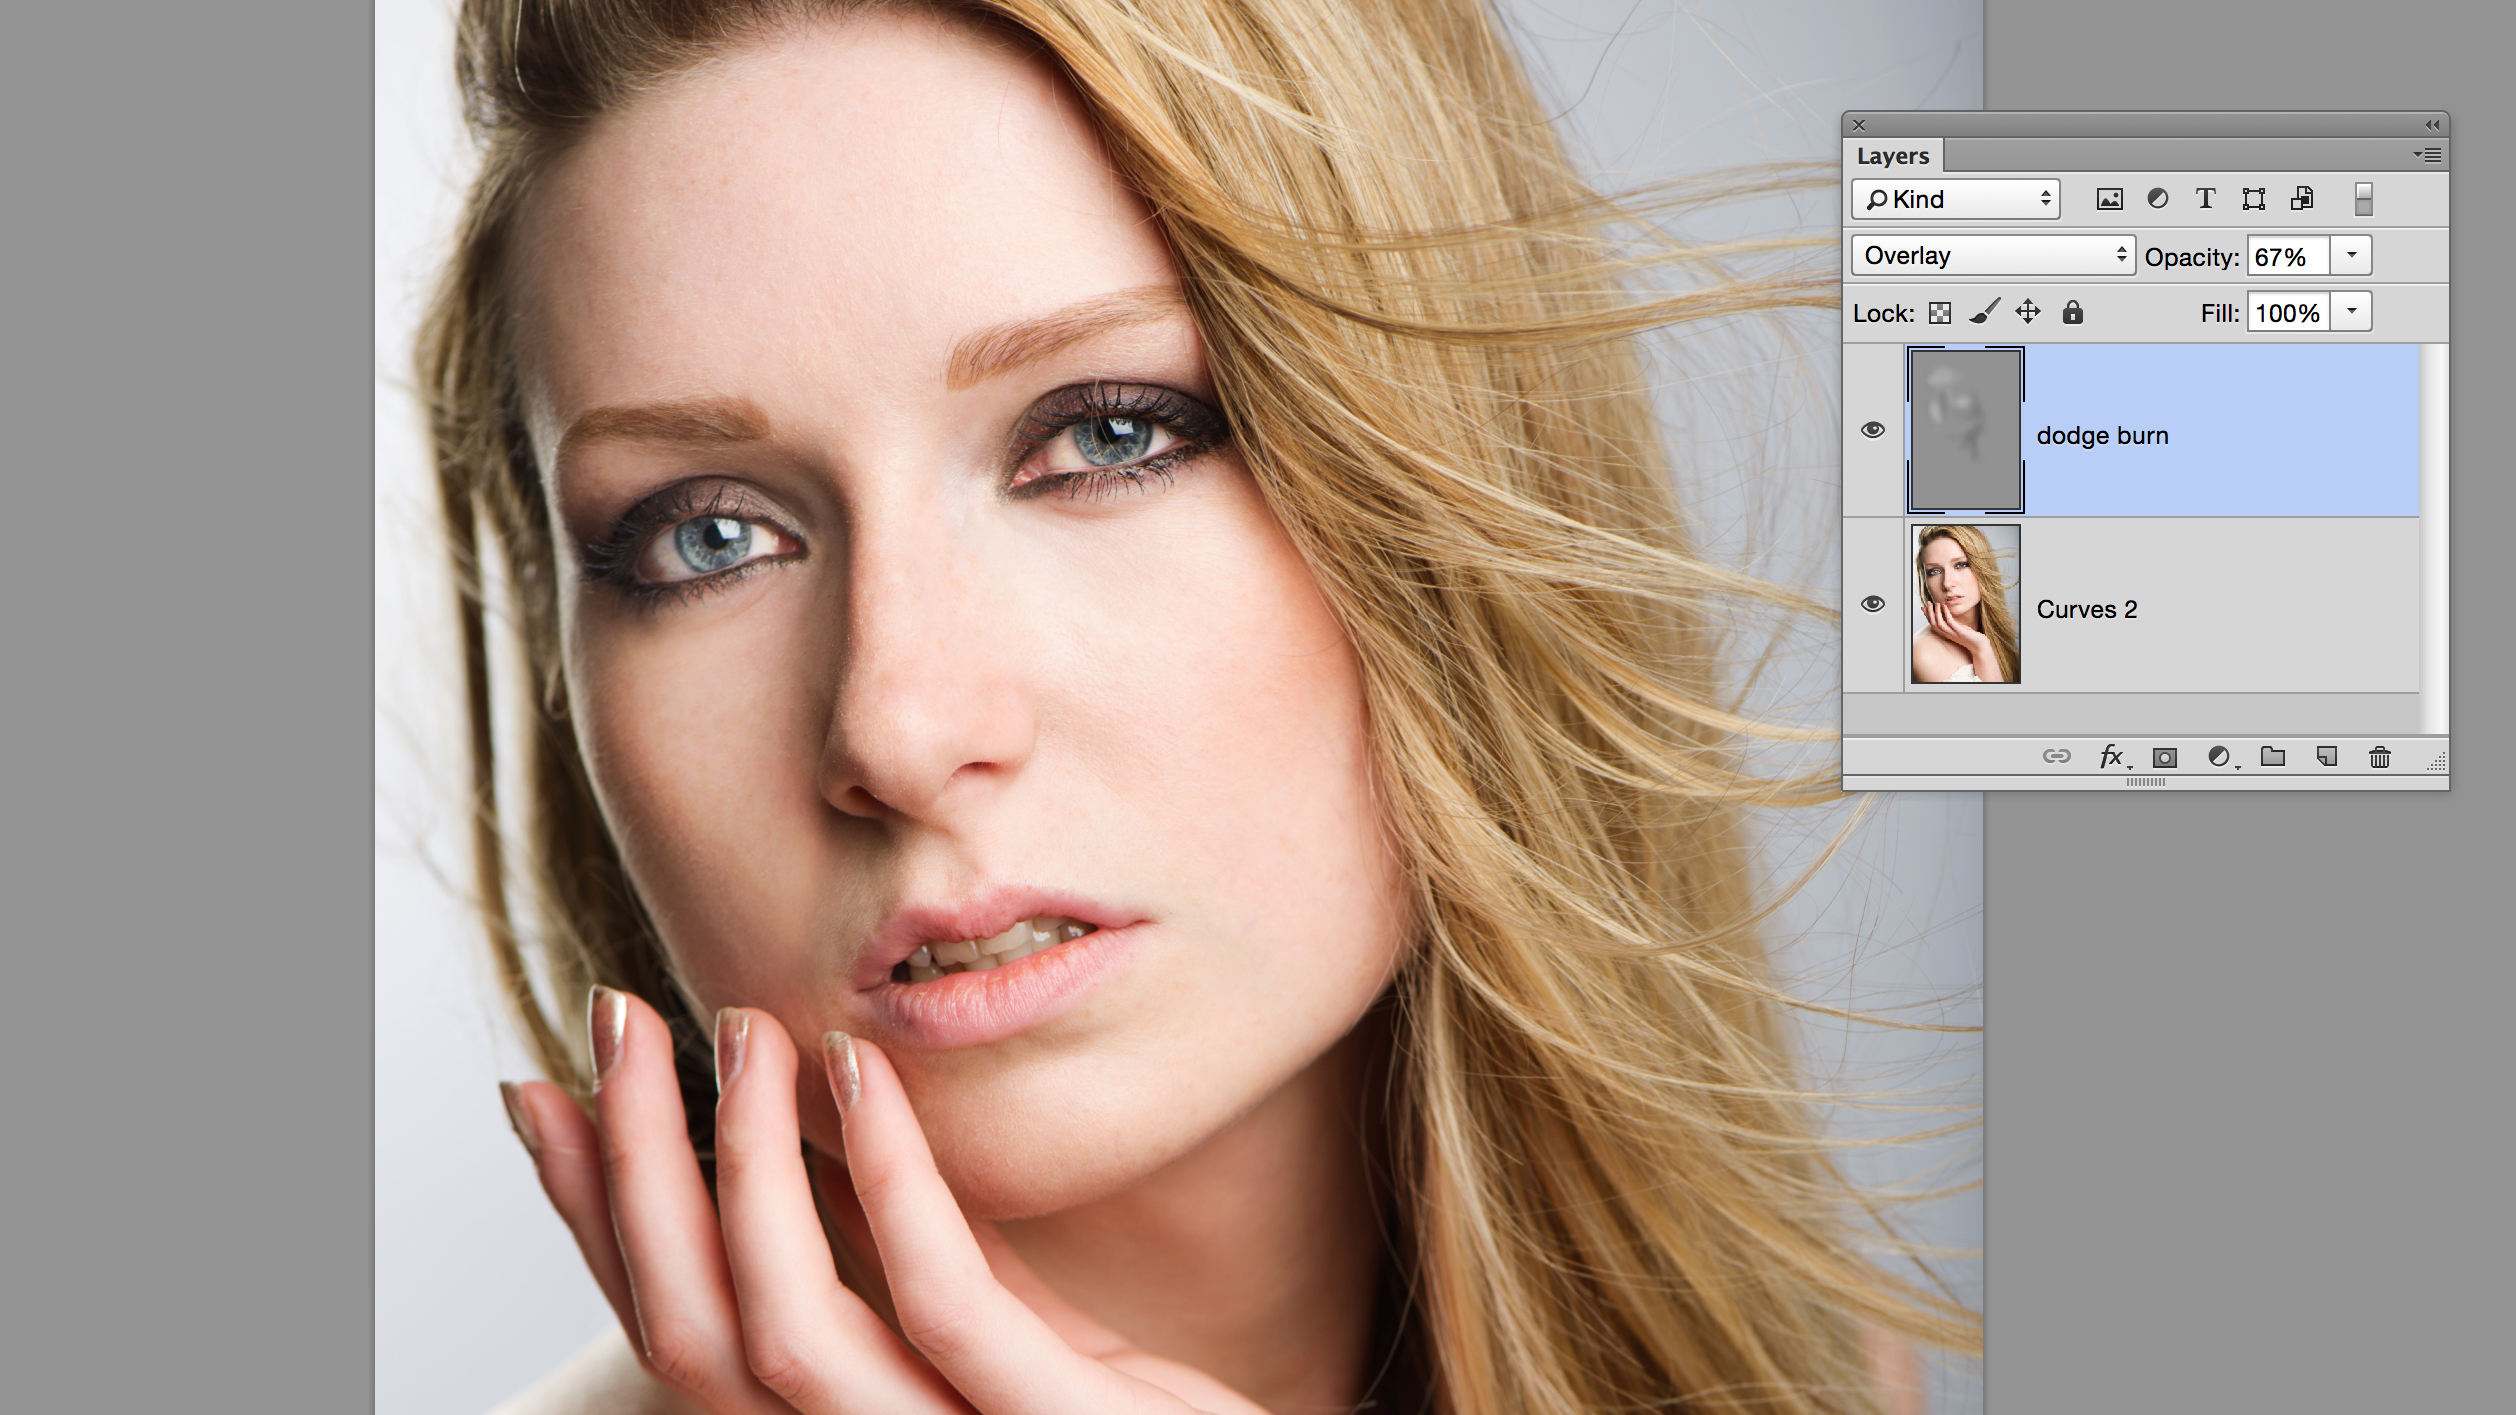
There’s a simple dodging and burning trick that works for all kinds of images, not just portraits. Hold down Alt and click the Create New Layer icon to bring up the New Layer options. Name the layer ‘Dodge and Burn’, then set Mode: Overlay and tick the Fill with... box to fill the layer with grey. Click OK and you’ll have a new invisible layer.
Sign up for breaking news, reviews, opinion, top tech deals, and more.
Paint white or black on this layer to lighten or darken. Press B for the Brush tool and 1 to set its opacity to 10%, then paint with black over the darker parts of the face such as below the cheekbones to subtly darken them. Press X and paint white over the lighter parts, such as above the cheekbones, to lighten them.
Top workflow tip: blur the burn
After you’ve finished dodging and burning on your grey layer, go to Filter > Blur > Gaussian Blur and soften the layer slightly so that the brushstrokes blend together.
Removing stray hairs
There’s no quick fix when it comes to frizzy hairs
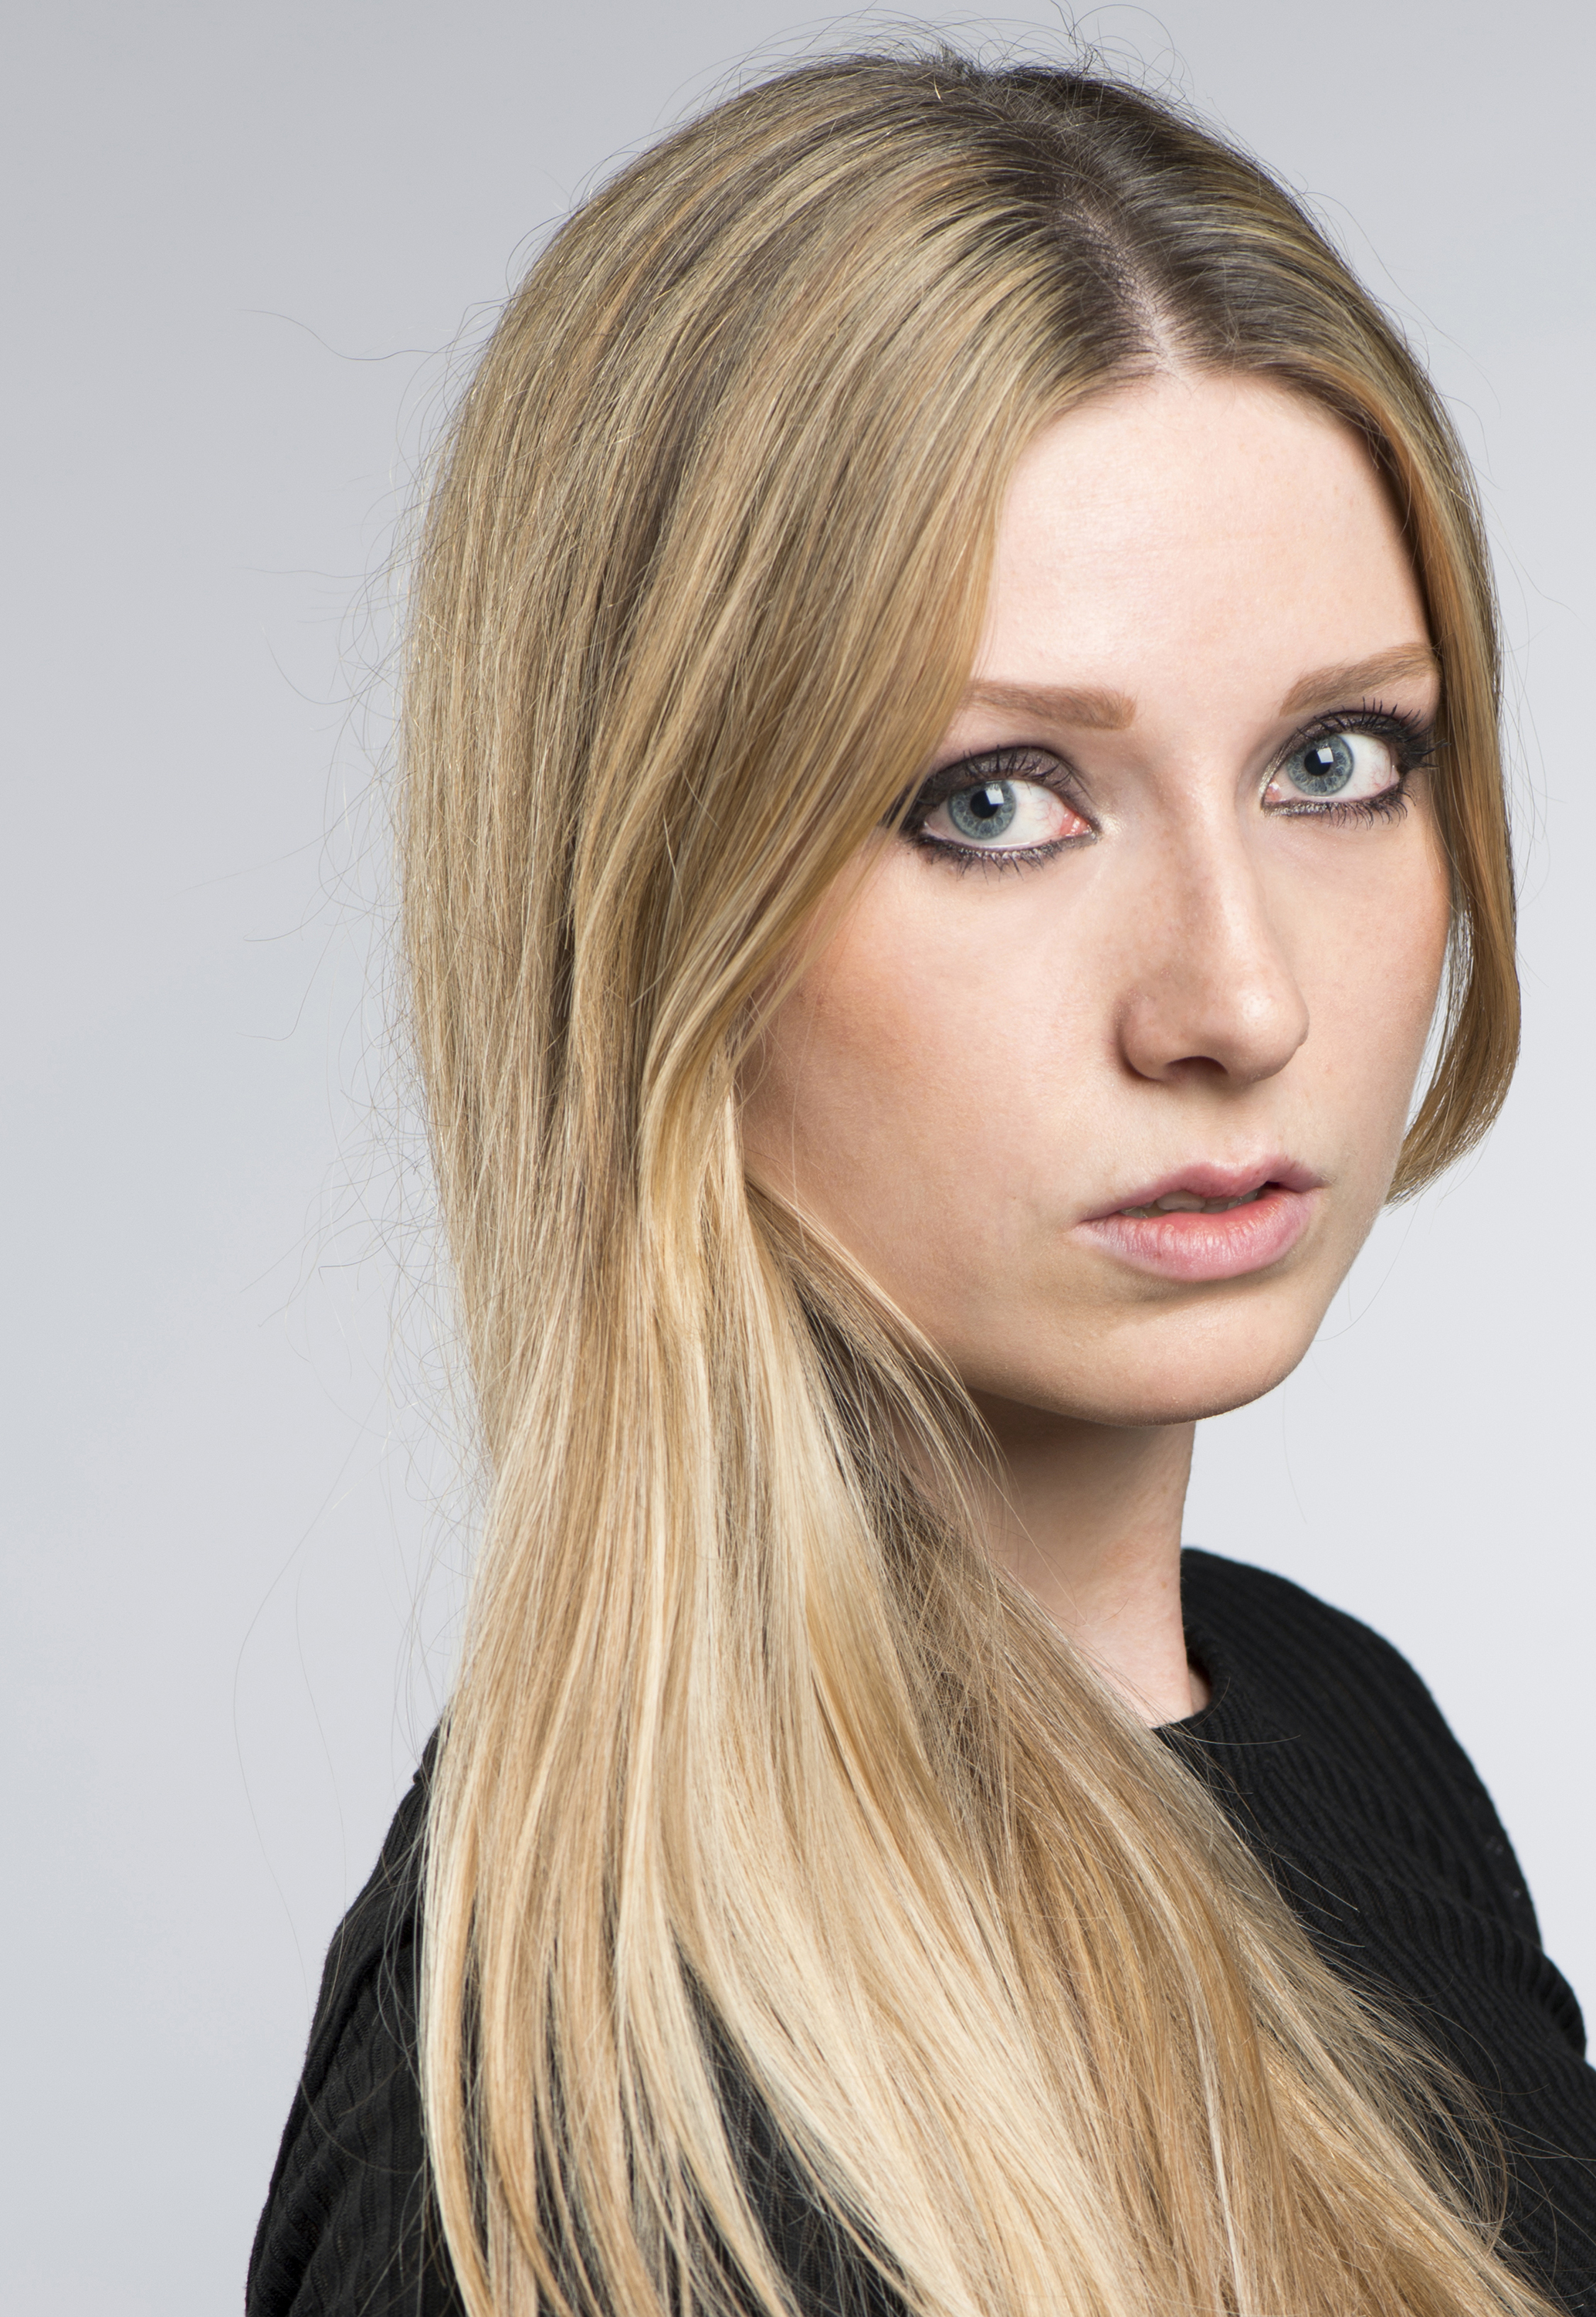
Before
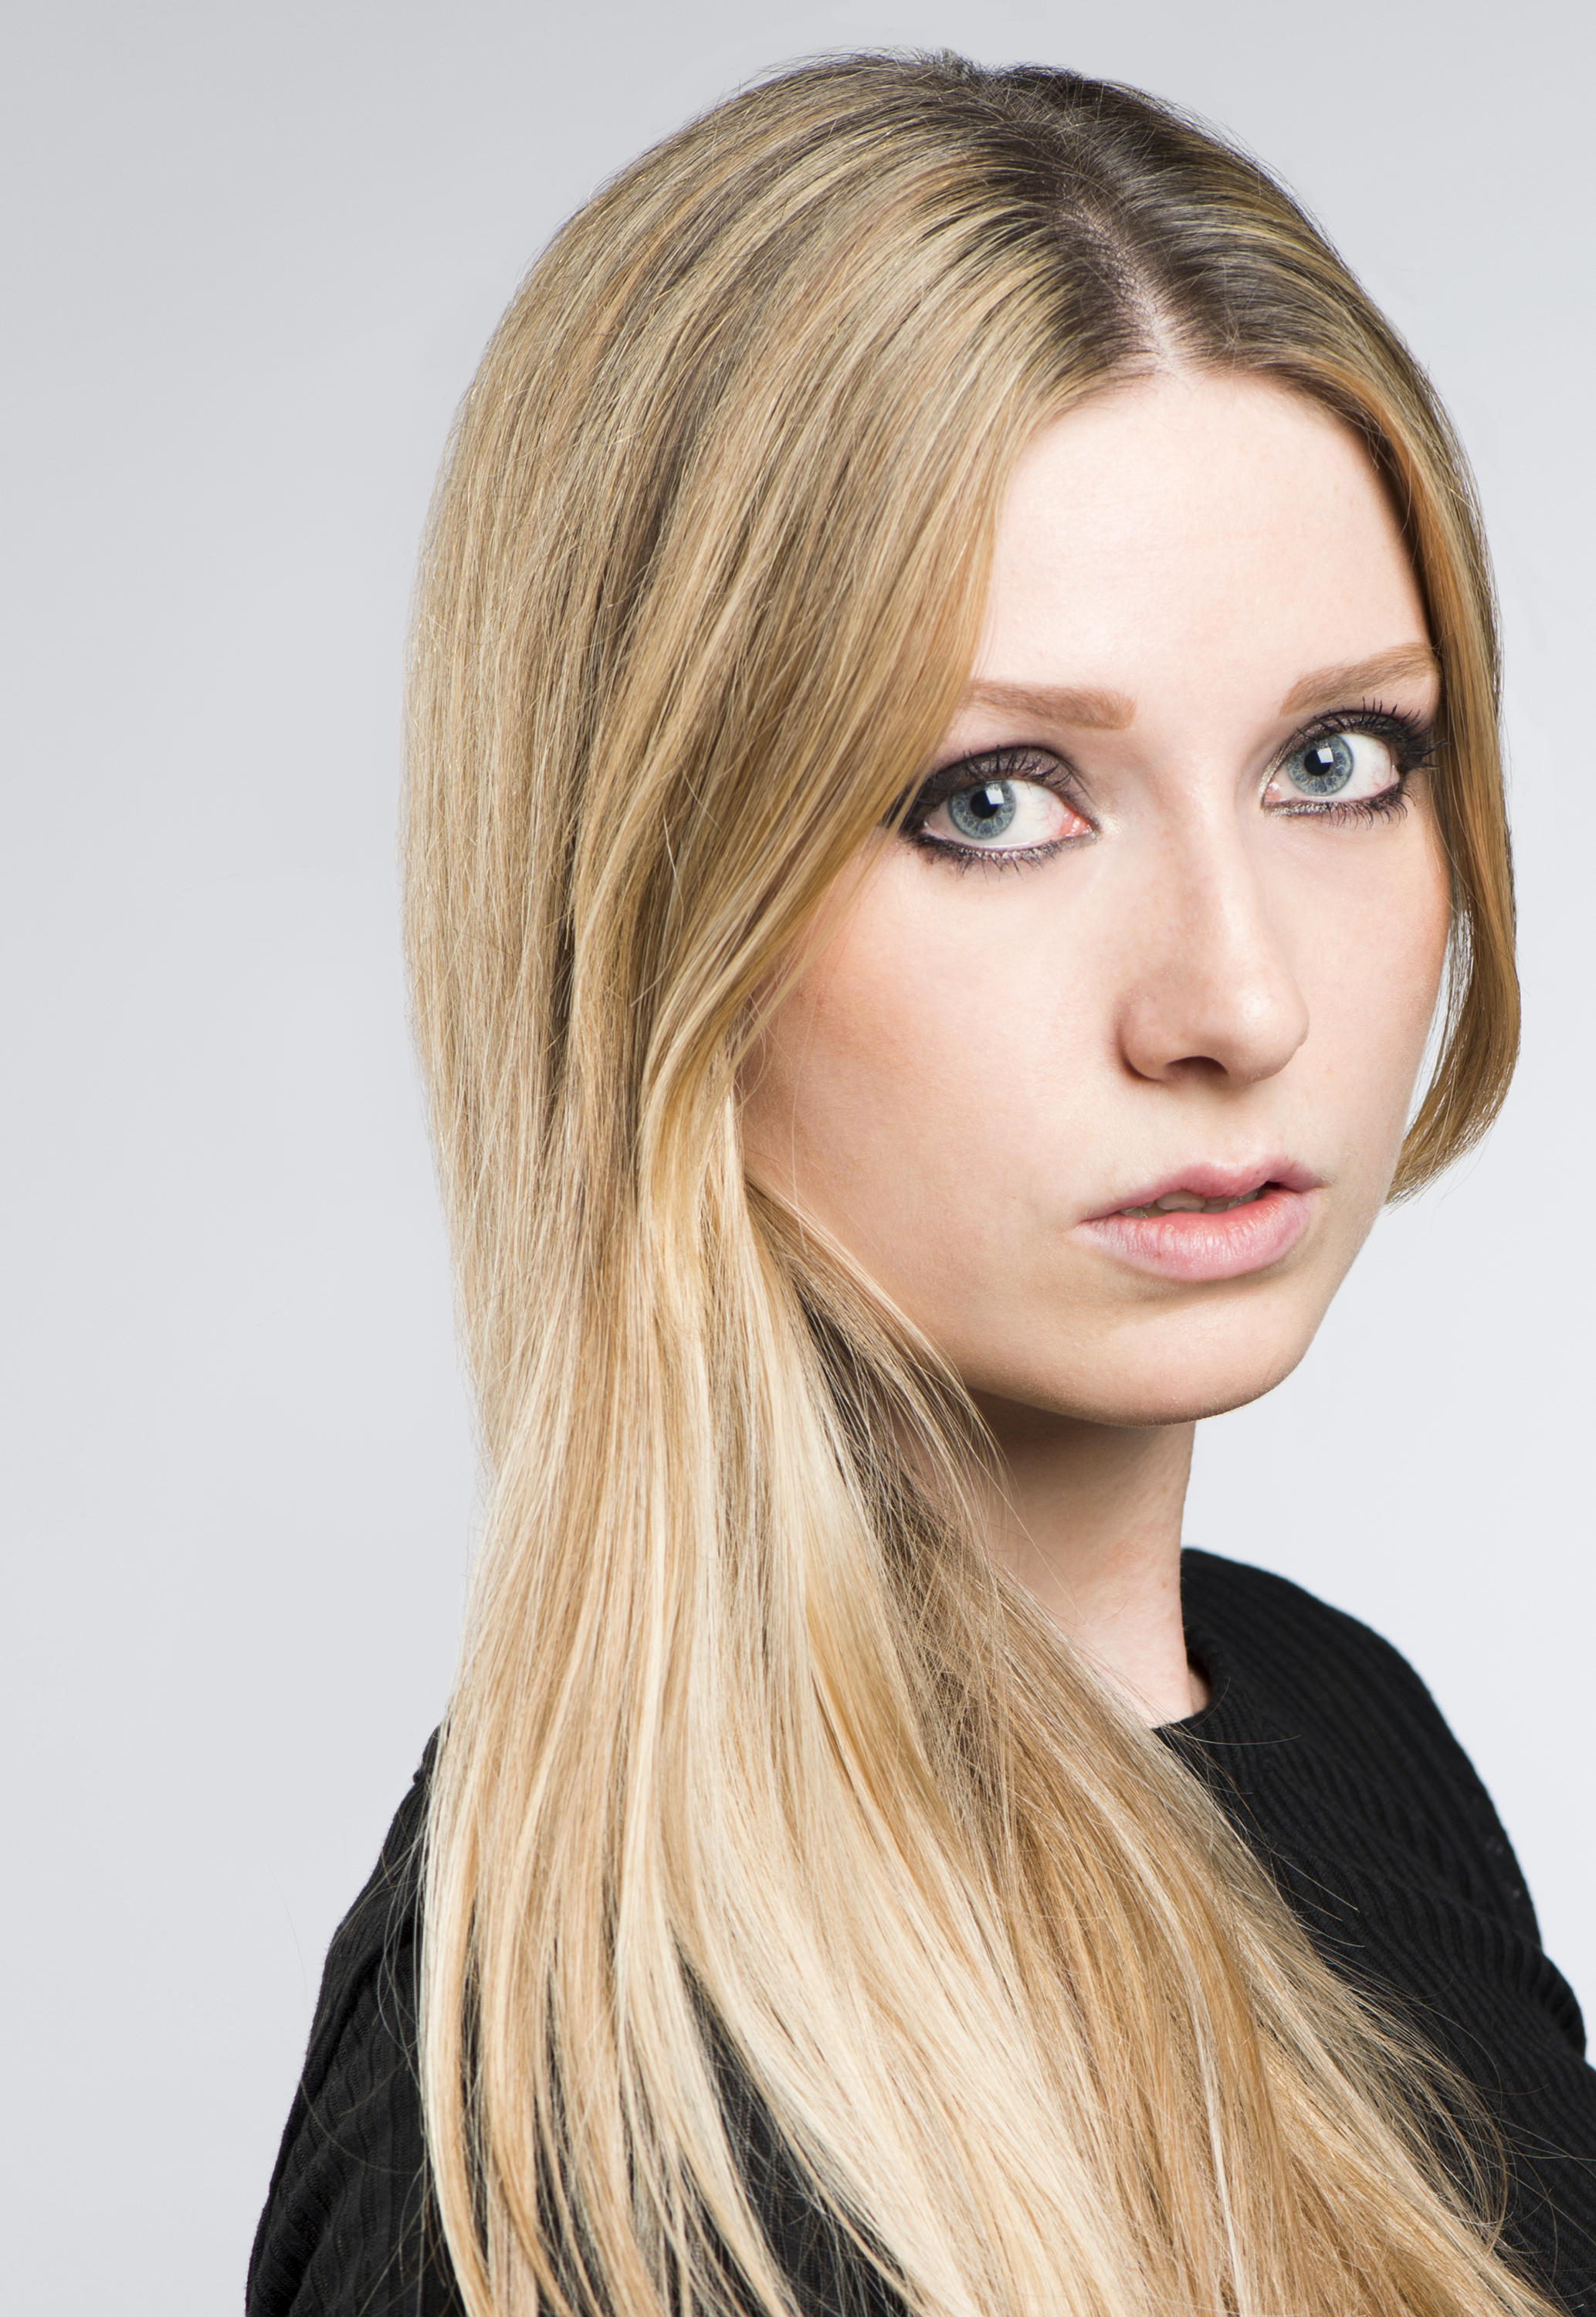
After
The Spot Healing Brush tool is the quickest tool for retouching, but it’s a little hit-and-miss when faced with the task of removing stray hairs, because it can leave a smeared edge at the point where the hair meets the head. To make the tool perform much better, you simply need to disconnect the stray hairs at this point. So use either the Clone Stamp or the Healing Brush tool and cut off each stray hair at the base.
Once done, you can then switch to the Spot Healing Brush tool and paint to get rid of the majority of the strand.
If the background is a single uniform colour, it’s often easier just to Alt-click with the Brush tool to sample a colour, then paint over the hairs
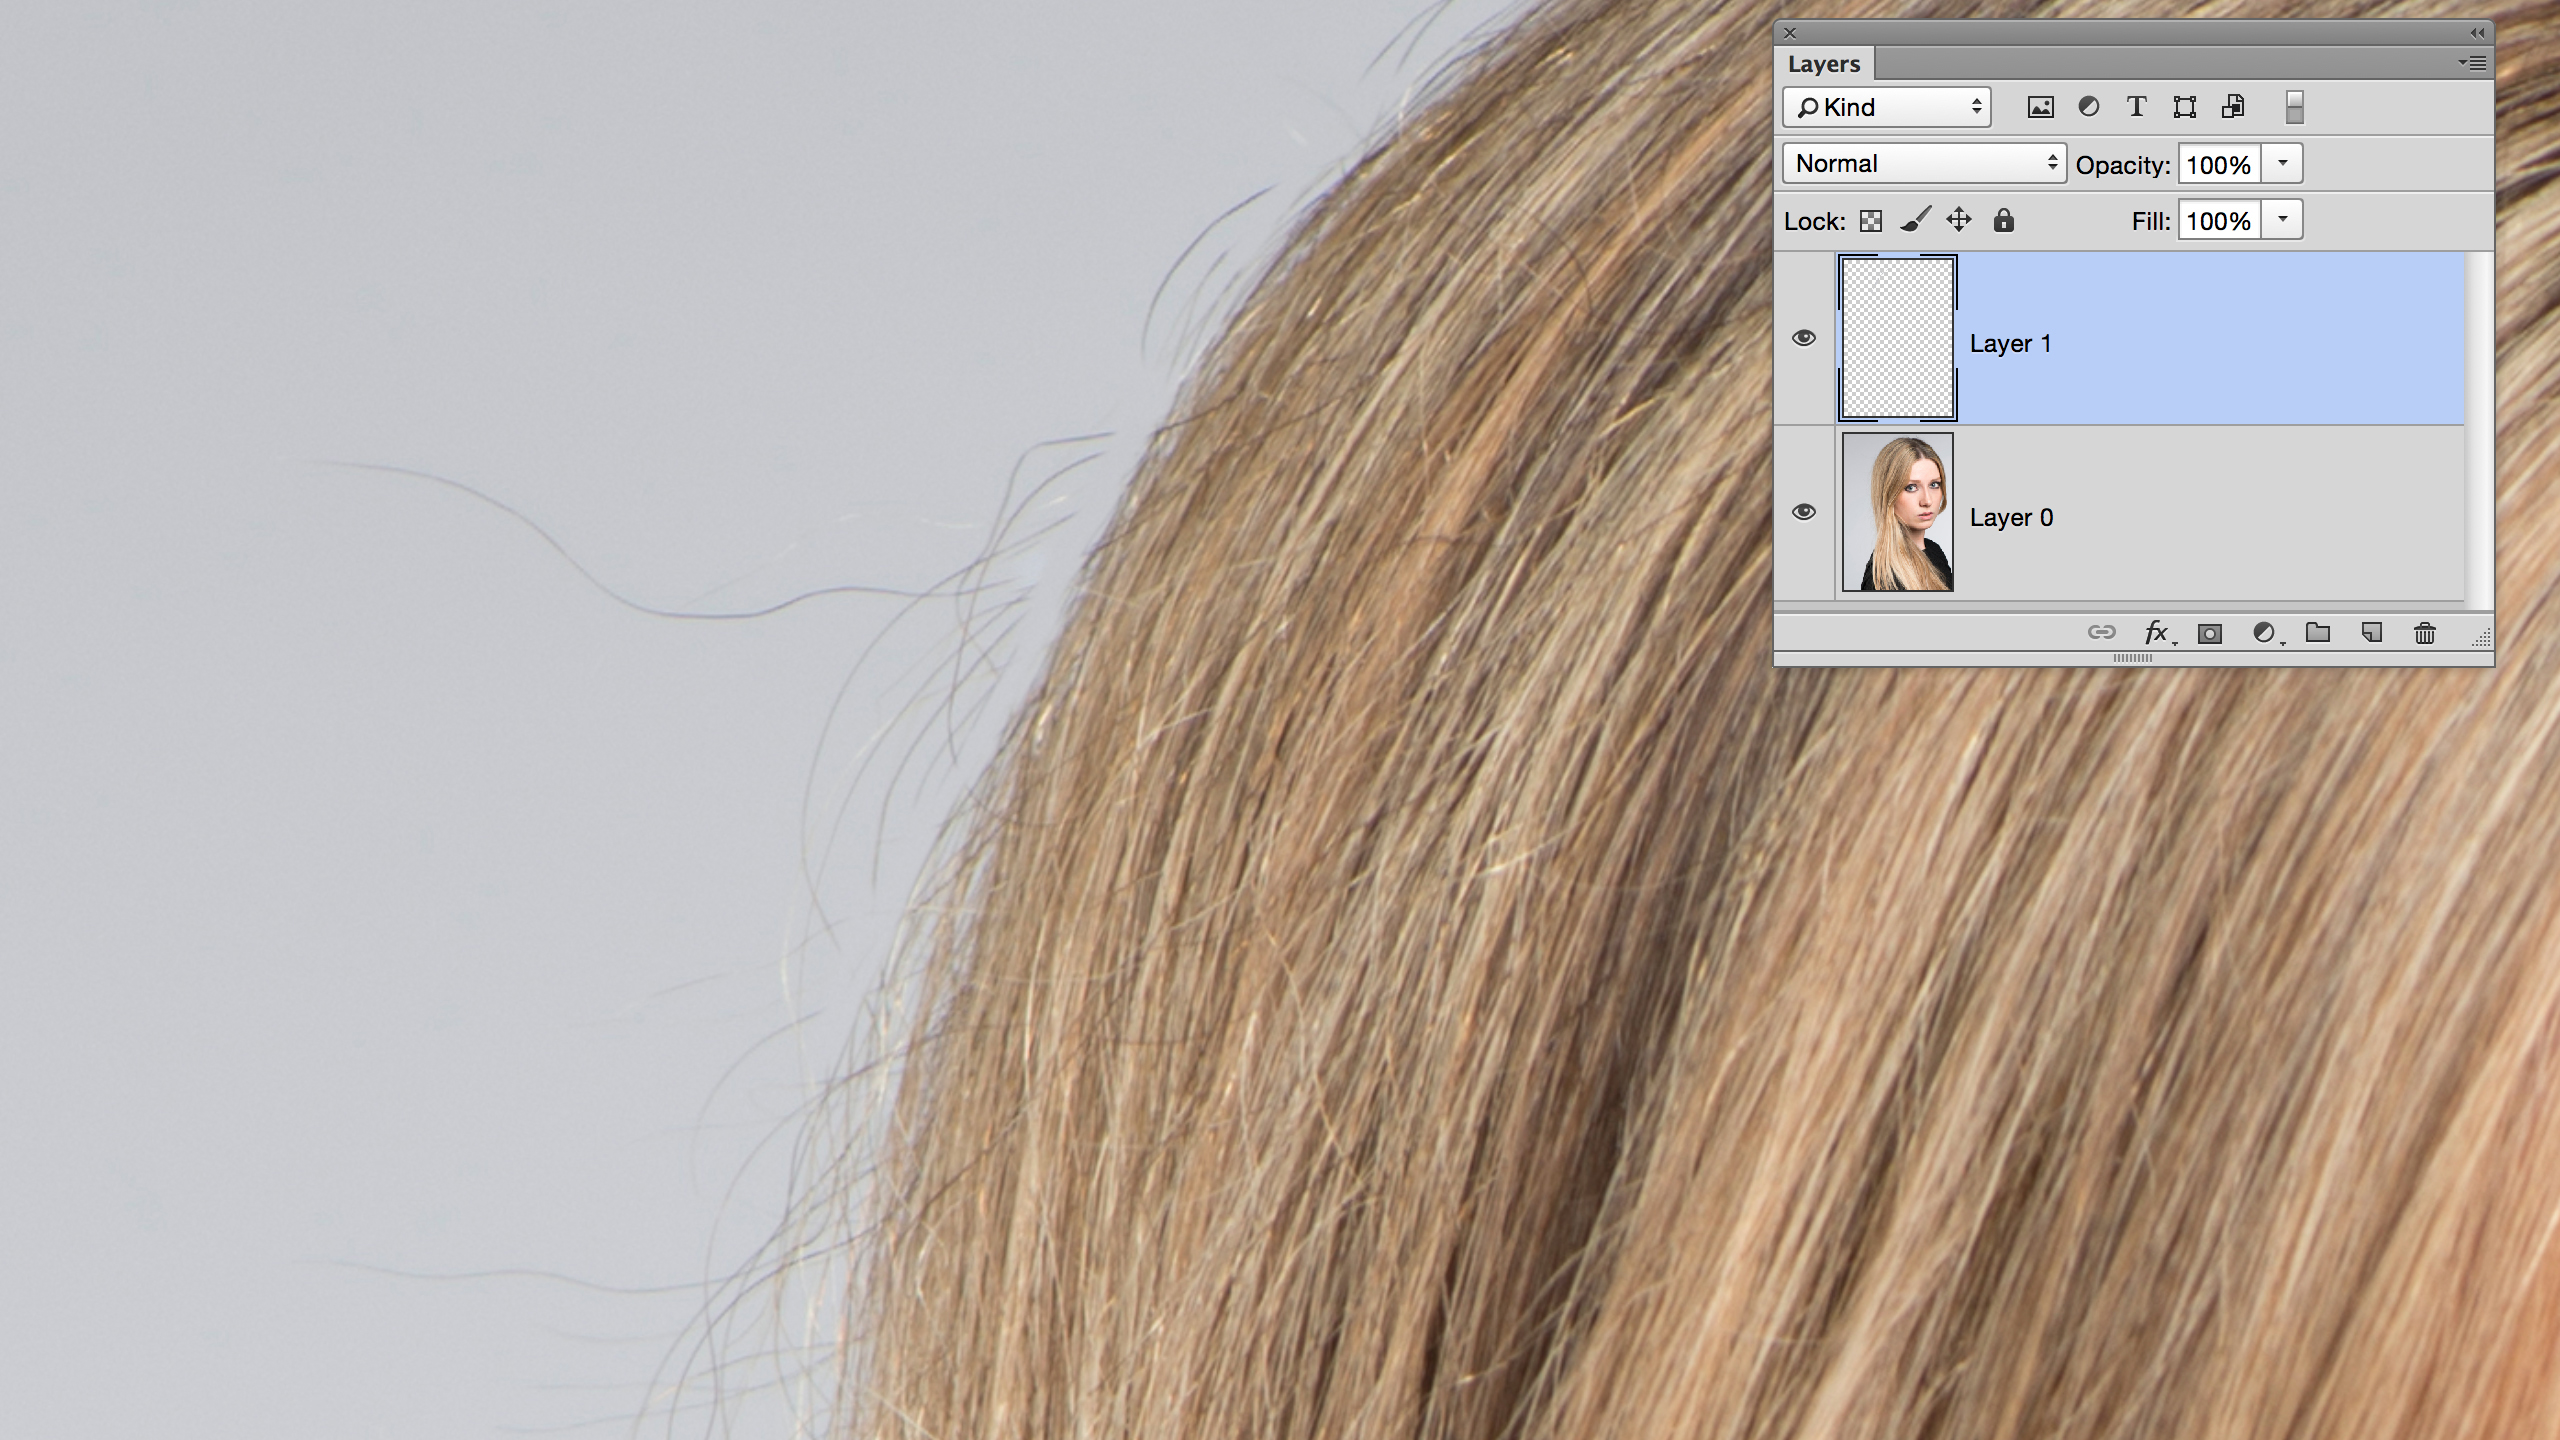
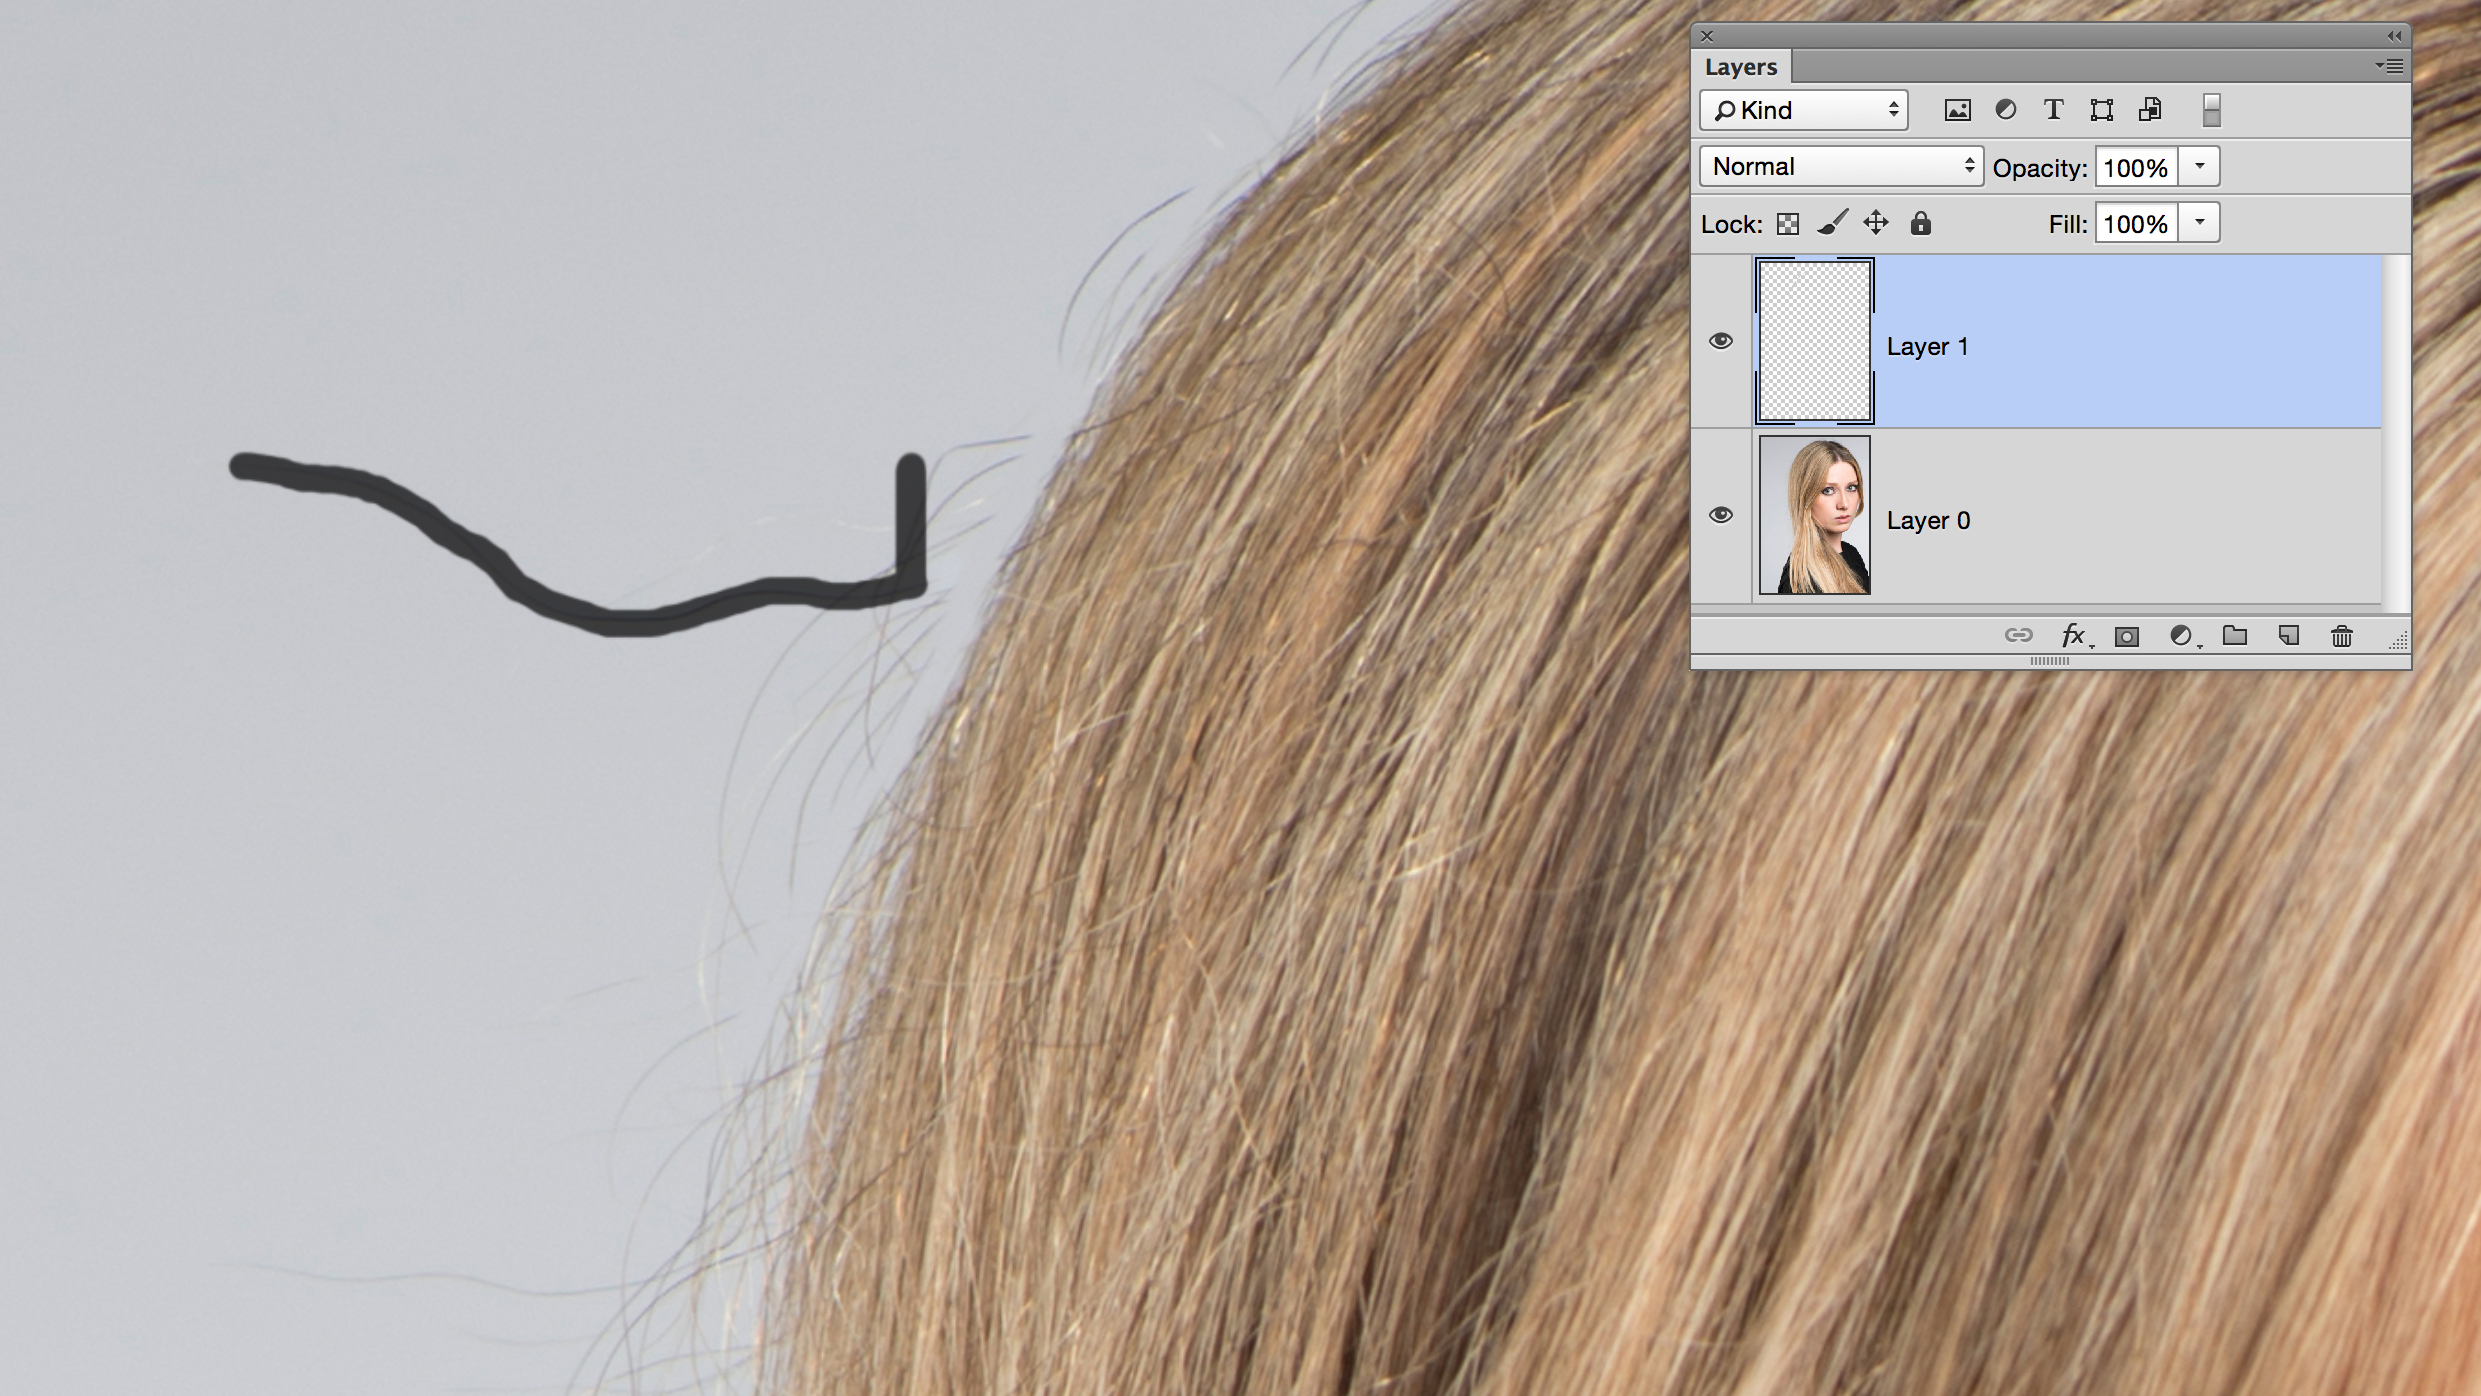
Top workflow tip: sample all layers
The Spot Healing Brush, Healing Brush and Clone Stamp tool can all be set to Sample All Layers in the tool options, which enables you to work non-destructively on a new empty layer while sampling from all the layers below.
Get rid of eye bags
Most of us don’t get as much sleep as we’d like. It’s easy to remove the tell-tale signs…
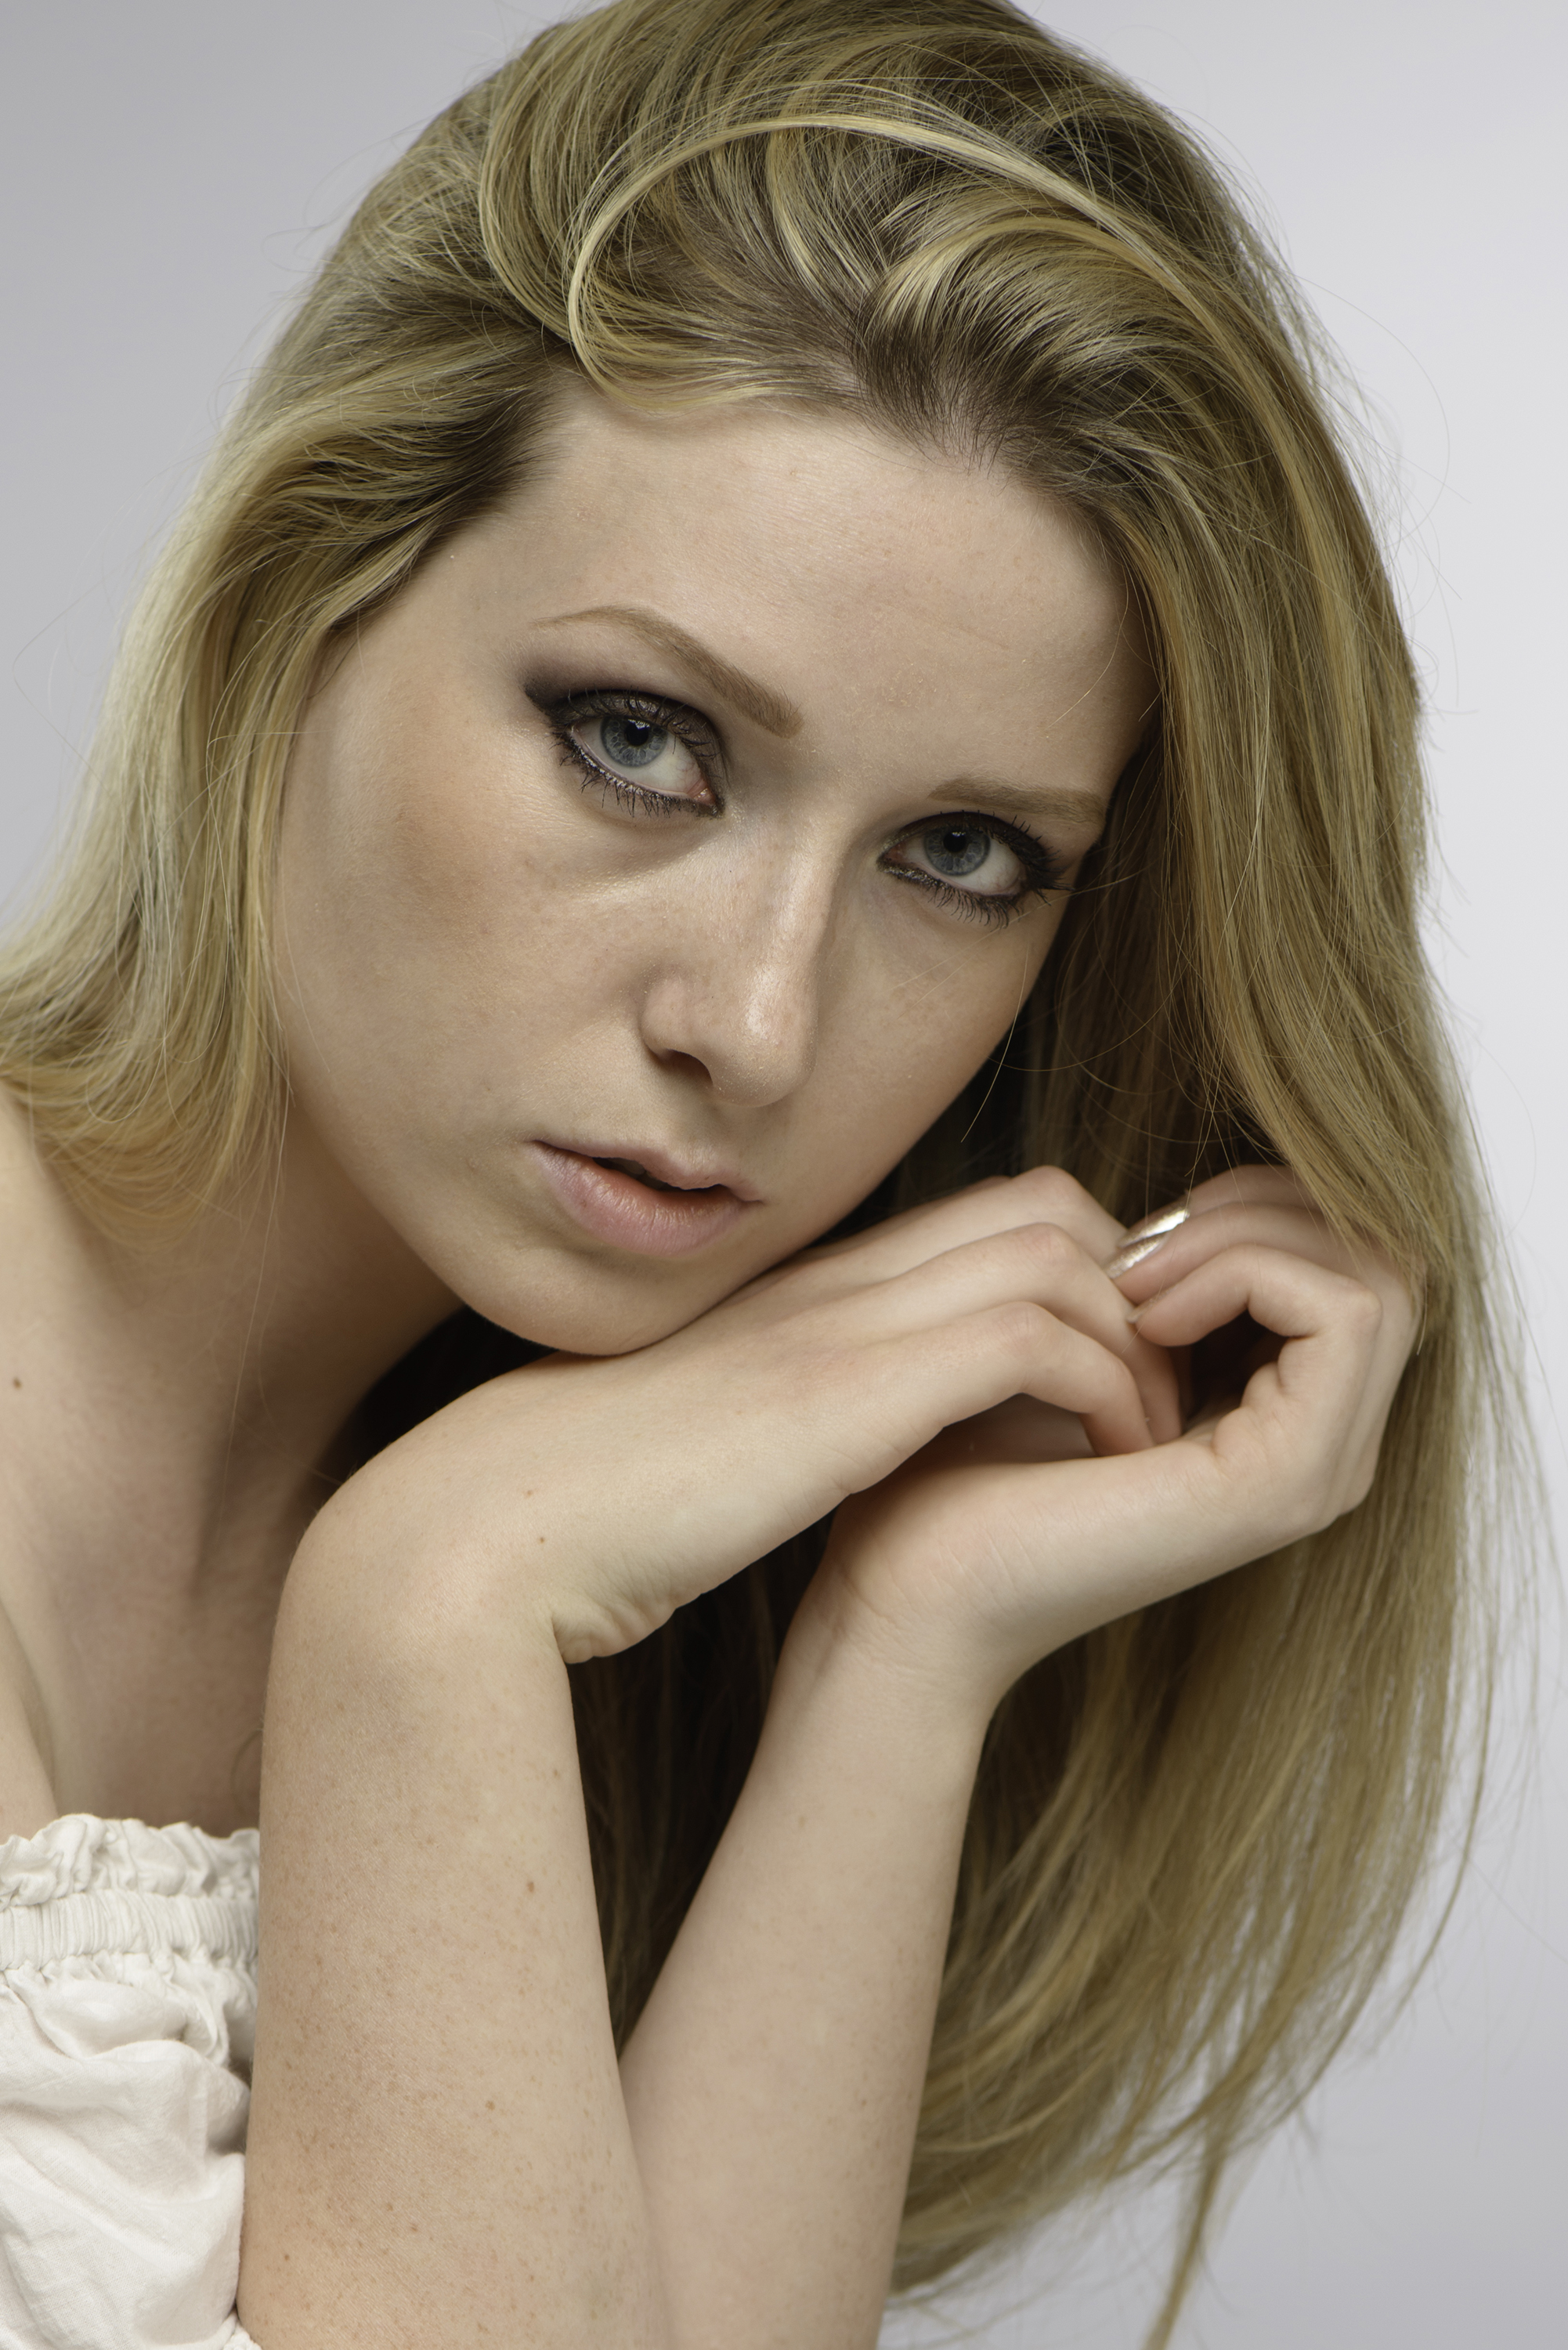
Before
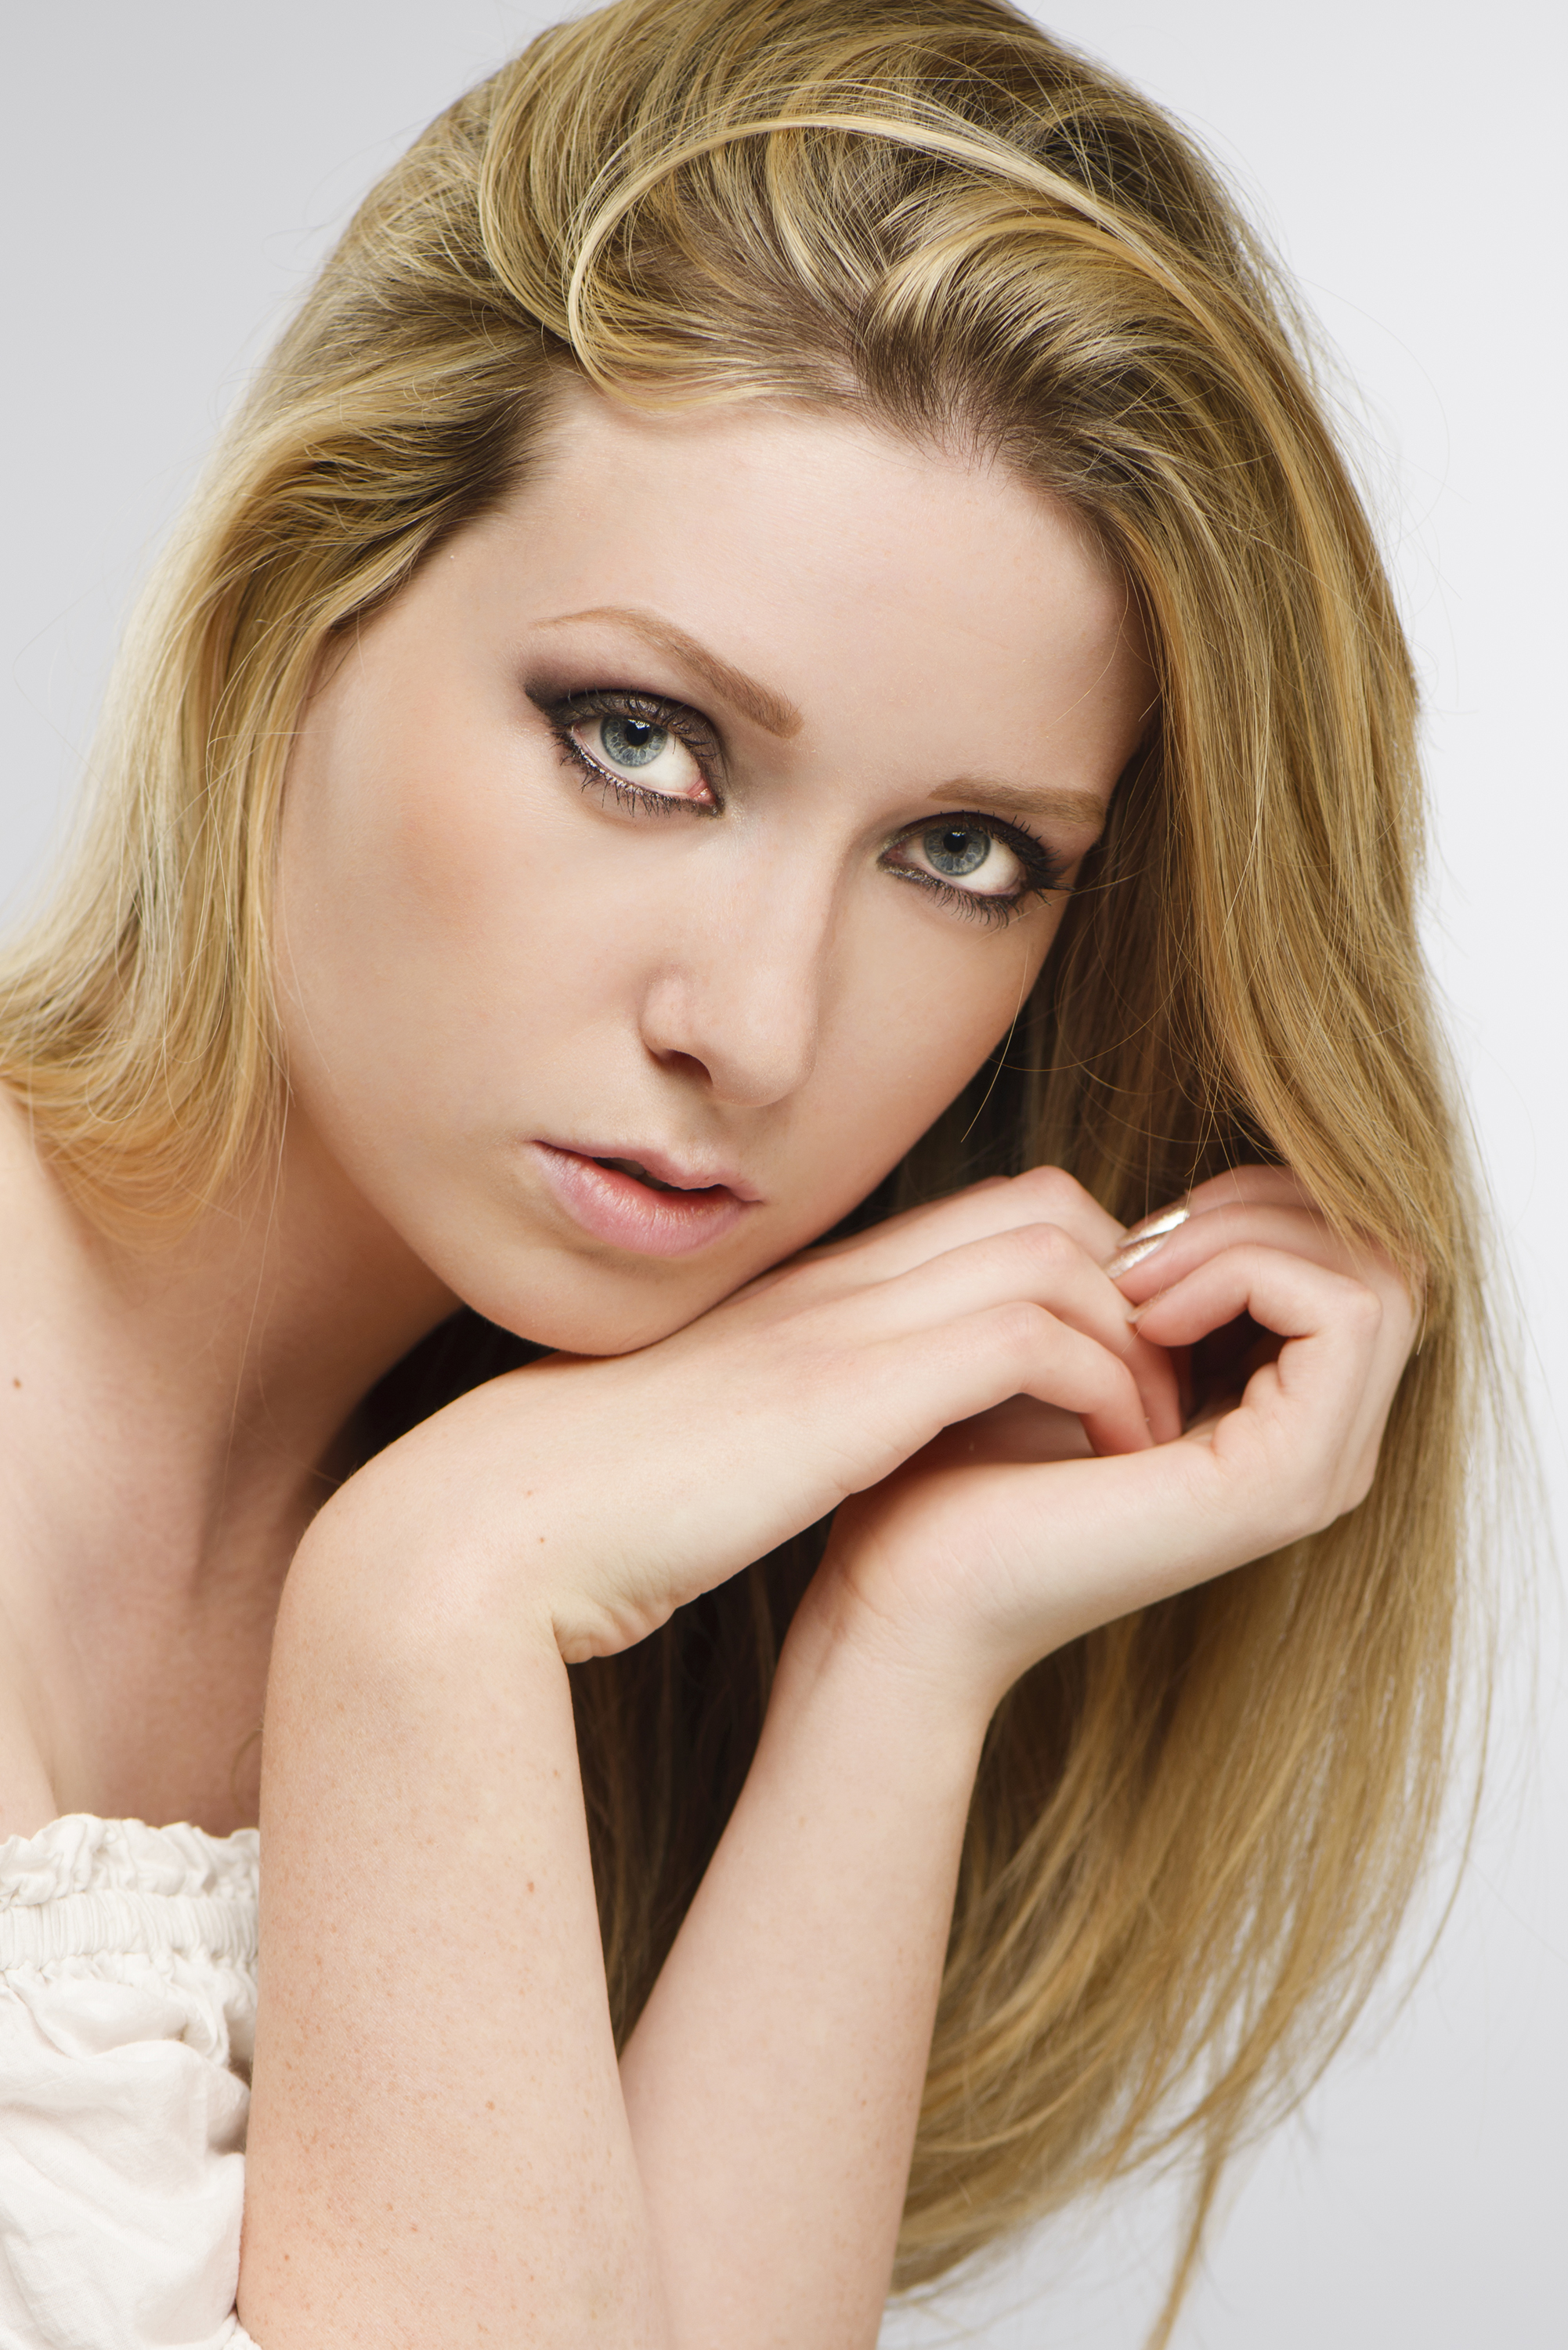
After
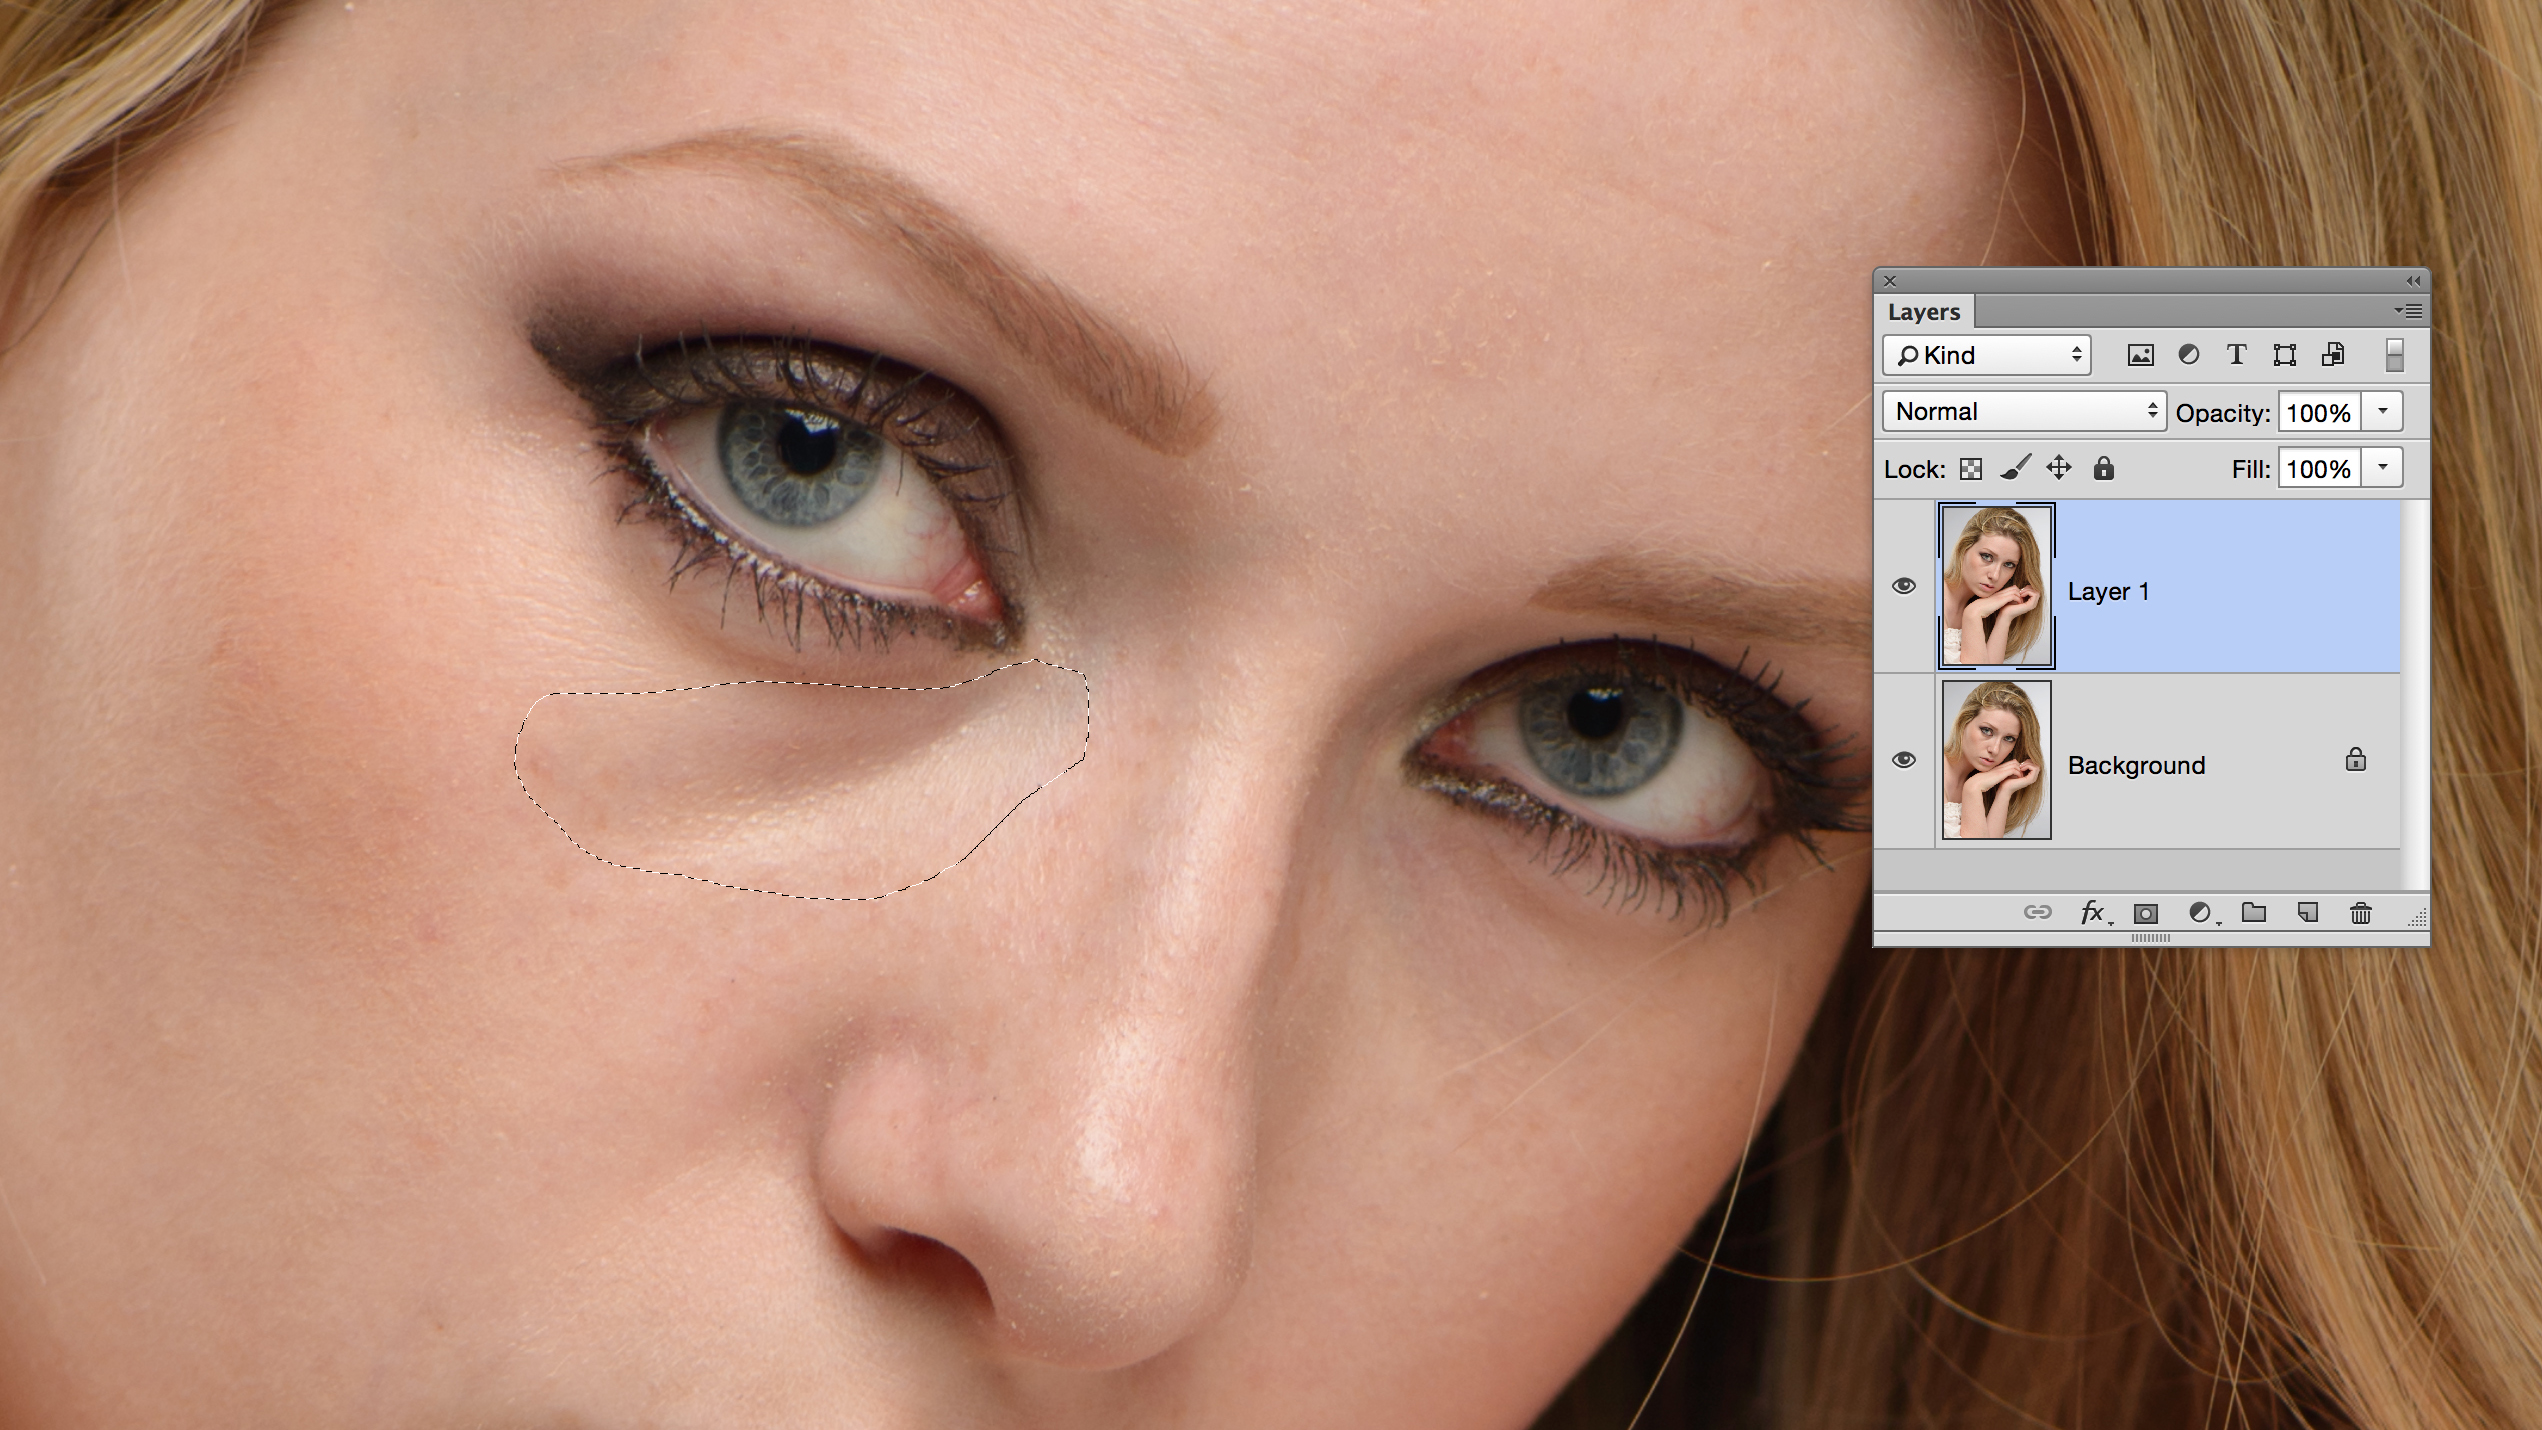
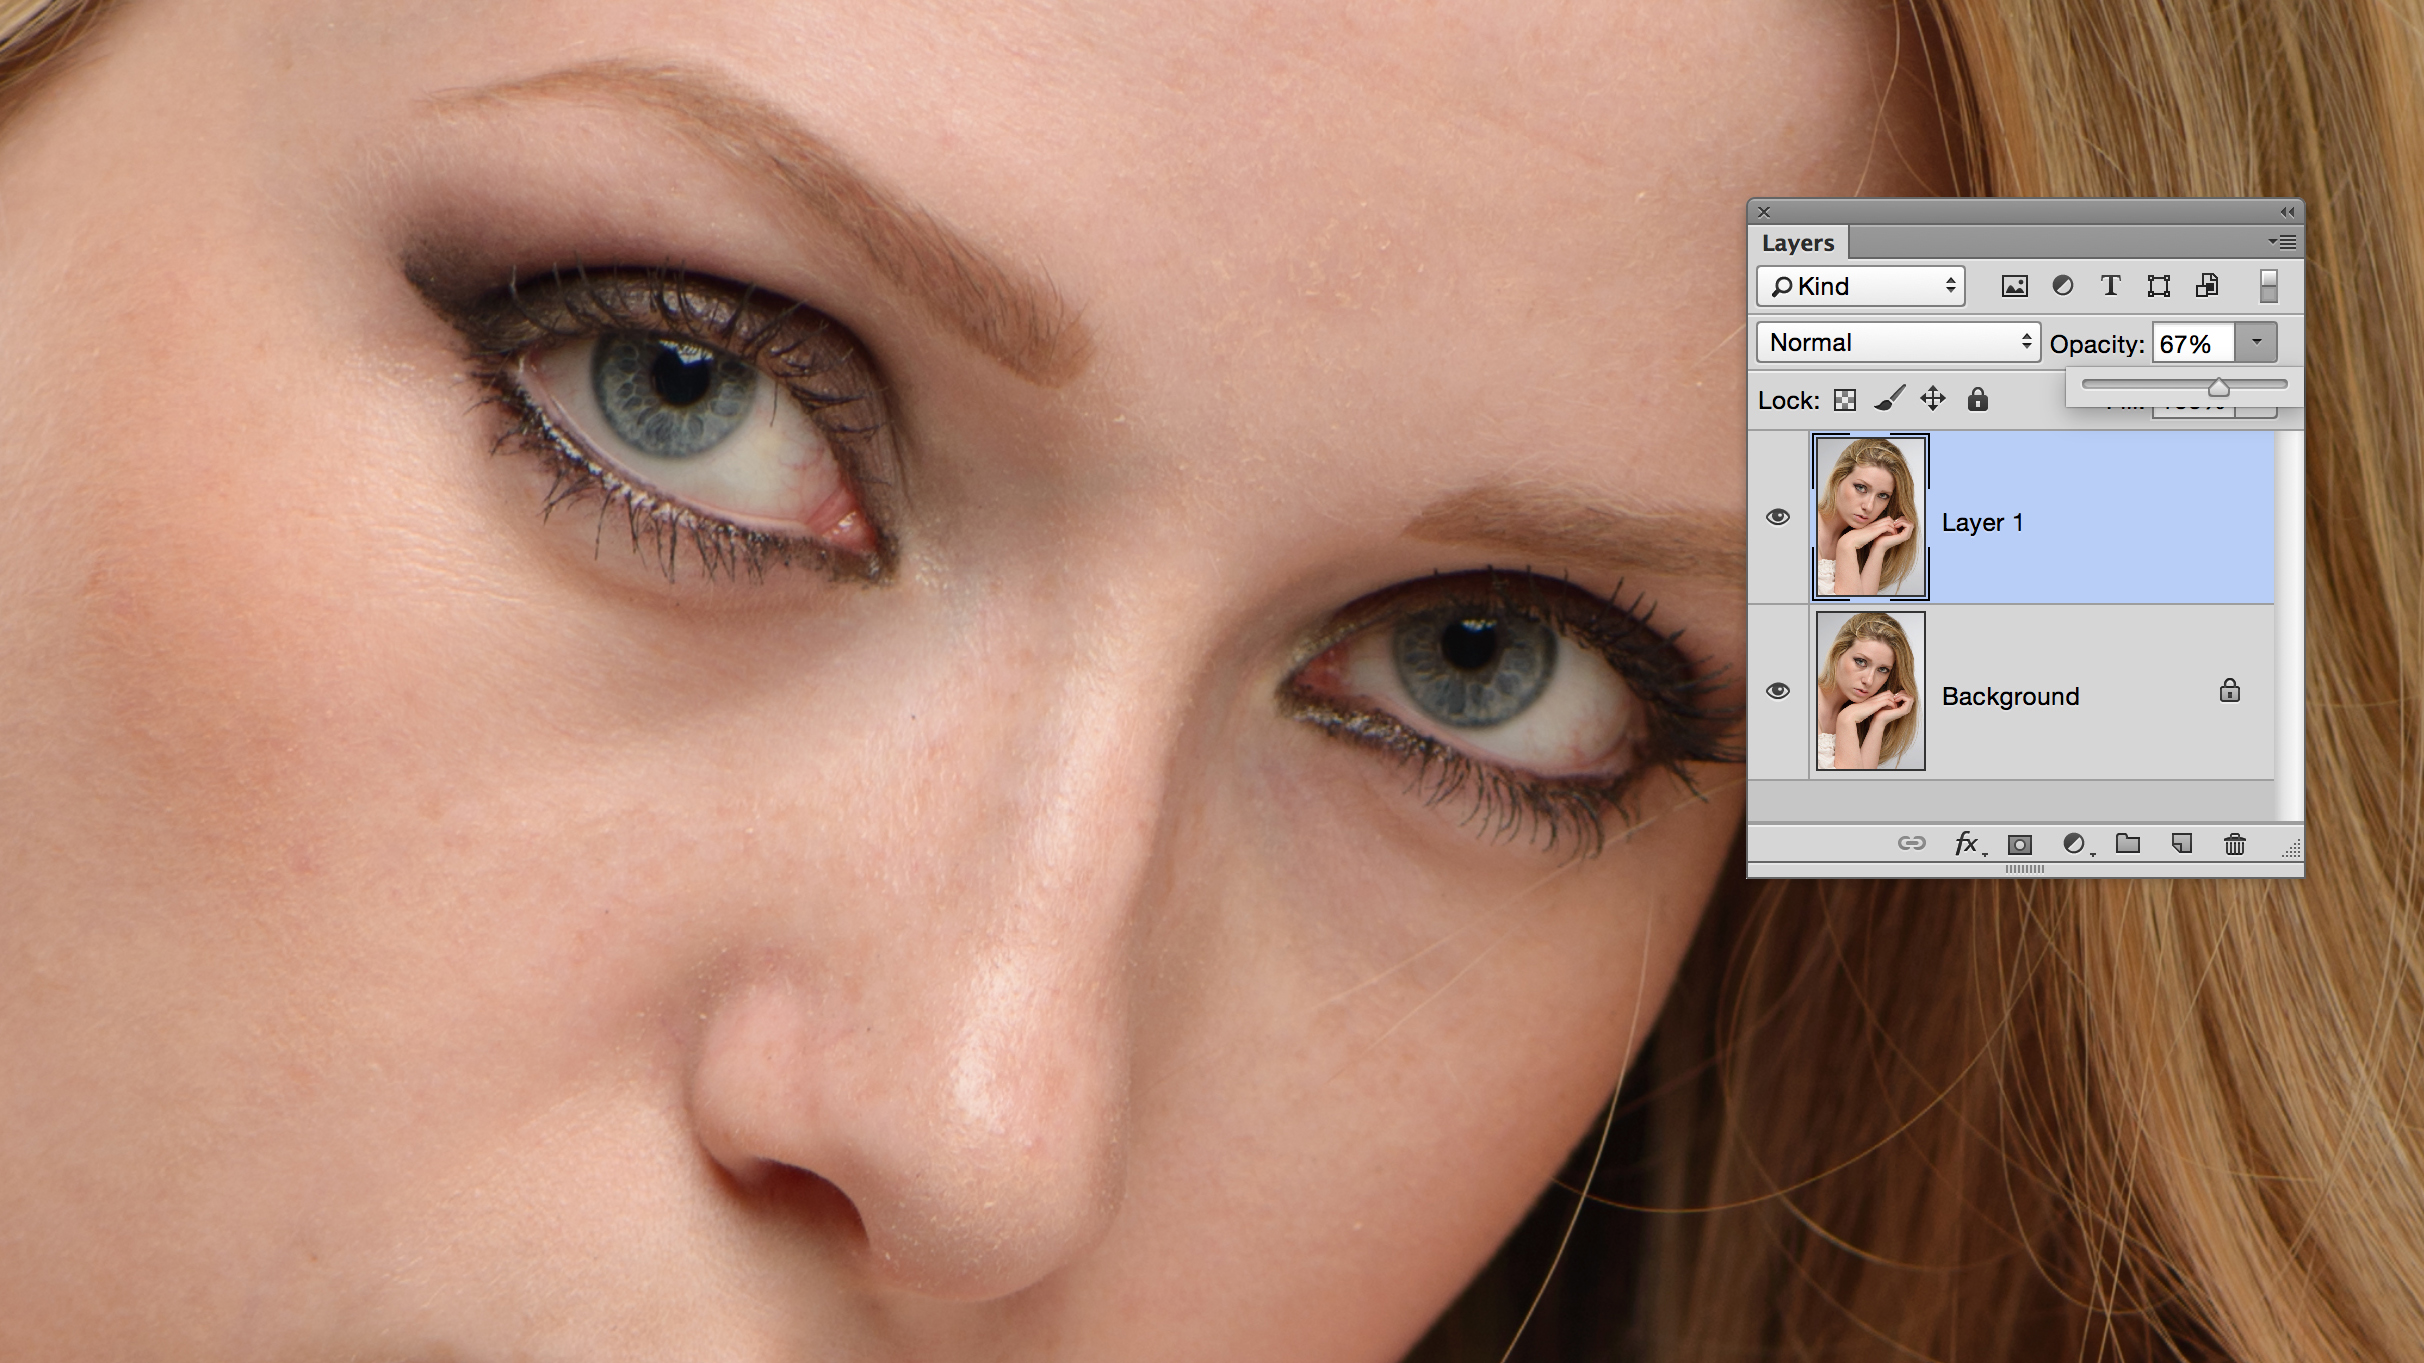
Press Ctrl/Cmd + J to duplicate your background layer, then grab the Patch tool. In the tool options, change to Patch: Normal (rather than Content-Aware). This will retain the texture. Draw a rough selection around the dark patch, leaving a little room around the edges, then drag the selection to a clean area of skin – the forehead usually works.
Press Ctrl/Cmd + D, then go to the Layers panel and lower the opacity of the layer until the effect looks more natural. If needs be, switch to the Clone Stamp tool and clone at a low opacity of around 20% to smooth out any rough areas.
Top workflow tip: use a tablet
Tablets come in handy for all kinds of Photoshop work, but especially retouching. A pen is much quicker and more precise than a mouse, and you can programme the tablet’s hot keys with all your favourite retouching shortcuts and actions.
- 1
- 2
Current page: Sharpening, dodge & burn, stray hairs and eye bags
Prev Page Eyes, skin softening and hot spots