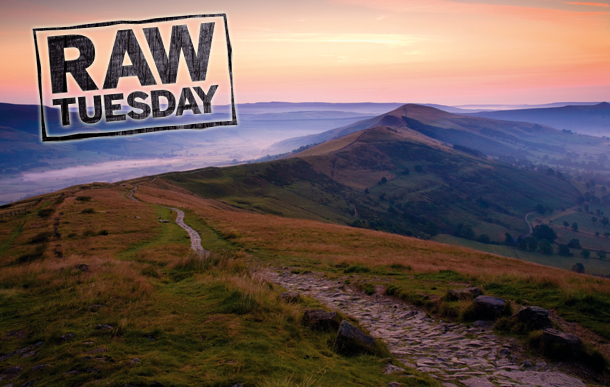
How to process raw images the right way

Do you shoot in raw format but you're unsure how to edit your files effectively? Our latest Raw Tuesday post shows you how to process raw images the right way. This easy-to-follow primer for raw editing is all you need to feel more confident in the digital darkroom!

Like modern digital photographers, traditional film-based photographers used (and still use) Neutral Density filters to help them avoid over-exposing the sky while preserving a scene's colours.
They'd use the camera's light meter to set aperture and shutter speed to capture a balanced exposure. However, film photographers knew that when they pressed the shutter button that was only half their task to capture a perfect print.
Article continues belowThe job would continue in their darkroom as they developed the negative - dodging and burning selective areas to reveal detail where it was required.
Many digital photographers review their shots on the back of the camera and make an instant judgement about the success or failure of the photo.
[caption id="attachment_545966" align="aligncenter" width="300"]

Our original image[/caption]
Sign up for breaking news, reviews, opinion, top tech deals, and more.
A shot may look like it has little detail in the shadows and suffers from a blown-out sky, but that's like criticising an undeveloped negative.
When you shoot in your camera's raw format, the image is crammed full of information regarding the scene's colours and tones.
Only by processing your raw format files in Photoshop's Adobe Camera Raw (ACR) editor can you really assess the quality of the images and create a perfect picture.
The latest incarnation of Adobe Camera Raw boasts a number of powerful new processing tools, making your digital darkroom even more effective.
You can coax colour and texture from apparently blown-out skies thanks to the new Graduated Filter, the selective Adjustment Brush lets you dodge and burn specific areas, and the Spot Removal tool clobbers ugly sensor spots into submission.
We'll put all of these powerful tools through their paces in this advanced photo editing tutorial to show you how to make a good shot great.
How to process raw images (steps 1-6)

01 Adjust the exposure
Open your raw file. Start by adjusting the ground's tones, as the murky mountains make up most of the shot. You can fix the sky later. Increase Exposure to +0.30 to make a global adjustment, then slide Fill Light up to +19 to reveal more midtone detail in the backlit mountains.

02 Tweak the contrast
For a healthy range of tones from black shadows through to bright highlights, drag Blacks to 10. This will darken the shadows of the foreground stones. Increase the Contrast to +41 to reveal a lighter mist against darker midtones. This helps to reveal shapes in the landscape.

03 Colour and detail
By pushing the Vibrance slider up to +57, you can bring out features such as the warm yellowing grass and the cold looking greenery on the background hills, drawing attention to various textures in the scene. Warm the cold background up a little by sliding Temperature up to 5600.

04 Add a graduated filter
To capture sky detail on location we would have needed to close down the aperture by a couple of stops, but this would have plunged the backlit landscape into darkness. To make a selective sky adjustment, grab the Graduated Filter tool. Set the Exposure to -2.15 and the Contrast to -30.

05 Draw a gradient
Click at the top of the frame and drag the Graduated Filter down towards the top of the mountains. This will create a gradient that darkens the sky, revealing hidden textures and colours. It will also gently darken the top of the mountains, making them stand out from the rest of the scene.

06 Selective adjustment
Select the Adjustment Brush from the top tool bar. Set Exposure to +0.35, Size to 6 and Feather to 56. Next, spray over the stone path to lighten it a little - this will help to lead the viewer's eye into the scene. Use the left square bracket key on your keyboard to shrink the brush tip when required.
PAGE 1: How to process raw images - steps 1-6
PAGE 2: How to process raw images - steps 7-12
READ MORE
5 creative photo editing tricks for Adobe Camera Raw
Best Photo Editing Software? 6 budget alternatives to Photoshop tested and rate
Photoshop Curves Tool: 6 techniques every photographer must know

 Become a TechRadar Insider


