Sponsored by

How to remove backgrounds and objects in Adobe Lightroom
Removing backgrounds and objects in Lightroom is easy – and means you don't have to use Photoshop
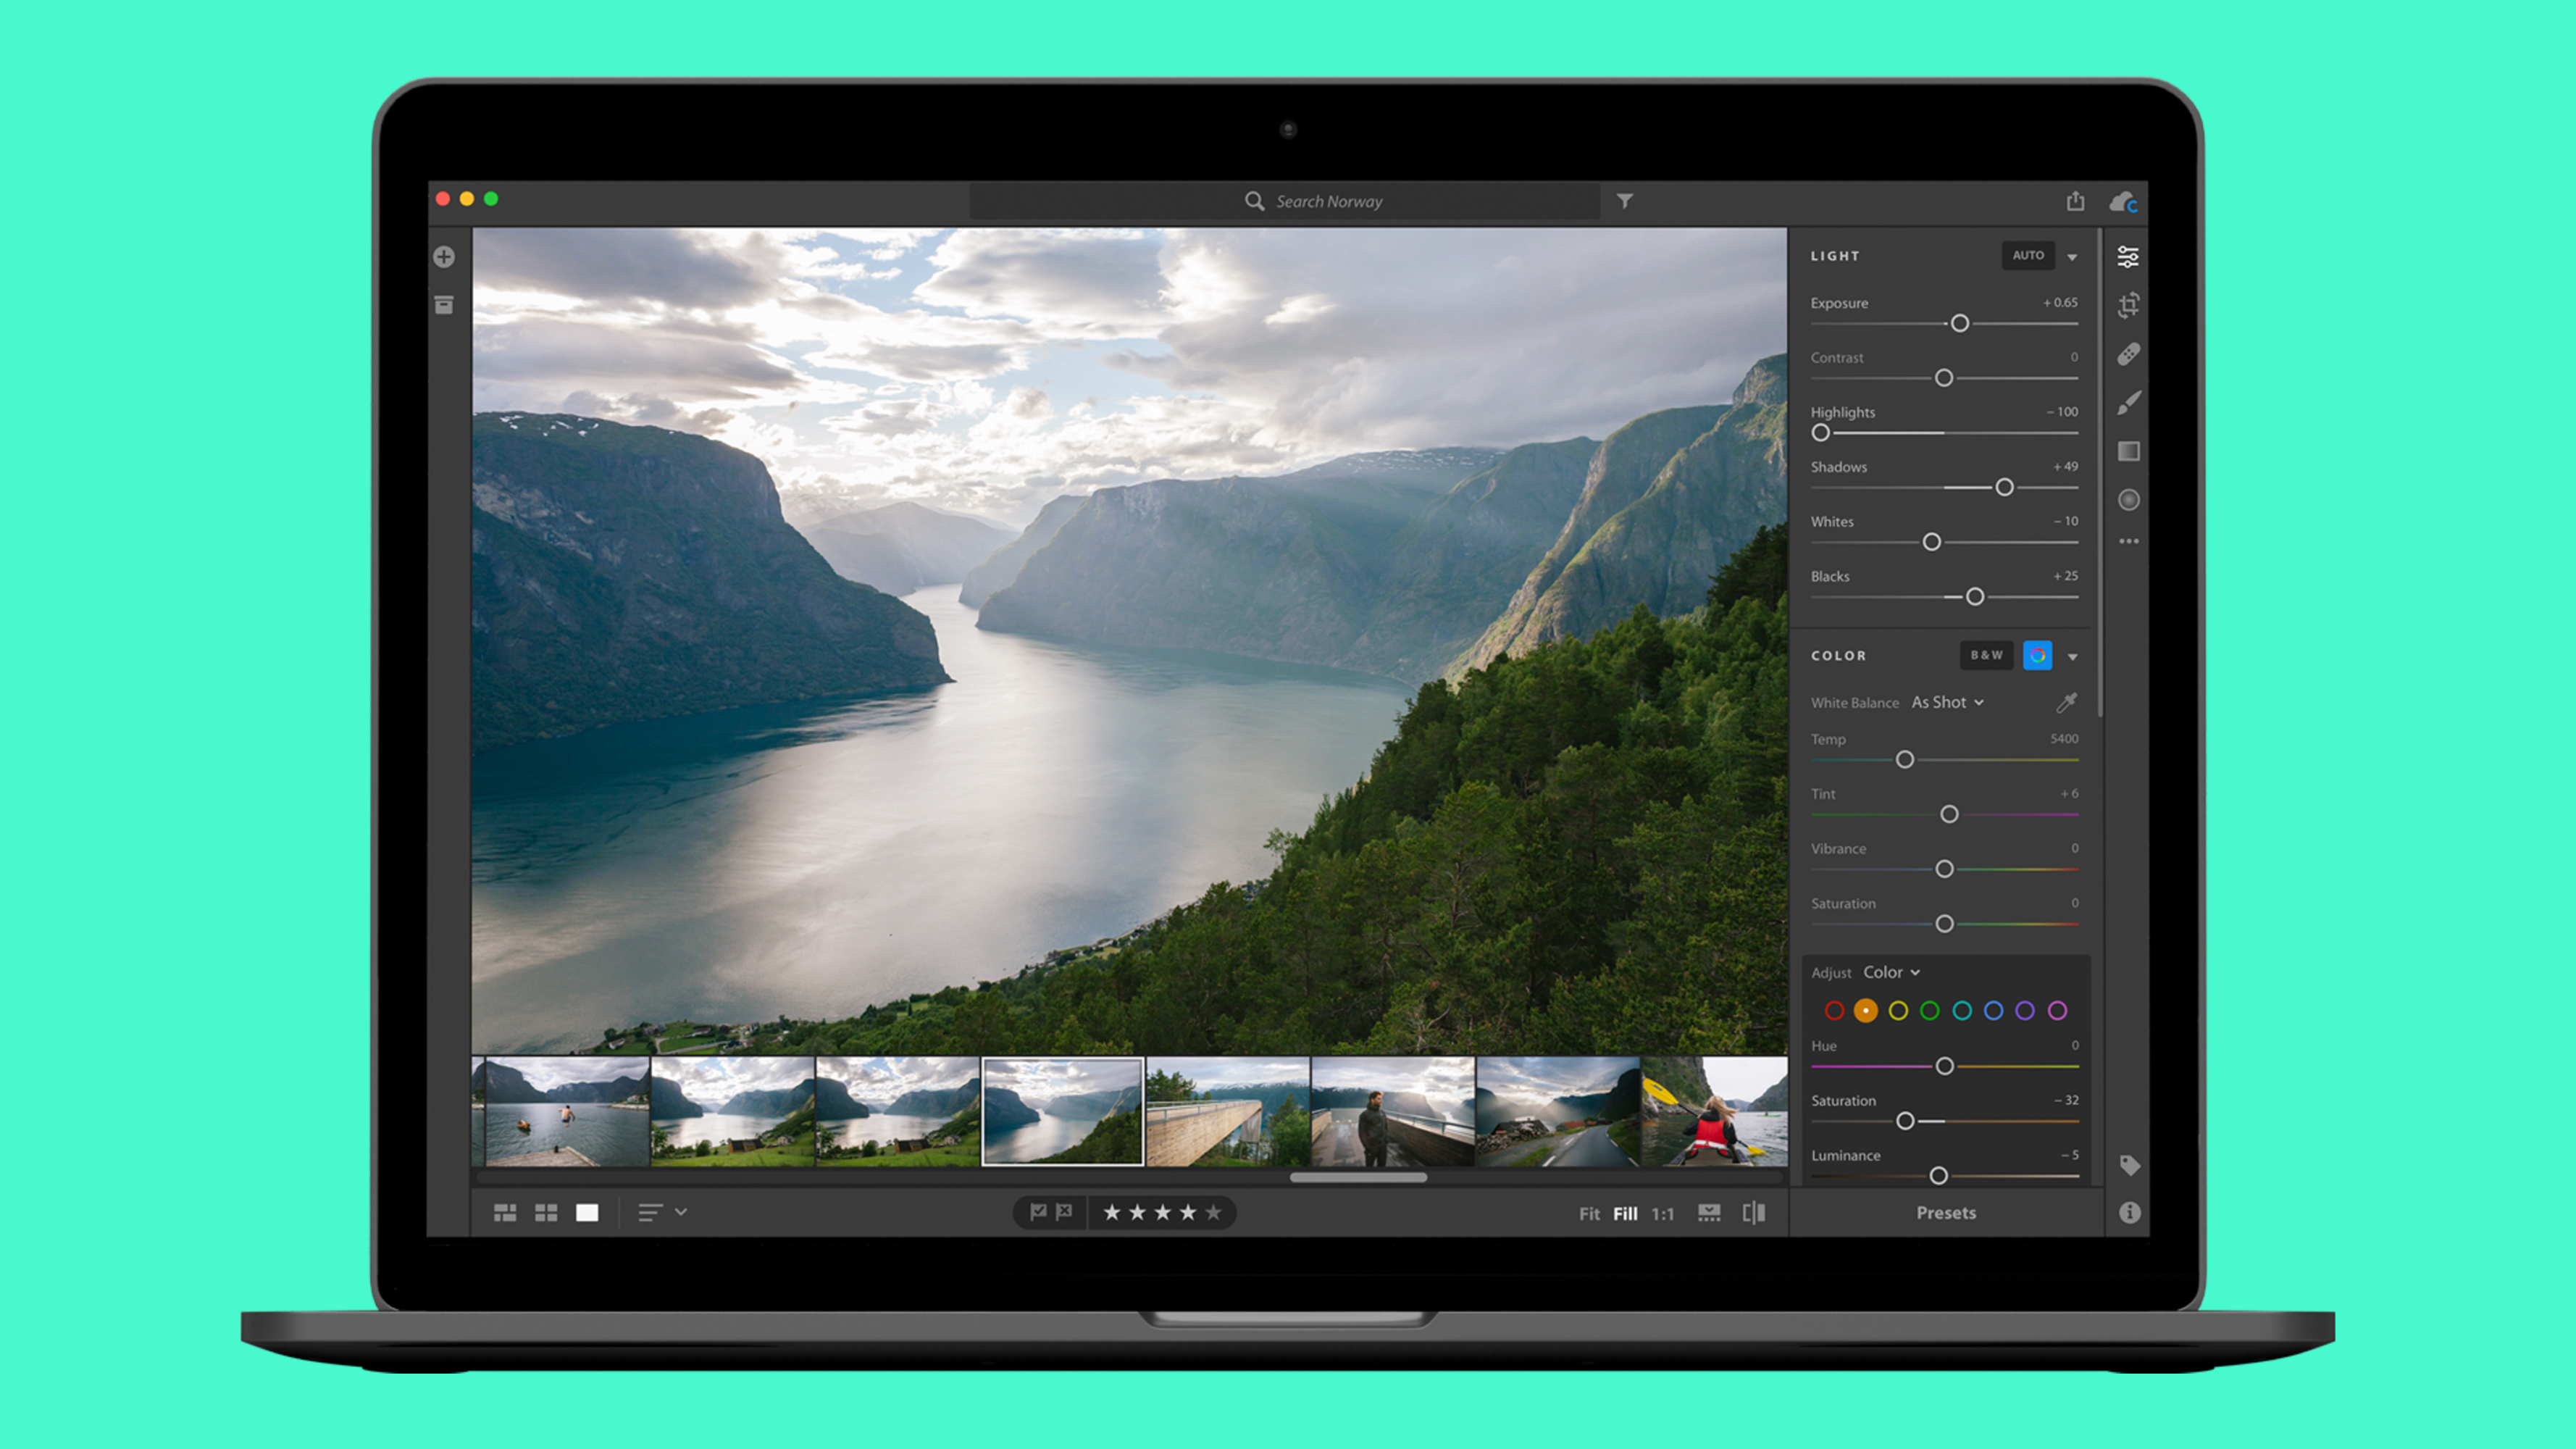
Adobe Lightroom is best known for its powerful photo-organising tools and quick colour corrections, but it’s also packed with clever AI features that make editing far easier than it used to be.
Among these are background and object removal tools – perfect for cleaning up messy shots, highlighting your subject, or giving your images a completely new look and feel.
Beyond simple touch-ups, these tools open up creative possibilities. You might want to create a consistent look across a series of product photos, replace a dull background with something more vibrant, or use selective edits to draw the eye exactly where you want it.
Lightroom’s latest AI-driven masking and healing options make all of this possible without steep learning curves, and they work just as well on your phone as they do on your desktop.
In this guide, we’ll show you how to use them effectively, step-by-step, compare Lightroom and Photoshop, and answer some quick questions at the end.
Adobe Lightroom is one of the most versatile photo editors on the market and doesn't come with the complexity of Photoshop. You can see what's on offer by clicking here.
What you need before you start
Before diving into background and object removal, it’s worth making sure you have the right setup.
Lightroom’s AI masking and healing features are available in both Lightroom (the cloud-based version) and desktop app Lightroom Classic, but you’ll need an active Adobe Creative Cloud subscription to access the latest tools.
You’ll also want to choose the right image to work with.
For the best results, pick a high-resolution photo where your subject is clearly separated from the background – this makes it easier for Lightroom’s AI to detect edges accurately. That said, even busier images can be cleaned up with a little manual refinement.
Finally, make sure your software is up to date.
Adobe regularly improves its AI detection and content-aware algorithms, so the latest version will give you the smoothest experience.
It’s also a good idea to work on a duplicate image or virtual copy. That way, you can experiment freely without losing your original shot.
Before we start, it's worth noting that at the time of writing, Adobe's Generative Remove does not consume Firefly generative credits but requires an internet connection.
How background removal works in Lightroom
At its core, Lightroom’s background removal is powered by Adobe’s AI masking tech, which can detect and separate the subject from its surroundings in just a couple of clicks.
The two most useful options are Select Subject – which automatically picks out the main focus of your photo – and Select Background, which does the opposite by highlighting everything except the subject.
These tools are available in both Lightroom versions, and they’re designed to save you the painstaking manual selections that used to be standard in photo editing. While some might not like AI, this is a clear win for most users.
Once the AI has created the mask, you can refine it by adding or subtracting areas manually with a brush, linear gradient, or radial gradient, which is particularly handy if the edges aren’t perfect, or if there are multiple subjects.
While Lightroom can’t completely delete the background in the same way Photoshop can, you can use masks to blur it, darken it, or even change its colour tone – effectively pushing it out of focus and making your subject pop.
For more complex edits, Lightroom’s masks can be sent directly into Photoshop for pixel-level work, thanks to the tight integration between the two apps.
How to remove a background in Lightroom
Lightroom’s AI masking tools make background removal quick and intuitive, whether you’re working on a desktop or editing on the go.
The process is largely the same in Lightroom and Lightroom Classic, though the interface layout differs slightly.
Desktop background removal workflow
- Import and select your photo: Open Lightroom and add your chosen image to your album. Once imported, head to the Develop module (Classic) or the Remove tool (Lightroom) and select your photo.
- Open the Masking panel: In Lightroom Classic, go to the Develop module. In Lightroom (desktop), open the photo in the Edit view. Open Masking from the right-hand toolbar (it’s separate from Remove).
- Choose Select Subject or Select Background
- Select Subject automatically detects the main person or object and creates a mask around it.
- Select Background masks everything except the subject – perfect if your goal is to adjust or remove the background.
- Refine the selection: AI detection is good, but not infallible. Use Add or Subtract to manually paint in or erase areas, adjusting the brush size and feathering for accuracy.
- Apply your background edits: You can’t fully delete a background in Lightroom, but you can make it visually disappear. Use Lens Blur for realistic depth-of-field. Create a Select Background mask (or invert Select Subject), then apply Lens Blur and tune Bokeh/Focus Range.
- Fine-tune for realism: Check that your edits don’t create visible halos or unnatural edges. If they do, tweak the mask feathering or reduce the intensity of your adjustments for a more natural transition.
Mobile background removal workflow
- Open your image in the Lightroom mobile app on iOS or Android and tap the Masking icon from the toolbar.
- Select Subject or Select Background – the AI will run and highlight the relevant areas.
- Refine the mask by adding or subtracting areas with the Brush tool. Pinch to zoom for precision on small details.
- Adjust the background by reducing brightness, adding blur, or muting colours to make the subject stand out.
- Save your changes or create a virtual copy so you can compare different edits.
Please note that these instructions are correct at the time of writing, and Adobe may update its products in the future. For example, the Remove tool is a new AI-infused addition to older versions of Lightroom.
How to remove unwanted objects in Lightroom
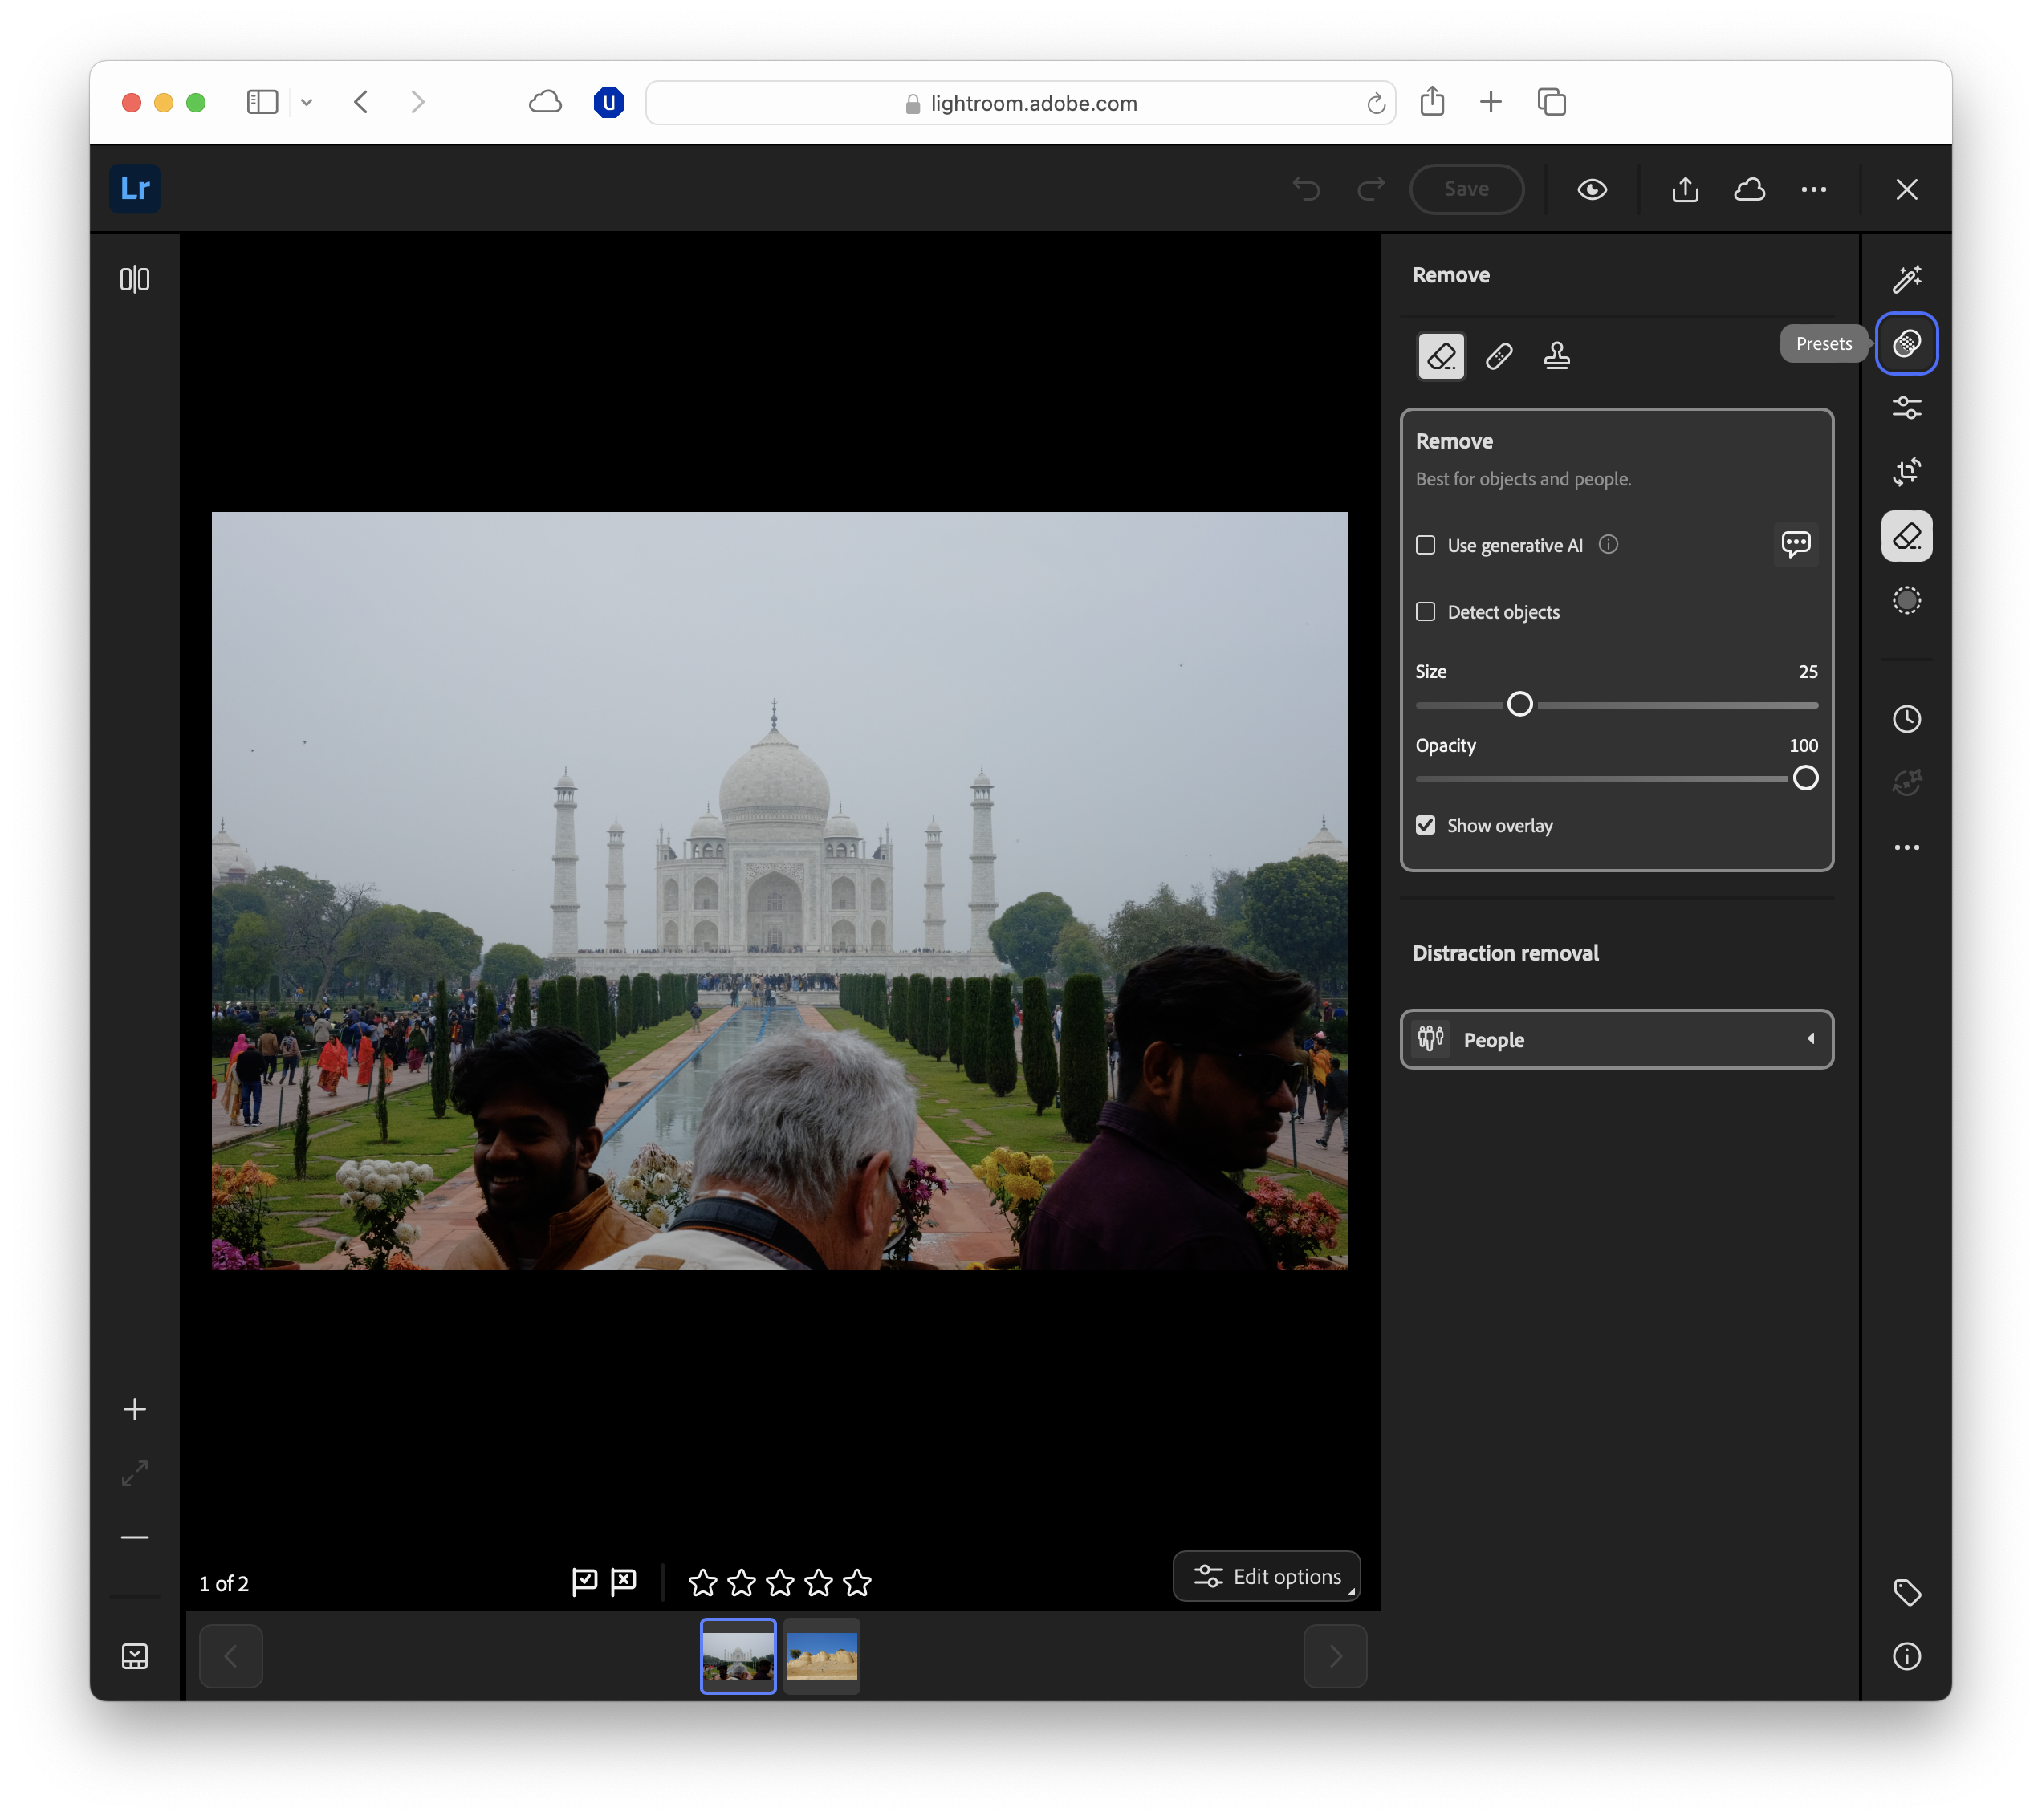
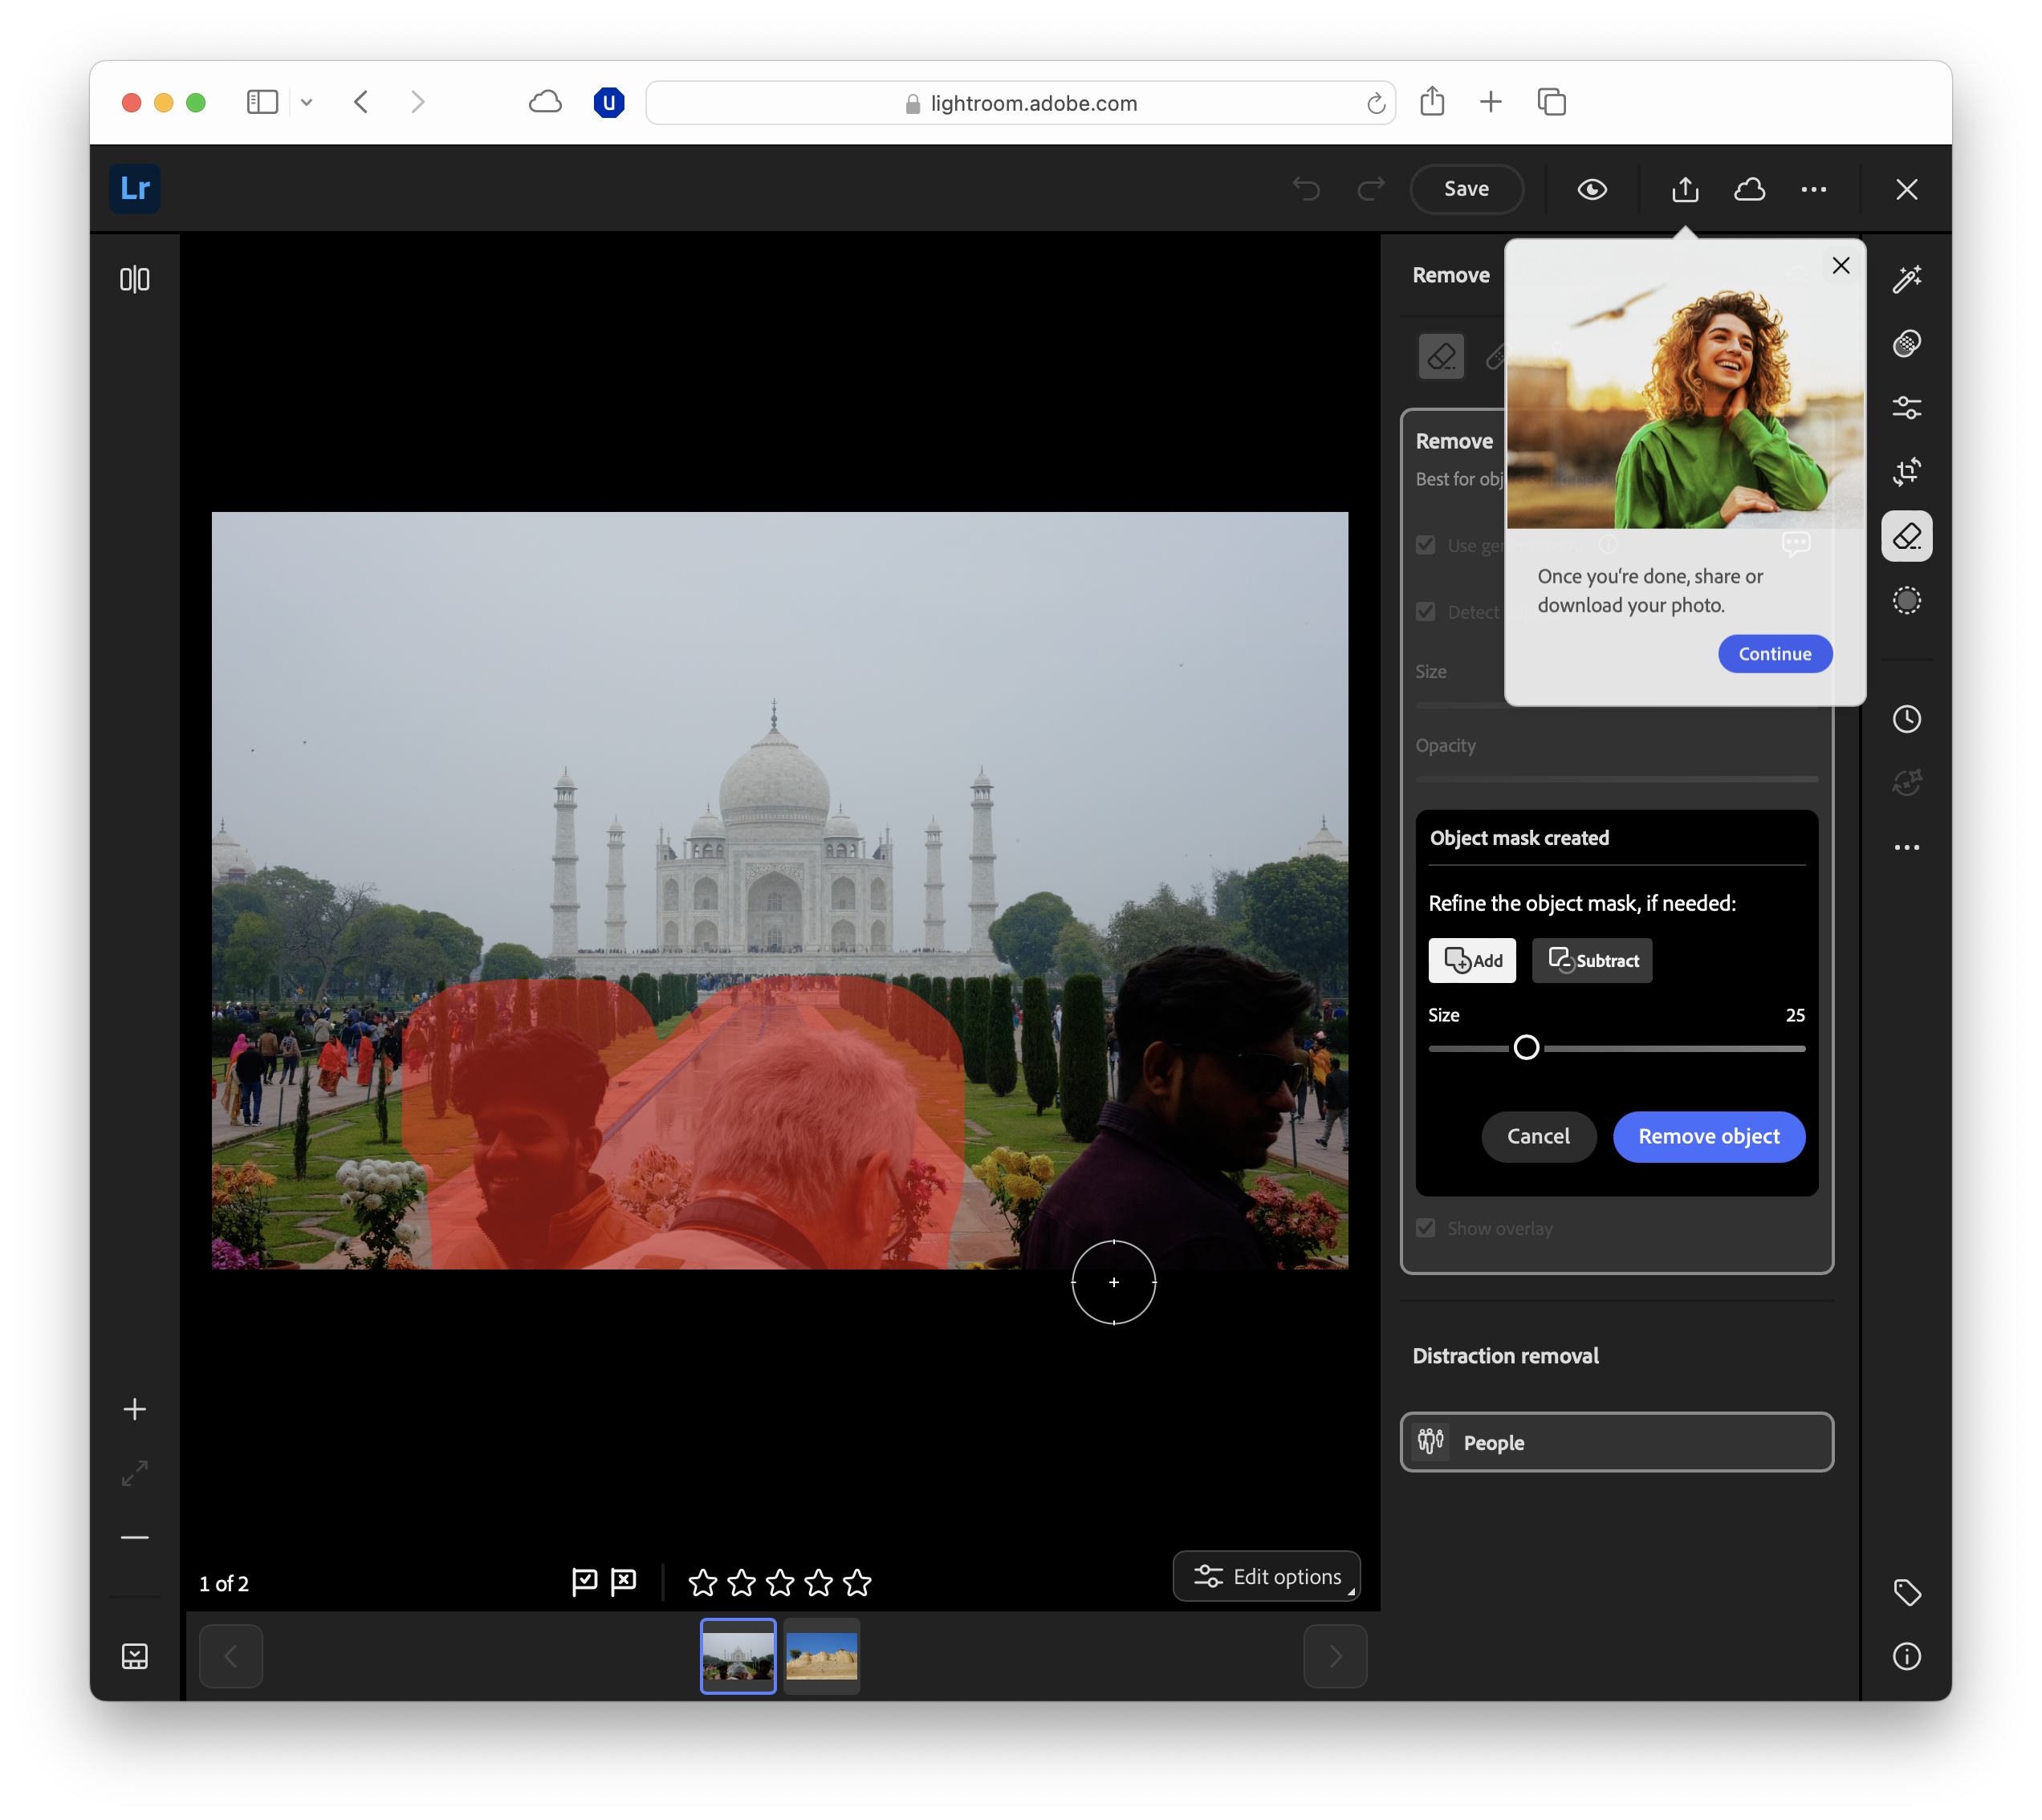
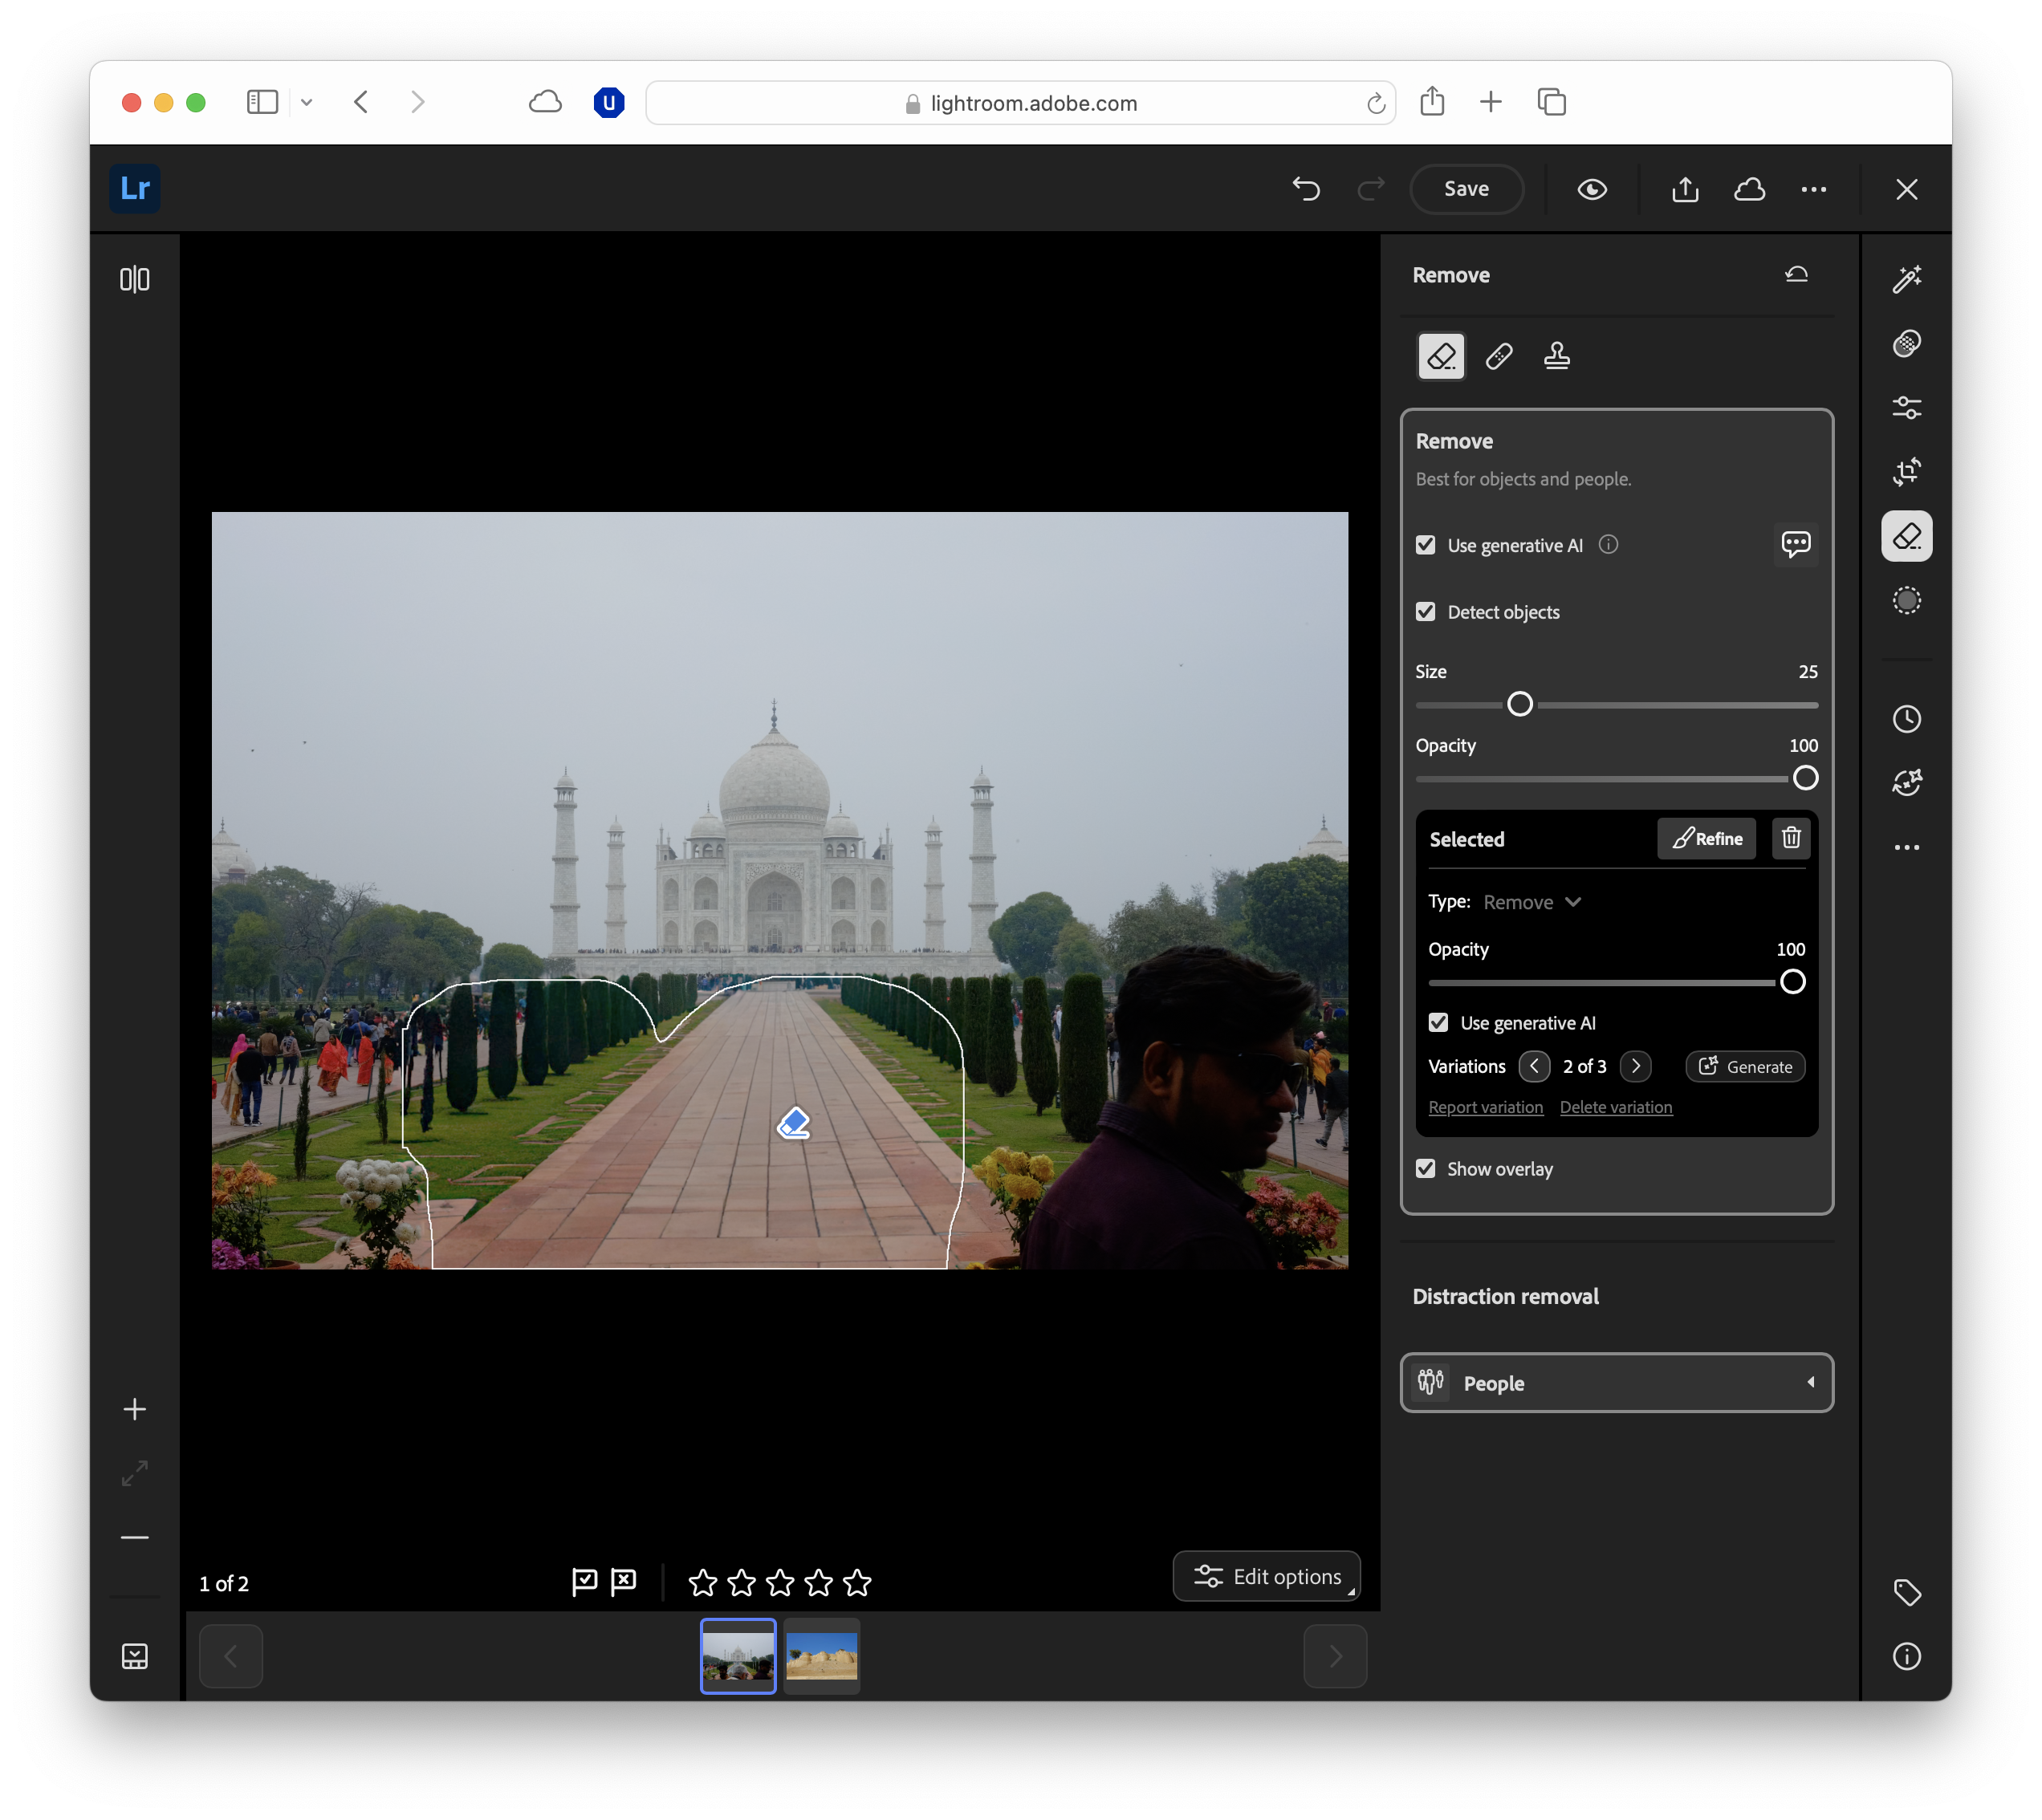
Lightroom’s object removal relies on its Remove tools – a set of brushes that can intelligently fill in areas where you’ve painted over unwanted elements.
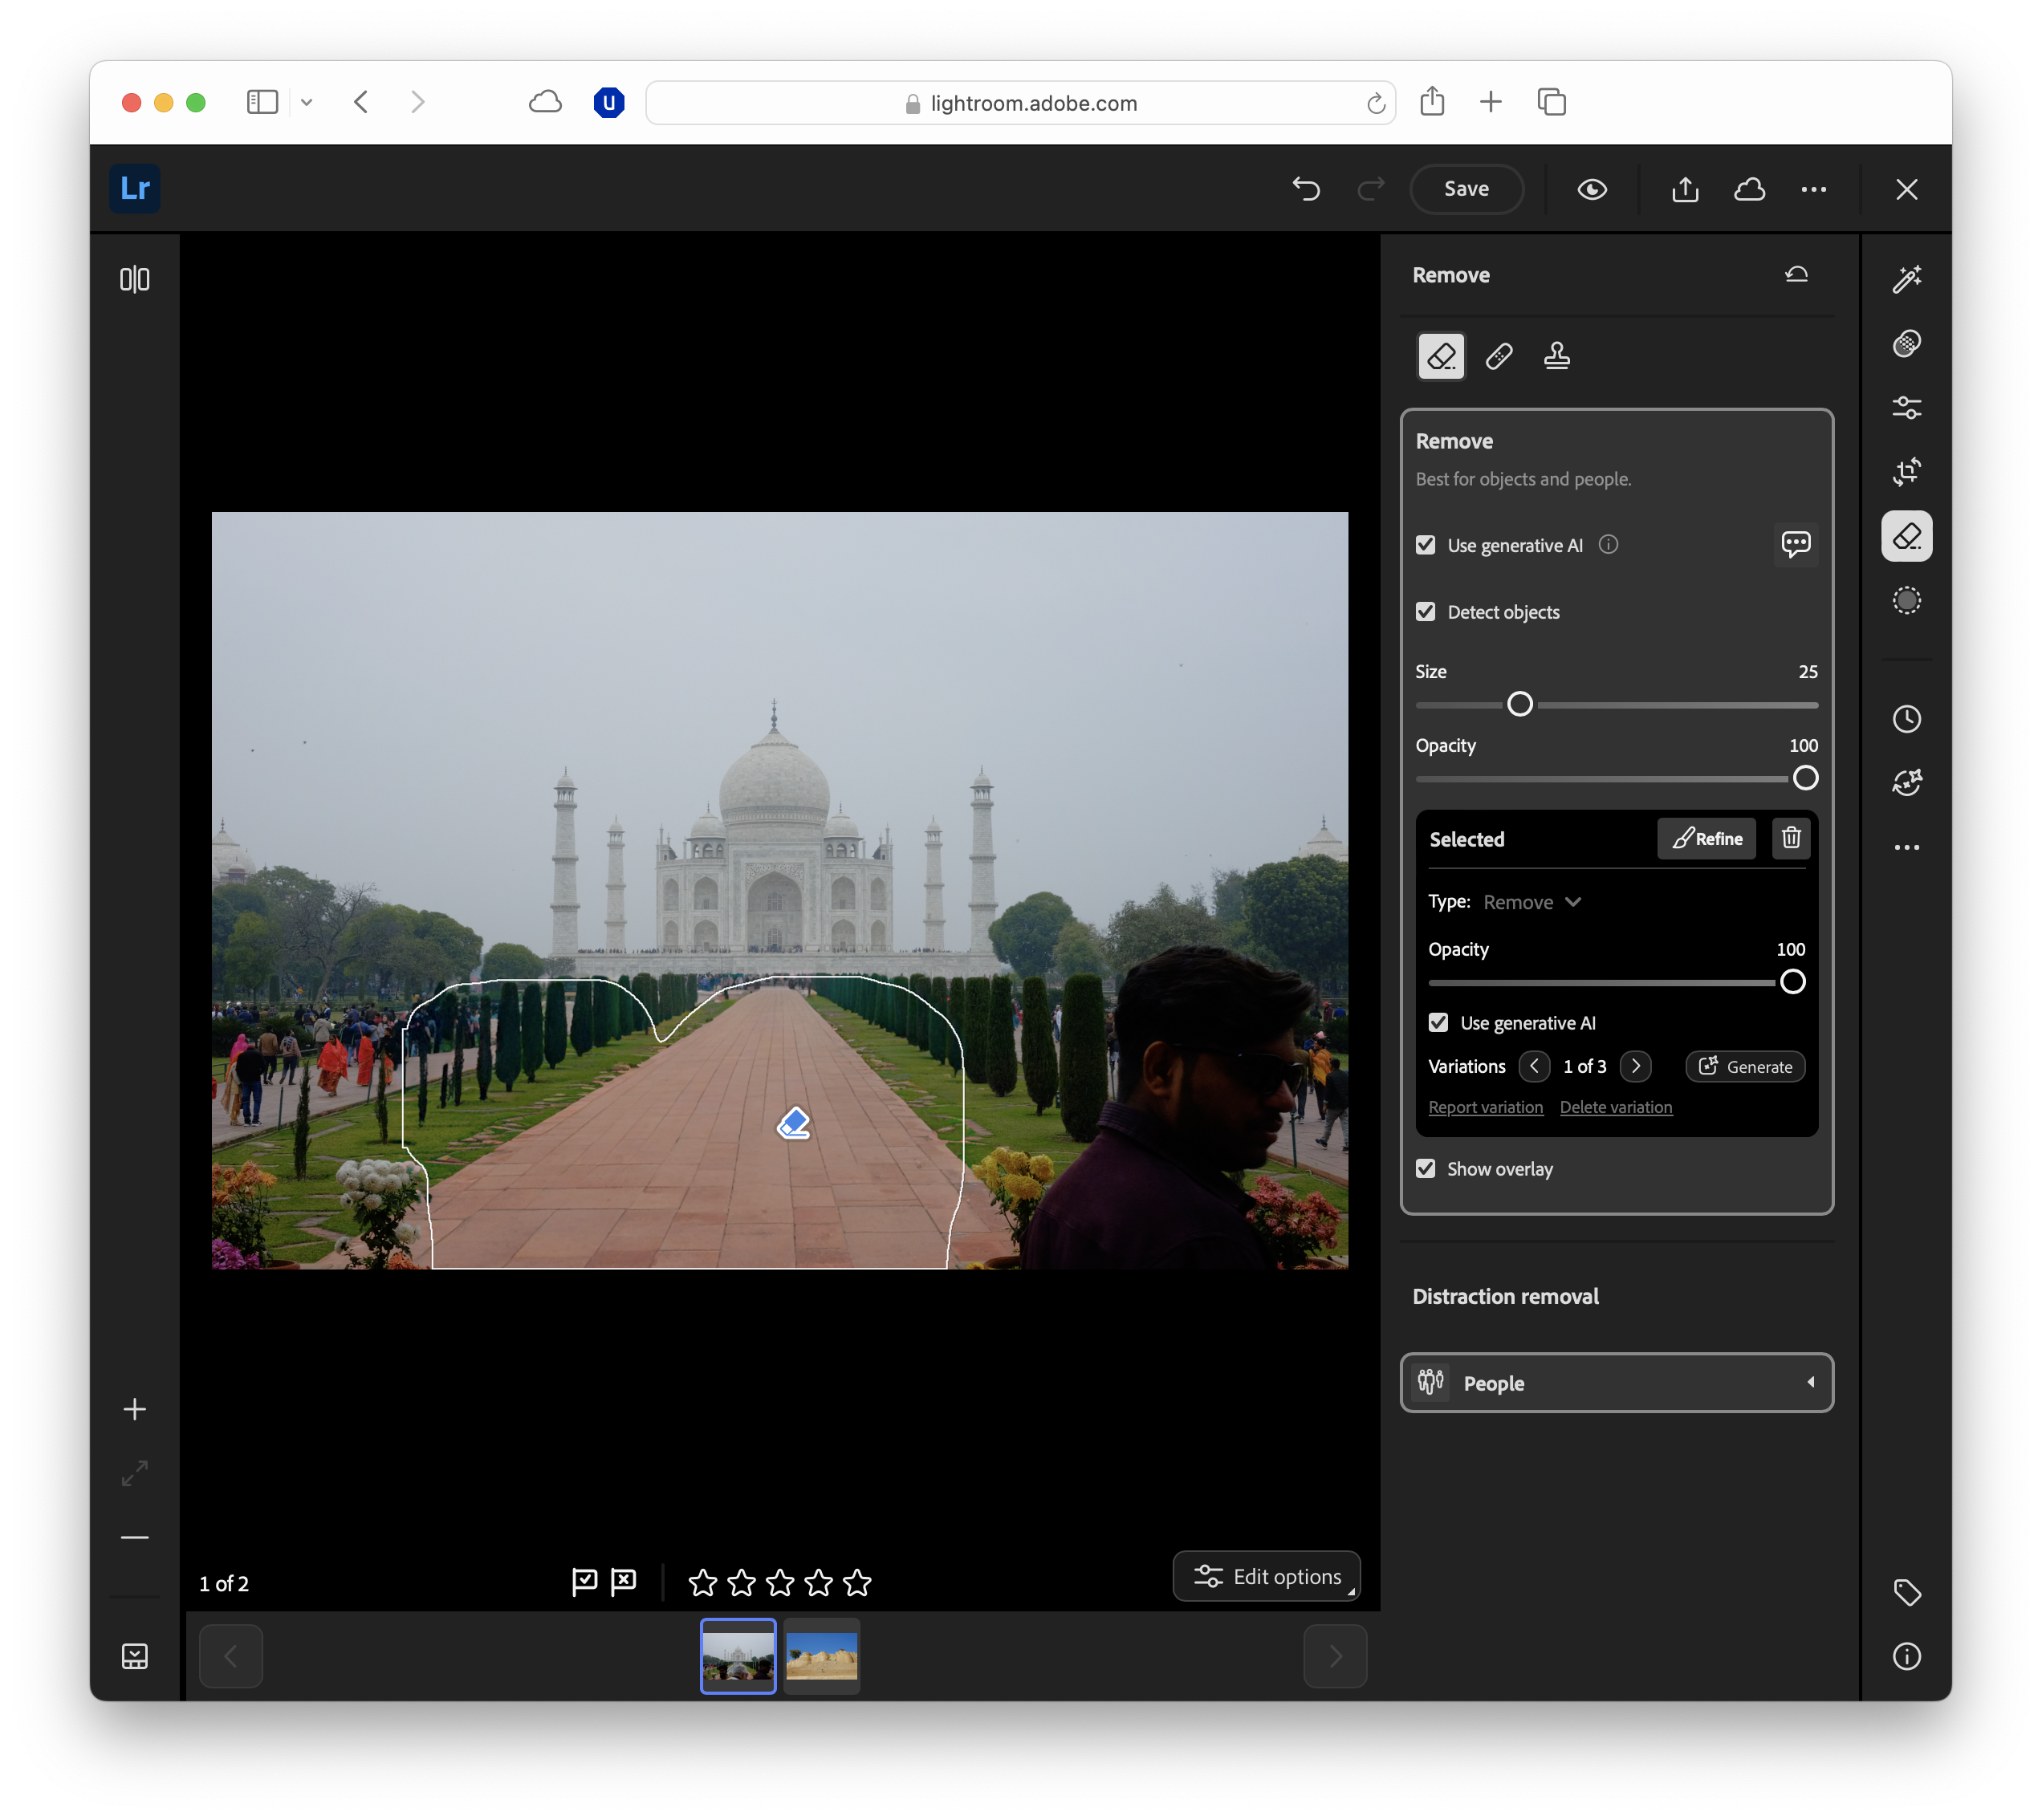
The most powerful of these is Content-Aware Remove, which uses AI to blend the replacement area seamlessly with the surrounding pixels. You’ll also find Heal and Clone options, which work well for smaller or more precise fixes.
Adobe has its own Firefly generative AI models that power much of the removals in 2025, and you'll be working with those.
Broadly, here's where to use each tool:
- Content-Aware Remove is best for complex areas with varied textures or patterns, such as grass, water, or fabric. Lightroom analyses the surrounding pixels and generates a natural-looking fill.
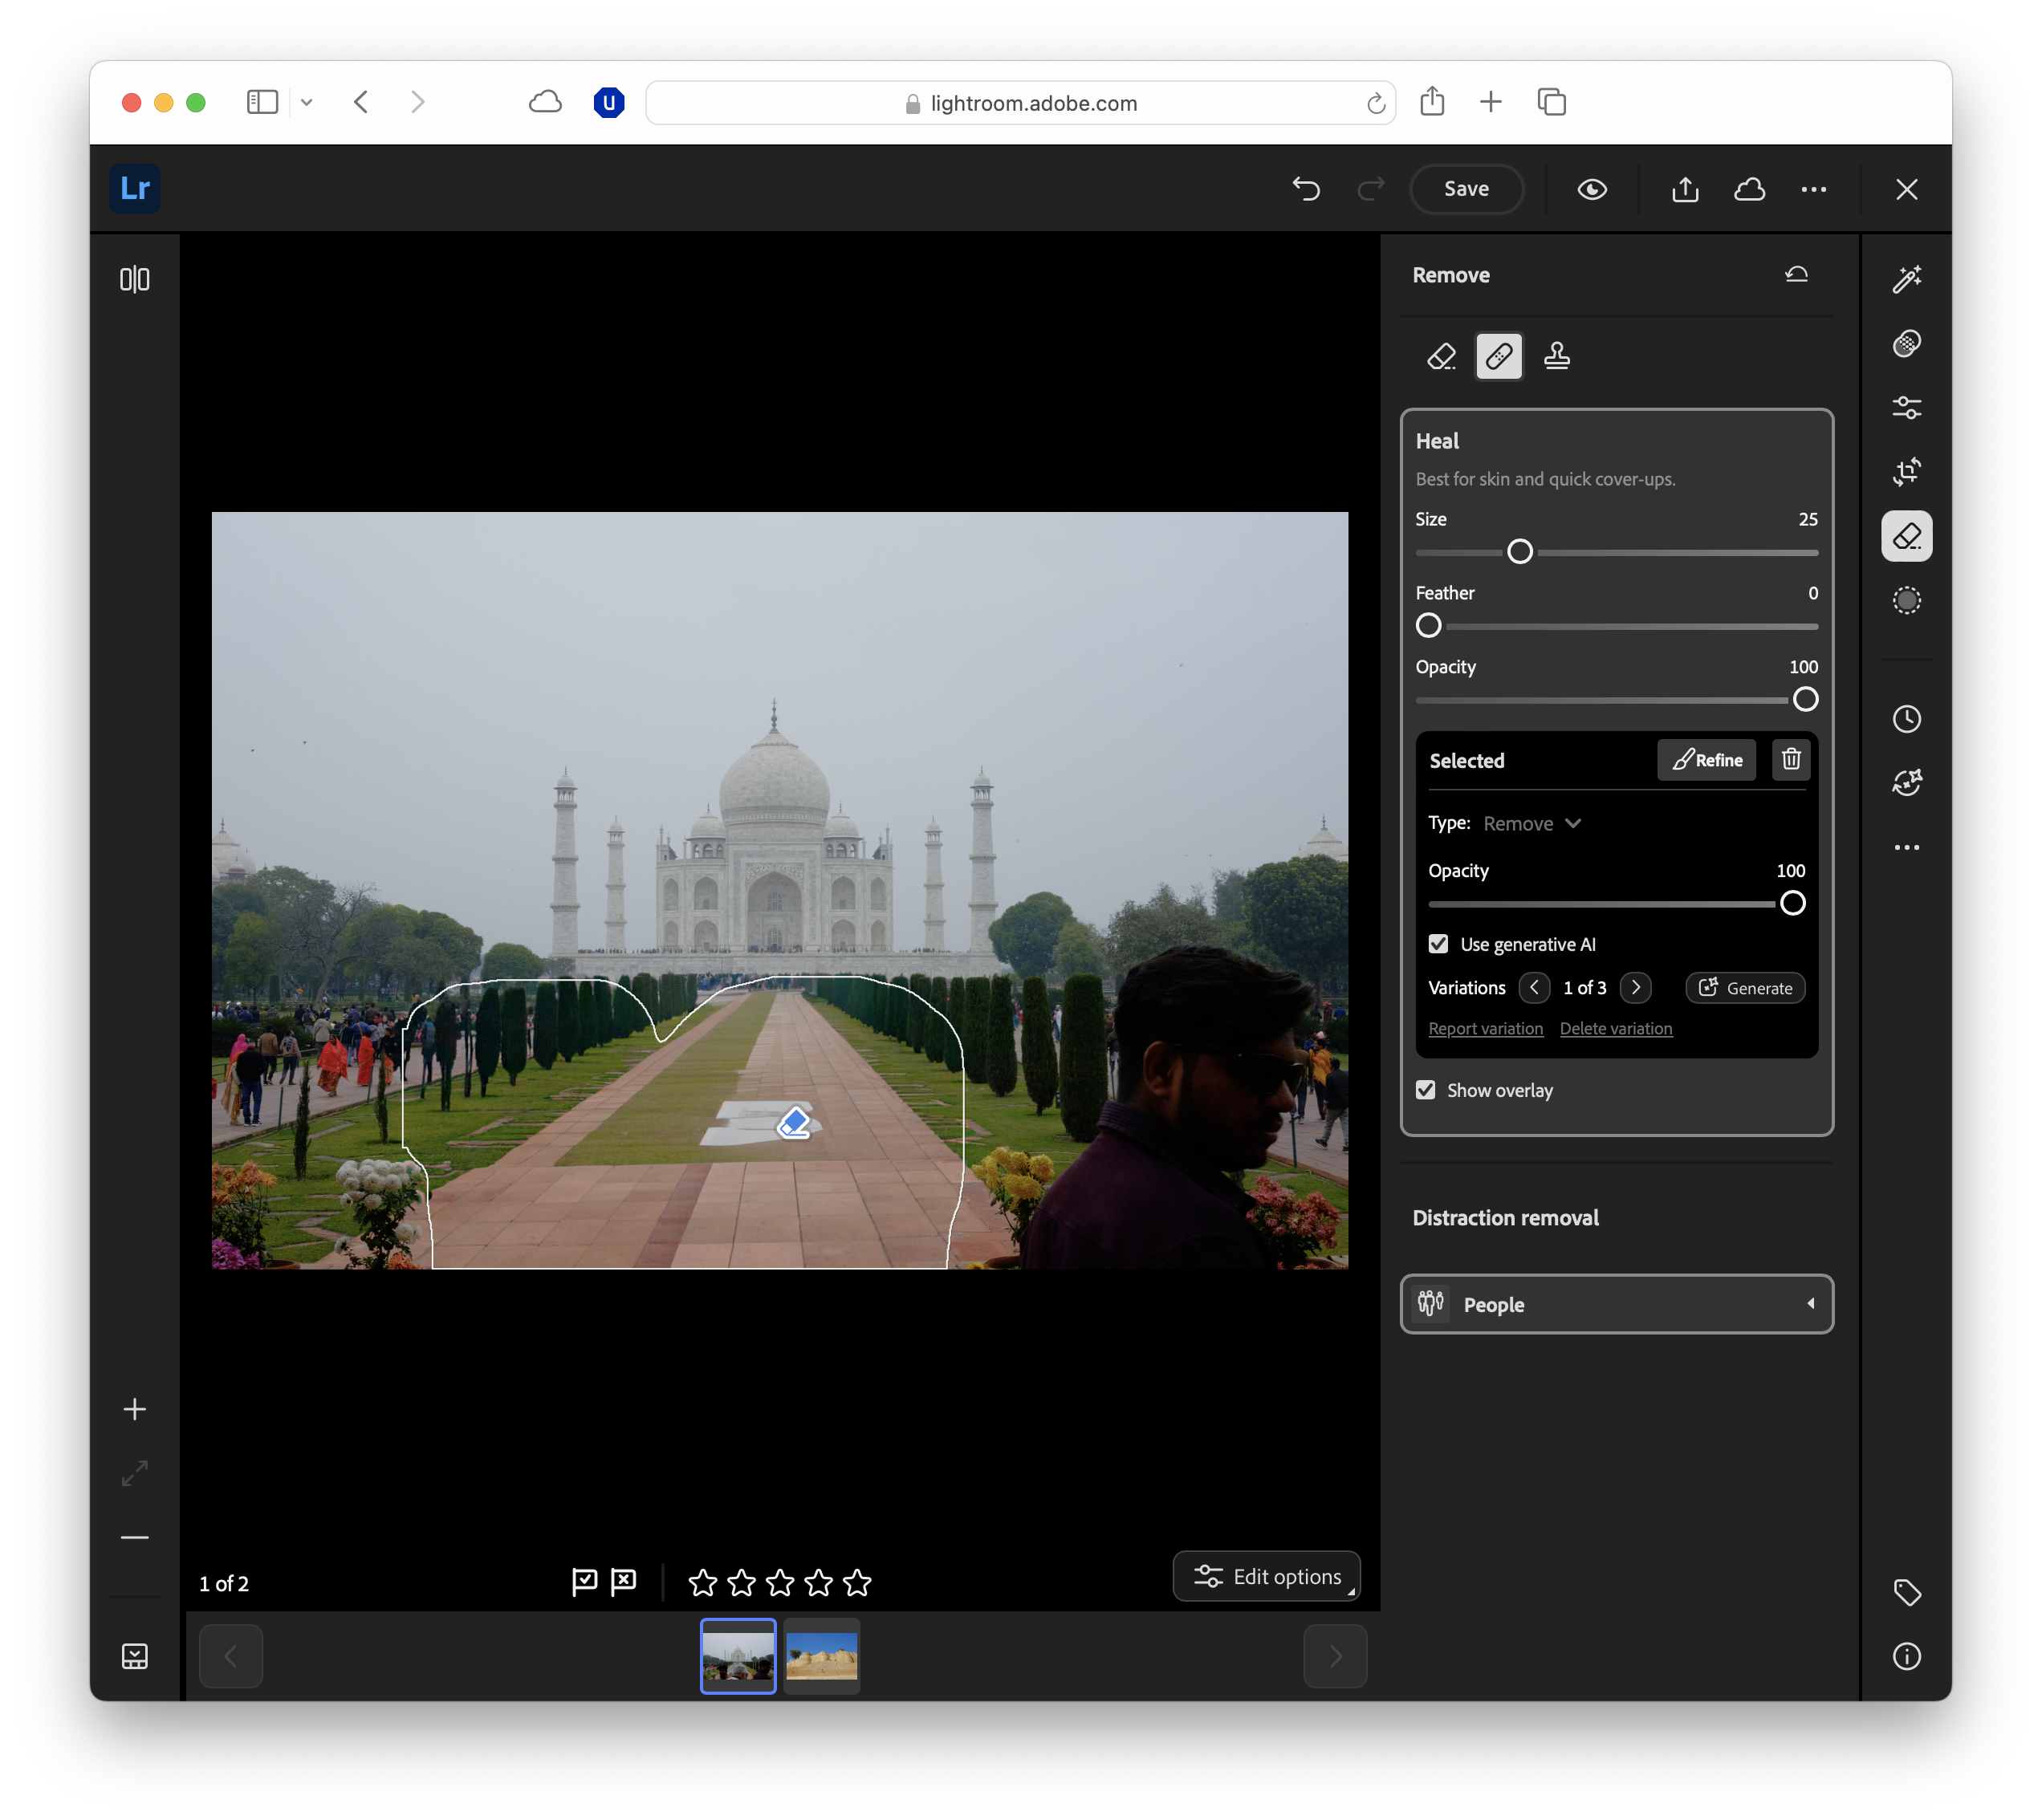
- Heal is ideal for blemishes, small marks, or areas with subtle gradients, and blends the sampled area with the target spot for a smooth transition.
- Clone covers repeating patterns where you want an exact copy, such as bricks, tiles, or foliage.
Desktop workflow
- Select the Healing tool: In Lightroom Classic, click the Remove/Healing icon under the histogram to access Remove, Heal, Clone and Generative Remove.
- Choose your mode: Content-Aware Remove, Heal, or Clone.
- Adjust brush size and feathering: Use the scroll wheel or bracket keys to resize the brush, and set feathering to blend edges naturally.
- Paint over the object: Simply brush over the area you want to remove. Lightroom will automatically generate a fill.
- Try the new People Removal to erase bystanders, and Reflections Removal to clean window/glass glare before manual brushing.
- Refine, if needed: If the result isn’t perfect, you can redraw the selection, adjust the sampled area (for Heal or Clone), or combine multiple passes for a cleaner outcome.
Mobile workflow
- Open the Healing tool from the toolbar and select Content-Aware Remove, Heal, or Clone.
- Zoom in for accuracy, then adjust brush size and feathering.
- Swipe over the object to remove it – the app will instantly fill the gap.
- Refine the result by re-painting or switching to another mode if necessary.
Pro tips for better removal
The workflows described above will cover most use removals, but what about harder images and difficult edge cases?
We've compiled some pro tips for Lightroom to help.
- Zoom in for precision: Small details are easier to refine when you’re working up close, especially around hair, edges, and fine textures.
- Feather your edges: A soft brush edge blends adjustments more naturally and avoids visible cut lines.
- Tweak in small steps: Large exposure or blur changes can look unnatural; build your edits gradually.
- Use gradients with masks: A linear or radial gradient can help backgrounds fade more realistically.
- Work from a virtual copy: This lets you experiment freely and compare before-and-after results without risking your original.
- Shoot with editing in mind: Clear separation between subject and background makes masking faster and more accurate later.
Lightroom vs Photoshop for removals
Lightroom’s masking and healing tools are more than enough for many editing jobs. Its AI-powered tools are fast, intuitive, and available across desktop and mobile – ideal for quick turnarounds.
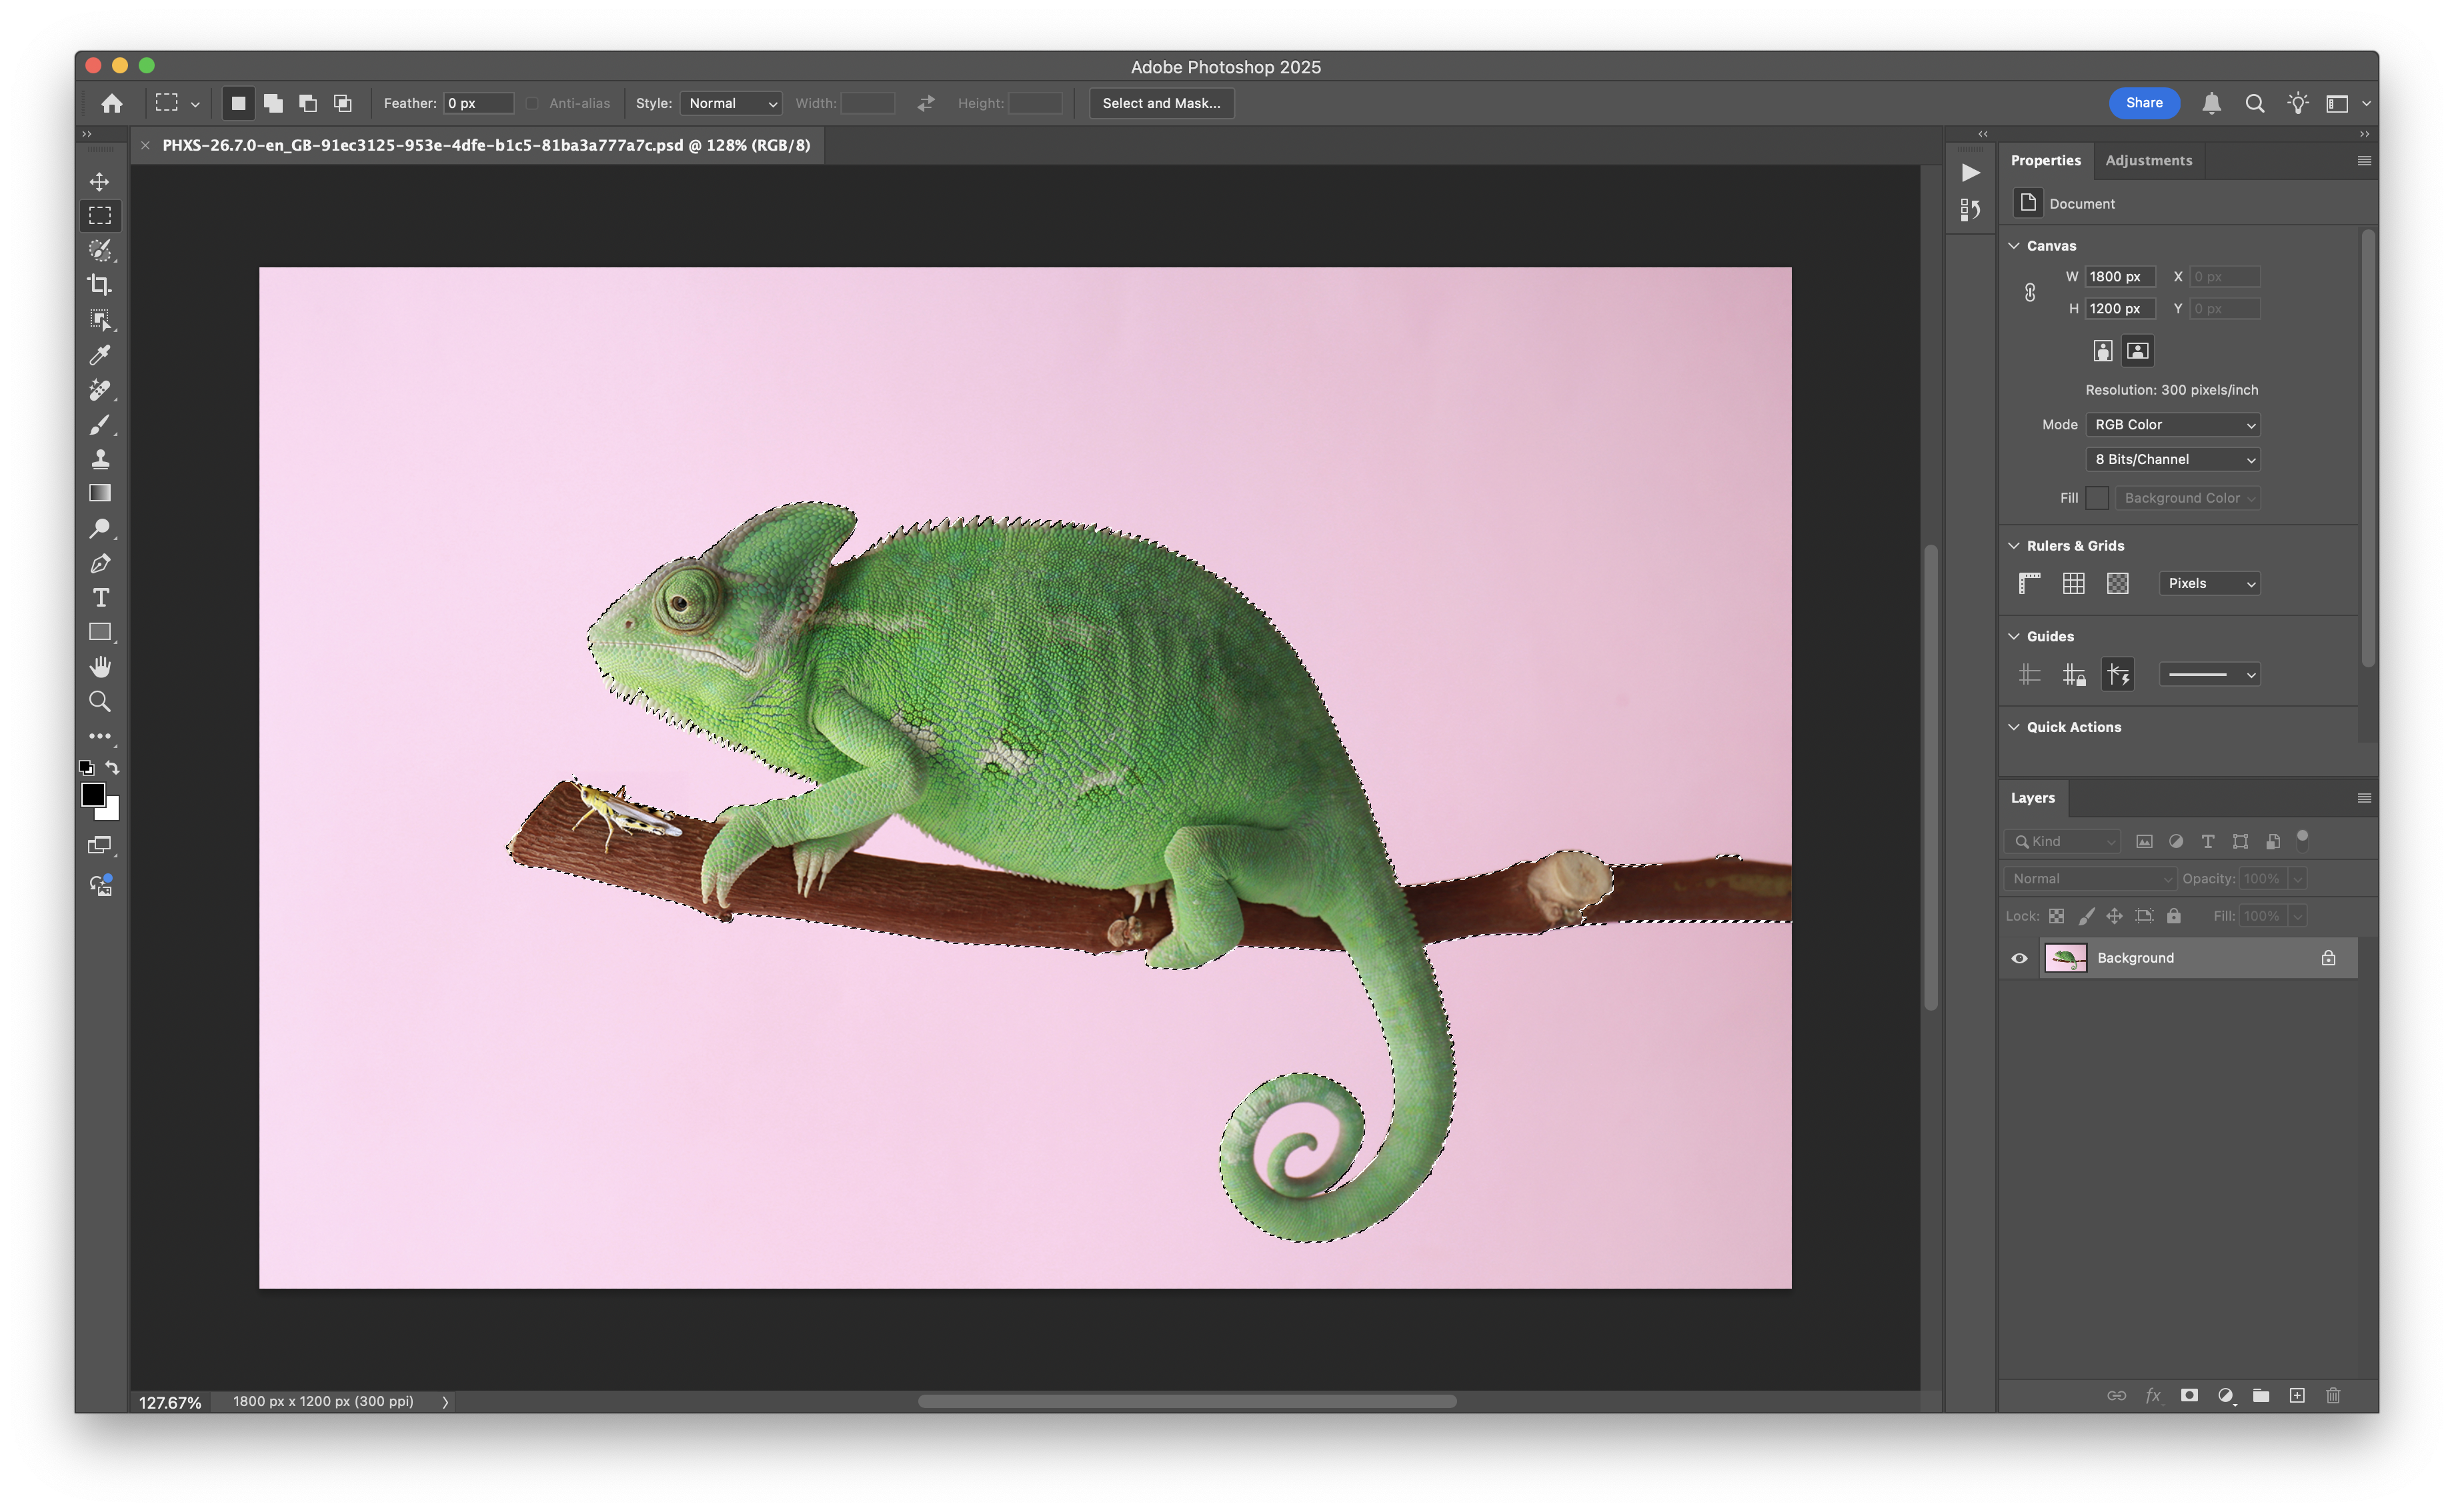
However, Lightroom doesn’t truly “delete” backgrounds in the way Photoshop can. Instead, it works by masking and adjusting, which is great for subtle edits but less effective if you need a completely transparent background or want to replace it entirely.
The same goes for complex object removals: intricate patterns, overlapping shapes, or tricky shadows are often easier to handle in Photoshop, where you have pixel-level control, advanced selection tools, and layers.
If you have both as part of your Creative Cloud plan, the two work hand-in-hand. You can start in Lightroom for quick adjustments and overall colour work, then send the file directly to Photoshop for precision edits.
Once finished, your changes are synced back into Lightroom, ready for export or further tweaks.
FAQs
- Can I completely delete a background in Lightroom? Not exactly. Lightroom uses masking to hide or alter backgrounds rather than removing them entirely. For full background removal, you’ll need Photoshop.
- Is background removal available in the free Lightroom mobile app?
Yes, but advanced AI masking features may require an active subscription. The free version includes basic editing tools but not all masking options. - Does Lightroom Classic have the same AI masking tools as Lightroom?
Mostly – both include Select Subject, Select Background, and healing tools, though the interface and update timing can differ slightly. - Can I replace a background colour in Lightroom? You can shift colours or tones within a masked area, but full background replacement works best in Photoshop.
- Is there a way to restore the original background after editing? Yes. Reset the mask adjustments or revert to your original photo. If you’re using a virtual copy, simply delete it to return to the untouched version.

TechRadar Pro created this content as part of a paid partnership with Adobe. The company had no editorial input in this article, and it was not sent to Adobe for approval.
Sign up to the TechRadar Pro newsletter to get all the top news, opinion, features and guidance your business needs to succeed!
Max Slater-Robins has been writing about technology for nearly a decade at various outlets, covering the rise of the technology giants, trends in enterprise and SaaS companies, and much more besides. Originally from Suffolk, he currently lives in London and likes a good night out and walks in the countryside.
 Become a TechRadar Insider


