How to use Apple Music Memos
Capture musical ideas
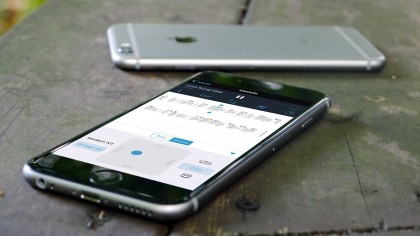
Introducing Apple Music Memos
Apple has a good track record of giving away music-making apps for next to nothing, or even entirely for free. Its latest audio-focussed app, Music Memos, falls into the latter category and runs on any device that supports iOS 9.1 or higher.
Of course, recording snippets of sound is nothing new, but this clever tool analyses what you record into it and detects both its tempo and pitch. You can then make some simple edits to your recording and add some backing parts, thanks to technology borrowed from Apple's Logic Pro software on the Mac.
The accompaniment is partly automatic in the sense that Music Memos guesses the pitch and speed information of your recording, be it guitar, piano or vocals, and adds drums and a bass part. Either of those can be switched on or off, depending on whether you want a more stripped-back accompaniment or a fuller sound.
The really cool thing is it adapts even when you change key or if you speed up or slow down a little, thanks to the musical warping technology in action. For the drums, you can select one of two kits, and also whether the pattern uses open or closed hi-hat cymbals.
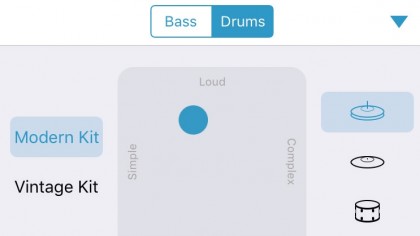
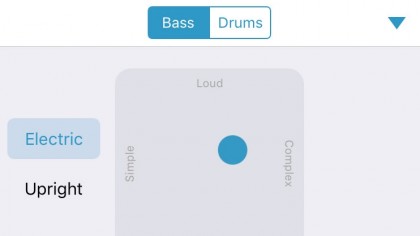
There are two basses as well, and for either drums or bass you use an X/Y pad, dragging the dot on the pad along its two axes to make the patterns louder or quieter, and simpler or more complex. It works whatever the duration of your recording, and if the app has guessed wrong you can go into your recording and select new downbeats to correct the timing of the drums and specify new chords to modify the accompanying bass part into the right key.
From raw idea to song
Once you're done, you can add tags to your project for easy searching and export the resulting track either to iCloud or another app, such as iTunes, GarageBand for iOS or Mac, or email it to a friend.
Although much simpler than an app like GarageBand, Music Memos is a fantastic way to capture musical ideas on the go when all you might have with you is your guitar and your iPhone or iPad. Being able to add bass and drum accompaniment after recording, rather than needing them first for reference, means you're free to record at the drop of a hat. It's fast, fun, and best of all, free.

1. Make a recording
Open the app and either connect a special iOS-compatible microphone or use the mic built in to your device.
Tap the Record button or tap Auto, which records when sound is detected. Play your instrument or sing your melody.
2. Check the results
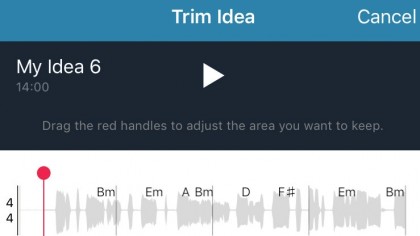
Tap the Stop button, then play back the idea. Tap the waveform for a detailed view, and drag the blue playhead around the recording.
Use the Trim tool (below the play button) to get rid of dead time at the start or end.
3. Correct any mistakes
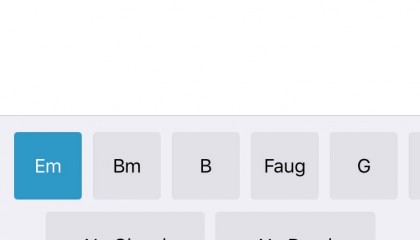
If the app has mistaken any chords, tap the Chord button (Cm7), then any segment, and then the correct chord below. This also applies to changing speed using the Tempo button.
You can return to do this later, if necessary.
4. Add some drums
Hold a finger on the drums icon to open the rhythm section. To the left of the X/Y pad, pick a modern or a vintage kit, and pick a drum type on the right. During playback, move the dot on the pad to alter volume and complexity.
5. Add some bass
Hold a finger on the bass icon and do the same for that part; you can choose from two instruments, and alter volume and complexity.
Using headphones can help, since iOS devices' speakers don't always do bass brilliantly.
6. Share the track
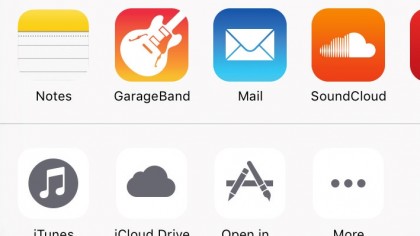
When you're happy with the results, tap the Share icon to upload your idea to iCloud, send it to iTunes to develop in GarageBand on your Mac, or to that app's iOS version.
You can upload to Soundcloud if its free app is installed.
- Enjoyed this article? Get more tutorials, guides, and tips on how to get the most from your Apple devices inside MacFormat. Take advantage of an exclusive offer in our sampler today.
Sign up for breaking news, reviews, opinion, top tech deals, and more.
You are now subscribed
Your newsletter sign-up was successful