How to use Raspberry Pi to make a media centre
TV on a Pi

Sign up for breaking news, reviews, opinion, top tech deals, and more.
You are now subscribed
Your newsletter sign-up was successful
You can use the Raspberry Pi to do all kinds of geeky things but one of the most interesting uses for the little device is that of a home theatre PC (or HTPC). The small size of the hardware and the fact that it runs silently make it a really good choice for building your own entertainment centre.
One of the best open source apps for turning any computer into a fully functional media centre PC is the recently rechristened Kodi media player, formerly known as XBMC. Kodi uses a 10-foot user interface, which is ideal for connecting to large-screen displays and projectors.
The interface has ergonomic display elements and can be easily navigated using a remote control. You can also control playback using your Android smartphone. Using Kodi you can view multimedia in virtually any format. Besides playing files from local and network storage devices, Kodi can also fetch files from online services, such as YouTube, Spotify, Pandora Radio and more.
- Find out what else you can do with the tiny PC with our collection of Raspberry Pi Projects
While you can install Kodi on top of Raspbian (the operating system for Raspberry Pi), there are several projects that produce a dedicated media centre distro for the ARM-based device, including OpenELEC.
The OpenELEC project produces streamlined builds based on Kodi for various platforms, including the Raspberry Pi.
The advantage for with OpenELEC for many people is that you can use the distro without any knowledge of its base Linux OS.
Download OpenELEC
To start setting up your HTPC, grab the OpenELEC build for the Raspberry Pi. As with other projects, OpenELEC hosts different images for the older single-core Raspberry Pis and the newer quad-core ones.
Sign up for breaking news, reviews, opinion, top tech deals, and more.
Once you've downloaded the image, extract it and transfer it on to an SD card, either from Linux using the dd command, as follows:
sudo dd if=OpenELEC-RPi2.arm-5.0.8.img of=/dev/sdd
or from Windows using Win32 Disk Imager. Then you need to insert the card into the Raspberry Pi, hook it up to your TV via the HDMI port and power it on.
OpenELEC boots up pretty quickly and will take you straight into Kodi. If you've used the media player (or its predecessor XMBC) before on the desktop, you shouldn't have any issues navigating it on the Pi. However, you will need to spend some time configuring the media centre to take advantage of this specialised environment.
Use your keyboard to scroll through the Kodi menu and head to System > OpenELEC. This section lists settings and configuration options related to the distro under five different categories.
From the System category, you can change the hostname of this OpenELEC installation. This is handy for distinguishing multiple instances, in case you have more than one system on your network – one in the living room, say, and another in the bedroom or kitchen.
Also, by default, OpenELEC is set up to inform you when a new update is available. However, you can toggle the Automatic Updates option and ask the distro to fetch the update without asking for your approval.

For a better HTPC experience, you can use OpenELEC with a Raspberry Pi-compatible Wi-Fi adaptor. Once you've connected the adaptor, head to System > OpenELEC > Network, and toggle the Active option under the Wireless Networks section.
Then switch to the Connections section and select your Wi-Fi network from the list that appears there. Now you'll need to click 'Connect' and enter the relevant authentication details to connect to your home Wi-Fi network.
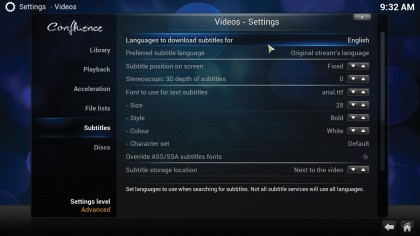
There are also a whole host of settings available in Kodi, which are listed under Settings > System. Using these settings you can configure such things as audio output, calibrate the monitor, set up remote controls and set up Kodi's built-in PVR etc.
To watch TV on your Raspberry Pi HTPC, head to Settings > System > Live TV, and toggle the Enabled option. You will then be asked to enable one of the supported PVR add-ons. Select your PVR from the list and click the 'Configure' button to enter the relevant configuration details, such as the IP address of the PVR host.
When you're done, click the Enable button to activate it. Then head back to the System > Live TV section to set up other options, such as altering the behaviour of the onscreen display, the length of the recording and parental controls etc.

With almost two decades of writing and reporting on Linux, Mayank Sharma would like everyone to think he’s TechRadar Pro’s expert on the topic. Of course, he’s just as interested in other computing topics, particularly cybersecurity, cloud, containers, and coding.