How to install Ubuntu on the Raspberry Pi
Best of MATEs
Sign up for breaking news, reviews, opinion, top tech deals, and more.
You are now subscribed
Your newsletter sign-up was successful
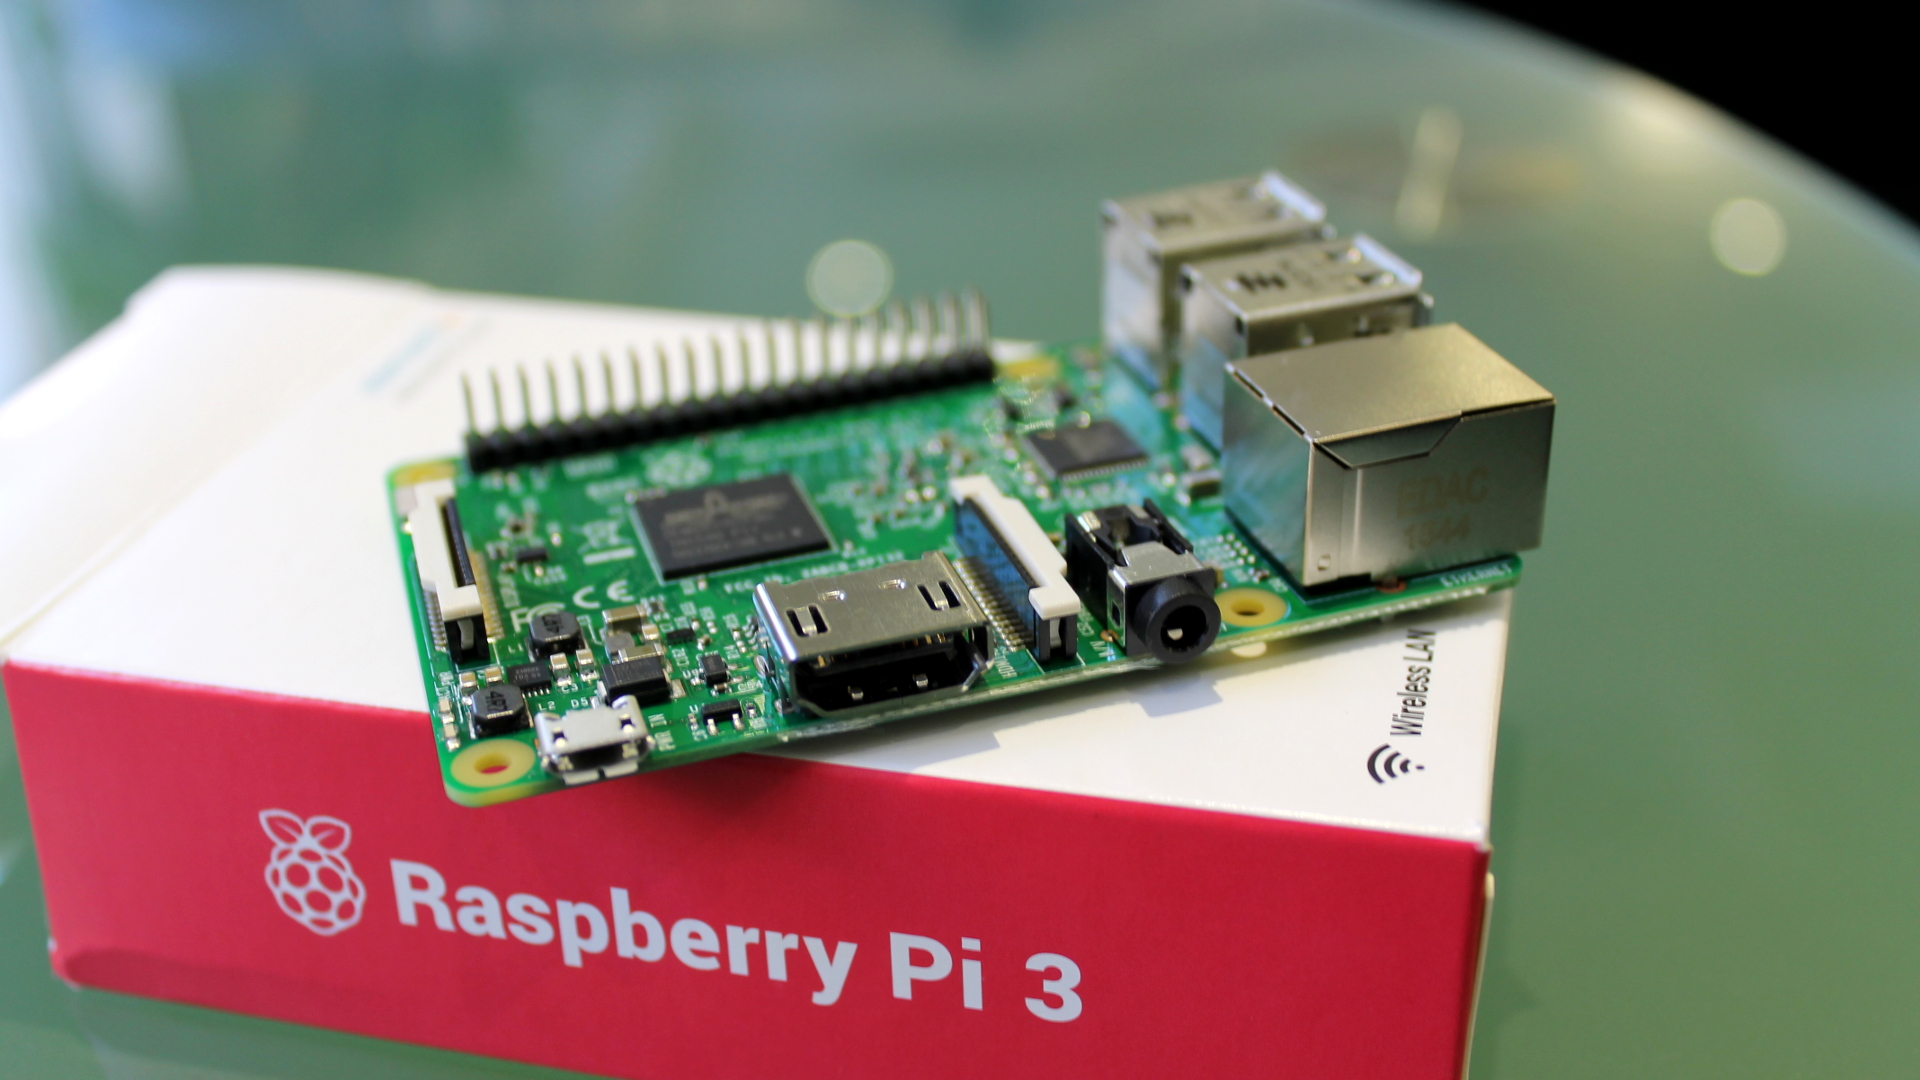
The Raspberry Pi is best characterised by the funky and useful Raspbian operating system. As the name suggests, Raspbian is designed specifically for the Raspberry Pi and is suitable for most applications.
However, if you want to use your Raspberry Pi for desktop computing, you might be disappointed. Raspbian is based on Debian, a Linux operating system designed for stability. Updates take place only once every few years meaning you won’t have the latest version of programs and their features.
Fortunately, there’s a way to bring the popular Ubuntu desktop operating system to your Raspberry Pi. Ubuntu MATE uses an extremely lightweight desktop environment and there’s even a version designed specifically for your Raspberry Pi’s ARM architecture.
In this guide, you’ll learn how to download the latest Raspberry Pi image of Ubuntu MATE, write it to a microSD card and setup the OS on your device. All you’ll need is a microSD card of at least 32GB, microSD card reader and a Raspberry Pi 3.
1. Download the Ubuntu MATE image
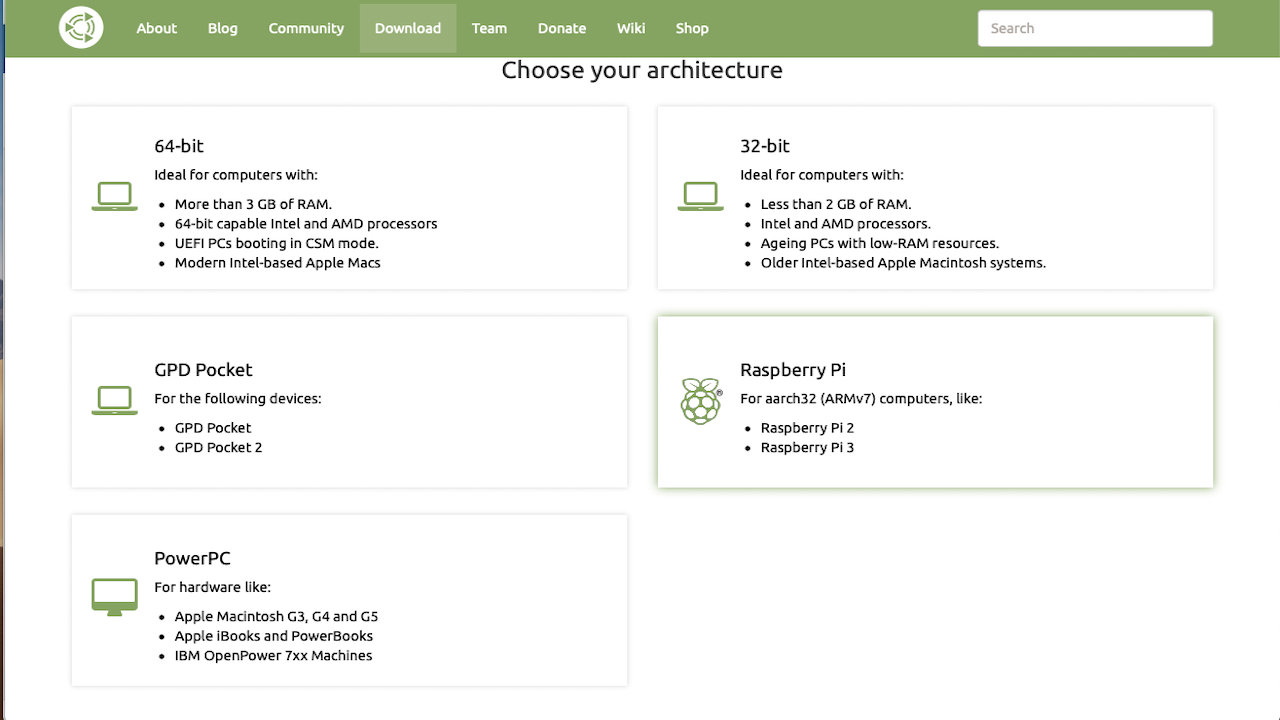
Open your web browser and go to the Ubuntu MATE for Raspberry Pi website. Click the button marked ‘Download Ubuntu MATE’. A new page will load asking you to choose your architecture.
Click the fourth option, which says ‘Raspberry Pi’. On the page called ‘which release would you like’, select the most recent version of Ubuntu MATE e.g. 16.04.2 (Xenial).
On the download page choose your download type. You may need to install bit torrent software to do this. The file will be around 1GB.
Sign up for breaking news, reviews, opinion, top tech deals, and more.
2. Extract the Ubuntu image
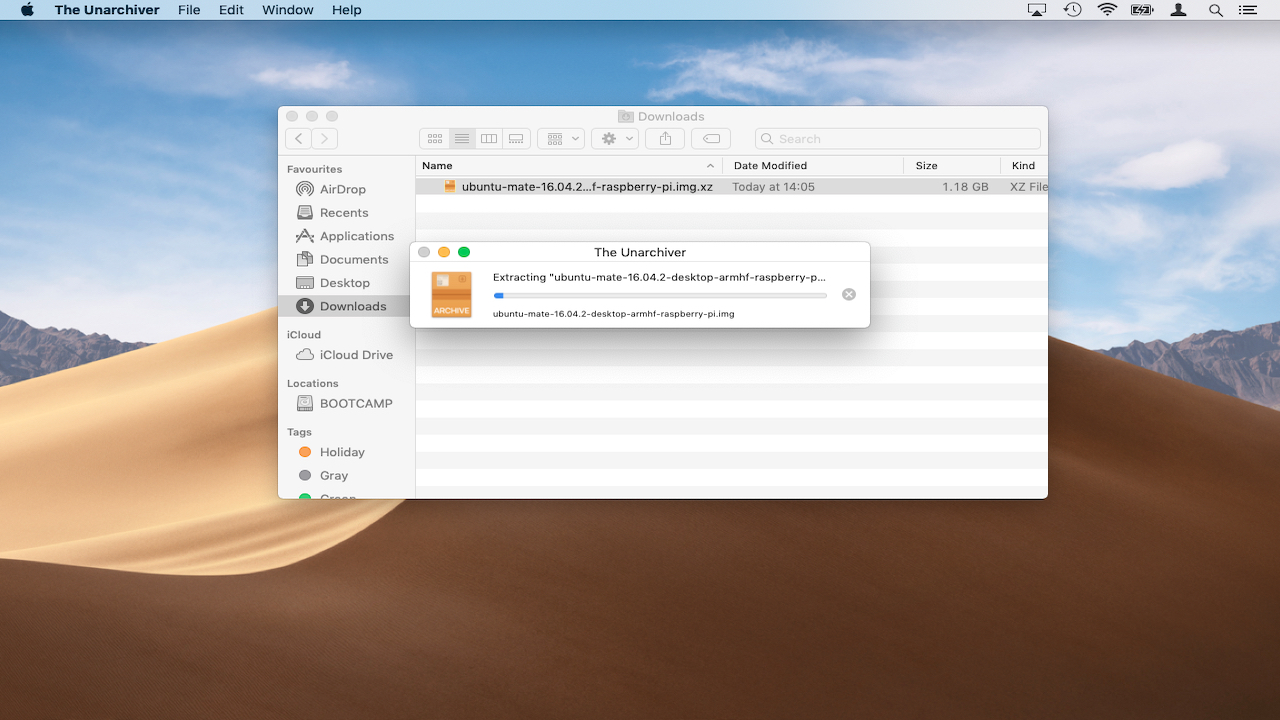
You’ll need a decompression utility like The Unarchiver for macOS or 7-Zip for Windows 10. The Unarchiver is available free from the App Store to extract the .xz file.
Once the utility is installed, simply double-click the file in your downloads to extract the image (.img) file.
For Windows, go to the 7-Zip website to install the application. Click on ‘Download’, choose ‘Save’. Go to ‘Downloads’ in File Explorer. Double click on the ‘7-Zip’ file. Choose ‘Install’.
Once the installation is complete, right-click on the Ubuntu MATE file. Select ‘7-Zip’. Choose ‘Extract Files’ and then click ‘Ok’. The file will now be extracted.
3. Format the SD card (macOS)
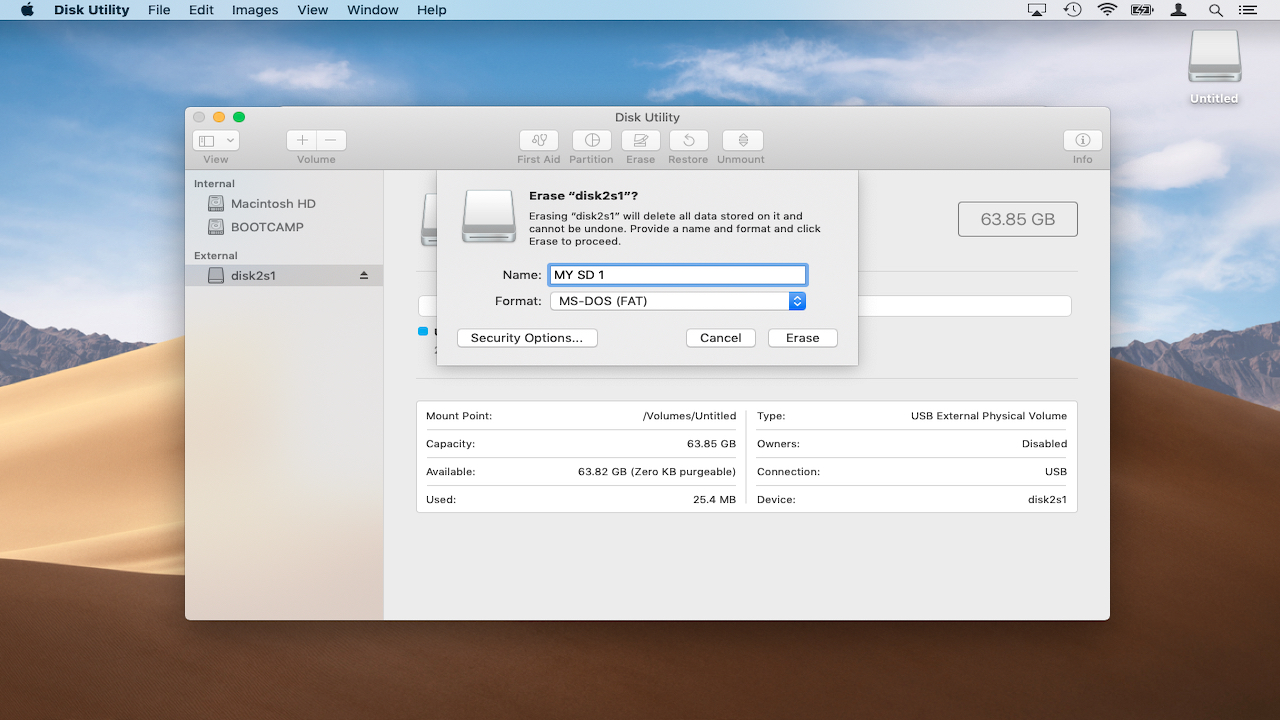
In order for your microSD card to be compatible with the Raspberry Pi it must be formatted to FAT32.
Connect the microSD card to your mac. The system will automatically mount it. Click ‘Spotlight’ at the top right of the screen, type ‘Disk Utility’ and press return.
Once Disk Utility launches, select the microSD card from the list of available disks in the pane on the left. Click the ‘Erase’ tab, then select ‘MS-DOS (FAT)’ from the ‘Format’ drop down menu.
You can also set a name for the microSD card here e.g. MY SD 1. Click the ‘Erase’ button when you’re ready.
4. Format the SD card (Windows 10)
Insert your SD card into the slot on your computer or a USB adapter.
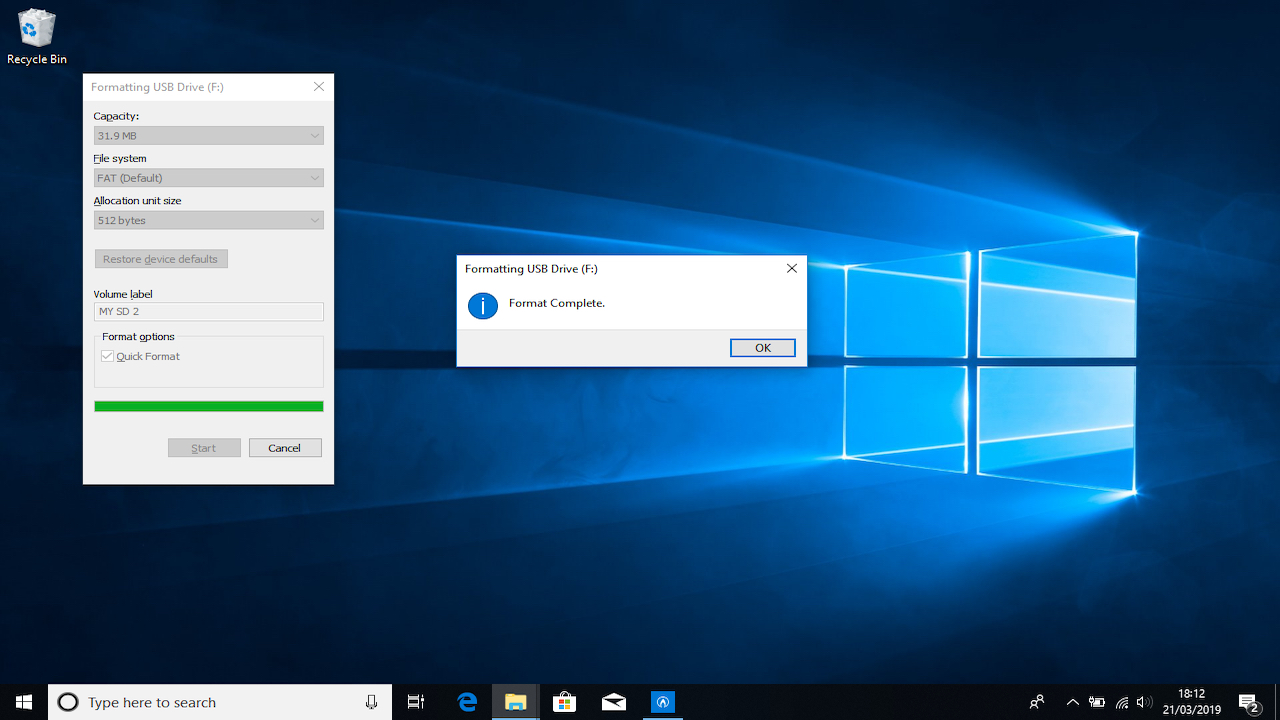
Windows will now inform you that you need to format the disk in order to continue. Click ‘Format Disk’. Next, you can choose the format, file system, allocation unit size and volume label. Windows will warn you that formatting will erase all previous data on the SD card. Choose ‘Ok’ to continue. The device will then be formatted.
If you don’t see the above notification, open Windows Explorer. Search for the SD drive. Right-click on this and from the drop-down menu, select format. Windows will automatically default to FAT32.

5. Download and install Etcher
If you’re not a power user, you can write the Ubuntu MATE to a microSD card using the handy utility Etcher. Etcher is available for both Windows 10 and MacOS. Choose the download for your operating system.
Etcher can be run directly from your downloads folder. Mac users can just double-click the DMG file to mount the disk image, then double-click again to launch Etcher. Windows 10 users can launch the utility by simply choosing to ‘Run’ the file from their web browser.
6. Rewrite to microSD
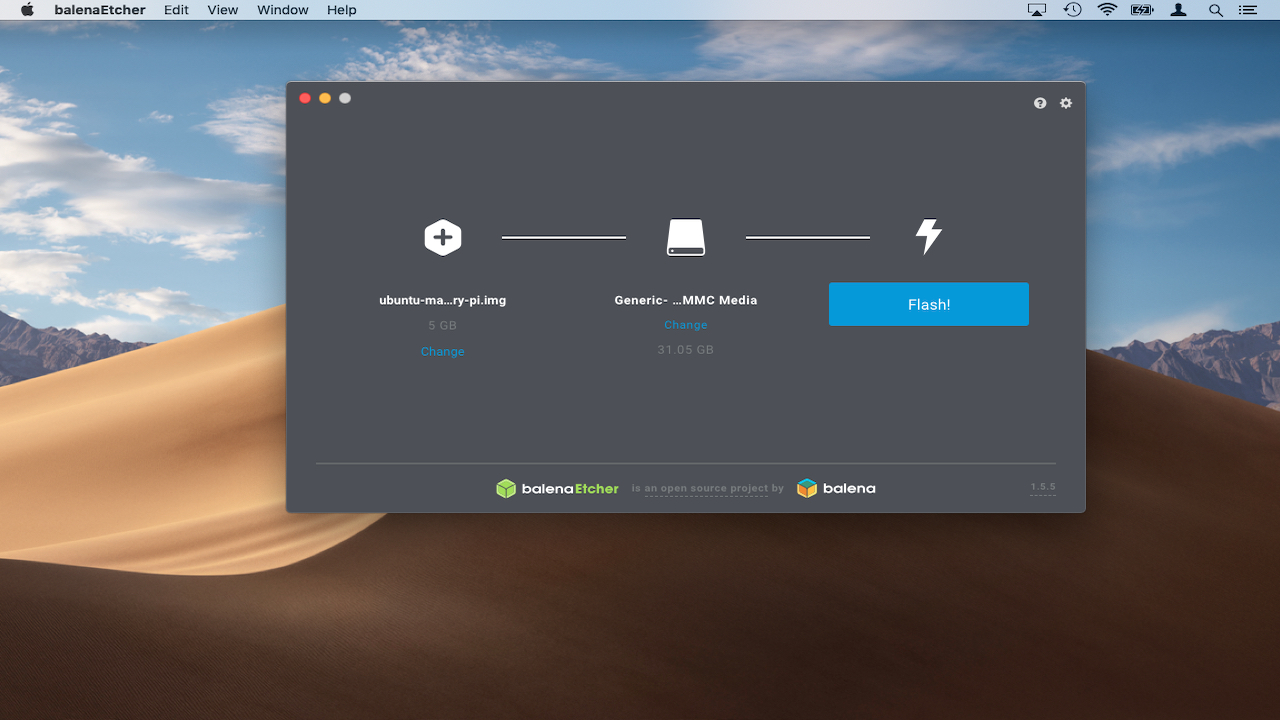
Once Etcher opens, it will ask you to select an image. Navigate to the Ubuntu MATE image and double-click to select.
Etcher will now be ready to flash the file onto the microSD card. The utility automatically detects the card. Select ‘Flash’ to begin the writing process. This will take around 15-20 minutes depending on your computer and microSD card.
7. Write image to microSD using Terminal
If you are a power user, you can use the macOS or Linux command line to write the Ubuntu MATE image to your microSD card. To do this you’ll need to know the specific device address e.g. /dev/rdisk1 of the microSD card.
Mac users can find this by opening the Disk Utility program, selecting the microSD card from the pane on the left and clicking the ‘First Aid’ button.
This performs a routine check on the card. Once this is complete, click ‘Show Details’ to see the report. The device address is listed next to ‘fsck’ e.g. /dev/rdisk2s1.
Linux users can view the device address simply by opening the ‘Disks’ utility and selecting the microSD. The device address is displayed at the bottom of the window.
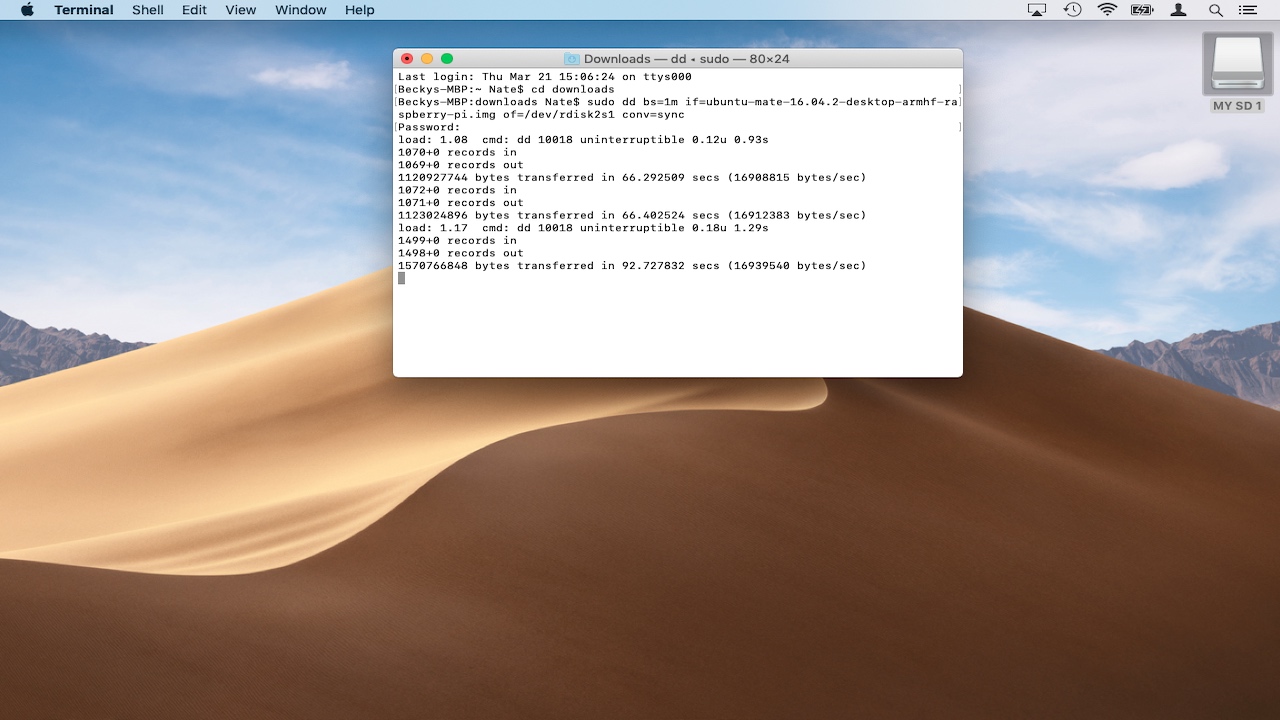
Next, open Terminal. From here, you can use the dd command to write the Ubuntu image file to the microSD card. First, switch to your ‘Downloads’ folder with the command:
cd downloadsNext, use dd to begin writing e.g:
sudo dd bs=1m if=ubuntu.img of=/dev/rdisk1 conv=syncMake sure you substitute ‘ubuntu.img’ & ‘/dev/rdisk1’ with the filename of the Ubuntu MATE image and the device address for the microSD card respectively.
You can use the shortcut Ctrl + T to check the progress of the write process.
8. Set up Ubuntu MATE
Eject the microSD card safely from your computer then insert it in your Raspberry Pi.
Next, connect the power cable, keyboard, mouse and monitor to the Raspberry Pi. Ubuntu MATE setup will now launch. These setup screens are fairly self-explanatory and will be familiar if you’ve used Ubuntu before.
Choose your language, Wi-Fi network and location. Next, Ubuntu MATE will ask you to set a username and password. Make sure to write these down in a safe place before continuing.
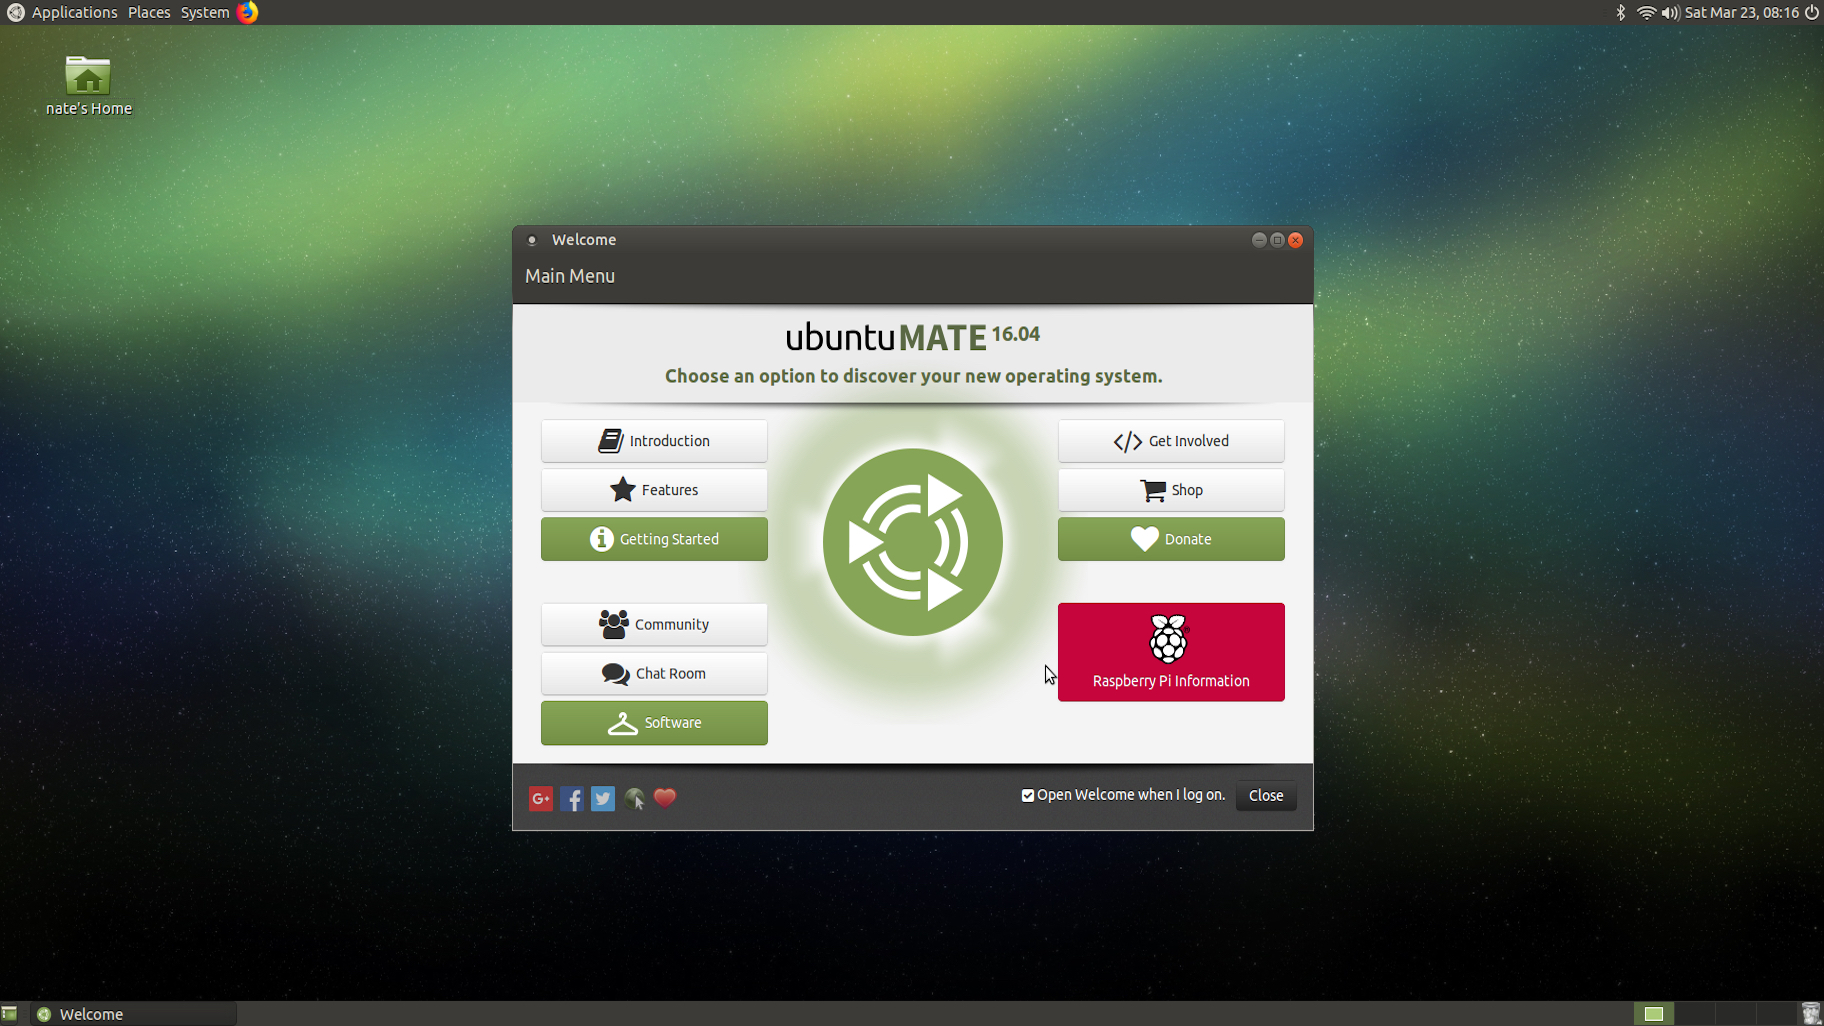
Once setup is complete, the Ubuntu MATE desktop will load. The OS will display a welcome message and offer you’re a tour of Ubuntu’s features. Make sure to go through this if you haven’t used the MATE desktop environment before.
9. Update & upgrade Ubuntu MATE
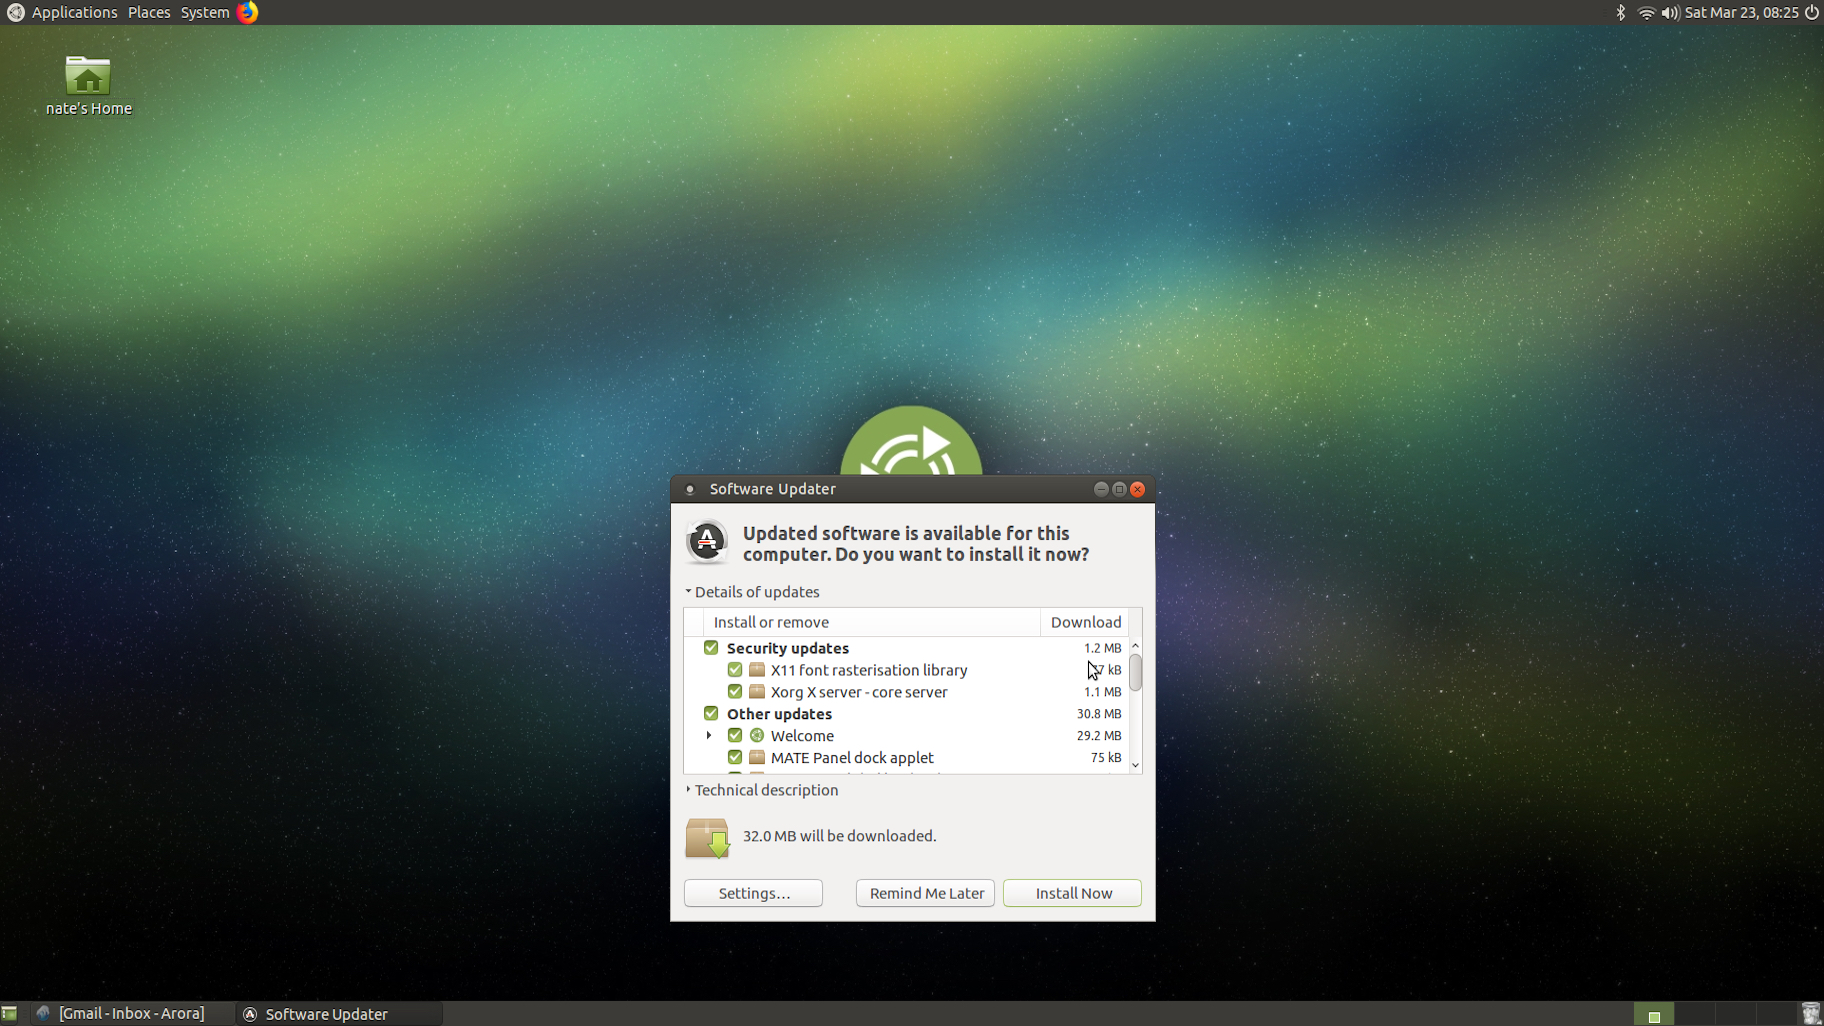
The version of Ubuntu MATE you have now installed may not be fully up-to-date. To check if this is the case, go to System > Software Updater.
The system will now scan for updates. A box will appear stating ‘Updated software has been issued since Ubuntu x.04 was released. Do you wish to update?’. Click ‘Install Now’ to update your system.
10. Troubleshooting
Some Ubuntu MATE users have reported issues with connecting to Wi-Fi after install, the network manager says the ‘device not ready’. This issue is specific to the Raspberry Pi 3. fortunately restarting the Raspberry Pi almost always fixes this problem.
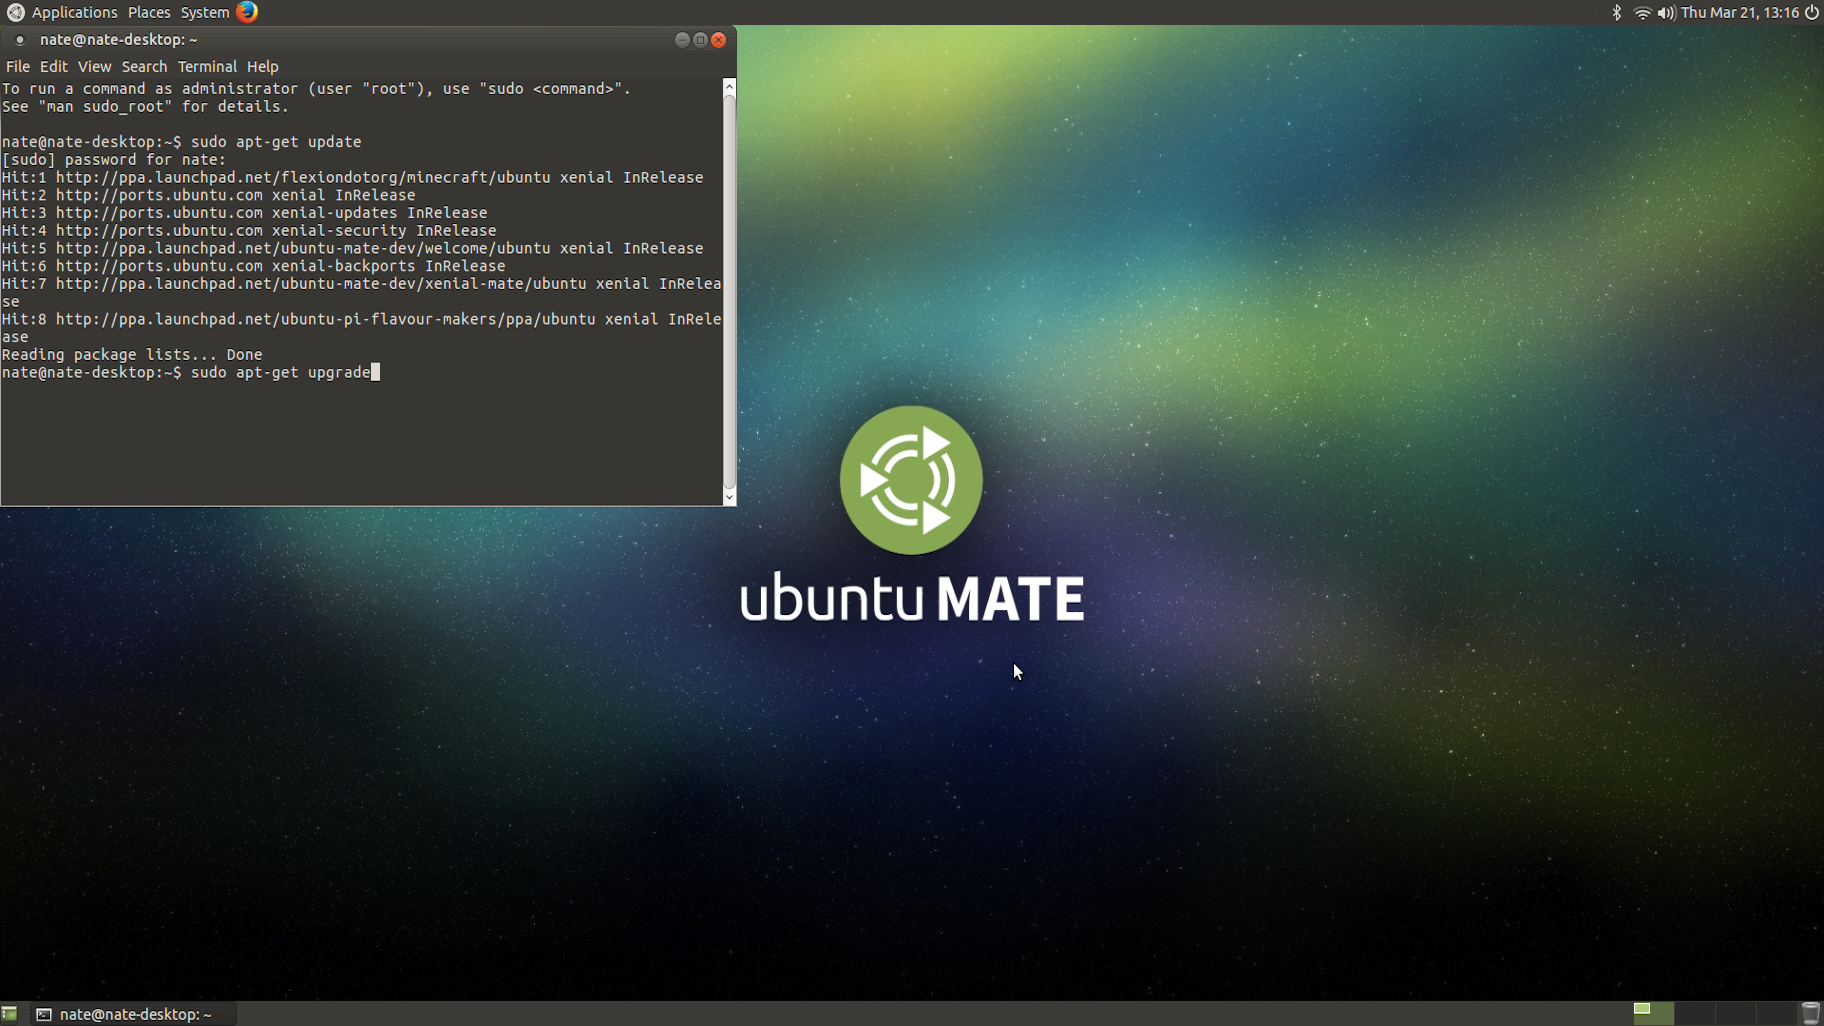
Other users have reported issues installing and upgrading software using the built-in software updater. If this happens, open the MATE Terminal. Next, run the command:
sudo apt-get updatethen:
sudo apt-get upgradeThat should fix the issue and you'll now have Ubuntu MATE running on your Raspberry Pi!
- Check out our collection of Raspberry Pi projects
Image credits: TechRadar
Nate Drake is a tech journalist specializing in cybersecurity and retro tech. He broke out from his cubicle at Apple 6 years ago and now spends his days sipping Earl Grey tea & writing elegant copy.