How to build your own drone
Pi-powered flight
Sign up for breaking news, reviews, opinion, top tech deals, and more.
You are now subscribed
Your newsletter sign-up was successful
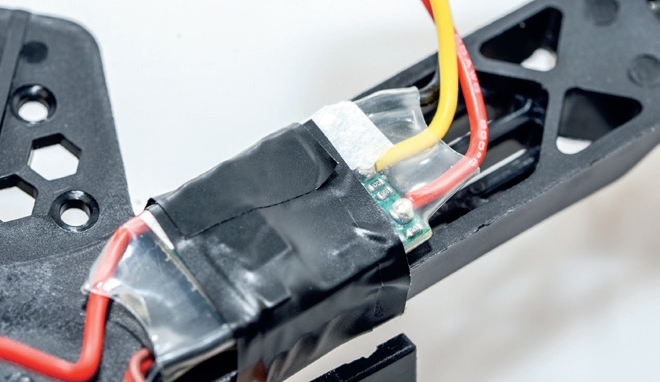
Due to the small size of the drone it's quite difficult to keep things neat as you tuck in wires, wrap insulation tape and zip ties around the frame in order to hold everything together.
Whilst it might seem fiddly and time-consuming to make sure that the PXFMini, Raspberry Pi Zero combo are absolutely level, it's one of the most important aspects of the build!
From the outset of building the frame you need to continually check that everything about your build is as accurate as possible. The frame kit that we've used in this project does the job well despite it being cheap, but there are some of the parts, including the frame legs, that take a bit to fit correctly and have a habit of dropping out.

The only way around this particular issue is to glue them in place, as if one leg falls out during takeoff or landing, the effect as the drone tries to correct itself as can be quite dramatic.
Legs are an easy fix, but there are several other issues with the frame as it hasn't been designed for the shape or size of the autopilot we're using. Not only this but the size of the space for the autopilot is too small.
This means that without filling the hole it's extremely difficult to get the autopilot to sit flat. If it's not flat then when it takes off it will try to level itself and if you do get it into the air the flight will be erratic.
In order to get around this and also to help cut out vibrations from the motors, we added a large section of foam inside the slot. This helps to bulk out the section as well as create a rough damper for the autopilot to sit on.
Sign up for breaking news, reviews, opinion, top tech deals, and more.
The first flight
Before you start double check your drone and make sure that everything is in place and all wires are secure and taped to the frame. As this will be your first attempt at flying the drone remove the propellers so if anything does go wrong the drone will at least stay exactly where it is rather than bouncing round the room poking eyes out and smashing ornaments.
Start by switching on the controller making sure that all switches are in the up position and the throttle is in the lower position. Now connect the battery to the power module and you should hear a beep as the board starts loading which can take up to a minute to complete.
Another beep will highlight the end of the boot sequence and then another 5 to 10 seconds is needed before the drone is ready for testing. On the transmitter, move the left stick to the bottom-right position for five seconds and holding it in place flick down switch D (SWD) which on the SKYFLY FS-i6 is the switch on the top right of the handset.
The motors should now start, flick the switch back up to stop the motors. Now you should be able to use the throttle to start and increase the speed of the motors. If you decide to leave the drone for a short time then the start up process will need to be repeated.
If all is in order and all four motors spin and react correctly with the transmitter then you're ready to start your first flight once the propellers are attached. If only three motors start or you can visibly see that one motor is spinning at a much lower speed than the others, then you'll need to load AMP and configure your transmitter with the drone.
- Enjoyed this article? Expand your knowledge of Linux, get more from your code, and discover the latest open source developments inside Linux Format. Read our sampler today and take advantage of the offer inside.
Alastair is a photographer, filmmaker and tech writer who has been working in the publishing industry since the late 1990s. For more than 25 years he has covered photography, video and technology across Future's photography, technology and gaming brands. He runs a photography and video production company and lectures in TV and film. He can usually be found testing mini PCs or prototyping and prop building with the aid of 3D printing.