
 Become a TechRadar Insider


Back in the day when Apple was interested in DVDs and pioneered the creation of iDVD discs, iMovie was tightly integrated with that program.
This enabled you to add chapter markers throughout your project so that your viewers could easily skip to the next scene while watching the film on their widescreen TV.

But just because iDVD is on life-support and Apple is more interested in online digital distribution, it doesn't mean that chapter markers are no longer of any use.
Yes, that feature was notoriously absent from the re-imagined iMovie back in 2007, but it made a comeback and it's better than ever - although you wouldn't know it by glancing at the interface. The features are hidden.
That's because Apple designed iMovie to be perfect for novice editors. Everything they need is at their fingertips without overwhelming them. However, it's worth enabling the advanced features to get more control over your editing; these will keep you engaged with the app after you've mastered the basics.
Here we'll show you how to enable and make use of markers in your projects.
1. Advanced Tools

iMovie's interface is relatively bare. You can import clips into Events, browse iPhoto and Aperture libraries, add a part of a clip to one of your projects, and insert titles and basic effects. But the most interesting features are concealed by default. To reveal them, you need to go to iMovie > Preferences (or use the Cmd +, shortcut), select the General tab and tick Show Advanced Tools.
2. Brown bubble

With a project open, you'll notice two new icons, top-right of the Project section: a brown speech bubble and a red one with a white arrow inside it. Click the brown one and drag it onto your project. As you do so, it'll offer you '1' as its basic title, but you can overwrite that simply by typing. Hit the Enter key to set the change.
3. A comment

This is not a chapter marker but a comment - useful if you have more than one person working on the same project and you want to leave notes about the edit. Don't worry if you forget to remove them since they won't be exported into your finished product. They're there to help you with the editing process for complex projects.
4. Red bubble

Drag a red bubble onto your project. You'll notice that it offers you '2' as a default title if you hadn't altered the comment's one. That's because the numerical values for the comments and chapter markers are linked, which could be a little confusing if you're not careful, since brown and red are quite similar when glanced at rapidly.
5. Move around

Wherever you've added your markers isn't set in stone: you can drag them to any position. If you wish to be more precise, click on one to select it, then use the left and right arrow keys to move your comment or chapter marker back or forward one frame. This enables you to place it perfectly within your project.
6. Anchored markers

Notice that your marker has a small line to its left, pointing down onto a clip. This shows you where the marker is located since a long title can make it hard to see where it's supposed to start. It's also anchored to that clip. This means that if you were to move your clip to another place in your project, the marker would move along with it.
7. Marker removal

Since a marker is linked to a specific clip, deleting that clip will remove the marker. To delete a clip, click to select a portion of it (four seconds by default) then go to Edit > Select All (or press Cmd+A). Once the yellow highlight covers the entire clip, hit the Backspace key to remove it. To remove just the marker, click it and hit the same key.
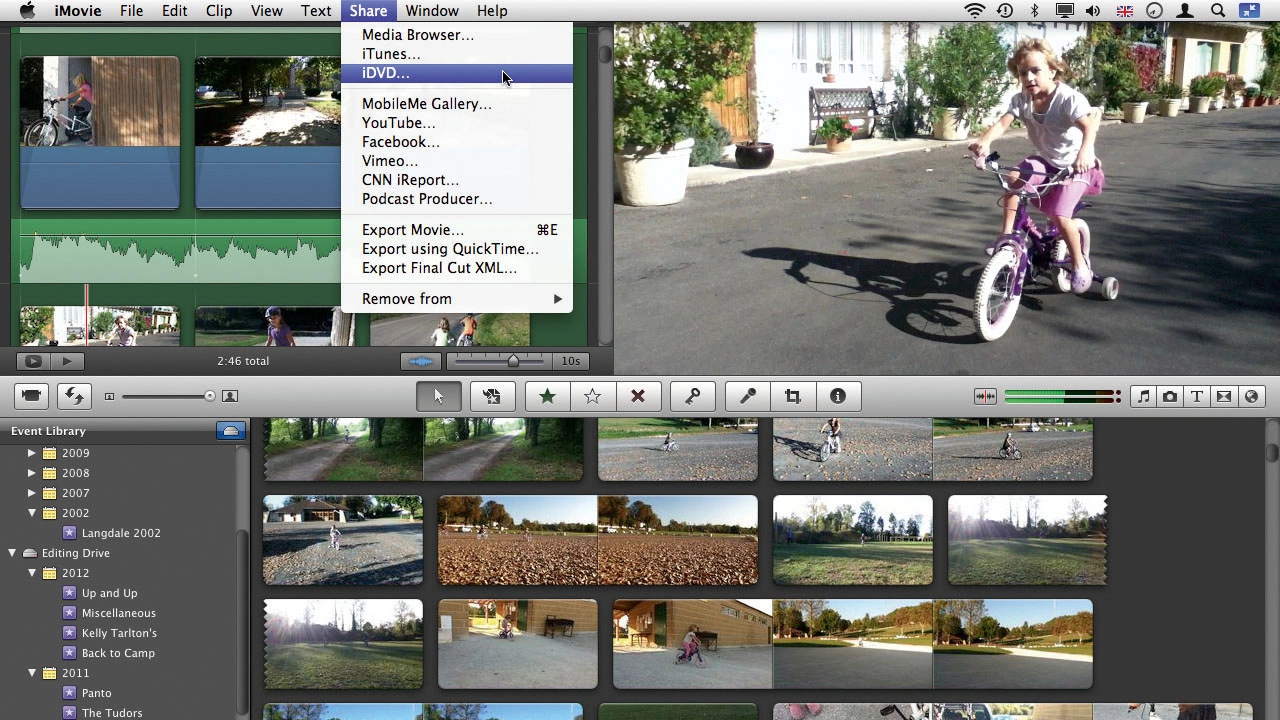
8. Save chapter markers

Exporting your film is done via the Share menu, but not all options will preserve chapter markers. Sending it to YouTube for instance will remove them from your film. If you want to be certain your chapter markers are preserved, use Media Browser, iTunes, Export Movie or Export Using QuickTime.
Open up your finished film in QuickTime and you'll be able to access those chapters. You can do the same in iTunes or on your Apple TV.
And if you upload the video to an iPhone, you'll be able to see and access those chapters by tapping on the menu to the left of the playback controls. Markers definitely have many more uses than just being a DVD tool.
