How to take a screenshot on a Mac
We show you how to take a screenshot on a Mac
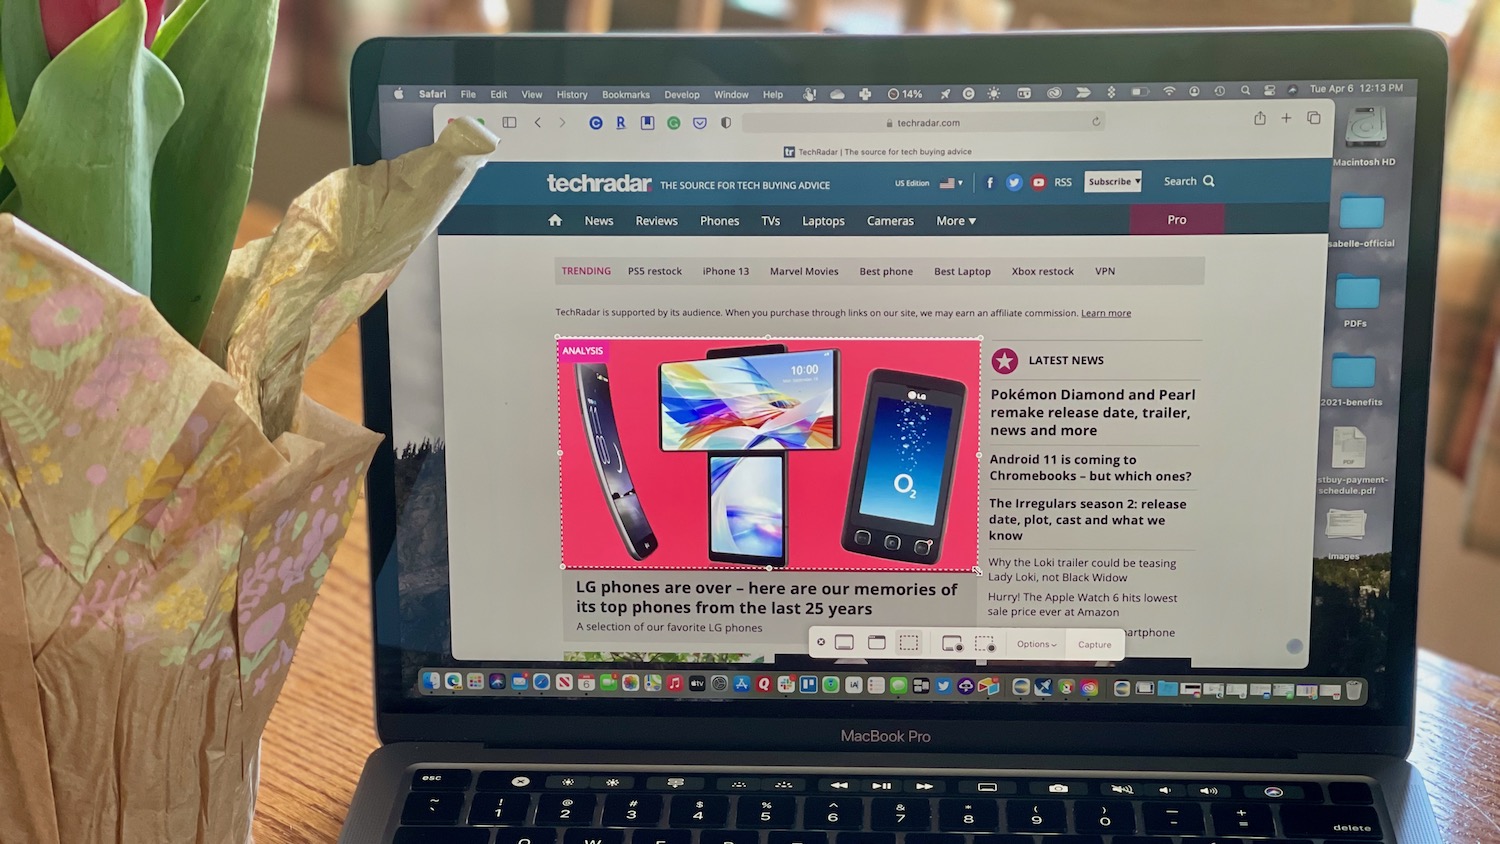
Knowing how to screenshot on Mac is a crucial skill that will come in handy sooner or later. Even if you don’t need it right this moment and are just using one of the best Macbook or Macs to binge Netflix and make Zoom calls to friends and family, there will come a time when taking a screenshot will be necessary.
Thankfully, it’s a very simple process to do, whether you’re running macOS Monterey or macOS Ventura, and it’s versatile, meaning you can capture an open window, the entire screen, or just a specific portion of the screen. You can even use the same tool to take a video recording of your screen or to annotate your screenshots before sending them to a friend or colleague.
With this guide, you’ll learn the ins and outs of taking a screenshot on Mac. We’ll show you how to take full advantage of macOS’ Screenshot tool. And, before long, you’ll find yourself taking screenshots like a computer wizard.
Steps for how to take screenshots on a Mac
- Choose which kind of screenshot you'd like to take
- Use the respective shortcut OR
- Open Screenshot
- Save, edit and or share your screen capture
Step by step guide for how to take screenshots with keyboard shortcuts
There are two ways to take screenshots on a Mac, but using shortcuts is by far the quickest and easiest.
Following our shortcut instructions, we've also included steps for how to use the Mac Screenshot tool if you want to adjust the options and settings in more depth.
1. Find the shortcut for your desired screenshot format
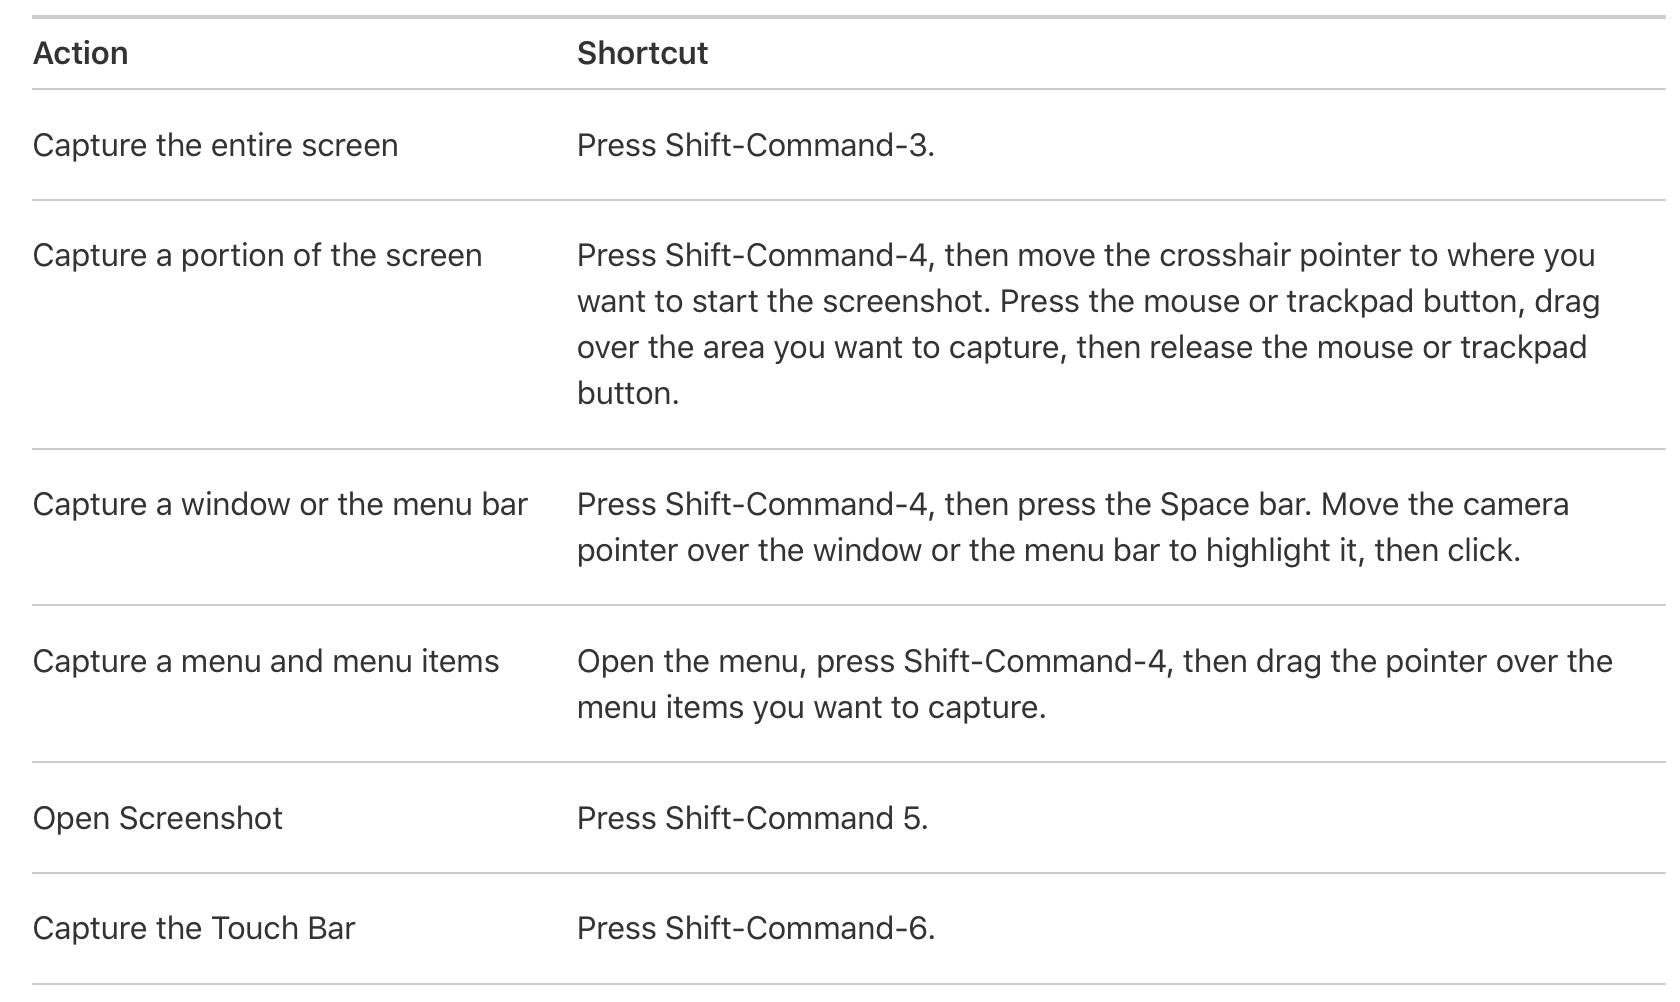
Most likely, you'll be wanting to capture the entire screen, in which case you press Shift, Command and 3 at the same time, or crop a specific area of the screen, when you'll press Shift, Command and 4. This will transform your mouse into a crosshair, and you can click and drag the area you'd like to capture.
Other available keyboard shortcuts include actions to capture a window or the menu bar, or capture a menu and menu items, and you can also use keyboard shortcuts to open the 'Screenshot' tool and capture the Touch Bar, where available.
Keyboard shortcuts are customizable by going into the Apple menu, then choosing 'System Preferences'. From there, select Keyboard > Shortcuts.
Step by step guide for how to use the Mac Screenshot tool
1. Open Screenshot

There are different ways to bring up the macOS Screenshot tool. On every Mac, you can press the 'Shift' + 'Command' + '5' keys or launch the Screenshot tool through Launchpad. On compatible MacBook Pro models, you can also use Touch Bar.
2. Choose which kind of screenshot you want to take
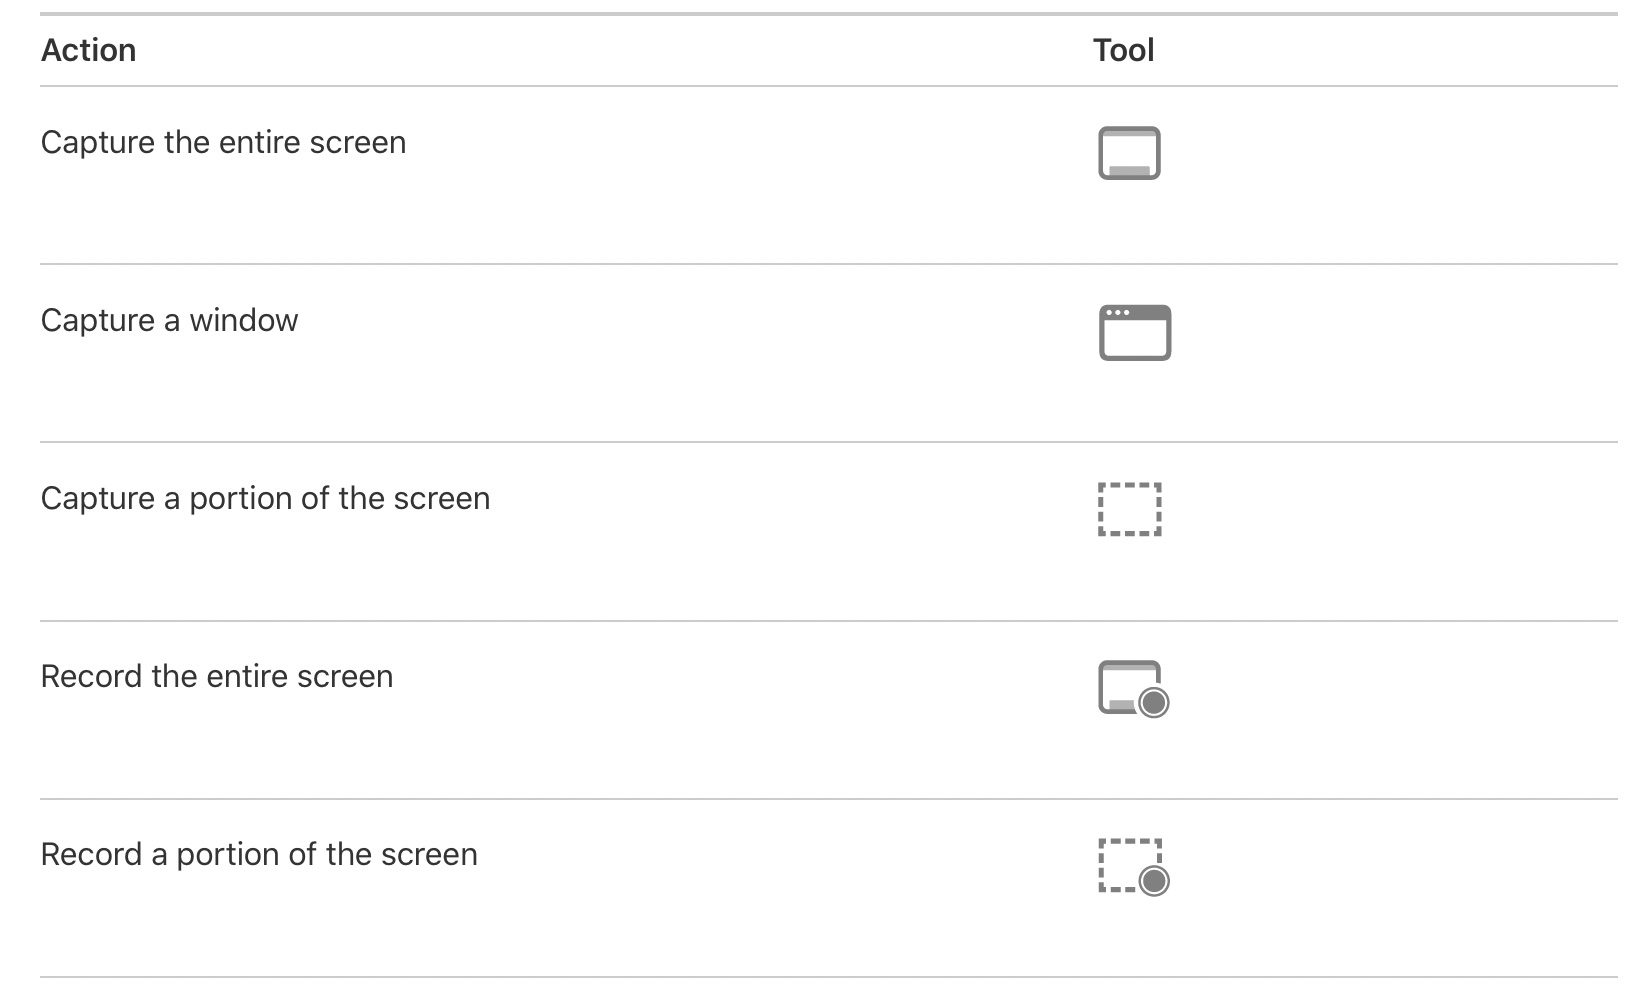
There are five actions in the Screenshot tool. These actions include capturing the entire screen, capturing a window, or capturing a portion of the screen for screenshots. For video recording, the choices are to record the entire screen or record a portion of the screen. Select which tool you want to use.
To start a screenshot or screen recording:
- For the entire screen or a portion of it: Click 'Capture'.
- For a window: Move the cursor to the window, then click the window.
- For recordings: Click 'Record'. To stop recording, click the 'Stop Recording' button in the menu bar.
3. (Optional) Adjust screenshot settings
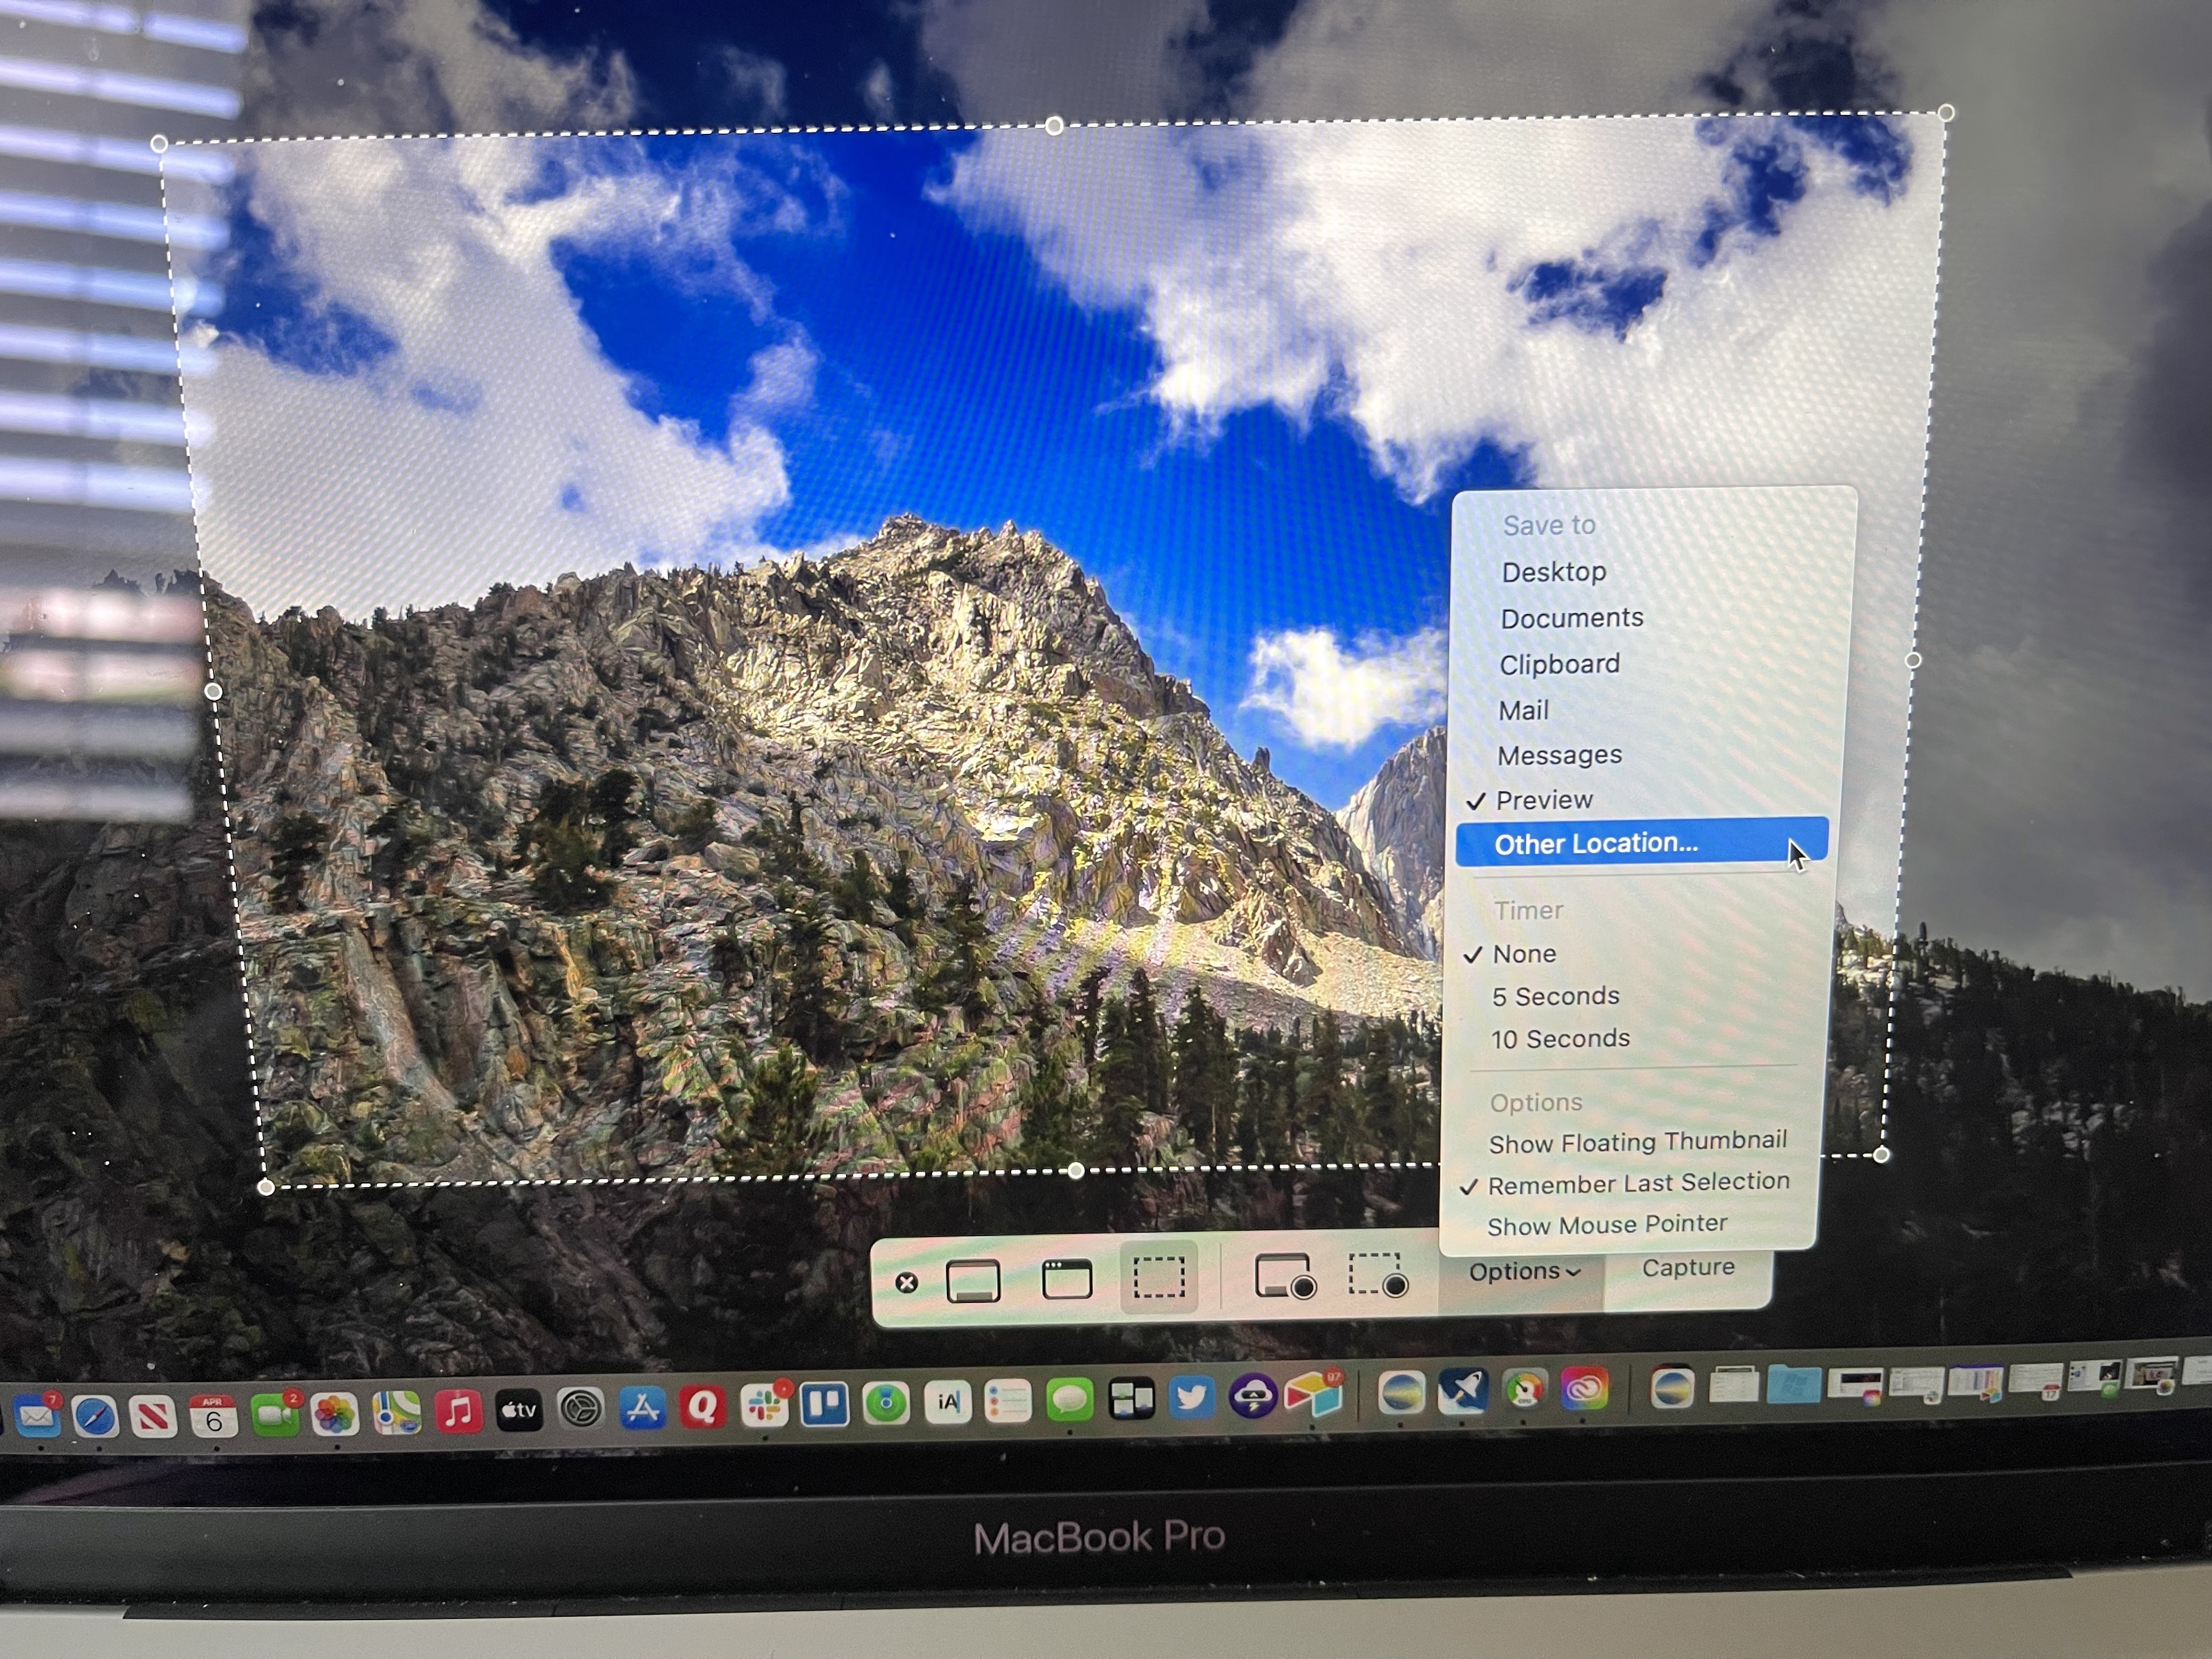
Click 'Options' on the Screenshot tool to bring up additional settings. The available options differ depending on whether you're taking a screenshot or a screen recording. Among the options are where to save the file and whether to add a timed delay. You can also add the ability to show mouse pointers or clicks in the screenshot or video recording.
Additionally, when activated, the 'Show Floating Thumbnail' option temporarily floats a thumbnail of the completed screenshot or video clip at the bottom-right corner of the screen. You have a few seconds to drag this thumbnail into a document, mark it up, or share it.
Thumbnail options include:
Sign up for breaking news, reviews, opinion, top tech deals, and more.
- Swipe right to save the file immediately and make it disappear.
- Drag the thumbnail into a document, an email, a note, or a Finder window.
- Click the thumbnail to open a window where you can mark up the screenshot or trim the recording, or share it.
- Check out our favorite MacBook and Mac desktop models.
Change the default format and save location of screenshots
Step by step guide for how to change the default format and save location of screenshots
If you're using a version of macOS earlier than macOS Mojave, then follow these instructions to change the type and location of the files.
1. Open Terminal and change file format
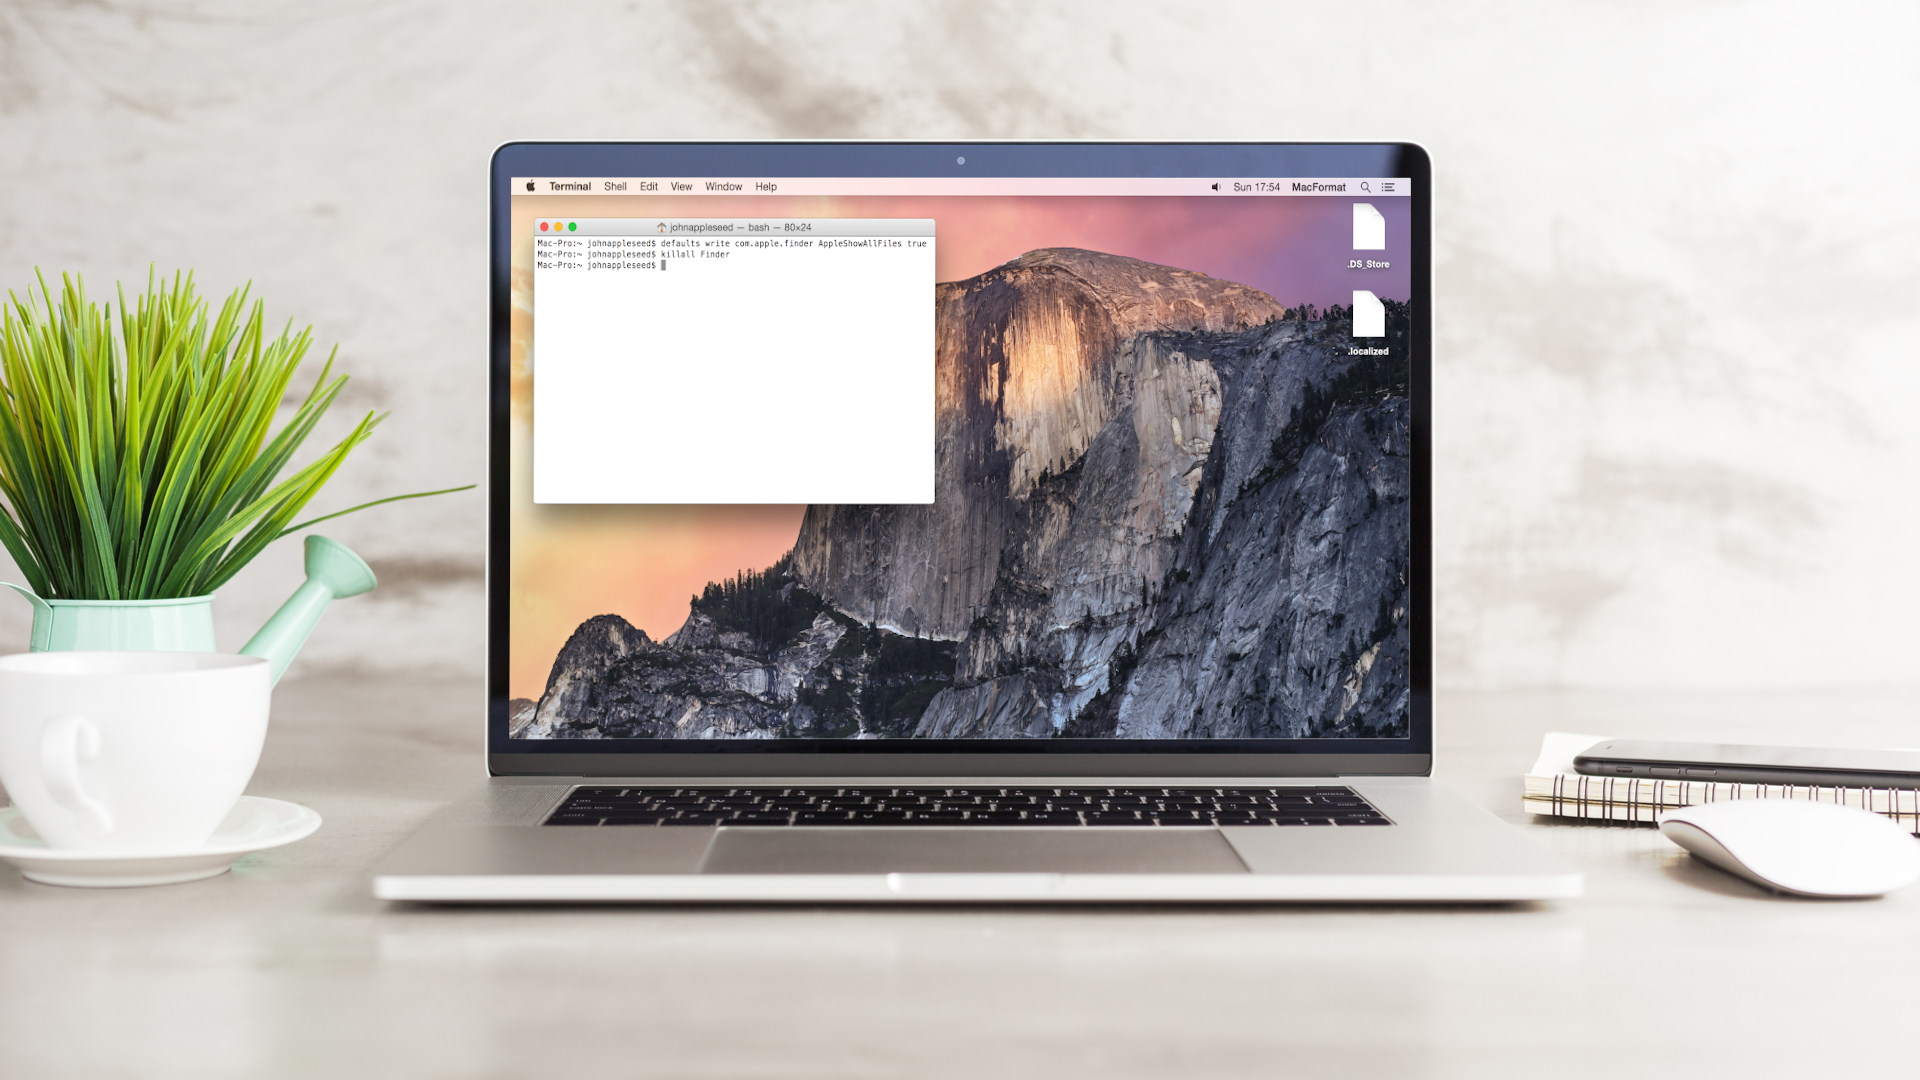
OS X saves screenshots as .png files by default, which can be changed to jpg or other supported extensions such as PDF, tiff, or bitmap, among others. Simply open Terminal from the Launchpad or in Applications > Utilities > Terminal, and then input the following command:
defaults write com.apple.screencapture type XXXYou can replace the 'XXX' with whichever file format suits.
2. Input prompt to change file save location

By default, screenshots will save to your desktop on a Mac with the date and time as the filename. However, this can get very cluttered pretty quickly.
To change this, as above, open Terminal, then type in the following command to change the location your screenshots will save to:
defaults write com.apple.screencapture locationThen, enter the path of the new folder you want to save the screenshots into, or drag and drop it into the Terminal window.
3. Hit Return and load the new setting
Make sure you Press the return key after each command. Then, enter one final command to load the new setting:
killall SystemUIServerFAQs
How do I take a screenshot on a Mac using a Windows keyboard?
If you use a Windows keyboard with your Mac, you can still use the keyboard shortcuts listed above. However, as Windows keyboards do not have the Command (⌘) key, you need to press the Windows key (which holds the Windows icon).
How do I edit my screenshots in Preview?
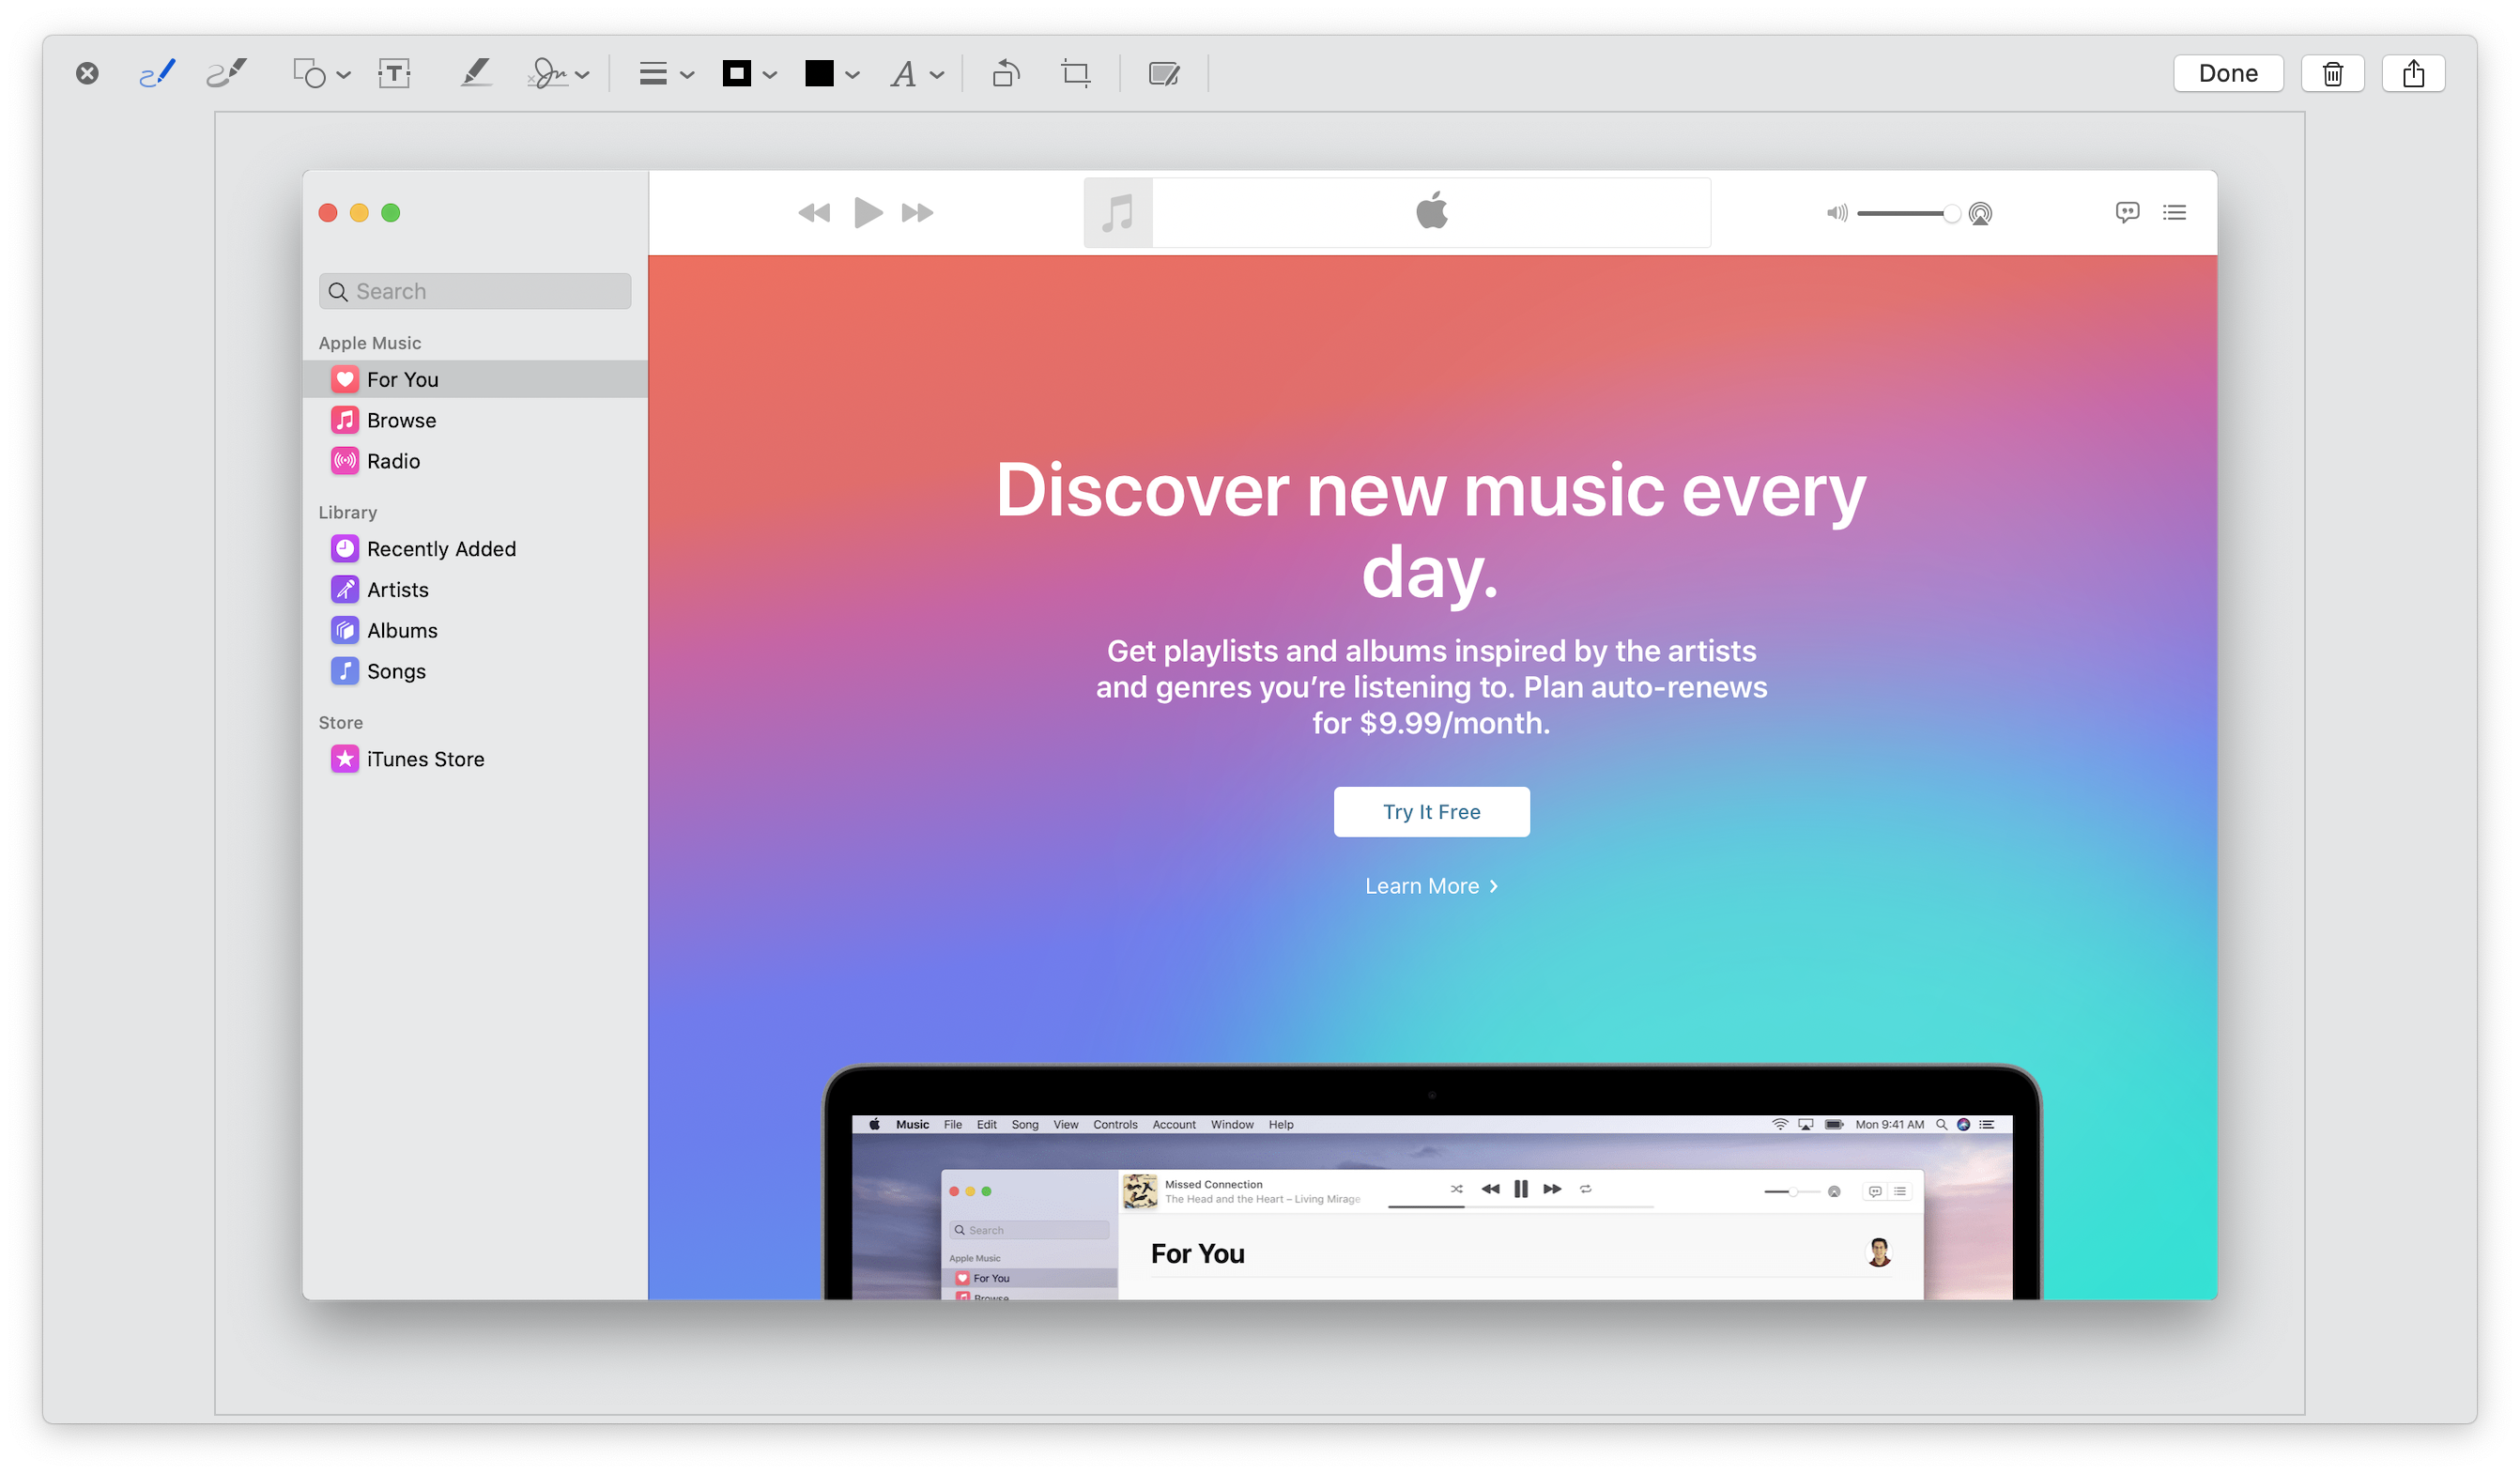
If you’d rather annotate your screenshots later, instead of clicking on the thumbnail to do so immediately after capturing, you may certainly do so. When you’re ready, click on the saved screenshot file to open it in Preview.
Preview won’t just let you crop, resize and tweak your screenshots – it also has some nifty built-in annotation features that come in handy for placing text over them. Make sure the Edit Toolbar is visible (from the View menu) and you’ll see options for drawing shapes, speech, thought bubbles and more.
For creating instructions out of screenshots, the arrow tool will come in particularly useful. There's also the option to highlight text in different colours, strikethrough some text, add notes and type some text into boxes.

Bryan M. Wolfe is a staff writer at TechRadar, iMore, and wherever Future can use him. Though his passion is Apple-based products, he doesn't have a problem using Windows and Android. Bryan's a single father of a 15-year-old daughter and a puppy, Isabelle. Thanks for reading!
- Alan Stonebridge
- Josephine WatsonManaging Editor, Lifestyle