 Become a TechRadar Insider


You can use one of the best running apps to help you improve your fitness without the need for an expensive gym membership, personal trainer or bulky home equipment.
With the current social distancing advice about coronavirus, and the closing of gyms in many countries, it’s a good time to download an app to help you track your runs, give you motivation and (virtually) compete with friends you might not have seen in a while.
But remember: in many places people are currently advised to keep their distance from others and only exercise once per day. That means if you’re going to run outside, run responsibly and keep up to date with the latest guidance.
There are many different running apps available. From those for experienced runners that rely on app tracking, as well as fitness wearable data, to give you a detailed picture of everything from your route to your heart rate through to those for complete beginners, which provide you with plenty of motivation and audio encouragement throughout your workout.
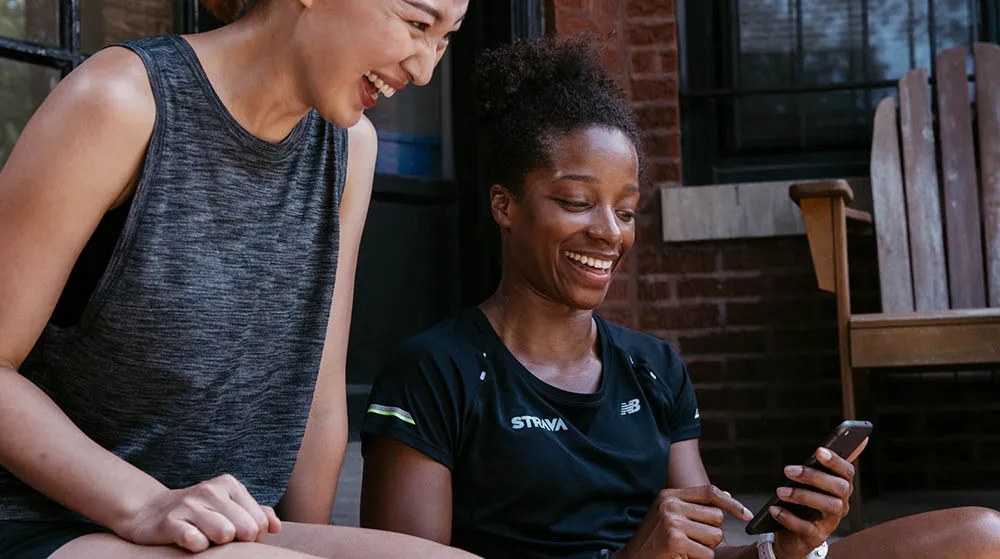
Since it launched in 2009, Strava has long been one of the most popular running apps around (it also allows you to track other kinds of exercise, including cycling) because it provides excellent GPS tracking, a simple dashboard and great community features – like challenges and clubs.
With that in mind, here’s our guide to help you get up and running with Strava.
What is Strava?
Strava is a free activity tracking platform that can be used as an app or via the web. Although it has so many additional features that many consider it a social network for athletes rather than just an app.
Although this guide is about how to use Strava for running, it can also be used to track all kinds of sports, including cycling, hiking, and even more obscure activities, like ice-skating.
It works as an app on your phone, tracking your activity and runs, but you can also upload data from fitness trackers to Strava as well. This way, you’ll see even more information about your runs and your body. But, importantly, you don’t need a fitness tracker or heart rate monitor to use the app.
It has good GPS tracking, making it a great option if you like to see exactly where you ran and what your performance was like in certain areas. But it also serves up information about your run, like how long you ran for, your pace and your speed.
As well as tracking your runs, there’s a big community element to Strava. You can post updates, share photos, add friends, connect with other runners, share your runs and activity, praise people for their runs, take part in challenges, join clubs, receive badges and much more.
We recommend Strava for those who already have a good running habit in place. That’s because it doesn’t provide a great deal of explanation or motivation when it comes to running – we’d recommend an app aimed at beginners like Couch to 5K if you’re looking for that.
That’s why it’s no surprise it’s particularly a hit amongst marathon runners, those who take their running habit seriously and those who want to connect with fellow runners.

Strava: how to get started
1. Install the app
The first step is to download the Strava app, which is compatible with most Android and iOS devices. Just head to the Apple App Store or Google Play and search for Strava.
2. Sign up
Once you’ve downloaded the app, you’re only prompted to fill in your name, gender and birthdate. This is good for those who want to get, literally, up-and-running as soon as possible.
But this does mean in order to add more details to the app, tweak privacy settings and find out more about the community features, you’ll need to go and hunt them down for yourself.
3. Adjust settings
To change settings at any time, go to the Profile tab in the bottom menu bar. In the top right-hand corner, hit the cog icon to get to your settings.
This is where you can make changes to your whole experience with Strava, including connected apps and devices, units of measurement, push notifications and, importantly, privacy settings.
4. Customize privacy
When we first set up a Strava account, we were a bit shocked to find that all of the settings to share your profile and activity were automatically set to ‘everyone’. Sure this makes the set-up process quicker and makes sense given Strava is geared up for community, but this didn’t give us a great deal of confidence about our data.
What’s more, we were asked if we wanted to sync contacts during the sign-up process. Despite hitting ‘No’, access to contacts was toggled on.
This shouldn’t stop you from using the app. But it does mean you’re going to want to spend some time combing through the settings to make sure you’re happy with what Strava is sharing.
Again, head to your profile, hit the cog icon and then scroll to Privacy Controls. Depending on how you want to use the app, we’d recommend reading through each option here and making changes accordingly. For example, it makes sense to have your profile open to everyone for many of us, but you might want your activities sharing with just you.
Of course if you want to share everything, you can. But remember that your running data can reveal a great deal about your habits and location.

Strava: how to track a run
There are three ways you can record activity with Strava. You can enter the data manually, record your run with the Strava app, keeping your phone with you as you run. Or you can sync the data from a fitness tracker, like a Fitbit or GPS sports watch.
We’ll cover fitness tracker syncing below. But to manually enter data you need to hit the small + icon in the left-hand corner of the Feed dashboard and select Manual Activity. You then have all kinds of fields you can fill in if you have the right information, like time, distance, pace and then other personal details, like photos and how the run felt. This is a good option if you decide to do a tech-free run, use a different app or tracker and forget to sync it or anything else.
If you’re only concerned about tracking a run for now, then you’ll want to head to the Strava dashboard and hit Record to get started. The app will then lock onto your location and confirm that there’s a GPS lock in place – this is what tracks your location. Wait for this until you set off, but don’t worry it tends to only take a few seconds.
Then you hit the orange 'Start' button to begin. While you run, large, bold stats are displayed on the screen. Once you’re done, hit the stop button. You’ll see your route displayed on a map, as well as details about your speed, distance and power output.
Hit 'Finish' to add more details about your run, like a title for that particular run, any photos you took while you were running, as well as a description about how the run felt. You then can save or discard your activity. That will be shared with whoever you chose to share it with in your settings and you’ll know it’s saved because it’ll appear on your Feed homescreen.
To take a look at your activity over time, just head to your Profile. This is where you’ll see details about how often you run, how many miles you’ve run and your mile total this year. Hit Statistics and these stats are broken down into even more detail.
Strava: advanced features

Community
Described by some as a fitness social network rather than just an app, if you want to use Strava to connect and compete with other runners, then there’s plenty on offer.
Firstly, you can add people you know who also use Strava. To do this, hit the icon of two people in the top right-hand corner of your Feed. There you can sync contacts, find people on Facebook or just go with the people Strava has suggested. This is where you can also find a link to Invite friends.
As well as adding people you know, you can find a Club to join full of people you don’t. To do this, head to the Clubs tab, which is at the top right of your Feed. Then click the button that says Explore Clubs. This is where you’ll find Challenges, which you can join. These include things like ‘run a half marathon this month’ or ‘run a 10k’. Once you’ve joined a challenge, your activity counts towards that challenge.
As well as challenges, there are also Clubs. These are, as you’d expect, clubs full of runners. There’s a park runners club, a road runners club and loads more. Once you join these, you can write a post to others in the club, view a leaderboard and see who has clocked up the most in the group and more.
If you don’t fancy joining Challenges or Clubs, you can also look at Segments as a way to compete with others. These are running routes, which are dotted all over, and you can compete with people about how well you do on a particular route. Click on a segment and you’ll see who had the all-time best performance on that segment.
There are more ways to connect with others, but once you’ve got your head around Challenges, Clubs and Segments, you’ve got the basics covered.

Fitness trackers
Strava can also be used with a fitness tracker, and is compatible with most major fitness tech brands. If you sync up a fitness tracker with Strava, the app will show you even more information about your runs, like your heart rate.
The way you connect your fitness tracker up to Strava will depend on which tracker you have. But most will need to be synced up first. To do this, go to your Strava app. Hit 'Profile', then 'Settings'. Then scroll to 'Applications, Services and Devices'.
This is where you’ll be able to sync up a fitness tracker. Simply click Connect a new device to Strava and select which device you have (all the major ones play nicely with Strava). You’ll then be asked to connect to that service and will be prompted to log-in to the other app.
For example, if you wanted to connect your Fitbit Versa, you’d hit the Fitbit icon, be asked to log into your Fitbit account and approve everything that way. Once this is all set-up, activities from your fitness tracker should automatically sync with Strava.
Strava Summit
If you start to really enjoy Strava, and find its tracking and community elements fun and useful, then you might want to consider signing-up to Strava Summit. This is a premium subscription that unlocks more tools, including setting goals, devising training plans and more.
Strava Summit costs $47.99/£47.99 (about AU$80) if you make an annual payment (which works out at £4/$4 a month) and $5/£6.99 (about AU$8) if you’d rather pay monthly. We’d recommend you spend at least a couple of weeks with the regular Strava app before you sign up.
- Best running watches 2020: the perfect GPS companions for your workouts
