How to switch Apple ID
Transition seamlessly between Apple IDs on your devices
Sign up for breaking news, reviews, opinion, top tech deals, and more.
You are now subscribed
Your newsletter sign-up was successful
Learning how to switch Apple ID is essential if you’re juggling different profiles for personal use, work, or family sharing. Your Apple ID is a secure gateway to accessing your data and all of Apple's services, like app subscriptions and cloud storage.
Regardless of your Apple device, switching your Apple ID is a breeze and will be helpful for separating purchases/subscriptions or using different sets of family-shared apps and content. In this article, we’ll guide you through the steps to switch Apple IDs on your iPhone, iPad, and Mac.
And if you’re planning to upgrade to a powerful work computer, consider our roundup of the best business Mac.
Tools and requirements
- An iPhone, iPad, or Mac
Steps for how to switch Apple ID
- Open Settings > Tap your name > Scroll down and press Sign Out.
- Enter your password > Tap Turn Off.
- Scroll down and tap Sign Out again.
- Toggle on app data you want to retain > Press Sign Out > Tap Sign Out on the pop-up.
- Tap Sign in to your iPhone.
- Select Sign In Manually.
- Input your username and password and press done on the keyboard.
- Enter your iPhone’s passcode.
- Choose between Merge and Don’t Merge.
Step by step guide to switch Apple ID
We’ve demonstrated these steps on an iPhone 11 running iOS 17.4.1, but the process is similar on iPad and Mac.
Also, ensure to back up your device before switching your ID — learn how to back up an iPhone here.
1. Settings > Your Name > Sign Out
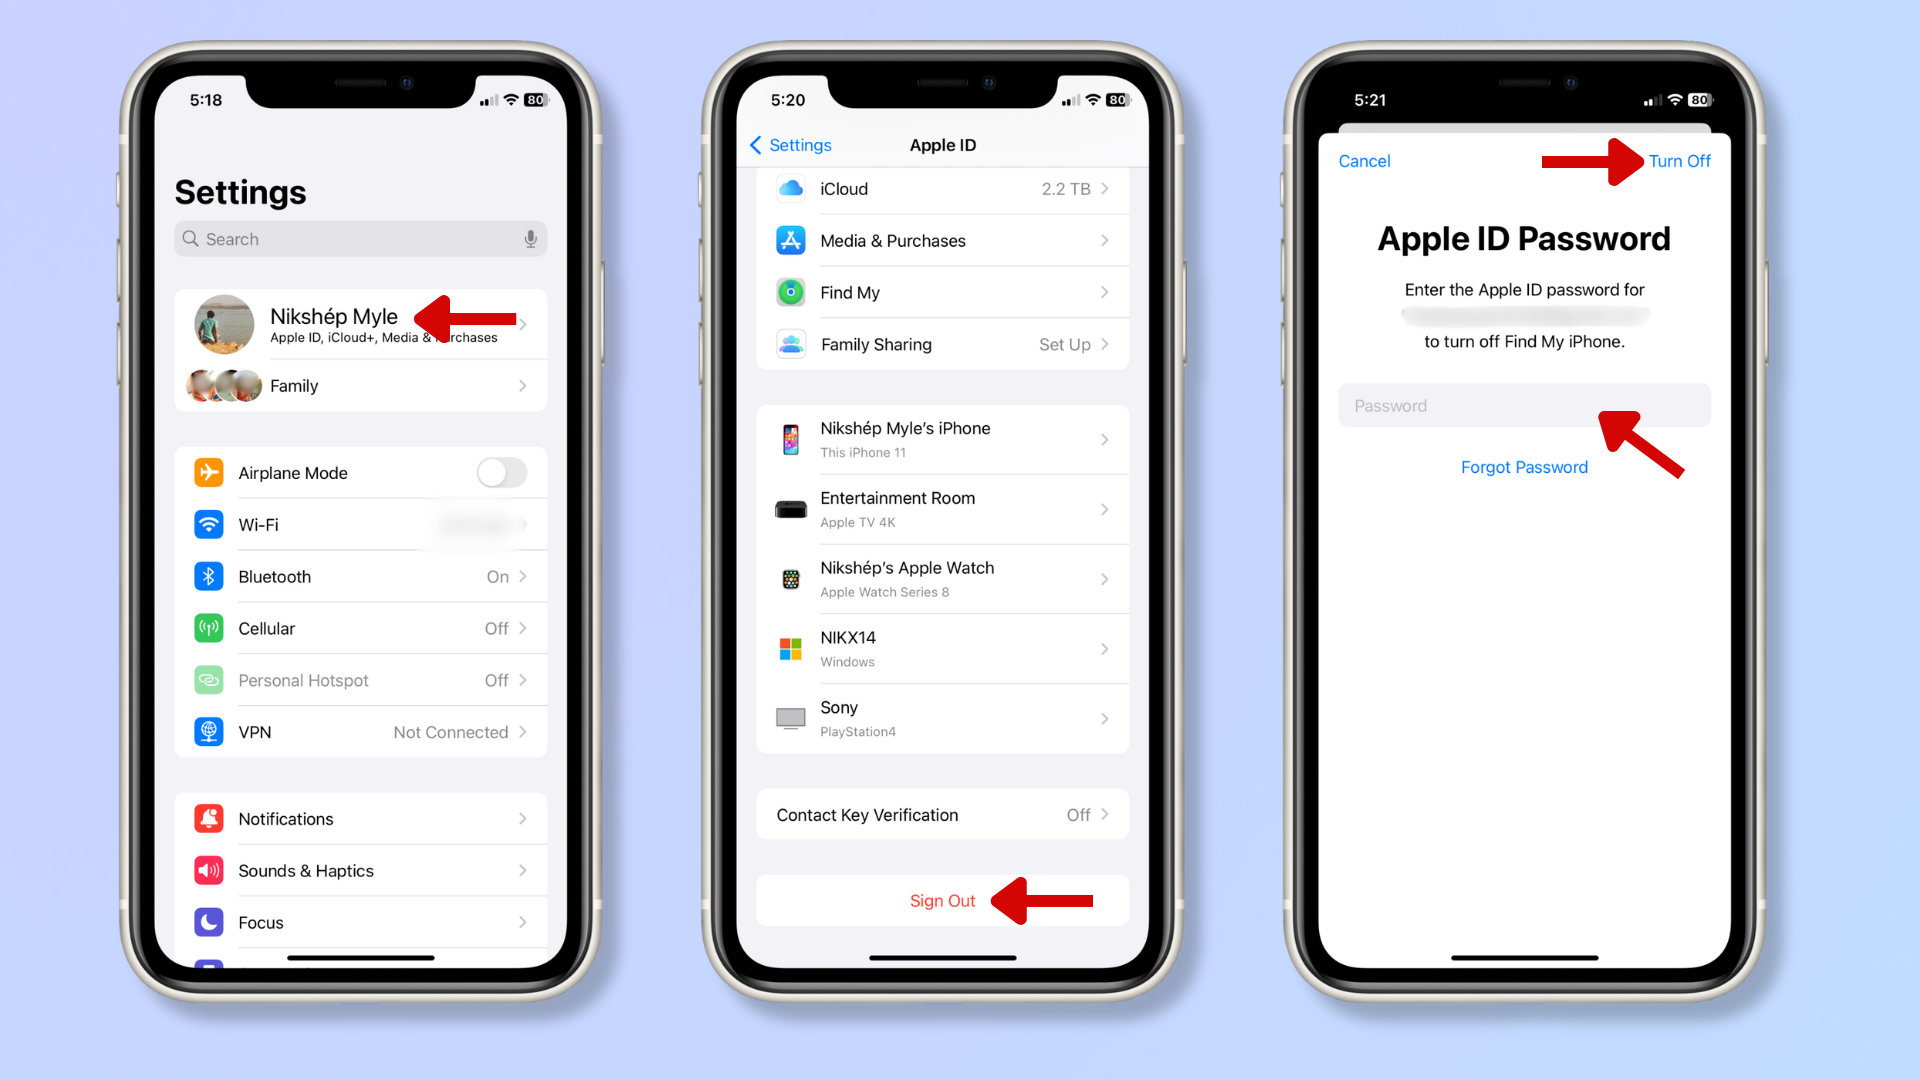
Launch the Settings app (System Settings on Mac) and tap your name at the top. Then, scroll down and tap Sign Out.
Enter your password and press Turn Off at the top right to turn off Find My iPhone.
2. Select data to keep on iPhone and sign out
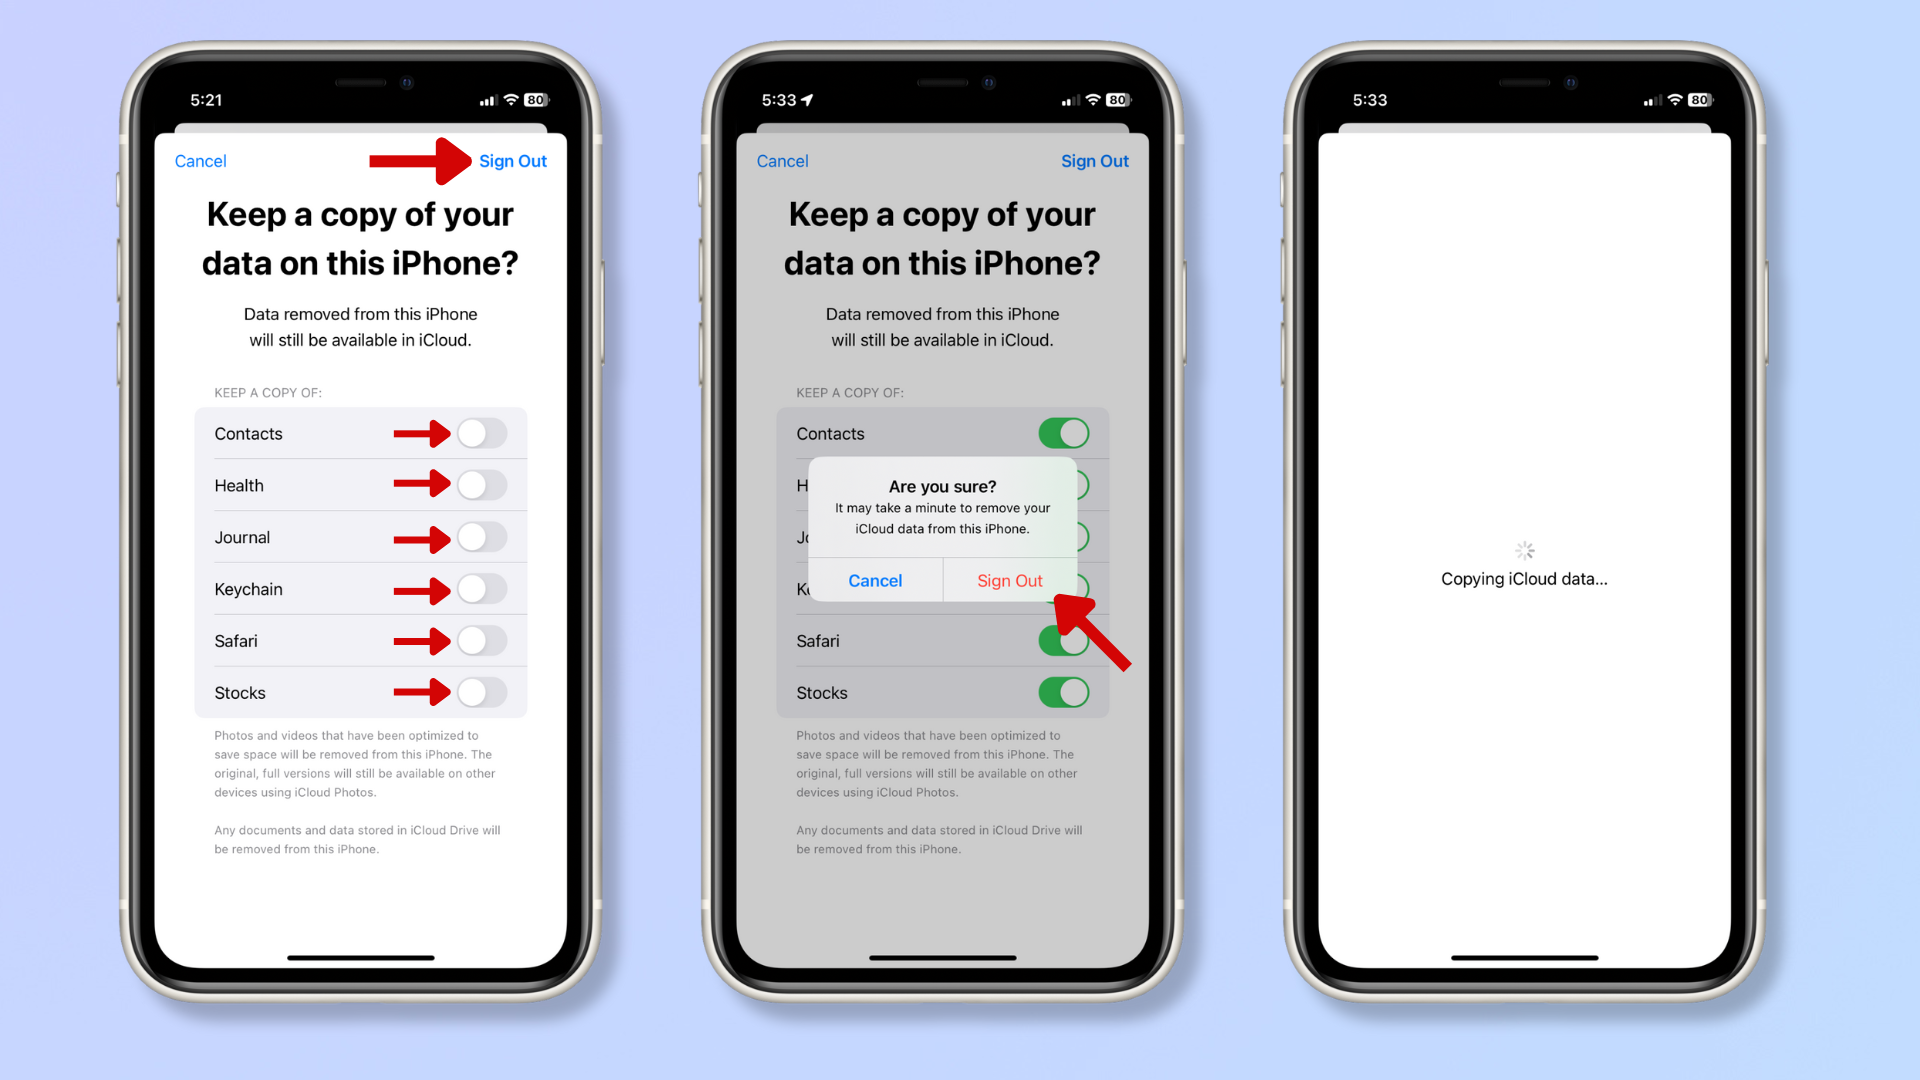
After turning off Find My iPhone, scroll down and tap Sign Out again.
Toggle on the apps whose data you want to keep on your iPhone when you see a window asking, “Keep a copy of your data on this iPhone?”.
Press Sign Out at the top right and then tap Sign Out on the tiny pop-up to confirm.
3. Sign in with a new Apple ID
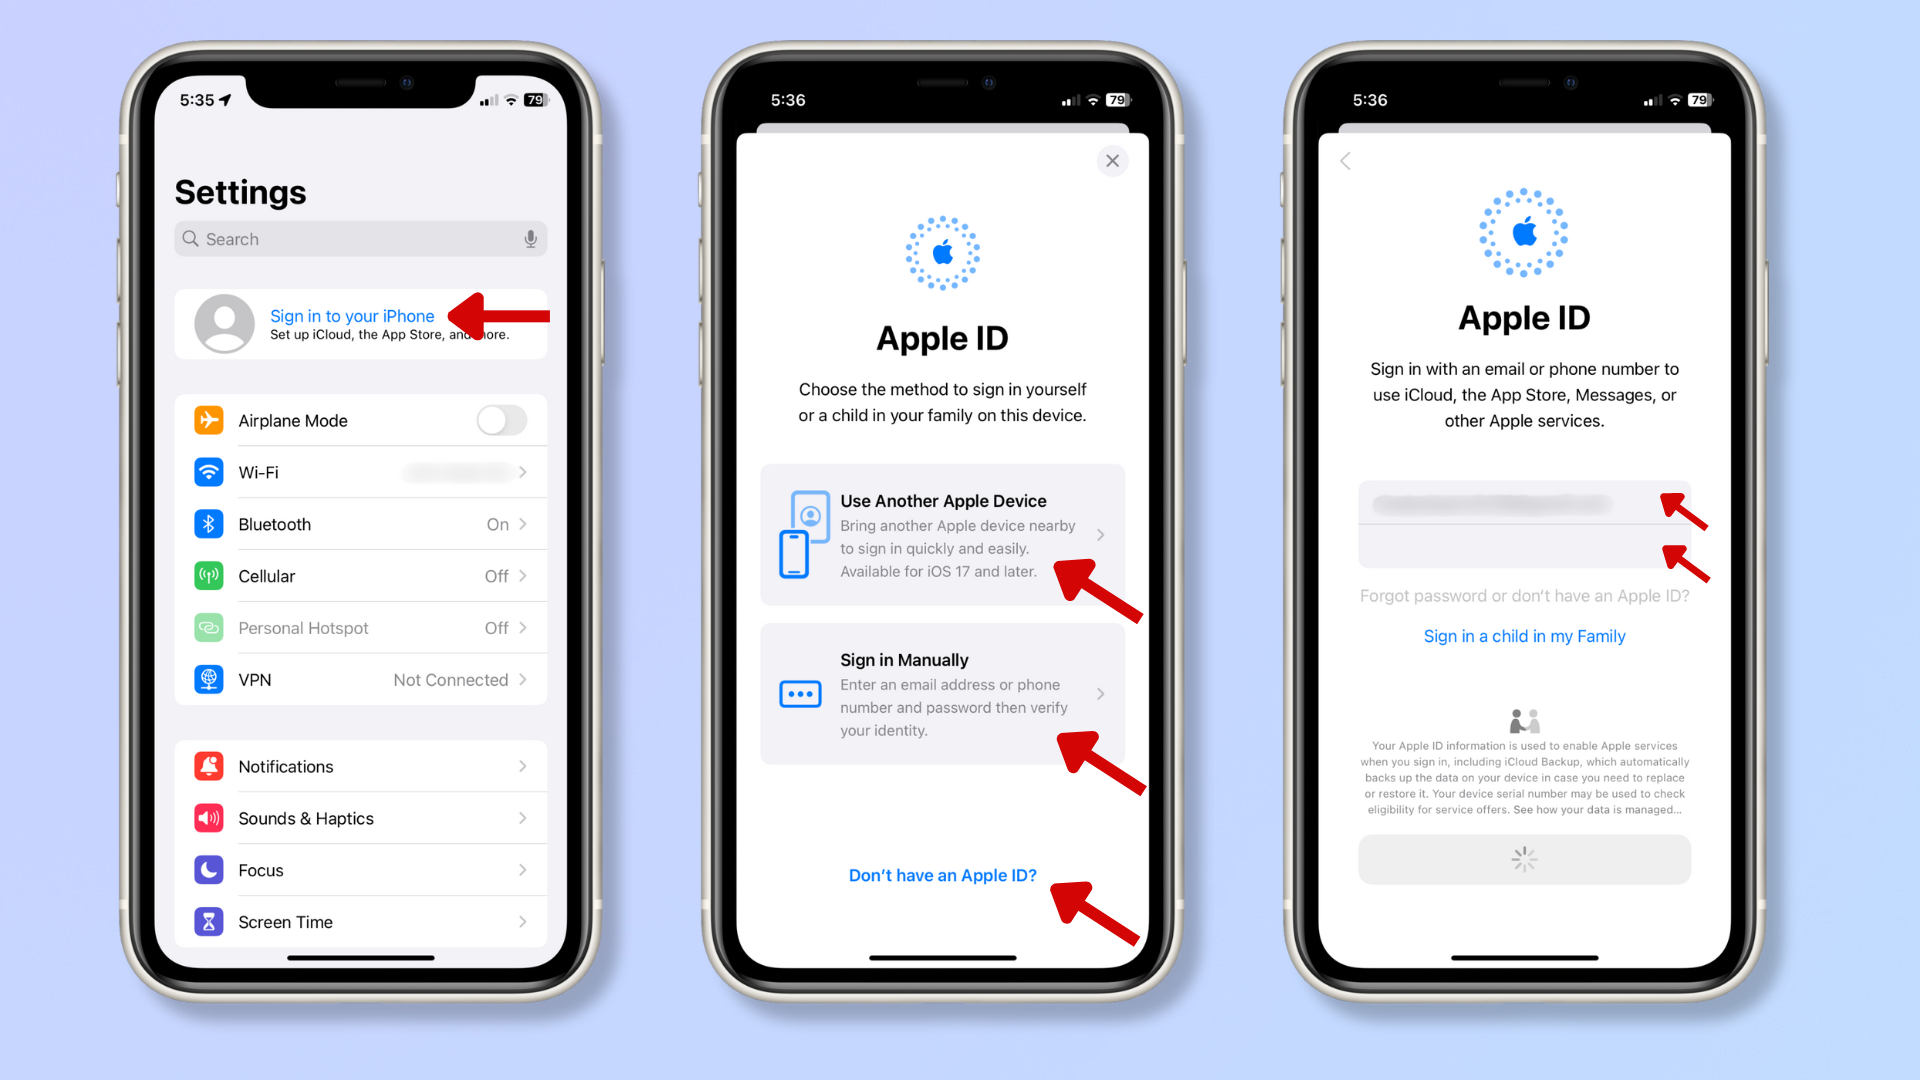
After signing out, you’ll return to Settings.
Tap Sign in to your iPhone at the top and choose a method to sign in (Use Another Apple Device or Sign in Manually). Below these options, you'll find Don’t have an Apple ID?. Tap this if you want to create a new account to sign in.
If you tap Use Another Apple Device, you'll find onscreen instructions to complete signing in.
Press Sign in Manually if you have the account's login information. Then, enter your username and password and tap done on the keyboard.
If you have Two-factor authentication enabled, you’ll have to input the 2FA code to sign in.
4. Merge/Don’t Merge iPhone data with iCloud
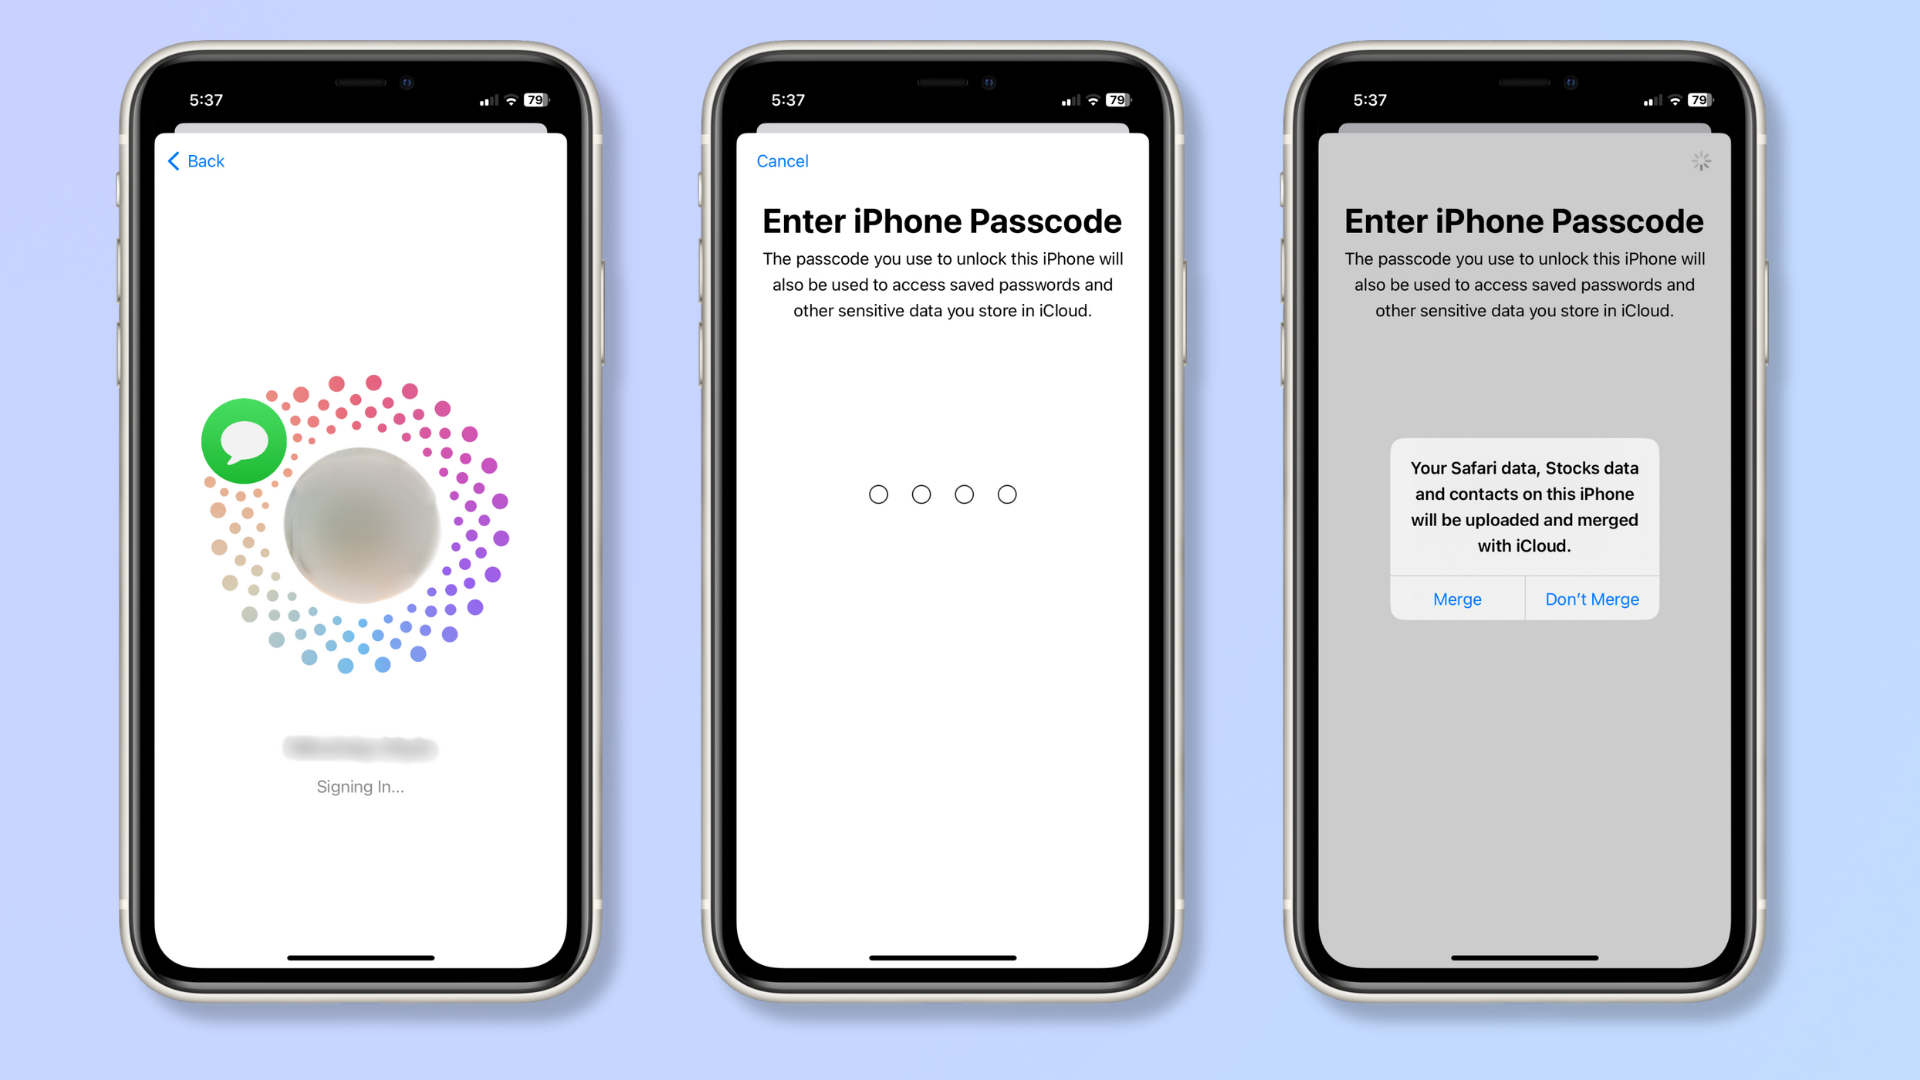
Once signed in, you’ll have to enter your iPhone’s passcode.
A pop-up will then ask you to merge the iPhone’s data with your iCloud. Select the option appropriate for you (Merge or Don’t Merge).
Final thoughts
Now that you know how to switch your Apple ID, you can move seamlessly between your accounts and keep your data organized for greater efficiency. Note that if you have a lot of data stored on your iCloud, your device may take time to download everything.
For more tips on managing Apple devices, check out our guides on how to put parental controls on an iPhone, how to use visual look up on iPhone, and how to clear an iPhone before selling it.
Sign up for breaking news, reviews, opinion, top tech deals, and more.
Nikshep Myle is a freelance writer covering tech, health, and wellbeing. He has written for popular tech blogs like Tom's Guide, GadgetReview, SlashGear, and Creative Bloq, and has extensively reviewed consumer gadgets. When he’s not writing, you’ll find him meditating, gaming, discovering new music, and indulging in adventurous and creative pursuits.