How to record your desktop in video with the updated Snipping Tool in Windows 11
Capture videos of everything you do on your PC

Sign up for breaking news, reviews, opinion, top tech deals, and more.
You are now subscribed
Your newsletter sign-up was successful
Windows has allowed you to take a screenshot for years now - mainly by using the ALT + PrintScreen keys. However, Snipping Tool has been Microsoft's way of replacing this method, with powerful tools to take a screenshot of certain parts of the screen for example.
In Windows 11, the app has seen a further update where you can now capture video, allowing you to view it again in a saved movie file.
With this in mind, we've created this handy guide to show you how this can be done to get the better side of your desktop.
Tools and Requirements
- Windows 11
- Snipping Tool
Step by step guide
1. Update the Snipping Tool
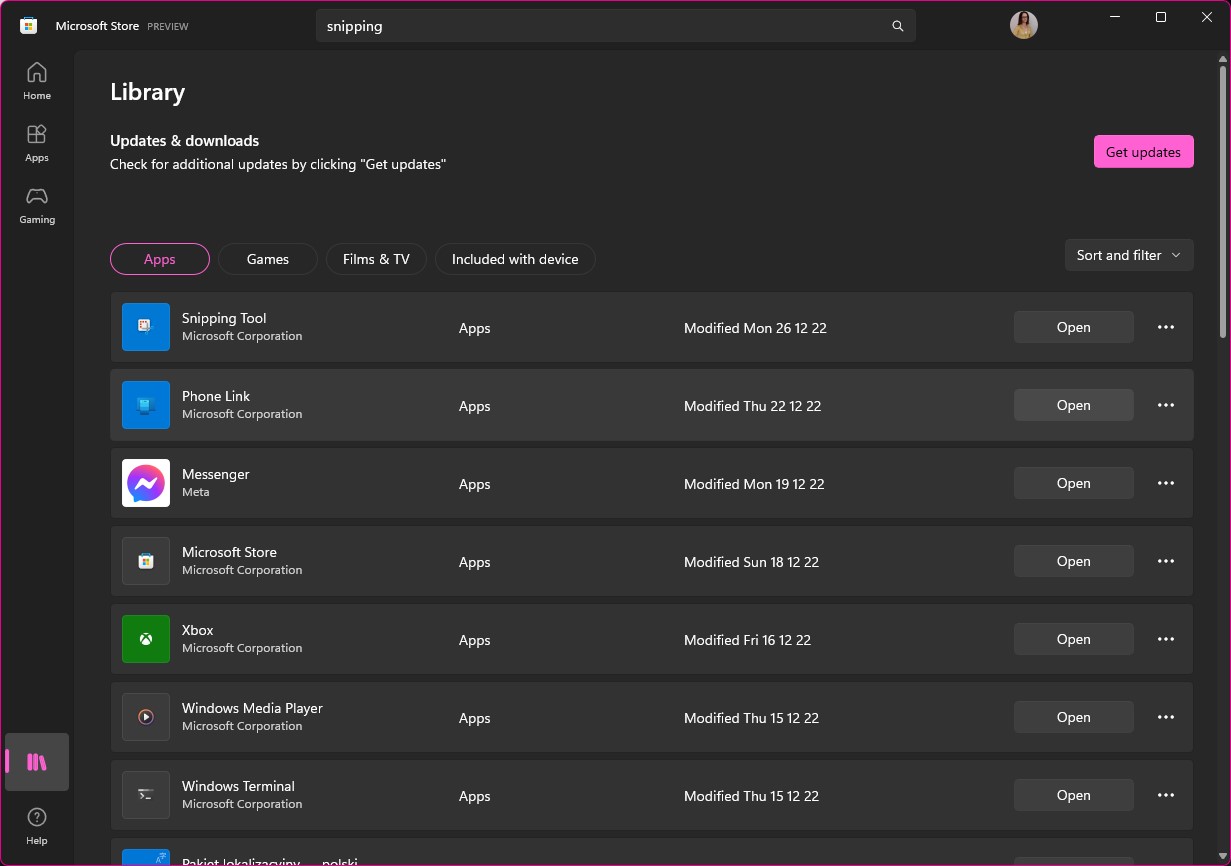
The original version of the Snipping Tool app did not include the option to record video, only the ability to capture different types of screenshots. As such, you will need to make sure that you have the very latest version of the app installed to ensure that you have access to all of the latest features, and you can do this via the Microsoft Store.
Launch the Microsoft Store app, click the Library button to the lower left and then click the Get Updates button to the upper right.
2. Changing Snipping Tool keyboard shortcut
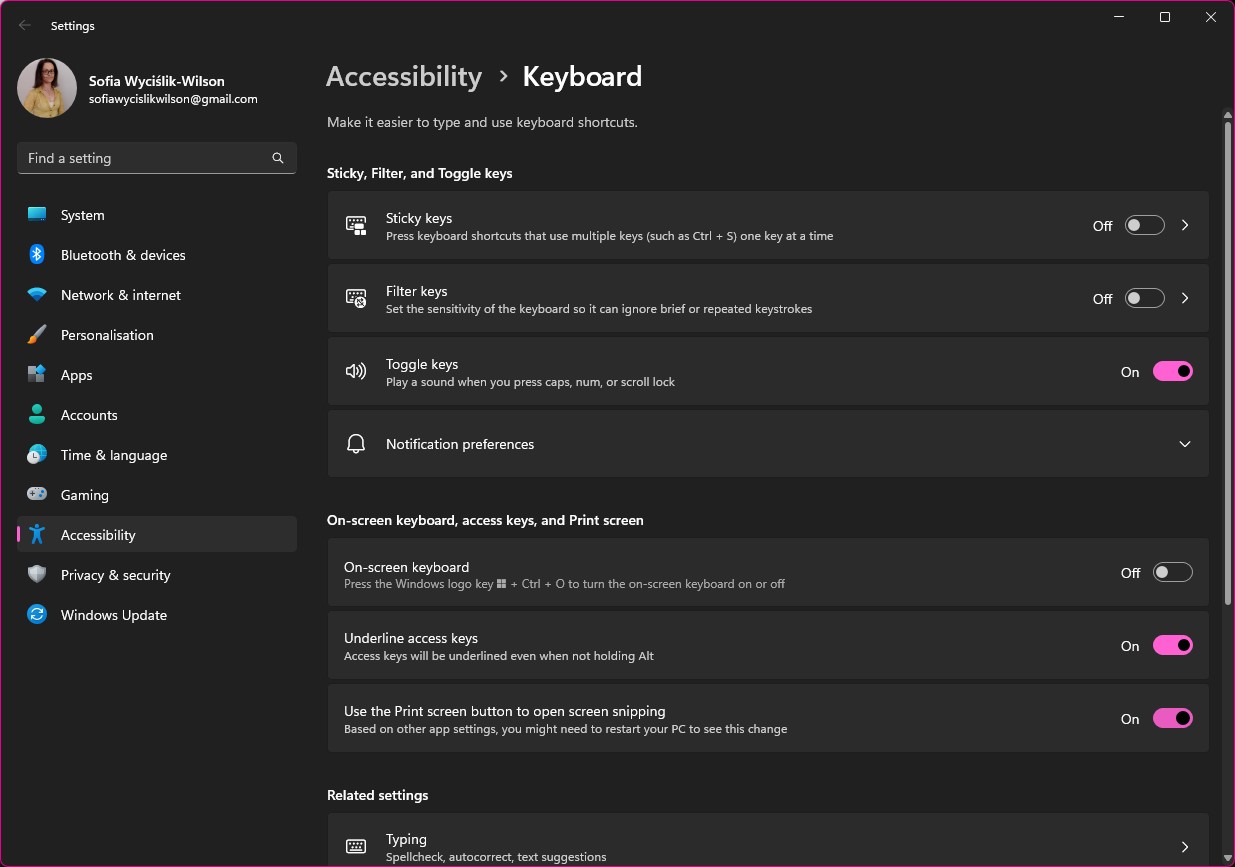
By default, the keyboard shortcut for accessing the Snipping Tool is Windows + Shift + S, but you can also use the PrtScr key by changing a setting in Windows 11. Open the Settings app from the Start menu -- or you can press Windows + I -- and move to the Accessibility section.
Under the Use On-screen keyboard, access keys, and Print screen heading, move the Use the Print screen button to open screen snipping toggle to the On position.
3. Launch Snipping Tool
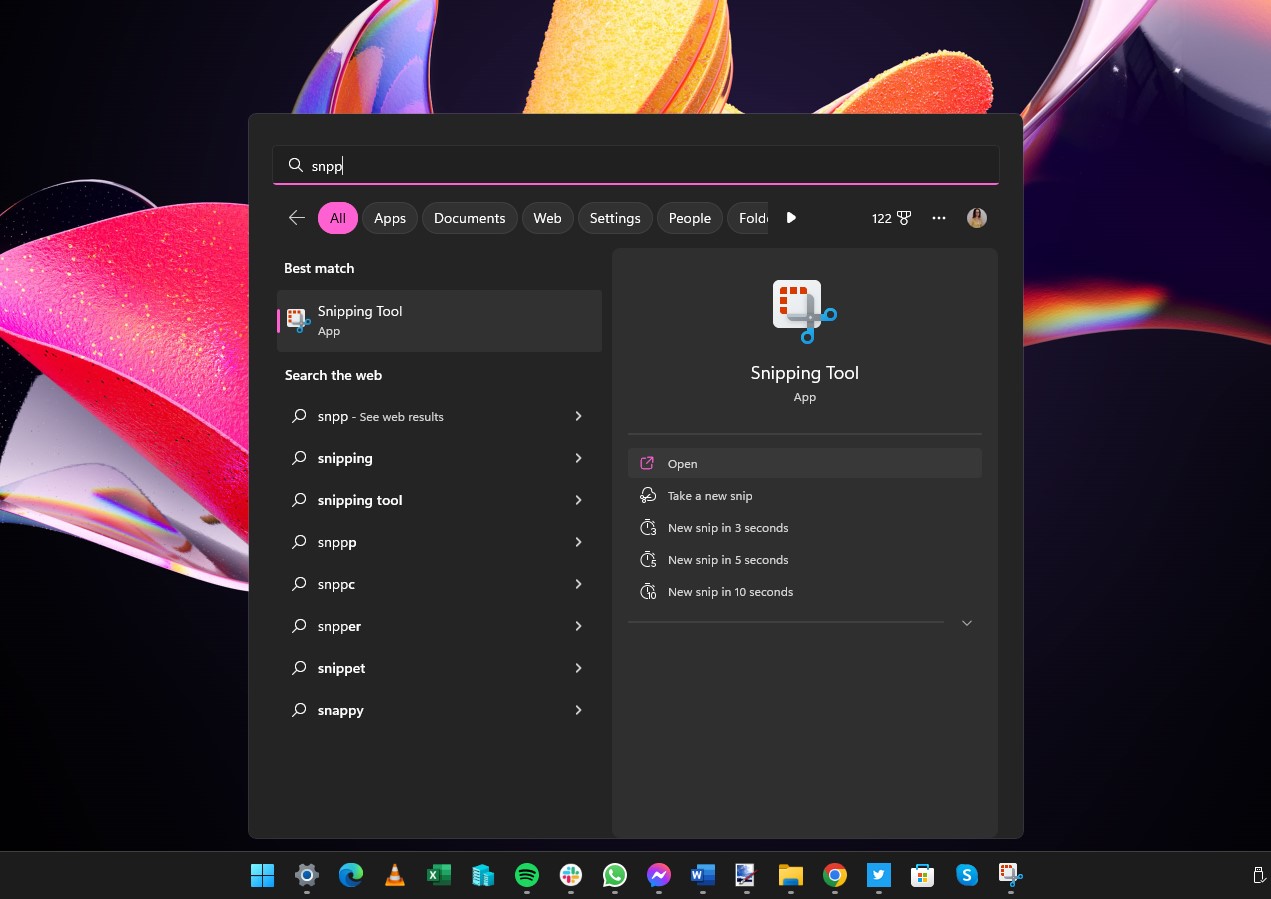
The Snipping Tool can be launched from the Start menu just like any other app. Click the Start button, type Snipping Tool and click the link to open the app.
If you feel that you are going to be using the app a lot, especially if you are going to be using it for video capture as well as screen grabbing, it makes sense to pin the app shortcut to the taskbar -- just right-click it and select Pin to taskbar. This is because using the keyboard shortcut to launch the app launches it directly in capture modes, bypassing the main interface which you may need access to.
4. Switching snipping modes
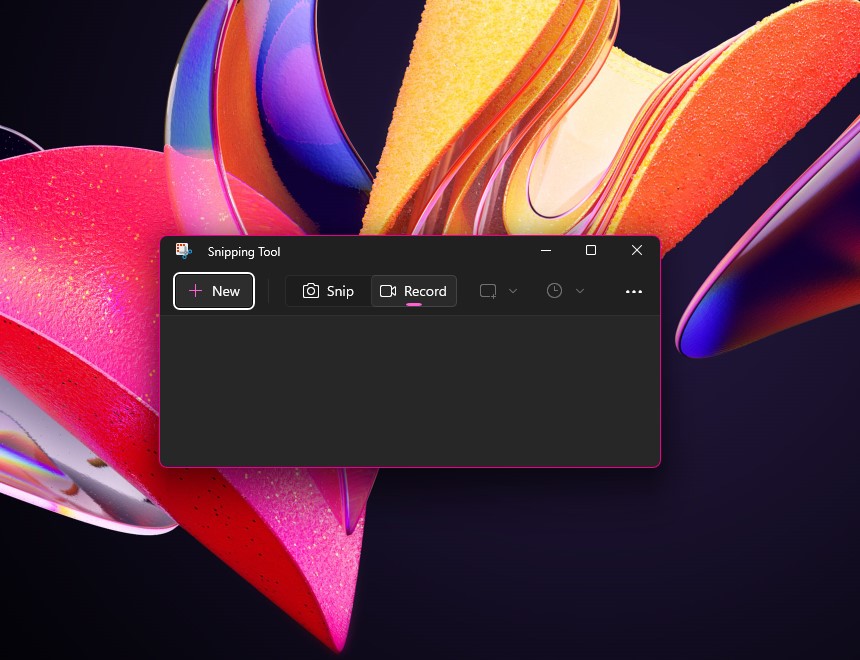
When you launch the Snipping Tool, you will notice that there are a series of buttons in the toolbar, the first three of which bear labels. You are likely to find that the first time you launch the app, the Snip button has a line beneath it, highlighting the fact that Snipping Tool is currently in screen capture mode.
If you want to capture video footage of your desktop activity, you need to click the Record button to switch to this mode instead.
5. Selecting screen recording area
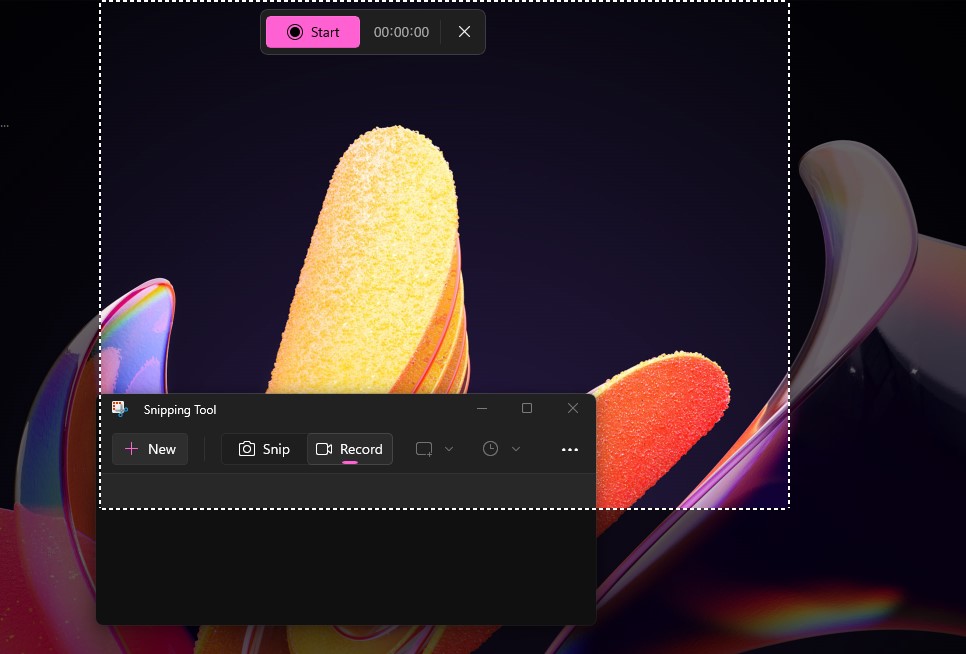
Once you have switched to the relevant mode, you can start screen recording by clicking the New button in the toolbar You will notice that your screen goes slightly dark and that your mouse cursor changes into crosshairs.
You need to draw a box around the area of your desktop that you'd like to capture, by clicking the left mouse button, keeping the button held down, and dragging until you have drawn a selection area. You can then release the mouse button.
6. Making selection adjustments
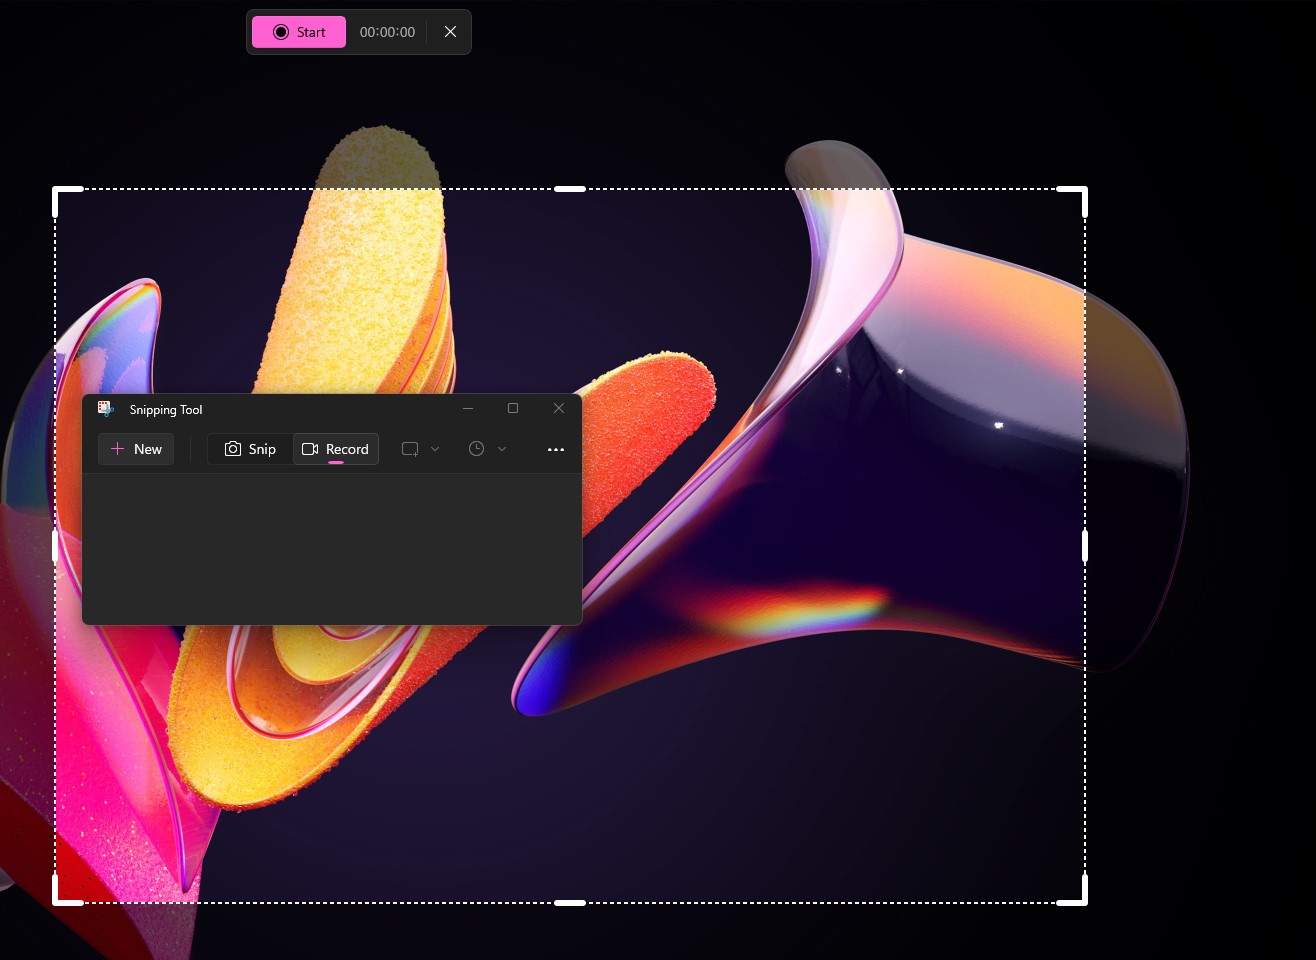
Even if you are careful, you may well find that you have not selected precisely the area of your screen that you intended. Thankfully, if you are not entirely happy with your selection it is easy to make quick adjustments before you start recording.
Just as if you were using an image editing app, you can resize the select area by dragging the corner or border anchors to new positions. You can keep making adjustments until you are completely happy.
7. Starting and stopping recording
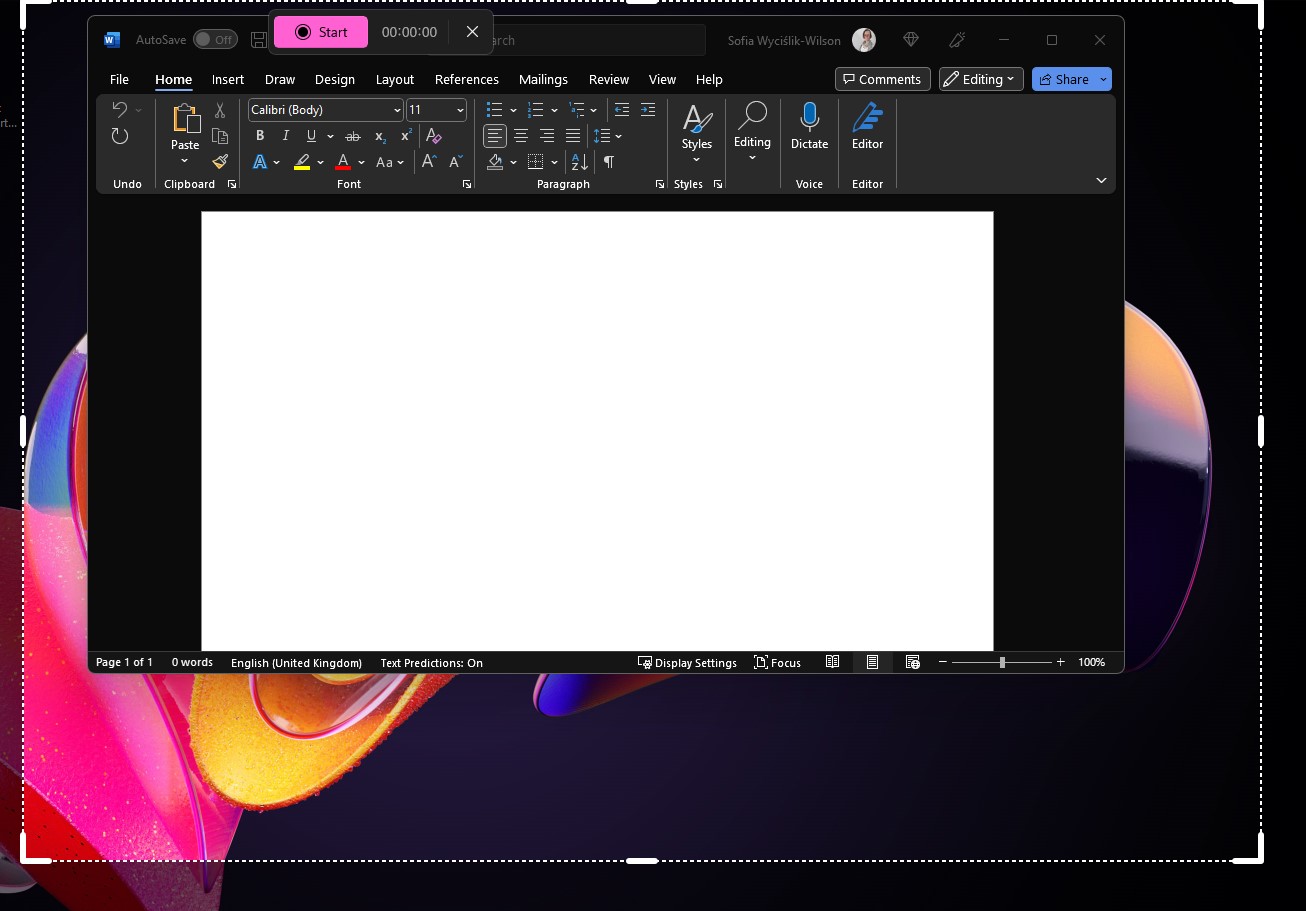
Once you have selected and, if necessary, adjusted the area of the screen you would like to capture, you can start the recording process by simply clicking the Start button in the mini floating toolbar at the top of the screen.
As soon as you start recording the contents of the toolbar change to include a Stop button and one featuring a trash can. When you want to stop recording, you just need to hit Stop; clicking the trash can button deletes the recording, which is useful if something goes wrong.
8. Checking and saving recordings
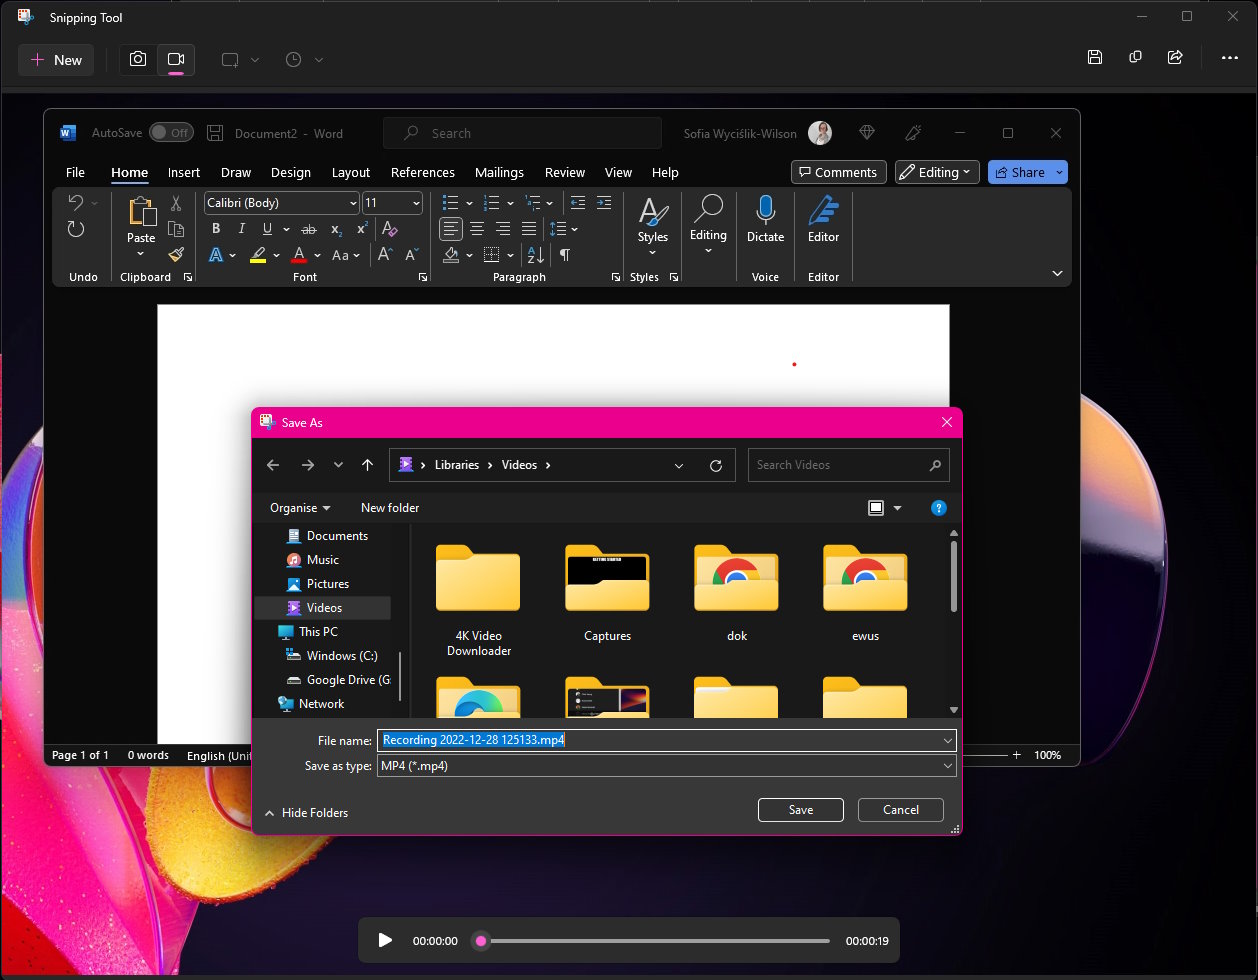
When you hit the button to stop recording, Snipping Tool will switch to a different view in which you can preview the video you have recorded. There are standard media playback controls at the bottom of the screen, and if you are happy with what you see, you can save the video file.
Click the save button to the right of the toolbar, and you can then choose a name and location for the video which will be saved in MP4 format.
Final thoughts
Screen grabbing has long been a feature of Windows, and the Snipping Tool made things much, much easier. With the addition of a screen recording option, the app has become even more useful, providing you with a way of creating videos for tutorials, capturing live streams and so much more. It's a great capability to have access to, and you'll undoubtedly come up with many uses for it.
While capturing a screenshot can be a simple matter of pressing the PrtScr key on your keyboard, there have long been numerous apps available that provide additional features and options. The same is true when it comes to screen recording -- there are various alternatives to the Snipping Tool.
Two titles that are especially worth checking out are Snagit and Bandicam, both of which are paid-for products. Snagit offers a range of features not found in Snipping Tool such as basic video editing options, a choice between creating videos and animated GIFs, and the ability to capture webcam footage and overlay it picture-in-picture over screen recordings. Bandicam is free of charge, and lets you save footage in AVI or MP4 formats, is also capable of recording from webcams and other sources, and offers up to 4K quality.
Sign up for breaking news, reviews, opinion, top tech deals, and more.

Sofia is a tech journalist who's been writing about software, hardware and the web for nearly 25 years – but still looks as youthful as ever! After years writing for magazines, her life moved online and remains fueled by technology, music and nature.
Having written for websites and magazines since 2000, producing a wide range of reviews, guides, tutorials, brochures, newsletters and more, she continues to write for diverse audiences, from computing newbies to advanced users and business clients. Always willing to try something new, she loves sharing new discoveries with others.
Sofia lives and breathes Windows, Android, iOS, macOS and just about anything with a power button, but her particular areas of interest include security, tweaking and privacy. Her other loves include walking, music, her two Malamutes and, of course, her wife and daughter.
- Daryl BaxterContributor