How to build a texting doorbell with a Raspberry Pi
Automate your house

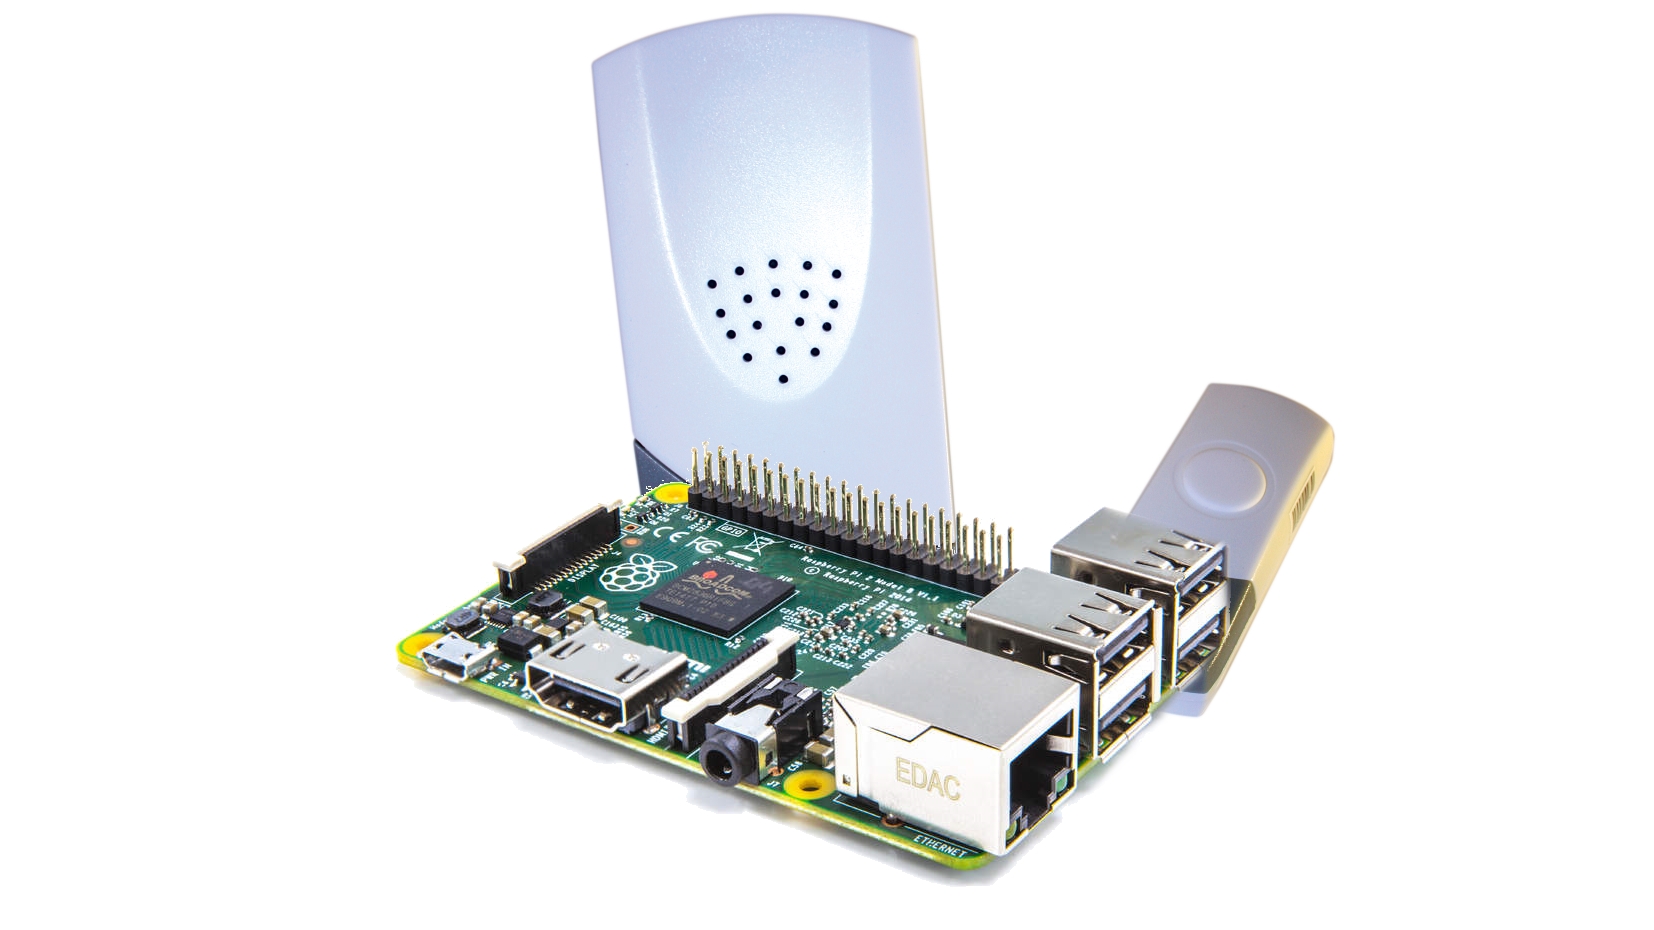
The humble doorbell is great for alerting us to visitors as long as we're in earshot, but we could fix that with a little Internet of Things (IoT) knowhow and the Raspberry Pi.
For this project, we've used a cheap wireless doorbell (found on Amazon for a fiver). We took apart the push button unit and found a circuit which uses a simple momentary switch powered by a 12V battery.
The Raspberry Pi GPIO can't directly work with voltages over 5V so we first need to change the power supply for something lower.
You will need
- Any Raspberry Pi but A+ is best.
- A wireless doorbell
- Soldering skills
- Twilio account
- The latest Raspbian OS
- Download all of the code
Building the project
You'll need to solder two wires onto the battery contacts for the push button unit. When pressed, the momentary switch connects the power to ground and effectively drops the current, changing the state of the unit from on to off and creating a trigger.
Using a multimeter, locate the correct pins for your unit and solder wires to them. For added strength use a hot-glue gun to keep the wires on the contacts. Attach the positive battery terminal to the 3V3 GPIO pin and the GND of the battery terminal to the GND of your Raspberry Pi.
On your momentary switch attach the button to pin 17 (Broadcom pin reference) and the other to the 3V3 GPIO pin.
You will need to create a Twilio trial account in order to send an SMS Boot your Raspberry and navigate to the terminal and type the following to install the Twilio API for Python: $ sudo w pip3 install twilio .
Sign up for breaking news, reviews, opinion, top tech deals, and more.

Open the Python 3 application via the Programming menu, create a new file and immediately save it as Doorbell-SMS.py. We start our project by importing the Twilio API, the time library and the GPIO library:
from twilio.rest import TwilioRestClient
import time
import RPi.GPIO as GPIO
Afterwards, we need to configure our GPIO to use the Broadcom pin-mapping, set up pin 17 as an input and set its built-in resistor to pull the current down:
GPIO.setmode(GPIO.BCM)
GPIO.setup(17, GPIO.IN, GPIO.PUD_DOWN)
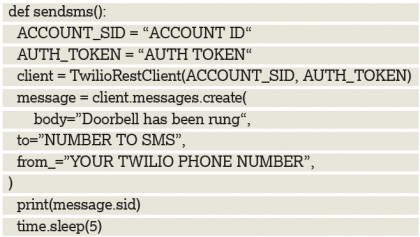
Next, we create a function that will handle sending a text message using the Twilio API. You will need to replace the account and token details with that of your own and change the to= and from_= telephone numbers to correspond with our requirements. Pay attention to the spaces before each line:

Our last section of code is a loop that will constantly go round. We look for the current on pin 17 to drop in the loop and when it does the function is called triggering an SMS being sent to your mobile:

Save your code and click on Run > Run Module to test.
External services
Working with external data sources and services is an exciting area to explore with your Raspberry Pi. There are many different sources, such as weather, astronomical and mobile communications data.
Data sources can be used as a method of input to trigger an event in the physical world, eg such as turning on a fan based on the current temperature or a data source can be used as an output, eg such as an air pressure changes log.
In this project we used the Twilio service to access SMS functionality through a Python API. Twilio is a cheap and robust service for projects and after the free trial ends it's pretty cheap to use at $1 charge per month and around $0.04 per SMS. Using Twilio we can go further and turn our simple IoD (Internet of Doorbells) into a truly powerful device with MMS (Multimedia Messages), which contain video and pictures captured by the Raspberry Pi Camera.
There are other SMS providers, one being www.smspi.co.uk, which itself uses a Pi to handle sending and receiving SMS messages and comes with 2,000 free SMS.