
 Become a TechRadar Insider


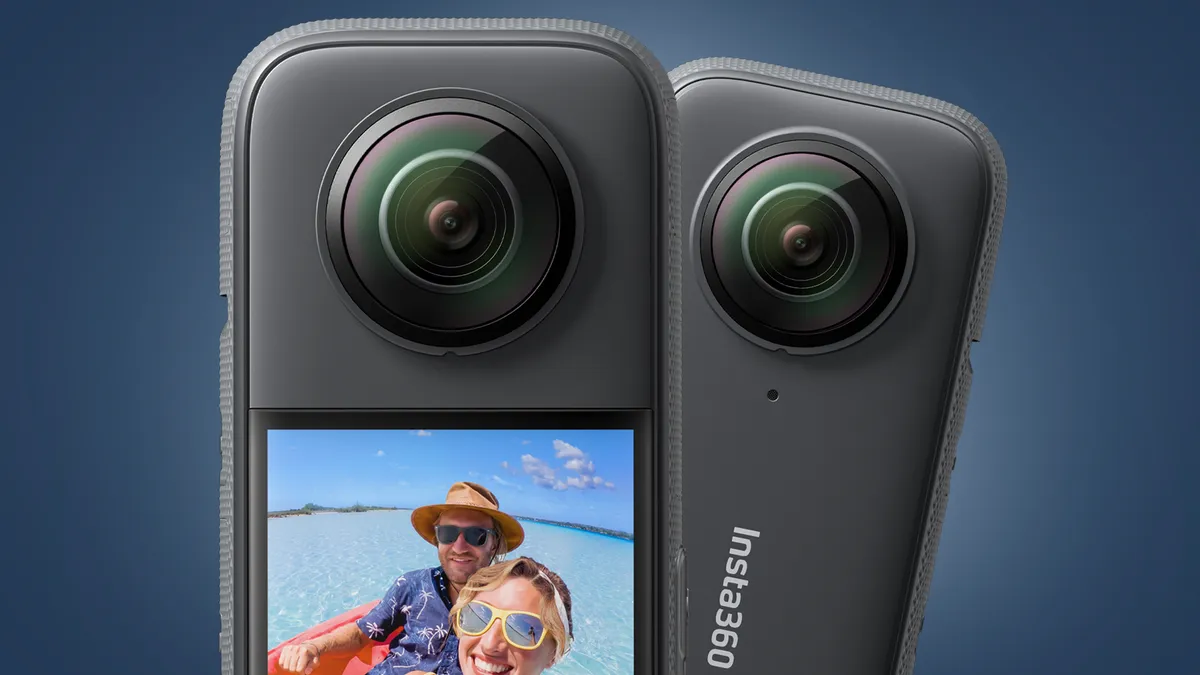
There was a time when 360-degree cameras seemed like a gimmick that'd never catch on; poor image quality and limited software were just two of the reasons why they seemed destined for fad status. But thanks to the likes of Insta360, the best 360 cameras are now some of the most versatile cameras you can buy. And if you've just received or bought one, you may be wondering how to get the best from it.
We've put together this guide to help you do just that. The key advantage of 360 cameras – being able to 'reframe' your videos during editing after they've been shot – is now pretty accessible and intuitive, thanks to the software and apps available from Insta360 and GoPro. 'Reframing' means choosing a video's camera angle or field of view after you've got back home.
But something that's less clear is how to maximize the image quality produced by these little cameras. Our tips below are a handy starter pack for anyone who's new to 360-degree cameras. Covering all the basics from how to hold a 360 camera to the best times to shoot, they also include more advanced pointers like plug-ins you can use to get more fluid movement in your videos.
While 360-degree video image quality isn’t quite as high as the best action cameras, these cameras do open up lots of creative and fun possibilities that aren't available anywhere else, even smartphones. And there are many ways you can make sure your 360 footage is the best it can be at the point of capture. Here's how to do exactly that...
1. Shoot on bright sunny days
Just like phone cameras, drones and action cameras, 360-degree cameras have small sensors. This means the video they capture always looks much more vibrant when shot on bright and sunny days. You can, of course, shoot around golden hour for softer and warmer light that will look fantastic, but shooting on dull overcast days will often result in lackluster video footage.
This goes against the grain of what you might call ‘standard’ video and photography, where softer light around golden hour is often preferable. But you have to play to the strengths of the kit you’re using – and for 360-degree cameras, that means brighter conditions are best. This is often ideal, because it’s more likely that you’ll use a 360 cameras on days out or holidays when the weather is typically good.

One of the challenges in these conditions is moving between bright light and shadow, which can play havoc with exposure if you’re shooting in manual mode. Shooting in manual mode is generally recommended for video, but there are downsides for 360 cameras. For example, when you expose for direct sun the shadows will clip, while exposing for shadows and highlights can see the mid-tones blow out and lose detail.
If you find yourself moving between darker and brighter areas or the light is changeable, it’s best to set exposure to 'Auto' to allow the camera to adjust accordingly and maintain correct exposure. Some cameras will also allow you to lock the white balance when shooting in Auto – if this is possible with your camera, it'll ensure color balance remains consistent despite shutter speed and sometimes ISO changing.
2. Change the default settings
Shooting in manual mode is usually the best option for video because it maintains consistency by having all settings locked. This avoids changes in shutter speed, ISO and white balance. That said, if you're moving through light and dark areas, 'auto exposure' with the white balance locked (if possible) is also a workable option.
One way to get a quick link to the correct settings for the conditions is to set the camera to Auto and then to Manual, which for most cameras keeps the Auto settings in place. Just make sure that ISO is set to 100, white balance to Daylight or 5500K, and that shutter speed is ideally double the frame-rate of the video.

For instance, if you're shooting at 30fps, the ideal shutter speed is 1/60 sec. The slight problem here is that few 360-degree cameras have ND (neutral density) filters to achieve the correct shutter speed for capturing natural movement, so in reality you’ll often have to shoot at a slightly faster shutter speed.
It's also best to make sure that video is set to the highest resolution possible. For example, for the Insta360 RS camera and 360 Lens we used above, that's 5.7K. Other important settings to change from the defaults are the Color Profile, Sharpening and Stabilization.
Set the Color Profile to Standard rather than Vivid for more natural colors, and Sharpness to Low, because High and even Standard settings apply too much sharpening that degrades image quality. Some cameras only apply stabilization in-camera, while others apply it in the camera editing software, so it’s safest to turn this on in-camera to be sure it’s applied.
3. Walk smoothly with bent knees
Electronic image stabilization (EIS) in modern action cameras and 360-degree cameras is nothing short of incredible these days. Jerky movements can be ironed out perfectly, but one thing that can’t always be removed by EIS is the up-and-down bobbing that occurs when we walk. This can ruin otherwise perfect footage, but it’s also one of the easiest problems to overcome simply by adjusting the way you walk.
When shooting video handheld using a 360-degree camera, or even when using a gimbal, it’s best to walk with bent knees to keep the camera level and as steady as possible.
The easiest way to describe how to walk is to imagine that you’re carrying two full glasses of water where the aim is to avoid the water spilling over the rims of the glasses. In this situation, you instinctively walk with bent knees and keep the glasses level, and this is the way that you should walk when shooting video handheld.
In public, you can feel self-conscious walking like this and you may get an odd look or two, but it’s worth it for the smooth and fluid video you’ll capture. Admittedly, it’s one of the harder points to remember when shooting, but the more you do it, the more instinctive it will become – you'll immediately see the benefits of doing so.
4. Lean on handy plug-ins
In an ideal world, you’d always be able to shoot using the 180-degree rule where the shutter speed of the camera is set to double the frame rate of the video. But with a wide field of view, many 360-degree cameras unfortunately don’t have ND filters available to help control that shutter speed. This means you’ll often be shooting at faster shutter speeds than the 'ideal' and the result is that movement will look unnatural and much more jerky than in the real world.
There’s little you can do about this at the shooting stage, but there is a video editing software plugin called ReelSmart Motion Blur ($109, around £90 / AU$164) that can be used to add blur to video footage that has been captured at fast shutter speeds. ReelSmart Motion Blur is available for Adobe Premiere, Final Cut Pro, Davinci Resolve Studio and many other software programs. Unfortunately, it isn't yet available for Adobe Premiere Elements, iMovie or other basic video editing software.
The advantage of ReelSmart Motion Blur is that it adds natural-looking blur to footage to provide a much more pleasing, and indeed natural look. And since keeping shutter speed under control with a 360-degree can be so difficult, an albeit pricey plugin is money well spent if you plan to shoot lots of 360-degree video. This software can also be useful for action cam footage if you don’t have ND filters, as well as adding motion blur to any video footage that needs it. You can even use it to remove motion blur if you need to.
5. Use a selfie stick
Selfie sticks aren't just for tourists. Whatever your feelings about the handheld monopods, they’re incredibly useful accessories – and for 360-degree cameras, they're an essential creative tool that helps you capture and create a variety of camera movements and effects.
Many 360-degree cameras render the selfie stick invisible, so you can capture videos of yourself walking without the stick being visible. And if you’re creative with how you hold the stick, such as resting it between your arms and a wall, or carrying something else with the end of the stick beneath it, it looks like a floating camera is following you around.

The creative possibilities are also endless. You can pull the camera through objects to add dynamic interest. The ability to shoot from a variety of viewpoints with the selfie stick extended, from the ground to overhead, is also super-handy. You can, for example, turn it into a drone by holding it high above your head, mimic a crane lift, spin around and much more. A photo accessory that’s often frowned upon is actually a 360-degree videographer’s best friend.
6. Make sure your subject is facing one of the cameras
360-degree cameras typically use two lenses to capture the view, with the two videos stitched together automatically in reframing software. You’ll notice that when you download footage, you’ll have two video files for every clip you shoot. The reason for making sure one of the lenses is facing the subject is that the stitch line can look a little strange – this can make a central subject look narrower than it should, with the middle of the frame being slightly distorted.
This is important for all shots, but more so for those where you’re filming yourself or a group of people around you, because the result looks slightly strange in the centre of the video. You can see this in the example video below, where the stitch line is obvious in the centre of the footage.
If you forget to position one of the lenses to face the subject, there’s nothing you can do during reframing or when editing clips together, except to change the direction of the camera – which defeats the purpose of shooting a specific subject.
If you do forget and the video is important, don’t worry about it and reframe the footage as you would normally. It’s always better to have something that’s not perfect than not have it at all, and it will motivate you to take extra care with lens direction in the future.
7. Reframing your videos
The magic of 360-degree video happens at the editing stage, when you load the footage into the camera manufacturer’s software to reframe it. Some video editing programs, including Adobe Premiere Pro and Cyberlink Power Director, can handle 360 video natively, while other might require a plugin from the camera manufacturer, if one is available.
But for most people, using the dedicated phone or desktop app from the likes of Insta360 is the quickest and easiest way to reframe footage. The clips can then be exported in 1080p or 4K in 16:9 format and edited together in standard video editing software.

Reframing is where you load the footage into the reframing software – here we used Insta360 Studio 2022. With this type of software, you can select the camera angle, change the field-of-view, add camera movements like spins and rolls and retime clips. This is achieved using keyframes where the field-of-view, distortion and camera angle (using pan, tilt and roll adjustments) can be adjusted. And with Insta360 cameras, stabilization can be applied in the software.
The way you shoot is still important, because good footage always provides a better result than poor footage. But the beauty of all this is that it’s in the editing where you can reveal the true potential of what you’ve captured. Not to mention, you can edit a single clip in multiple ways, opening up almost endless creative possibilities.
