Welcome to our guide on how to convert vinyl into MP3. There are many reasons why you’d want to digitize your vinyl collection and turn your LPs into MP3 files.
For a start, there’s the convenience of MP3. While nothing beats the feeling – and sound – of carefully taking out a vinyl album and placing it on a turntable, by having your collection in MP3 you can listen to it on the go, be it while driving or through your smartphone as you walk.
It’s also a great way of backing up your irreplaceable music, as it means you’re not risking scratching or damaging your precious vinyl every time you want to listen to a tune.
Article continues belowAlso, while streaming services like Spotify have made listening to music easier than ever, they don’t always have rare tracks. If you’ve got an eclectic taste in music, with rare vinyl that’s yet to be made available on other mediums, then converting the music you have on vinyl will be the only way to listen to those tracks on mobile devices.
What you need
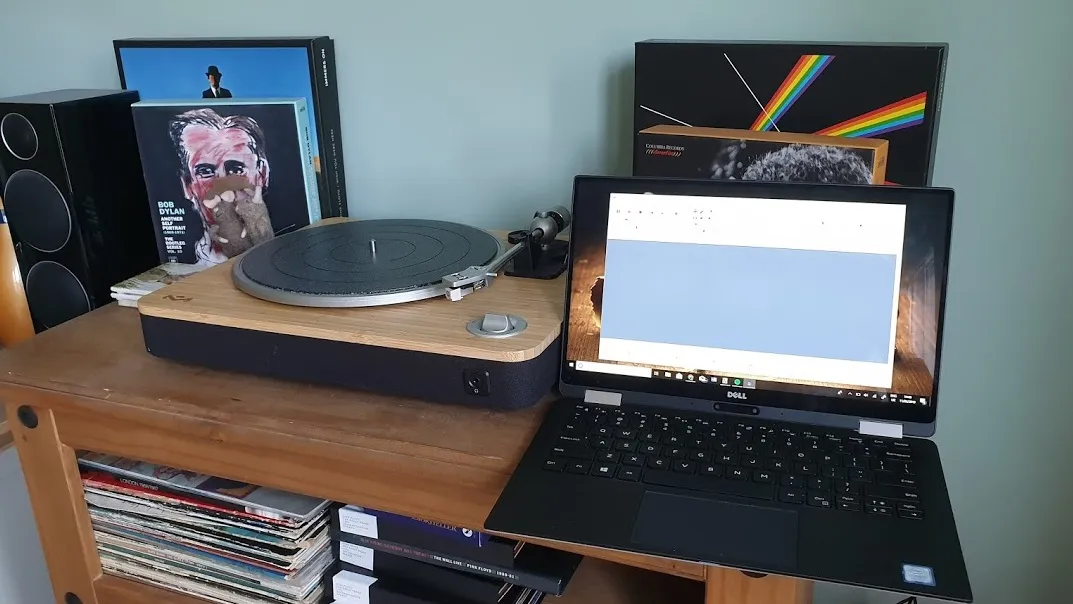
To begin converting your vinyl collection to MP3, there are a few things you’ll need to have. First, you’ll need a PC or laptop that’s got a USB port, or the very least headphone/mic jack. For convenience sake, a laptop is preferable, as it’s easier to set up next to your vinyl player.
You’ll also need the right cables to connect your computer to your vinyl player. These cables will vary depending on the outputs of your vinyl player. More on that in a moment.
You’ll also need software on your computer that will record music from your vinyl player and save it as an MP3 or other digital music file. For this tutorial, we recommend Audacity, which is a free application that can be used to record audio and save it digitally. Although it’s free, it’s got some decent features that will help you split the tracks (rather than just having one long audio file per side of vinyl) as well as tidy up the recording by reducing crackles and other unwanted sounds.

If you want a more powerful application that specializes in converting vinyl to digital, you could try Pure Vinyl, which has been designed specifically for the task. This makes the process easier, as it has some nice features such as automatic pop and click removal and track splitting. It is expensive, however, at $379/£300/AU$556, which means it is probably only of interest to people with huge vinyl collections.
Finally, you’ll also need a vinyl player. There are many modern vinyl players which come with a USB output for connecting to a PC and digitizing the music. This makes things much easier, as your PC will detect the turntable as an audio input source, and there shouldn’t be any need for pre-amps.
There are some budget vinyl turntables with USB ports, and while these are fine for quick and easy conversions, if you want to use the turntable for playing your albums at a decent sound quality, you’re better off spending a bit more on a better quality turntable.
That’s why for this guide we’ve picked the House of Marley Stir It Up turntable. Not only does it has a USB output, but it features excellent sound thanks to its high quality components. This includes an Audio Technica AT3600L cartridge. This offers superior sound to the cheaper turntables, and it can be replaced and even upgraded. Most budget USB turntables don’t have a removable cartridge, which means if the needle gets damaged, the turntable is useless.

The House of Marley Stir It Up turntable also features RCA photo outputs for connecting it up to other Hi-Fi equipment, and a pre-amp for using it with non-powered speakers.
It also looks fantastic, and is built with recycled and sustainable materials, which makes it ethical as well. There’s a lot to like with this turntable, and it suits our needs perfectly for converting vinyl into MP3.
If you have a vinyl turntable that doesn’t have a USB output, converting your music to MP3 is still possible, though a bit more tricky. You’ll need to plug in your turntable into your PC using audio cables, connecting the output of your turntable to the audio in your PC. Most PCs and laptops have an audio in jack that’s used for microphones.
You’ll need to make sure your vinyl player’s volume is set correctly. Too high, and the audio will be recorded with distortion, too low and your music will be difficult to hear. Test the audio before you begin.

1. Getting started
Converting a vinyl album to digital MP3 files can be a time-consuming process. This is because you need to play the tracks in real time, so a five minute song will take five minutes to record. Because of this, if you have a large vinyl collection, it could take some time to convert it all.
However, there are certain things you can do to make this process easier. First of all, make sure the albums you’re converting are clean and free from scratches. Also make sure that the needle of your turntable is free from dust, and it’s set to the right speed. You don’t want to spend all that time converting your music to find that it keeps skipping, or the audio quality is affected, due to dust.
Next, make sure you’ve got the software you need installed, and set up your PC or laptop next to your turntable. If you’re using a laptop, it’s a good idea to make sure it’s plugged in, so it doesn’t shut down while converting.
Also make sure you have enough storage space on your hard drive. Before converting the recorded audio to MP3, your computer will need to hold the audio as an uncompressed audio file, which can be quite large, especially with long albums and songs.

2. Connect the turntable to your PC
Now, you’ll need to hook your turntable up to your PC. If the turntable is USB-equipped, simply plug it into the USB port of your laptop and turn it on. Your laptop should recognize your turntable as an audio input.
If it doesn’t, make sure you visit the website of the manufacturers of your turntable and download any necessary drivers. They should be listed in the ‘support’ section of the website.
If your turntable does not have a USB connection, then connect the output of the player to the audio input of your PC. Check the manual for where you can find this on your PC.

You should also check the volume levels. In Windows, right-click on the icon of a speaker in the task bar and select ‘Sounds’. A new window will appear and click on ‘Recording’ and make sure ‘Microphone’ or ‘Line in’ is selected, depending on where you plugged in the audio cable from your turntable. With the right input selected, click ‘Set Default’. You’ll see a sound bar appear next to the name.
Now, try playing a vinyl with the turntable connected. If the sound bar remains green (or you can hear through your PC’s speakers that the sound levels are right), then you can leave things be. If the sound bar turns red, or your speakers play music that’s too loud (or too quiet), then click ‘Properties’ then select the ‘Levels’ tab. Lower the volume until the playback sounds correct.
If the audio from your turntable is too low, then you may need to make sure the pre-amp of your turntable is turned on.

3. Setting up Audacity
With the turntable connected to your PC, load up Audacity (or the software you’re using to record). You’ll now need to make sure that Audacity will record from the correct input. In the toolbar at the top of the screen, you’ll see an icon of a microphone, with a drop-down list box to the right of it. From there, select your turntable or input device.
It’s worth noting that your turntable may not appear by its correct name. In our example, the House of Marley Stir It Up turntable was listed as ‘Microsoft Sound Mapper – Input’. Because we made sure the turntable was Window’s default audio input in the previous step, this meant Audacity used it as the audio input.
Now, it’s worth doing a quick test run. Press the big red ‘Record’ button in Audacity, then set your turntable to play your vinyl. As Audacity records, you should see an image of the audio being recorded (known as a waveform image). If this waveform correlates to the music you’re playing, then it means you’ve selected the correct input. If the waveform remains a flat, straight, line, then you’ve selected the wrong input.
If the waveform looks correct, let Audacity record for a minute, then press the ‘Stop’ button in Audacity’s toolbar. Next, stop the vinyl from playing, then click the ‘Play’ button in Audacity and listen to what you recorded. If everything sounds correct, move on to the next step. If not, tweak the levels either in Windows or in Audacity and try again until the music sounds correct.

4. Recording from vinyl
Now you can begin recording your vinyl properly. Before you start, it’s worth making sure that you’ve set Windows to ‘Quiet Mode’ or ‘Focus Assist’ in the notifications menu (click the icon of the speech bubble on the taskbar to open the menu). This will prevent Windows from playing any notification sounds which could also get recorded depending on how you’re recording the audio.
Start Audacity recording, then begin playing your vinyl. You can now leave it to record the first side of the vinyl you’re digitizing. It’s worth keeping an eye on the process, however, to make sure everything is going well.
An average length for a side of vinyl is 25 minutes, so make sure you check to see when your vinyl stops – as Audacity will continue to record. Also, be careful when walking near the turntable as it records, as you don’t want to make it skip in the middle of the track!
Once the side has been recorded, press the ‘Stop’ button. It’s now worth saving your recording as an Audacity project. This doesn’t make it into an audio file you can play in a media player, but it means you can edit the recording in Audacity.

5. Editing the recording
Audacity will record the whole of the side of vinyl as one track. If there are multiple songs, you’ll want to split the track where appropriate into separate songs. Using the waveform image, you should see where each song begins and ends, with gaps where silences are between the songs.
If you have an album where songs fade into each other, or it’s a live album with audience applause between tracks, this is a bit more difficult, so you’ll need to play back your recording to find the different songs.
Click in the gap between the first and second song of the album and you’ll see a line run vertically through the waveform. Now go to ‘Edit’ in the menu bar of the program, scroll down to ‘Clip Boundaries’ and select ‘Split’.
Do this for the rest of the tracks on the album.
Now, double-click the first track to select it, then press Ctrl + C to copy it. Then, press Ctrl + N to begin a new Audacity project, then Ctrl + V to paste the selected song into the new project.

With the first song, you’ll notice that there’s probably a long silence at the beginning where you set Audacity to record, then turned your turntable on. You can shorten this by splitting the track at the end of the silence (just before the song begins), then double-clicking the part with the silence in it and pressing the delete key on your keyboard.
You can also take this opportunity to use some of Audacity’s tools to clean up any noise issues with the track. A handy tool is 'Click Removal'. Go to 'Effect' then select the tool, and have a play about to remove annoying clicks in the recording.

6. Add metadata
In the next screen, you’ll be asked to add metadata for your MP3. By adding the album and artist name and genre of the song, along with the song title and track number, it will make your music collection easier to organize.
If you add the artist name, album name and genre, you can then save it as a template so those details can be easily added for all the songs on the album. This can save you time later.
Once done, click OK to convert the track to MP3.
Now you can repeat the process for every track on that side of the vinyl. Once done, you’ll then need to record the second side following the same process.
It’s time consuming, but in the end you’ll have a digital version of your vinyl in MP3 format to be played on a large range of devices.
- Best turntables 2019: the best record players for any budget
Image Credits (unless otherwise stated): TechRadar
