PC case modding: a beginner's guide
Getting started on your first mod - painting, cutting and more
Sign up for breaking news, reviews, opinion, top tech deals, and more.
You are now subscribed
Your newsletter sign-up was successful
Learn how to add extra airflow with a 120mm blow hole and radiator mounting point
Don't be put off by the scale of this job, it's fairly easy and straightforward using a limited amount of tools. There are plenty of websites that offer templates for 120mm holes right up to 480mm radiator templates.
I have found that the Mnpctech website offers a download of pretty much all fan size cutting templates. We're going to cut a 120mm hole into the base of the chassis for a corresponding fan or radiator mounting holes.
An entry level water cooling system is going to be fitted into the chassis, but whether you decide to water-cool or stay with air cooling, an extra blow hole is a good addition to any PC chassis for extra air flow.
The tools required are an array of different-sized drill bits, a cordless or corded drill, several files, a hacksaw blade, masking tape and a pencil.
Again, I can't stress enough the importance of self preservation when drilling and cutting metal. Eye protection must be worn when cutting metals of any kind. Fast spinning drills have a habit of ejecting small shards of metal filings sometime not visible to the naked eye.
I can tell you from experience it's far better to wear goggles for three minutes rather than spending three hours in your local A&E department.
Sign up for breaking news, reviews, opinion, top tech deals, and more.
One other consideration is the tools used to complete the cutting of the blow hole. The main part of the hole can either be cut with large hole cutters found in most DIY stores or a Dremel of some kind. I'm going to be using a series of different-sized drill bits and hacksaw to cut my 120mm blow hole.
1. Day O, day-ay-ay O, daylight come and me wan' drill a hole
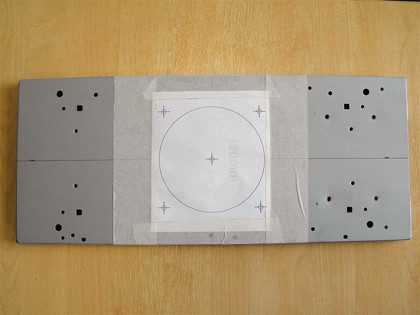
Draw a centre line to work from on the panel you've chosen for the 120mm blow hole. Using the template you've downloaded from www.mnpctech.com stick it to the panel and align accordingly. Getting this part 100 per cent correct is pretty much paramount to the next stage of the operation .
2. Day, me say drill, me say drill, me say drill
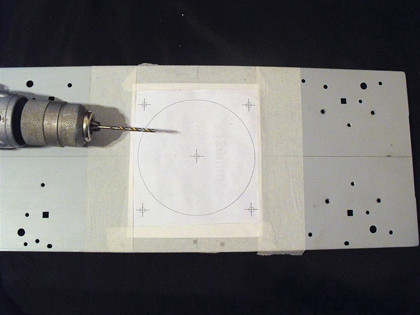
Once the template is securely fixed to the panel, we're now ready to mark the position of the four screw holes and centre hole with either a centre punch or by using the drill and 3mm drill bit. The hole centres are important to get right so take your time in getting this placed on the panel correctly.
3. Daylight come and me wan' drill no more
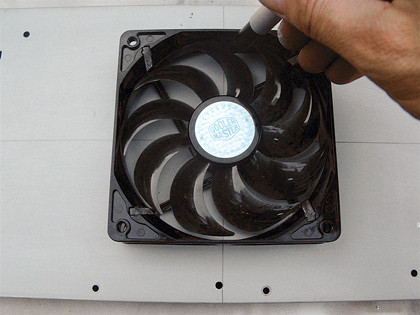
Five holes now drilled, I've opted to bolt a 120mm fan to the panel and draw around the internal section of the fan body. This allows me to be confident that the hole I'm about to hack out of the panel is a good fit against the fan itself. I don't want to leave any unwanted gaps between fan body and the panel.
4. Come Mister Tally man, tally me a nice cut hole
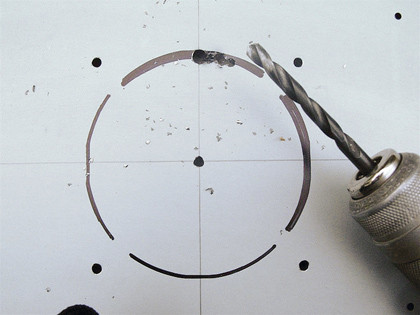
I've carefully drilled a couple of large holes first starting with a 3mm drill moving up to a 13mm drill bit. This allows me to pass the hacksaw blade through the hole easily and start cutting away. The hacksaw blade has just enough flexibility to cut around the radius of the marked out 120mm hole.
5. Come Mister Tally man, tally me a tidy hole
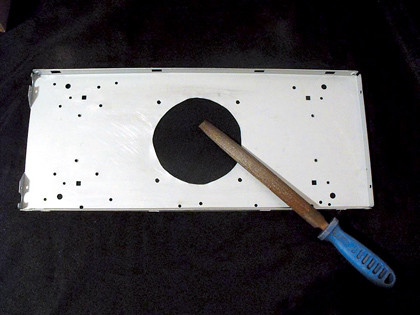
After the cutting is completed I've gone onto use a half-moon shaped file and spent some time to tidy up the edges all around the 120mm hole. If required remove the masking tape from the panel and bolt the fan back in place to check whether more of the panel material needs to be removed or not.
6. Daylight come, filed 'n' sanded now me wan' go home
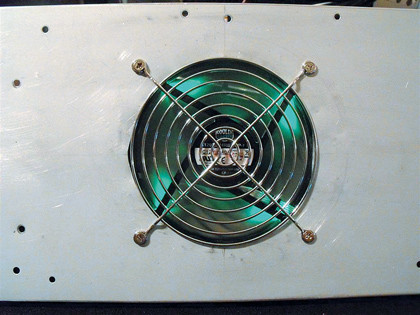
Once you're happy that the hole has been maximised without leaving any unwanted steel in situ, position the fan body. Run around the hole to remove any sharp edges of filing marks with something like 320 grit sand paper. You should now end up with something that looks like the image above.
Current page: PC case modding: Blow holes 'n' rad holes
Prev Page PC case modding: Colour Next Page PC case modding: Bling that box