iPhoto: the ultimate guide for Mac and iPad
Master iPhoto on OS X and iOS

Sign up for breaking news, reviews, opinion, top tech deals, and more.
You are now subscribed
Your newsletter sign-up was successful
No photo is perfect straight off the camera. Whether you need to brighten an outdoor scene, sharpen up a smile, or crop out other holidaymakers on the beach, a few quick edits can work wonders. And you don't even need a heavyweight program, such as Photoshop, for this (having too many options can work against you if you don't know how to apply them, anyway).
iPhoto makes editing your images easy. On the Mac, everyone gets a free copy of it, and while you do have to pay extra for the new iOS version (£2.99), it's now possible to get the same controls in a touch-friendly way, but you will need at least an iPad 2/iPhone 4 to run it. If you're behind the technology curve here, check out other tools, such as Luminance or Snapseed for mobile editing. Over the next few pages, we'll show you how to use iPhoto to the full.
Most images follow the same basic workflow - correct the lighting, correct the colour, then use more specific brushes to paint effects like red-eye removal and extra sharpness directly onto your photo. None of this is tricky, though it does take practice to work out how far you should go. In most cases, less is more, and too much processing in the name of brightness and saturation can look worse than the original unedited version.
With a few simple tweaks though, any photo you take can be ready to take pride of place on your wall.
Use iPhoto on your Mac
Let's start by looking at how it works on your Mac
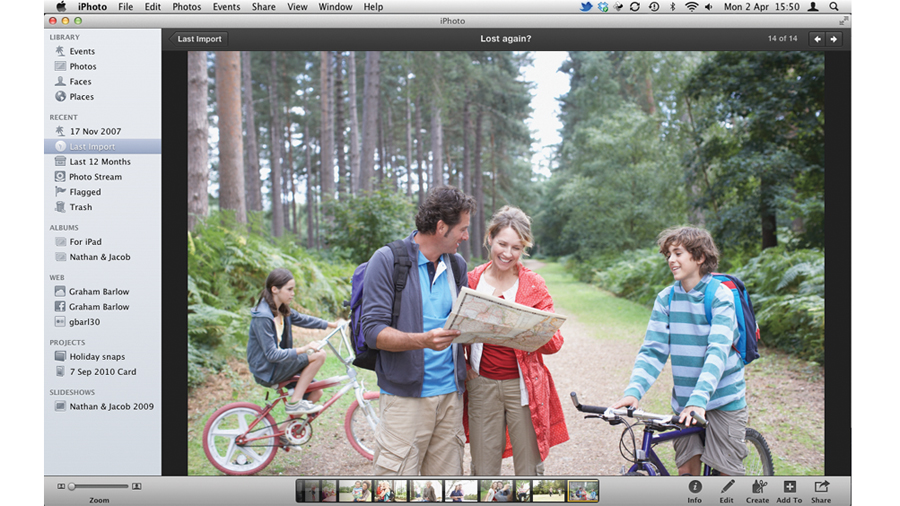
Apple's iPhoto is perhaps the most used of the iLife apps, and it's far more powerful than any photo program that's ever been bundled with Windows. The main interface change sees the predominant use of fullscreen views, enhanced email and Facebook integration. There's some new slideshow effects too.
Once your photos have been imported into iPhoto's library, there's so much you can do with them. You can create albums, pin your photos to a map, have iPhoto pick out the faces from your shots and, you can even show all the photos in which particular people appear - ideal for organising your family shots into useful folders.
Sign up for breaking news, reviews, opinion, top tech deals, and more.
It's also an accomplished photo editor. iPhoto hasn't got the power of software such as Photoshop - and you won't be using it to create rich photo montages - but it does a brilliant job of correcting poorly exposed shots and giving your images a polish. And what makes it more attractive for most photographers is that it's fast and friendly to use, with major features built-in.
When you're done, you can use iPhoto to share your pictures. You can publish them to online galleries or produce stunning photo books and calendars. iPhoto '11 makes some great improvements in this area, including the ability to create letter-press cards.
Perform some basic edits
Straighten up and improve your shots with just a few clicks
With the best will in the world, not every photograph that you take will be a prize-winning masterpiece. Almost any photo can be improved with more creative cropping, adjustment of exposure, tweaking of colours and removing nasties such as red-eye from a camera's flash.
But iPhoto's editing controls aren't just for photographic mistakes. For example, there's a handy Re-touch tool that can conceal spots, blemishes or just things that you don't want in the photo. In fact, iPhoto can handle many of the tasks that a professional image-editing program can, although you can still use one if you prefer.
If you do a lot of editing, you can choose to set up iPhoto to make it quicker and easier when you're sorting through your photos - the step-by-step guide below shows you how to do this.
The basic editing tools iPhoto offers are Rotate, Crop, Straighten, Enhance, Red-eye and Retouch. There are also panels called Effects and Adjust, which we'll discuss in detail later. With these few Quick Fixes, it's easy to make edits.
How to get started with edits
1. Get started
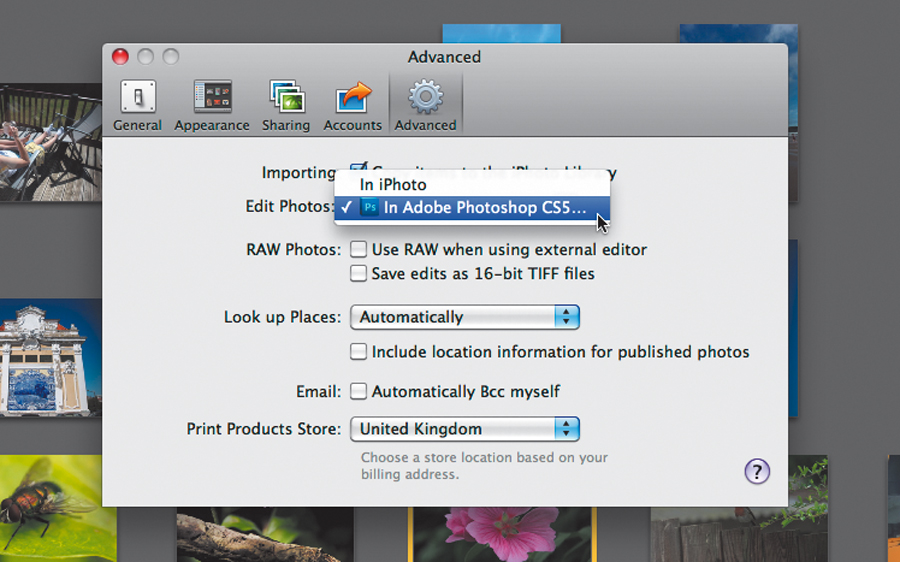
iPhoto is not your only option. If you're a Photoshop pro, for example, then you might prefer to do your edits in Photoshop. If you'd like to do this you can set up Photoshop to open whenever you edit a photo. In Preferences, go to Advanced and choose a new photo app.
2. New editing options
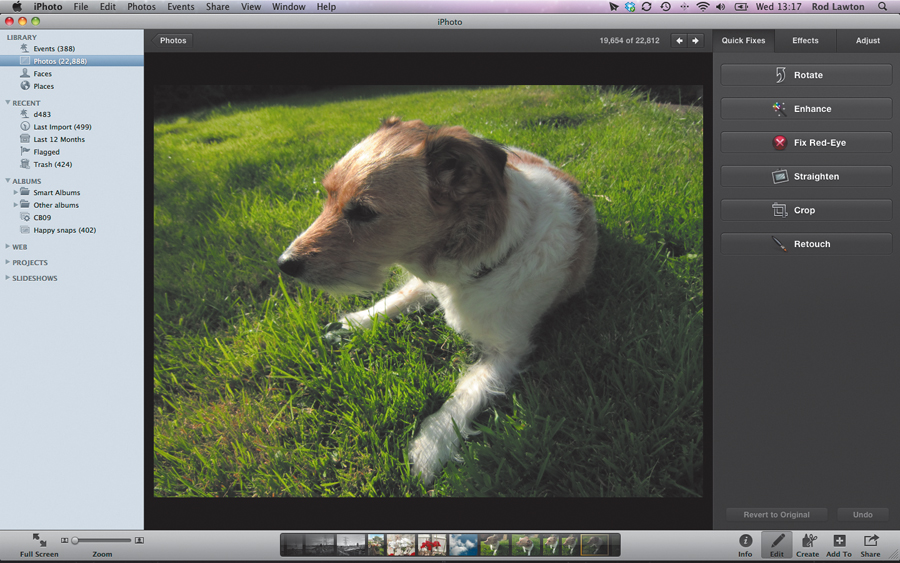
The editing controls have changed slightly in iPhoto '11. Instead of being in a floating panel, they are now part of the interface, so select a photo and click the Edit button at the bottom of the iPhoto interface. The Edit panel appears, showing Quick Fixes, Effects and Adjust tabs.
3. Go full screen
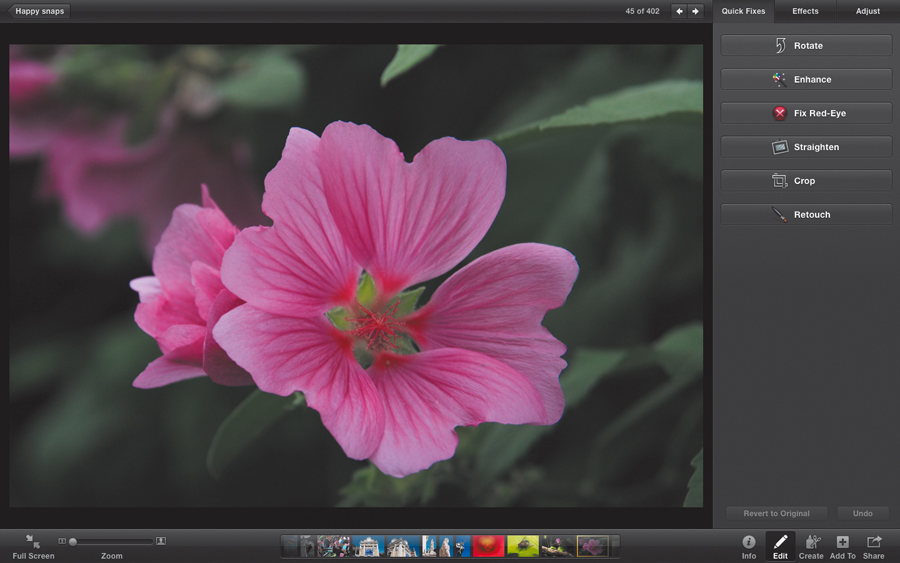
The best way to edit your photos is in Fullscreen mode; that way you see more of the image. Press the Fullscreen button at the bottom left of the interface to enter this mode. Some menu options aren't available in Fullscreen mode, but you can easily pop back out.
4. Removing red-eye
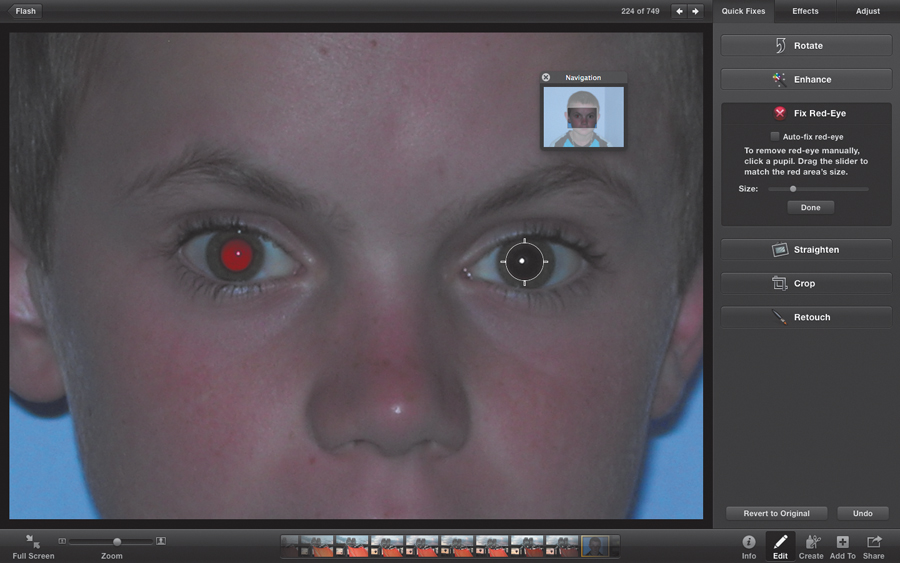
Removing red-eye is a common photo edit. Just click the Remove Red-Eye button and make sure the Auto-fix red-eye option is ticked. Or you can click on a pupil using the pointer. Change the size of the circle in which iPhoto will remove red-eye using the slider.
How to edit and enhance photos via simple steps
1. Rotate a photo
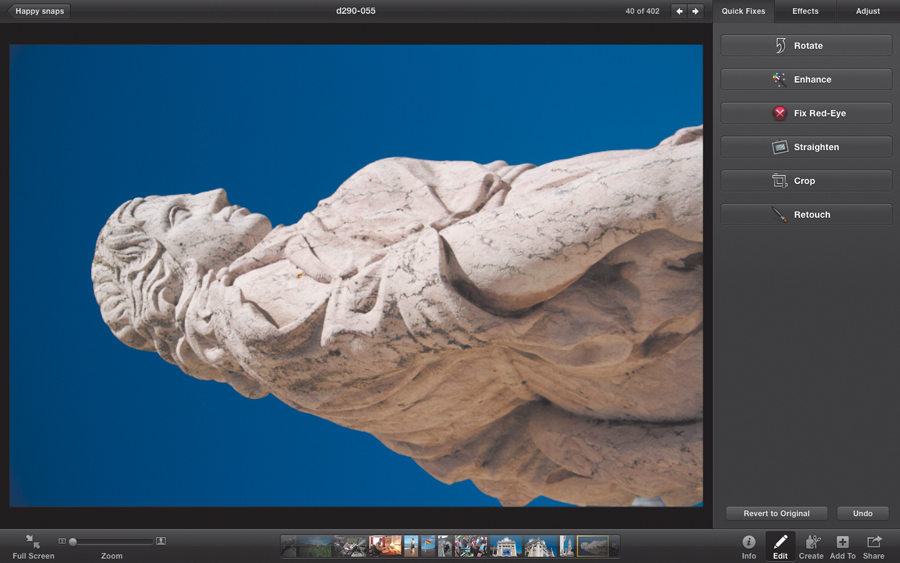
If you have vertical shots that haven't rotated automatically, use the Rotate button in the Quick Fixes panel. It turns a photo 90 degrees. By default, the tool rotates anti-clockwise, but you can change this in Preferences>General, or hold Option before you click Rotate.
2. Straighten up
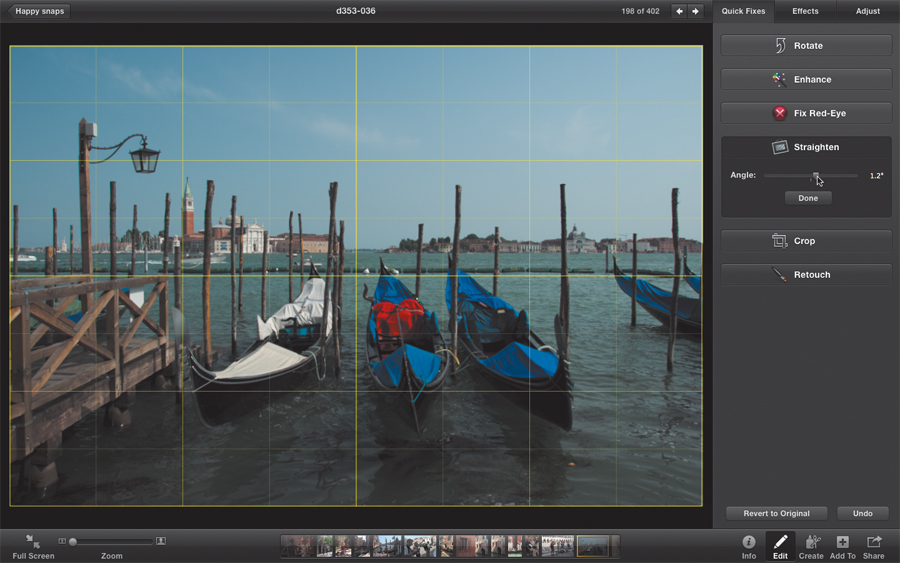
Wonky shots can stick out like a sore thumb, especially if you have a picture with a slanting horizon. Just select the Straighten tool and move the slider. A handy grid helps you to get things straight. An adjustment of 1.2 degrees is all that's needed for our pic.
3. Enhance
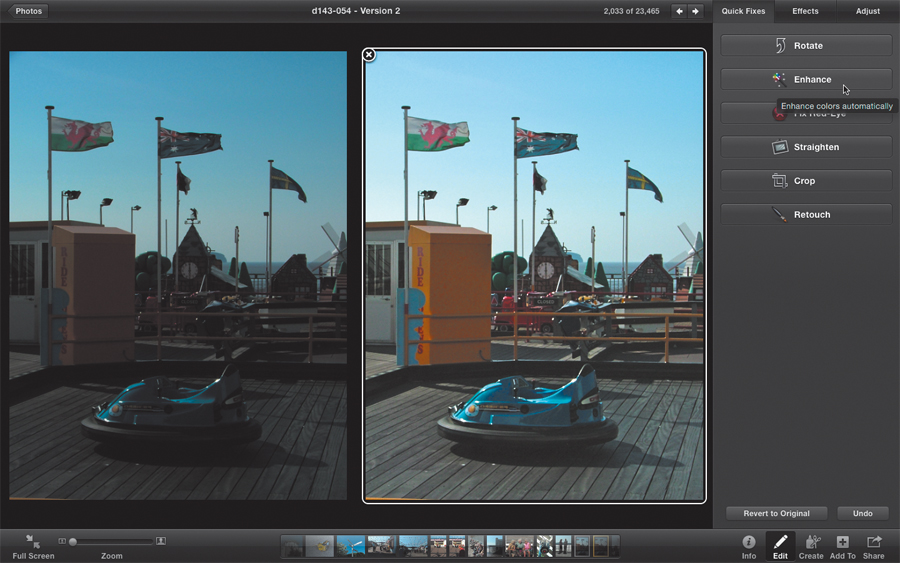
If your shot wasn't perfectly exposed, iPhoto has the Automatic Enhance tool. While it doesn't always work out - you can press Command+Z to reverse the tool - it does a great job in most cases. The photo on the left is the 'before' shot, and the one on the right has been well enhanced.
4. Touching up
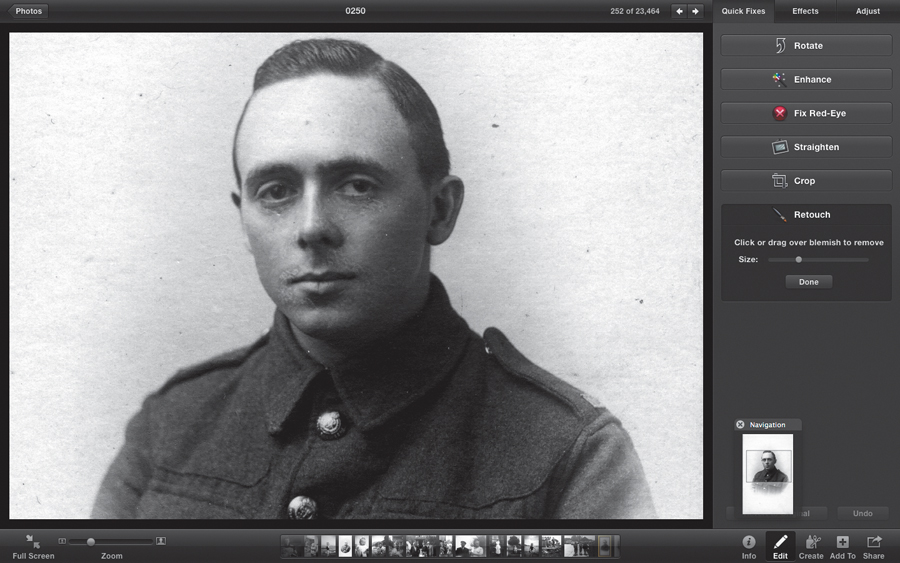
To retouch a photo,first select the Retouch tool and drag the slider until the brush size is slightly larger than the blemish you want to remove. Now dab on the picture to remove dust spots and marks, or drag to remove scratches or tears. To view the original, hold Shift.
5. Compare shots
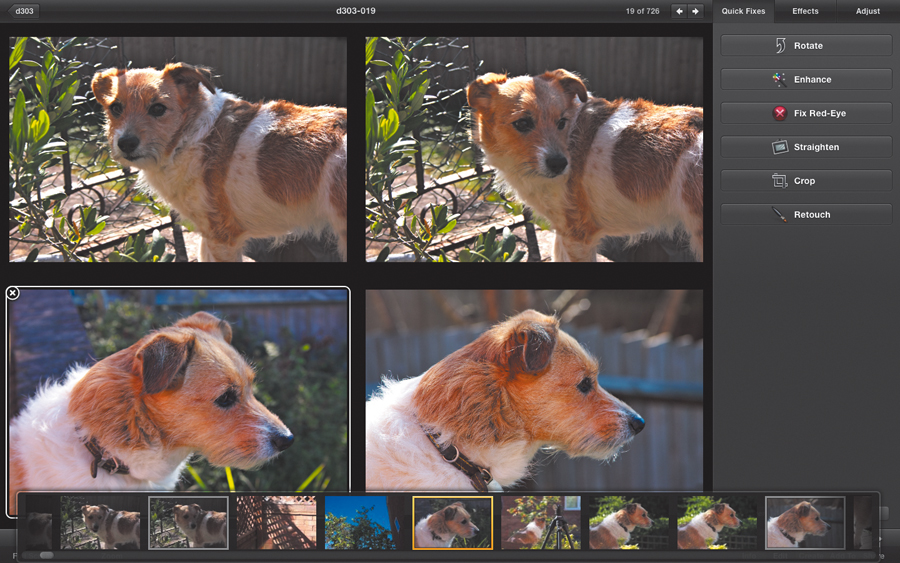
If you can't decide between shots that are similar to each other, you can compare them directly. Select the photos you want to compare next to each other and click the Edit button. You can click on any of the photos to make adjustments while you're choosing.
6. Oops!
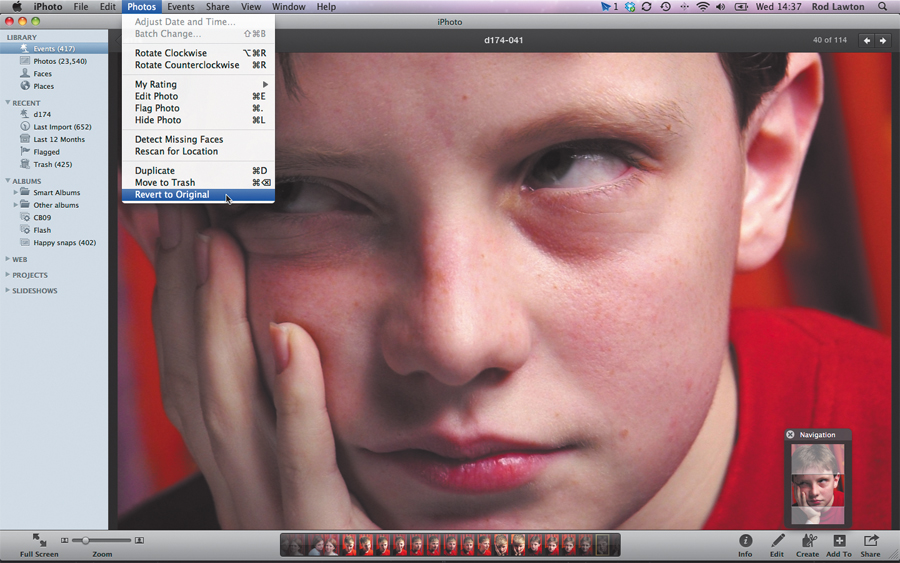
If you go wrong, press Command+Z to undo an action. You can also revert to the original photo even after you've exited the Edit mode by choosing Revert To Original from the Photos menu. iPhoto is a 'non-destructive' image editor - your original photo is always preserved.
Enhance colours and more
Create balanced and vibrant-looking colours in your shots
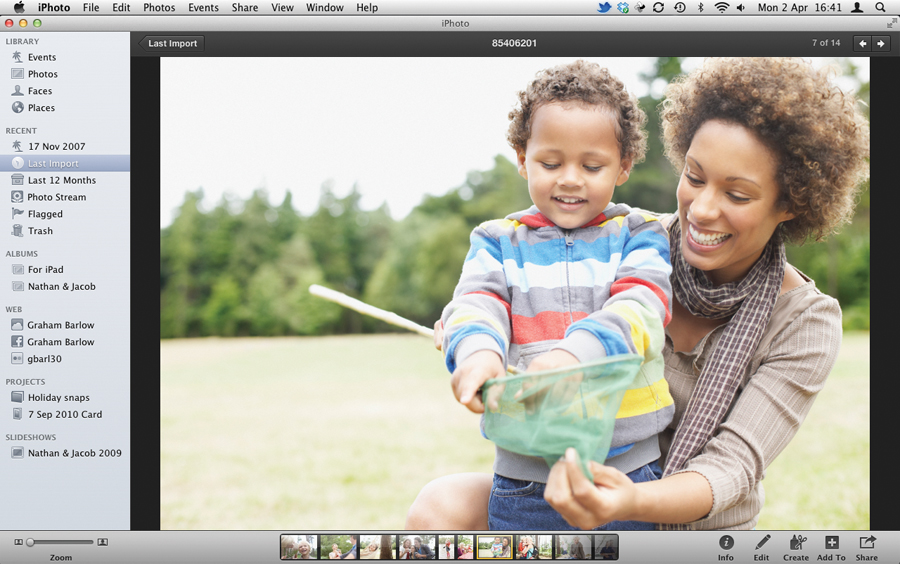
Most digital cameras have a variety of shooting modes such as Portrait or Landscape, where the camera processes a shot's colours to flatter the subject matter. Portrait mode increases the saturation of most colours to create vibrant-looking clothing, but without boosting warm colours that makes skin look orange. In contrast, Landscape mode boosts natural-looking blues and greens.
If you shoot in Raw format then the shot's colours will remain fairly faithful to the original scene, but you can boost the Raw photo's colour saturation in iPhoto to create more vibrant and attractive colours. We show you several colour-boosting techniques below.
Your camera also has a White Balance setting that can dramatically alter the colours in a scene. This is important because to a digital camera, indoor light is warm (orange), while outdoor light is cold (blue). The White Balance setting picks what it thinks is a neutral grey, and then cools or warms your shots to banish the oranges and blues and create more natural-looking colours. Sometimes, it makes mistakes, so we'll show you how to correct colour tints, as well as boost the shot's colour saturation.
How to create more vibrant colours
1. Quick Fix

The fastest way to boost colour is to click Edit and go to Quick Fixes. Click the Enhance button. iPhoto analyses the shot's colours and tones and make adjustments automatically. It will increase contrast for a range of tones and boost colour saturation.
2. Special effects

To take manual control of your colour enhancements click Effects. Click Saturate to boost the colours in your shot. Press Shift to switch between the original and the colour-boosted shot. You can also enhance tones using Contrast, or use Revert to original.
3. Boost
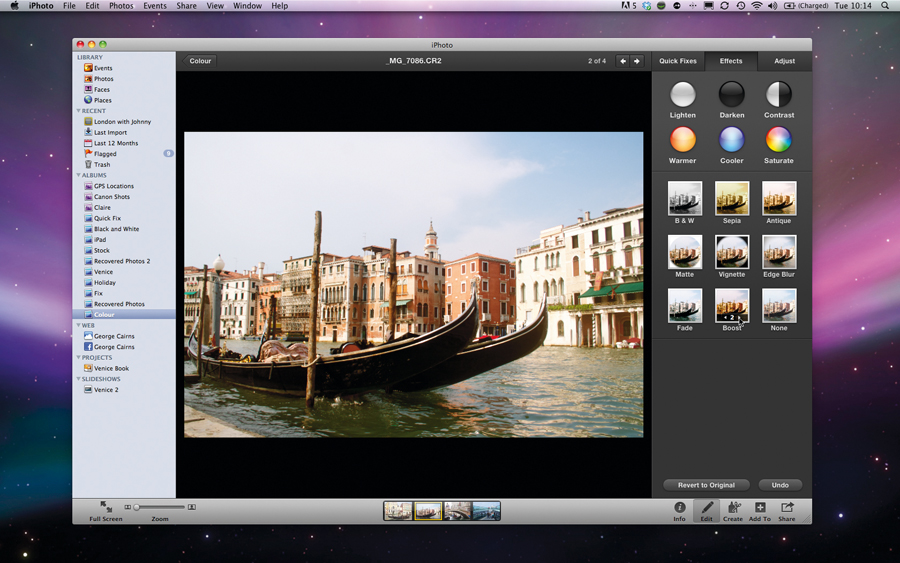
The Effects palette is another way to boost colour saturation and contrast. Click Boost and the shadows get darker and the colours more saturated. You can click the Boost icon's arrow keys to increase the intensity of the adjustments. Click None to undo.
4. Adjust
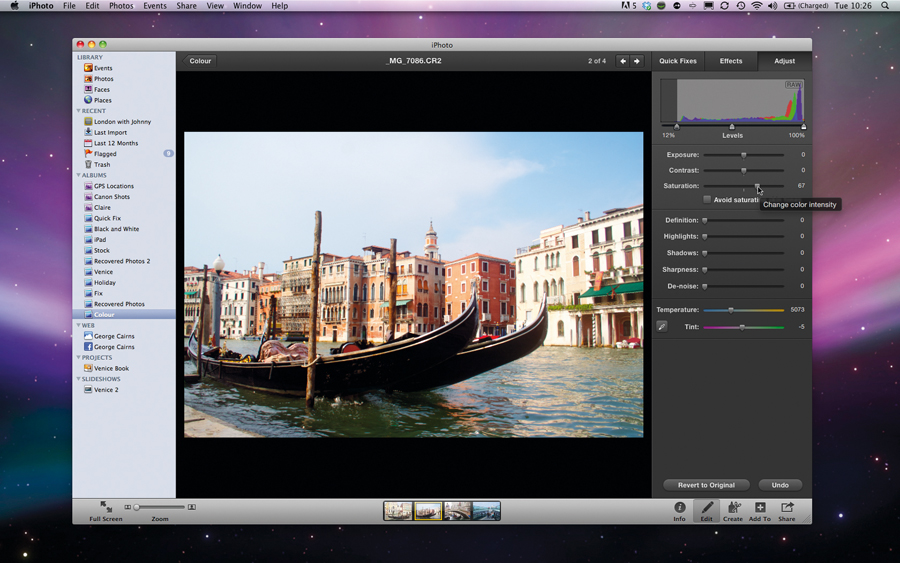
For more advanced colour-boosting click the Adjust tab, and use the sliders to create brighter highlights or blacker shadows. To target and enhance colours drag the Saturation slider to the right. If you have people in the shot tick the Avoid saturating skin tones box.
5. Colour temperature
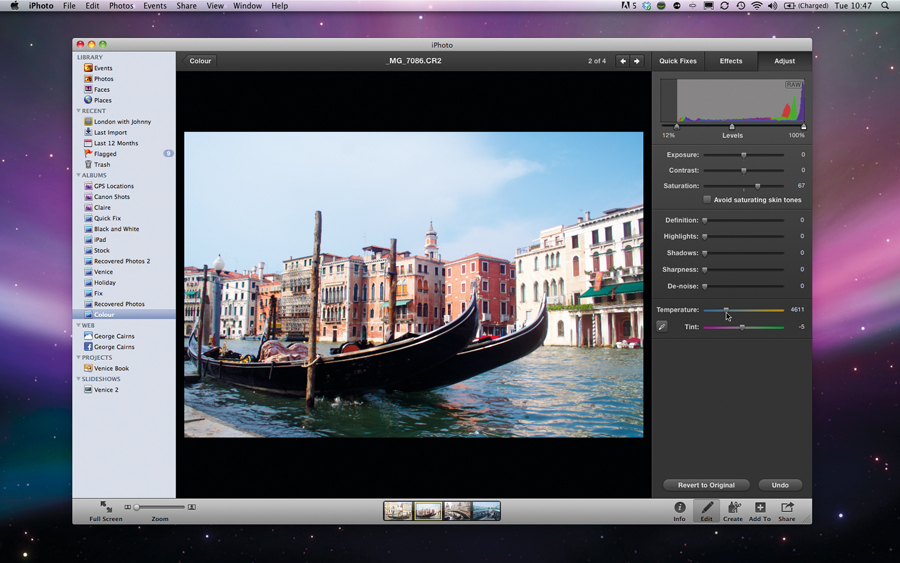
Our start image is a little too warm (orange) - dragging the Temperature slider left, to around 4611, cools the colours down. This is a creative use of colour balance, but many shots need a tweak for more natural-looking colours; there are several ways to do this.
6. Warm it up
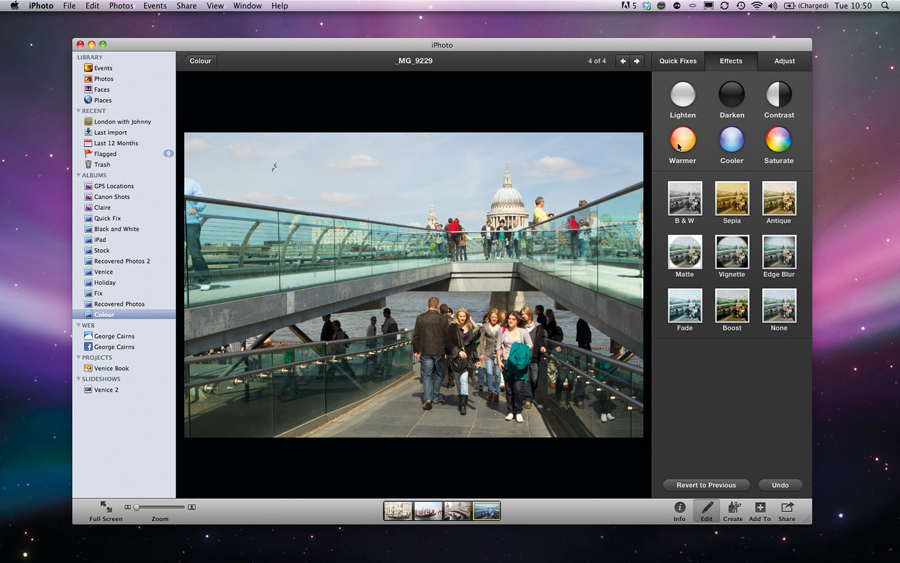
If your camera's White Balance setting is incorrect, your shots may suffer from colour tints. The picture above has a blue colour cast. A way to warm it up is to click on Edit, then pop to Effects. Click on the Warmer icon to banish the blue cast and create a healthier range of colours.
7. One-click wonder
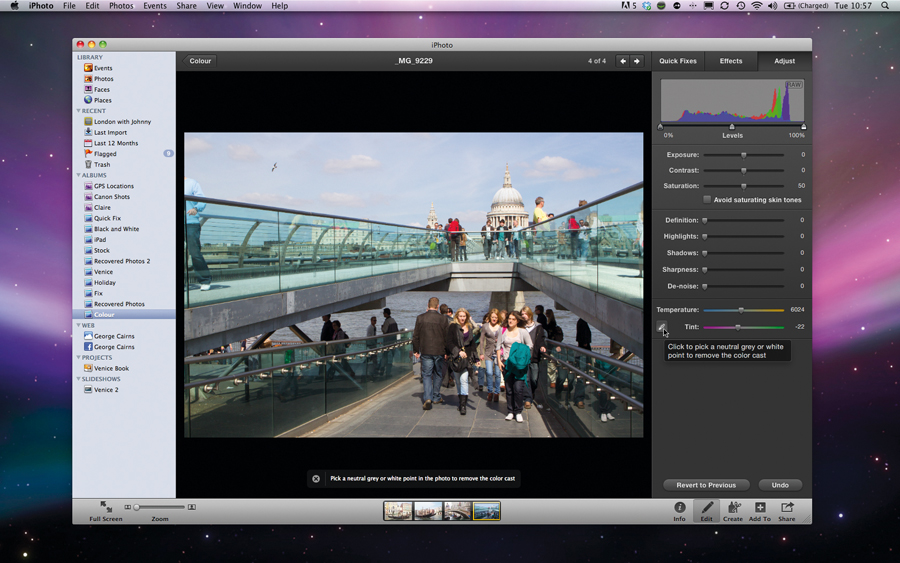
For precise control of colour temperature click the Adjust tab; to warm up a cold-looking shot drag the Temperature slider to the right. Or grab the Eyedropper tool and click on an area that should be white. iPhoto will warm up or cool down the area to remove any colour casts.

Rod is an independent photographer and photography journalist with more than 30 years' experience. He's previously worked as Head of Testing for Future’s photography magazines, including Digital Camera, N-Photo, PhotoPlus, Professional Photography, Photography Week and Practical Photoshop, and as Reviews Editor on Digital Camera World.