Back up your Mac: the complete guide
What you need to know about Mac backups
Sign up for breaking news, reviews, opinion, top tech deals, and more.
You are now subscribed
Your newsletter sign-up was successful
You never forget the first time your hard drive dies and you realise that you haven't backed up. The horrible, stomach-turning moment when you know you've just lost a whole bunch of stuff that's irreplaceable. Photos. Music. Videos that you took at family events. All gone.
You'll probably spend the next few hours sweating, downloading disk utilities and searching for boot disks to try and fix things. Perhaps you'll get lucky and be able to kick your drive back into life. Or perhaps everything will be gone, completely, for good. And it could all have been avoided.
You could have been sitting back relaxing, sure in the knowledge that everything was safely backed up - on another disk, or online. You could simply have reformatted your drive, restored everything from your backup, and picked up where you'd left off.
Then you would have grabbed a cup of tea, put your feet up on the desk, and felt mildly inconvenienced - rather than manically swearing at your Mac.
Let's face it - backup sounds particularly dull. But without it, that scenario of losing everything is a distinct possibility. In this feature we're going to look at different ways to ensure you're well backed up, without having to devote hours of time and effort to getting it sorted.
We're going to take you beyond the basics, and ensure that no matter what happens to your Mac, you're covered - and won't be left losing files that you can never get back.
Why you need to back up
Most of us use hard drives every day, without realising what an amazing piece of engineering they are. Inside every hard drive are a number of extremely thin circular platters, made from glass or ceramic material, spinning at 7200rpm or more.
Sign up for breaking news, reviews, opinion, top tech deals, and more.
Leave your hard drive on all day, every day, and each platter will spin 3,784 million times in a year. Floating just nanometers away from these platters is the read/write head, the part of the drive that (as the name suggests) reads and writes data to the drive.
As the head passes over the drive, it magnetises the surface of the platters in a series of zeros and ones. And the drive has to carry on working like this even when knocked, without crashing the head into the platter, which could easily kill the drive.
Given this, it's perhaps no surprise that hard drives fail. Generally, though, catastrophic failure is relatively rare.
According to a study released by Google, based on the millions of drives it uses, there's approximately a one-in-three chance that a drive will fail in five years of use. Figures like that sound reassuring to us - after all, one in three over five years doesn't sound too bad. But figures like this can also give some false reassurance.
In Google's study, nearly 3% of drives failed in less than three months. And if your drive is one of that 3%, without a backup you will have lost your precious data.
You might imagine that the answer to this is simple: solid-state disks (SSDs), as found in the current crop of MacBook Airs. These 'disks' aren't disks at all, instead using memory chips to store your files. They have no moving parts: no platters to spin out of control or heads to scratch the disks, which suggests that they should be more reliable.
Yet according to a survey of hard drive failure rates by French tech site hardware.fr, SSDs were no less prone to failure - particularly in the first few months - than spinning disks.
Some people are occasionally worried about the lifetime of SSDs, because of a quirk in the way they're rated. SSDs are rated in terms of write cycles, and a typical SSD might be rated at 100,000 cycles. Given that hard drives write thousands of times a day, this doesn't sound much - but in fact it's not quite that simple.
Through a process called 'wear levelling', the drive tries to ensure that no single storage element gets written to too often, making the entire drive more reliable. So there is no such thing as a drive that will last forever; this means that backup should be top of your agenda.
There are several kinds of backup, and which one (or more) will be right for you depends on your needs. The most complete kind of backup is also probably the most simple: a complete, working clone of your entire hard drive. This would include all of your documents, applications, and even the OS X system. The huge advantage of cloning your disk like this is you'll lose absolutely nothing.
Of course, the disadvantage is that it's time consuming, both to back up the whole thing and to restore it. The backup can be done incrementally, which means whatever backup application you're using only backs up files that have changed, but even this can be frustratingly slow under some circumstances.
The question to ask yourself is simply this: if your Mac was lost, stolen or fell into a pit tomorrow, what would you be unable to replace?
Whatever the answer is, that's precisely the stuff it's most important to back up. Everything else falls under the 'nice to have' category. So for data that's really, truly irreplaceable, you need to ensure that it's backed up away from your home or office too - and that this backup copy isn't too far out of date.
This is where online backup and other alternatives that move a copy of your data out of your home or office come in - and we'll cover how to include online backup later in this feature. Importantly, you need to know where the 'irreplaceable' stuff lives, because not everything lives in your Documents folder, or even in your Home folder…
The next thing to consider is what the potential disasters are. For example, it's no good having a complete, up-to-date backup of your Mac if it only exists on a drive sat next to your iMac and your house burns down. All you'll have is two melted, unusable copies of your data instead of one.
If you're serious about not losing important files, then you'll need to not only back up to something close at hand (for your convenience), but also to save to something away from your home or office, to ensure that your files would survive even something like a house fire or flood.
How to back up with Time Machine
Time Machine is the default option for backup on every Mac running OS X since the introduction of Leopard (OS X 10.5) in 2007. Therefore, this means most Macs are probably running it.
Although Time Machine wasn't the first backup software from Apple, it's probably safe to say it's the first serious application of its kind the company has produced. As you would expect, Time Machine is integrated into the OS itself, and is designed to be very easy to use.
Plug in a Mac-formatted external drive, and OS X will ask you if you want to set it up to be used with Time Machine. Using a drive with it doesn't mean you can't use that drive with anything else - you can still use the drive to store files using the Finder. Within a few clicks, you can be backing up your files, and every time you connect that drive Time Machine will, after a few seconds, start backing up anything that's changed or new.
Once set up, Time Machine is designed to need as little intervention from you as possible, and to be almost invisible until the point when you need to restore a file.
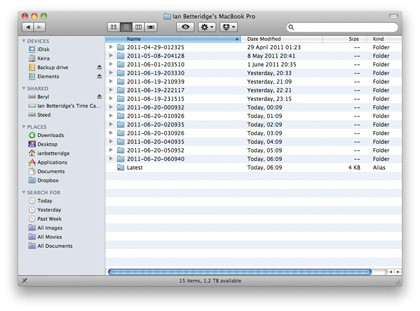
Time Machine doesn't simply 'clone' everything that's on your hard drive. Instead, it creates incremental backups, and using a clever piece of interface design allows you to step 'back in time' to find a deleted file.
It's not an archive programme, though: it's designed to capture the most recent state of data on your disk, as well as files you've deleted, rather than archiving multiple versions of the same file in a reliable way. In this sense, Time Machine differs from the auto-save and versioning feature in OS X 10.7 Lion.
Great timing
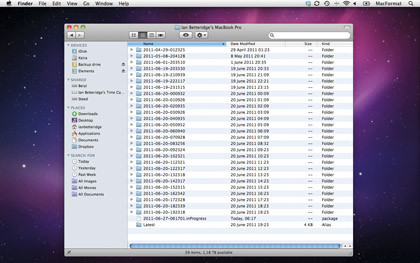
By default, Time Machine will save backups hourly. However, as you would imagine, if it saved an hourly snapshot of every file then your backup drive would get filled up very quickly.
So instead, it saves the hourly backups for the past 24 hours; then consolidated daily backups for the last month; and a weekly backup for everything older, until your drive runs out of space. At that point, it will delete the oldest weekly backup.
How big a drive you need to use with Time Machine will, of course, depend on how big your hard drive is and how many old backups you want to store. Something double the size of your internal drive will allow you to have plenty of room for backups, but you can use Time Machine with something the same size too, if you don't want to store many old files.
If you have a smaller drive you want to use, you can set Time Machine to exclude files or folders on your drive. For example, you might decide that you can live without having a backup of your applications folder, and - using the option in Time Machine's preferences - exclude it. Once excluded, anything in that folder will no longer be backed up.
Total failure scenarios
Remember though, that what Time Machine won't do is create a bootable version of your hard drive, which means that in the event of having a complete hard-drive failure you'll need to wipe and reinstall OS X from an installation disc and then restore from your Time Machine backup.
Time Machine backups don't have to be made to a drive connected directly to your Mac. Instead, you can use any network-attached storage drive formatted as 'journaled HFS+' that you're connected to over a network, including (of course) Apple's own dedicated Time Capsule device. This includes USB drives attached to Airport Express Base Stations, although this isn't supported by Apple.
And Time Machine doesn't enable you to back up over the internet - only your local network is supported.
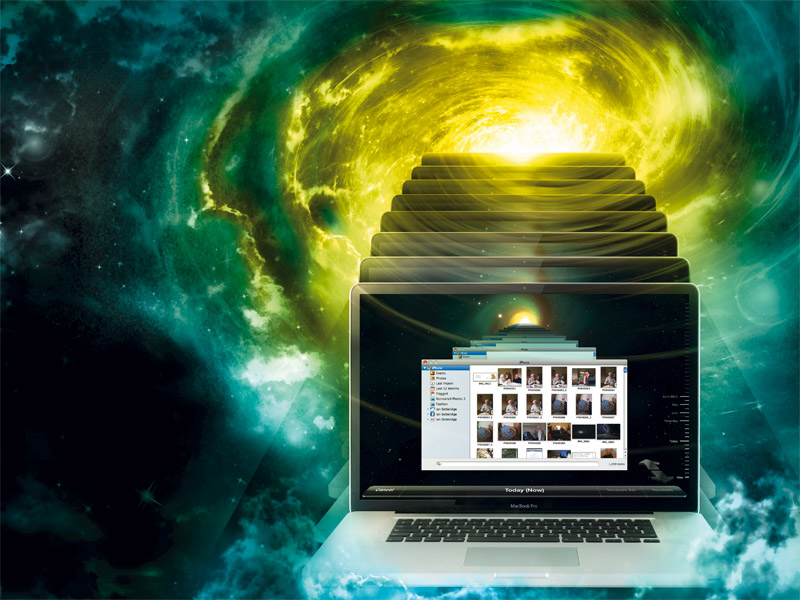
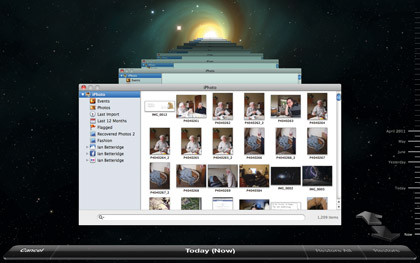
Recovering a backup from Time Machine is simple. Select 'Enter Time Machine' (either from the Dock or the icon in your menu bar) and Time Machine appears to float the active Finder window above an astronomical background. Behind the current window is a 'stack' of older versions, and you simply scroll back through this stack to find whatever deleted file you wish to retrieve.
In addition, some OS X applications can work directly with Time Machine to recover information. For example, if you select 'Enter Time Machine' while using Apple Mail, you can step back through deleted emails, in the same way as you can with items in the Finder. Other apps that support this include Address Book, iPhoto ('08 and later) and GarageBand ('08 and later).
If you're restoring a whole drive, you need to use an installation disc. When reinstalling OS X on a hard drive, the installation process gives you the option to restore the whole drive using Time Machine. Select this option, connect the drive with your Time Machine backup on it (or select a Time Capsule volume) and let the software do the rest.
How to set up Time Machine
01. Straight to Preferences
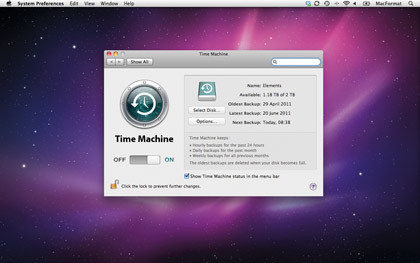
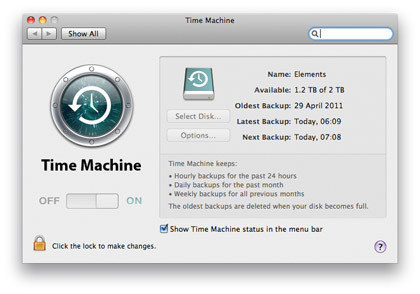
The first thing you'll need to do when setting up your Mac's Time Machine is open up its preferences from your menu bar. It will also offer to do this for you when you connect a new Mac-formatted drive.
02. Select your drive
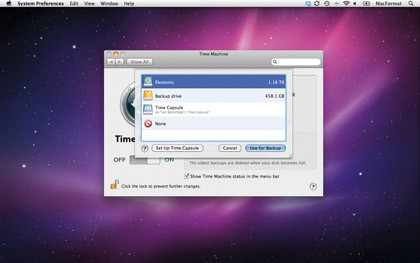
The next step is to select the drive you want to use with Time Machine. This can be a local drive, or any correctly formatted shared drive on your network - it's entirely up to you.
03. Choose what you back up
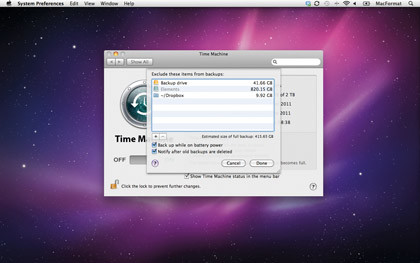
Finally, if there are any folders that you don't want to back up, for any reason, then click on the options button to select them. In this case, we have opted not to back up our Dropbox folder.
Ian has been writing about technology for more than 20 years, which is long enough for his original focus – Apple – to have gone from “five days from bankruptcy” to “biggest company in the world”. Since then he’s managed magazines, websites, apps, YouTube channels, Facebook pages and pretty much every other kind of medium there is. He’s interested in mobile technology, from laptops to phones via tablets and smartwatches, along with the cloud and startups.
