10 tips and tricks for your Nexus 6
Turbo charging, tabs and advanced security

Introduction
The Nexus 6 is a big and brash smartphone, with Google and Motorola teaming up to create a feature-pack handset to showcase the Android 5.0 Lollipop operating system.
Because it has been designed to be a showcase for the best that Android Lollipop has to offer, it has a number of cutting-edge features that you might not be aware of.
So here are some of the best tips and tricks to make your Nexus 6 even better.
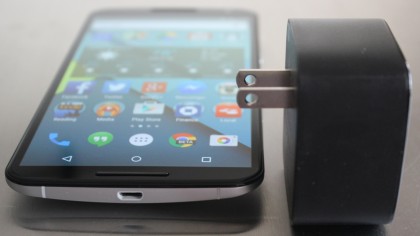
1. Turbo your charge
The Nexus 6, like most Android phones, comes with a standard micro USB port for charging – but don't throw away or lose the charger that comes with it.
It might look like any other plug but it's actually a Turbo Charger, which supplies a hefty 15W of power to charge up the Nexus 6.
This extra power means the Nexus 6 can charge a lot faster, so it can get a further six hours of use after just 15 minutes of charge.

2. Wirelessly charge the Nexus 6
The Nexus 6 has another charging trick up its sleeve – it can do it wirelessly. All you need to do is place the Nexus 6 on a Qi wireless charging device, like the Fonesalesman WoodPuck Bamboo Edition, and it will begin to top up the battery.
Although the wireless charging process isn't as quick as when using a cable (and certainly slower than if you use the Turbo Charger), it's still an incredibly convenient way of restoring your battery, as you don't need to fiddle around with any wires.
Because of the size of the Nexus 6, you might need to practise balancing it on some Qi pads to make sure it charges properly – but after a while it becomes second nature.
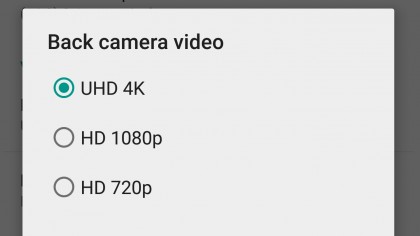
3. Shoot 4K video
The ability to shoot in 4K video is usually plastered all over promotional materials for smartphones in a bid to prove how blisteringly advanced they are, but the Nexus 6 has been rather modest about its ultra HD capabilities.
To film in 4K, open up the Camera app, select Settings then Resolution and Quality. From this screen, tap on "Back camera video" and select "UHD 4K."
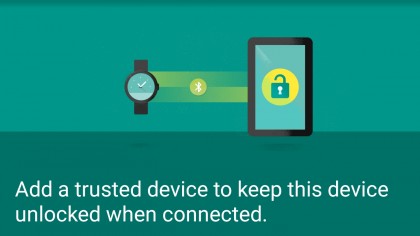
4. Smart Lock
The Smart Lock feature isn't confined to the Nexus 6, but like many of Android 5.0 Lollipop's most ground-breaking features, it works best with Google's own phablet.
The Smart Lock option appears when you set a method to lock the Nexus 6. Open up Settings then tap on "Security," then select "Smart Lock" to see the options. You can now set the parameters for when Smart Lock keeps your device unlocked. For example, if you click "Trusted devices" you'll see a list of Bluetooth devices that you can select as a trusted device.
If you have a smartwatch you could set it to be a trusted device, and then whenever the Nexus 6 is connected to the device via Bluetooth, the phone will remain unlocked. It can also be used with NFC stickers and tags, so you could just tap the Nexus 6 against an NFC-capable device that you've set to be trusted and it will automatically unlock.
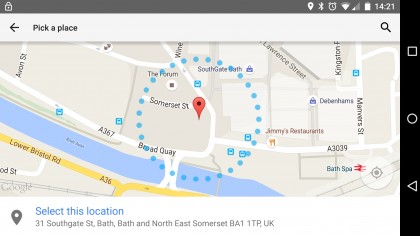
5. Keep your Nexus 6 unlocked at home
You can also set your Nexus 6 to remain unlocked when you're at home, in the office, or anywhere where you're confident that if you leave it lying about no one will try to gain access without your permission.
To do this, you need to go to the Smart Lock settings and tap on "Trusted places." If you've added your home address to Google Now and Google Maps, it will appear here. You can also tap "Add trusted place" to find a location on Google maps.
6. Bring back tabs to Chrome
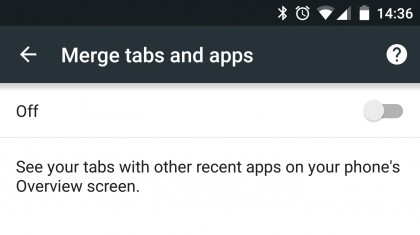
When browsing the internet using Chrome on the Nexus 6, you might have noticed that Chrome no longer stores your open tabs next to the address box.
Instead, it now mixes open tabs with open apps in the Task Switcher menu. This can make keeping track of open tabs tricky – especially if you have lots of open apps.
To switch back to the old way of doing things and display open tabs within Chrome, open up the Chrome app and tap the three vertical dots on the right-hand side of the address bar.
Select "Settings" then tap on "Merge tabs and apps." Next, click the slider to turn merging off and you'll now see the number of tabs you have open in a box next to the address bar. Click this to quickly flick between open tabs.
7. Use Tap and Go to set your Nexus 6 up
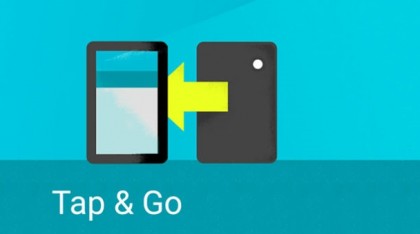
Are you moving from an older device that has NFC to the Nexus 6? If so, you can use the incredibly handy Tap & Go feature – all you need to do is hold your old device and your new Nexus 6 back-to-back and lightly tap them together.
In an instant all your Google account information, settings, wallpapers, apps and more will begin being ported over to your Nexus 6.
You'll be given the option of using Tap & Go when you first turn on (or reset) your Nexus 6.

8. Set up a guest account
The big, vibrant and high resolution screen of the Nexus 6 makes it an excellent smartphone for watching movies and playing games on, so you may find yourself often sharing your device with other people.
To make sure that your private and personal information is kept safe you can create a Guest account for people to use when borrowing your Nexus 6. This account means people can't access your apps, accounts, photos or other personal information, but can instead use your Nexus 6 safely and securely.
To set up a guest account, swipe down the Nexus 6 screen to bring up the notification menu and select your account icon from the top right-hand side of the screen. If you haven't set an image for your account it will be displayed as a blue silhouette of a person. Now tap on "Add guest" to create a guest account that people can use.
9. Quickly keep an eye on the data you're using
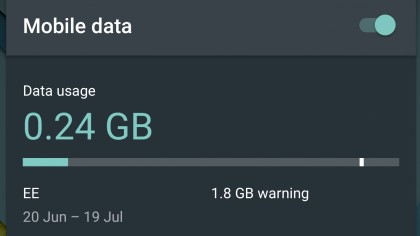
No one likes a nasty surprise at the end of the month when you've gone over your data allowance and your network sends you a hefty bill. Keeping an eye on the data you're using on the Nexus 6 is quick and easy, however, so you can avoid any extra charges.
All you need to do is swipe down twice from the top of the screen to get to the quick settings options. Click the name of your mobile network and you'll be shown how much data you've used for the time period you've specified.
10. Set who can contact you at certain times
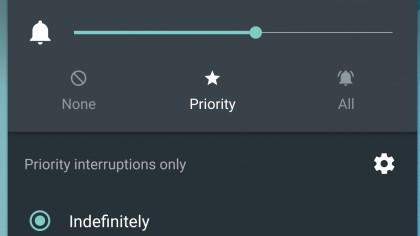
If you're heading off to bed and don't want to be woken up by your Nexus 6 when you receive a late night email, you can set it to only tell you when you get a priority notification. This means you're not disturbed by regular notifications, but if someone tries to ring you, you won't miss the call.
To turn on priority notifications press either the volume up or down buttons on the Nexus 6. Click the Star icon to set your Nexus 6 to display only priority notifications.
This will continue until you switch it back to normal, but if you only want it to be on priority notifications for a limited time, click the down arrow next to where it says "Indefinitely" and select the time period you want it to last for. If you don't want to be interrupted by any notifications at all, select "None" instead and you'll have some peace and quiet.

Matt is TechRadar's Managing Editor for Core Tech, looking after computing and mobile technology. Having written for a number of publications such as PC Plus, PC Format, T3 and Linux Format, there's no aspect of technology that Matt isn't passionate about, especially computing and PC gaming. He’s personally reviewed and used most of the laptops in our best laptops guide - and since joining TechRadar in 2014, he's reviewed over 250 laptops and computing accessories personally.
Sign up for breaking news, reviews, opinion, top tech deals, and more.
You are now subscribed
Your newsletter sign-up was successful