How to Make a Mac OS X Recovery Disk
Sign up for breaking news, reviews, opinion, top tech deals, and more.
You are now subscribed
Your newsletter sign-up was successful
OS X 10.7 Lion did away with recovery disks, and these days, Apple provides a built-in recovery system within Yosemite. Start your Mac and hold Command + R to go into recovery mode, from which you can start Disk Utilities, restore from a Time Machine backup, or perform a clean install. This recovery system is stored on a hidden partition on your Mac’s hard drive — but what if something happens to your hard drive? Well, if your Mac can’t find the recovery partition but it’s connected to the Internet via either Wi-Fi or a network cable, it’ll start the OS X Internet Recovery Feature. However, if your Mac is not online, or if you’ve upgraded an older Mac to Yosemite, that method won’t work. The simplest solution is to put an external USB drive or SD card into service using the OS X Recovery Disk Assistant. To create a recovery disk, you need a USB flash drive or an external hard drive that has at least 1GB free space. You’ll also need access to a Mac running Yosemite that includes an existing Recovery HD partition.
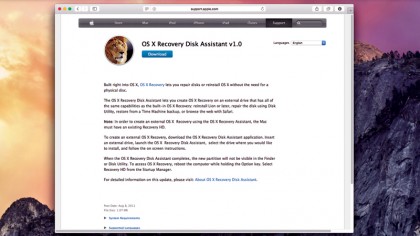
The steps below show how to download the Recovery Disk Assistant and create a recovery disk. Should you need to use it, you can then boot from this disk before restoring from a backup or reinstalling OS X.

1. Get the Assistant
If the Recovery Disk Assistant isn’t already in your Applications/Utilities folder, download it from http://support.apple.com/kb/dl1433. Once the download is complete, double-click the file called “RecoveryDiskAssistant.dmg” in your Downloads folder, then drag the resultant Recovery Disk Assistant.app into your Applications folder.

2. Select Drive
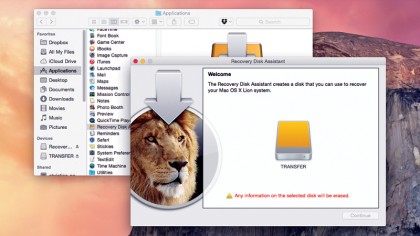
Insert a USB drive or attach an external hard drive, launch Recovery Disk Assistant (yes, it still has the OS X Lion image), agree to the terms, and wait while external drives are detected. Select the USB or external drive, then click Continue. Note that all data on this drive will be erased so that the assistant can install the files to make a recovery disk.

3. Eject and Keep
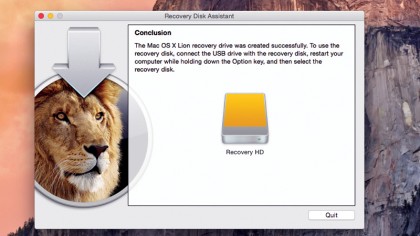
When the process is complete and you see the appropriate message that tells you so, click Quit, eject the disk, and store it in a safe place. Should you need to use it to recover your computer, make sure the disk is connected, hold Option as you restart, then select the recovery disk from the list of drives. It’s a good idea to refresh this disk every now and then.
Sign up for breaking news, reviews, opinion, top tech deals, and more.