5 Apple Watch fitness hacks to take your workouts to the next level
Five underrated-but-brilliant Apple Watch features

Sign up for breaking news, reviews, opinion, top tech deals, and more.
You are now subscribed
Your newsletter sign-up was successful
While your Apple Watch might be your all-singing, all-dancing personal assistant, the best Apple Watches shine when it comes to fitness and exercise.
While you might be a pro at tracking your workouts and closing those rings, there are some brilliant secret fitness hacks you can use on Apple Watch to take your workouts to the next level.
We've collected five of our favorites, from custom intervals and running stats, to race routes and kickboard detection. So if you want to take your Apple Watch workouts to the next level in 2025, here are five fitness hacks you need to know.

1. Create custom interval workouts
You can use your Apple Watch to create customized interval workouts, which are great for sprint training, HIIT workouts, or programs for beginner runners who may need to run for a bit, and then walk for a spell.
Previously, users were required to press ‘Start’ on their watch at the beginning of the workout and double-tap the display when they would finish a section of it. While this was the manual way of creating an interval, the watch also offers the ability to do it for you without requiring any of your input. It will automatically switch between your personalized intervals and, in some cases, even provide you with premade interval workouts. HIIT, for instance, offers a 30-minute pyramid workout interval all ready for you to take on.
Creating a custom interval workout on the watch is pretty easy. All you have to do is as follows:
- Launch the Workout app and pick the activity you wish to create an interval workout for, e.g. ‘Outdoor Run’.
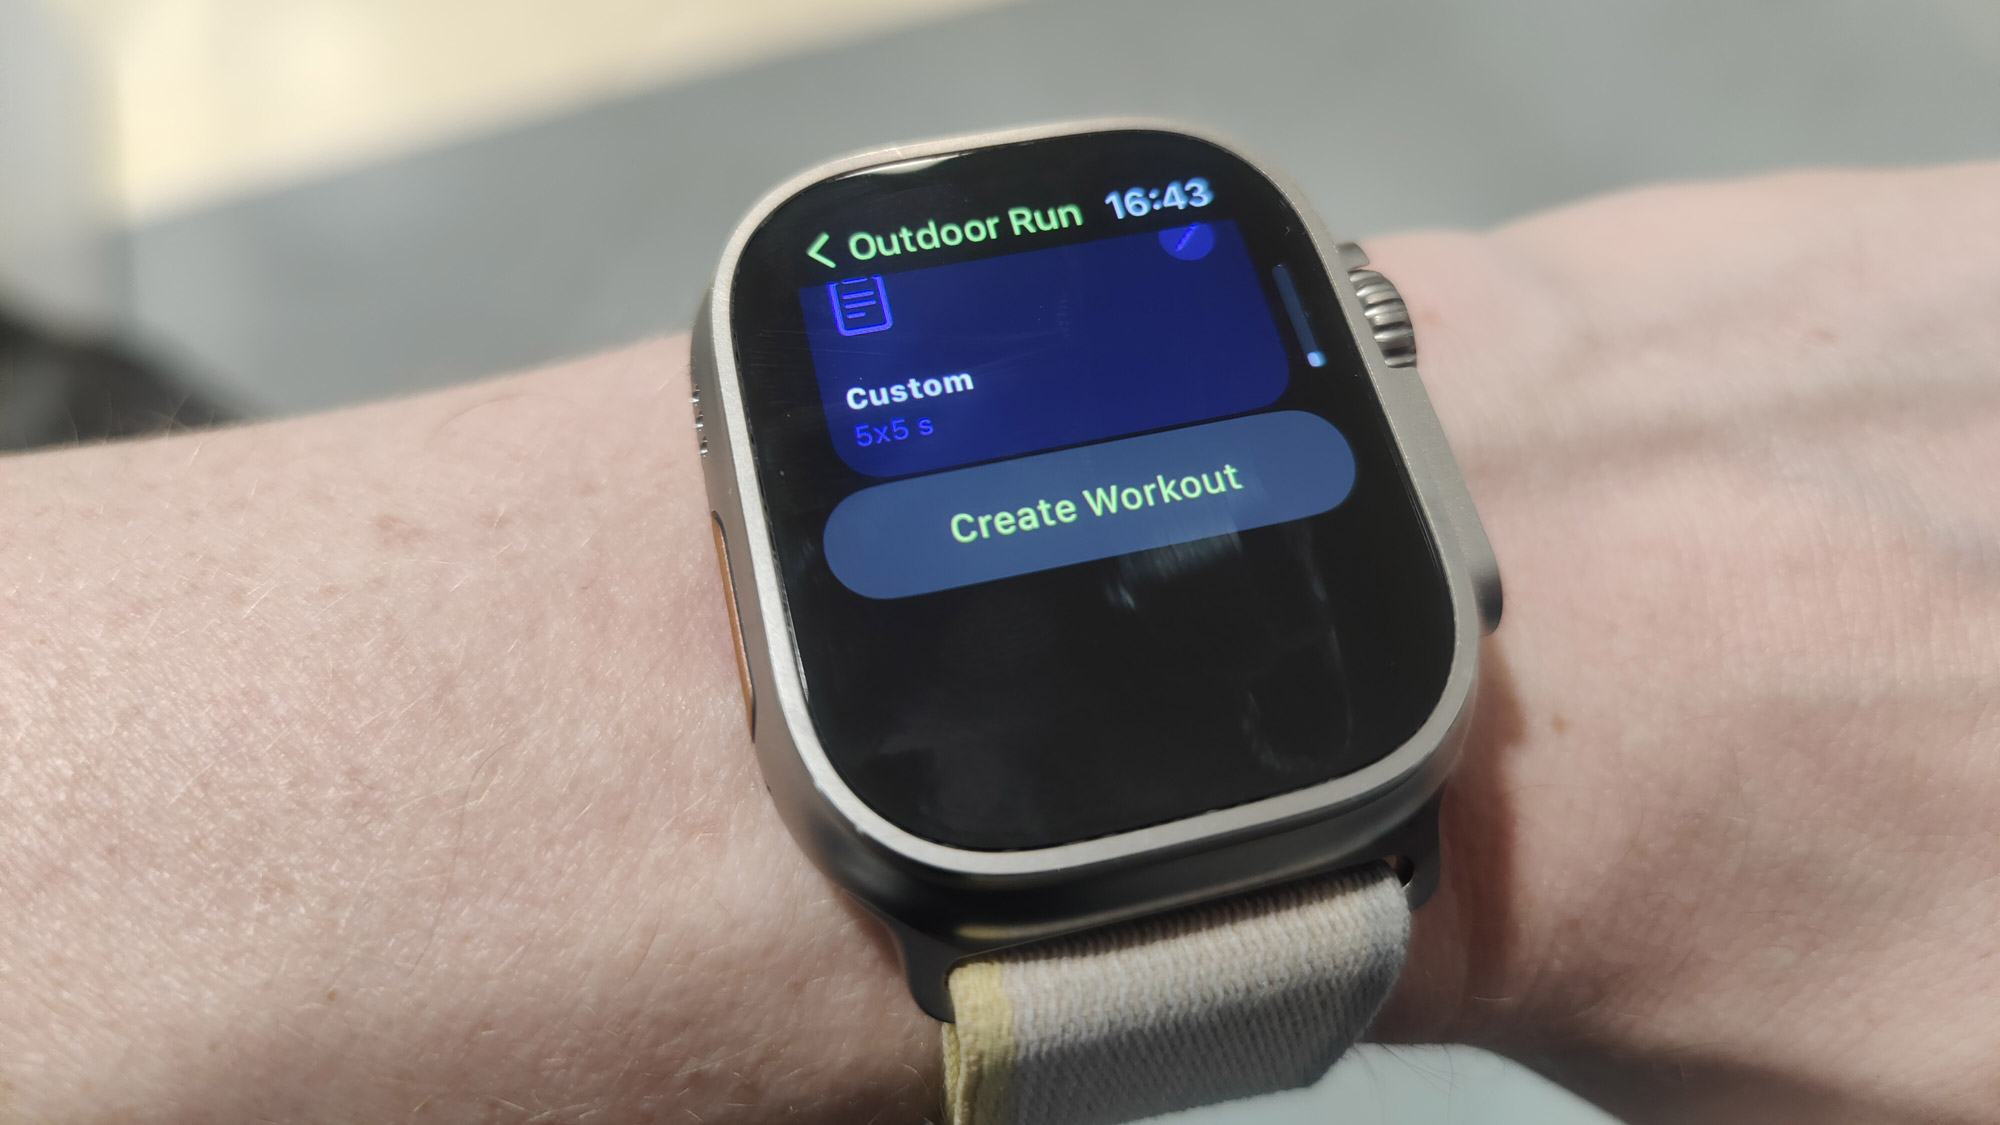
- Tap the three dots on the top-right, scroll down and tap on ‘Create Workout’, and tap the Custom option.
- You will first be asked to enter warmup details. If you’re not interested, hit ‘Skip’. Next, tap on the ‘Add’ option to create an interval, and pick from Work or Recovery depending on your goals for the day.
- Then enter appropriate values for the intervals: for example, minutes if you pick ‘time’ for your intervals, or miles if you pick ‘distance’.
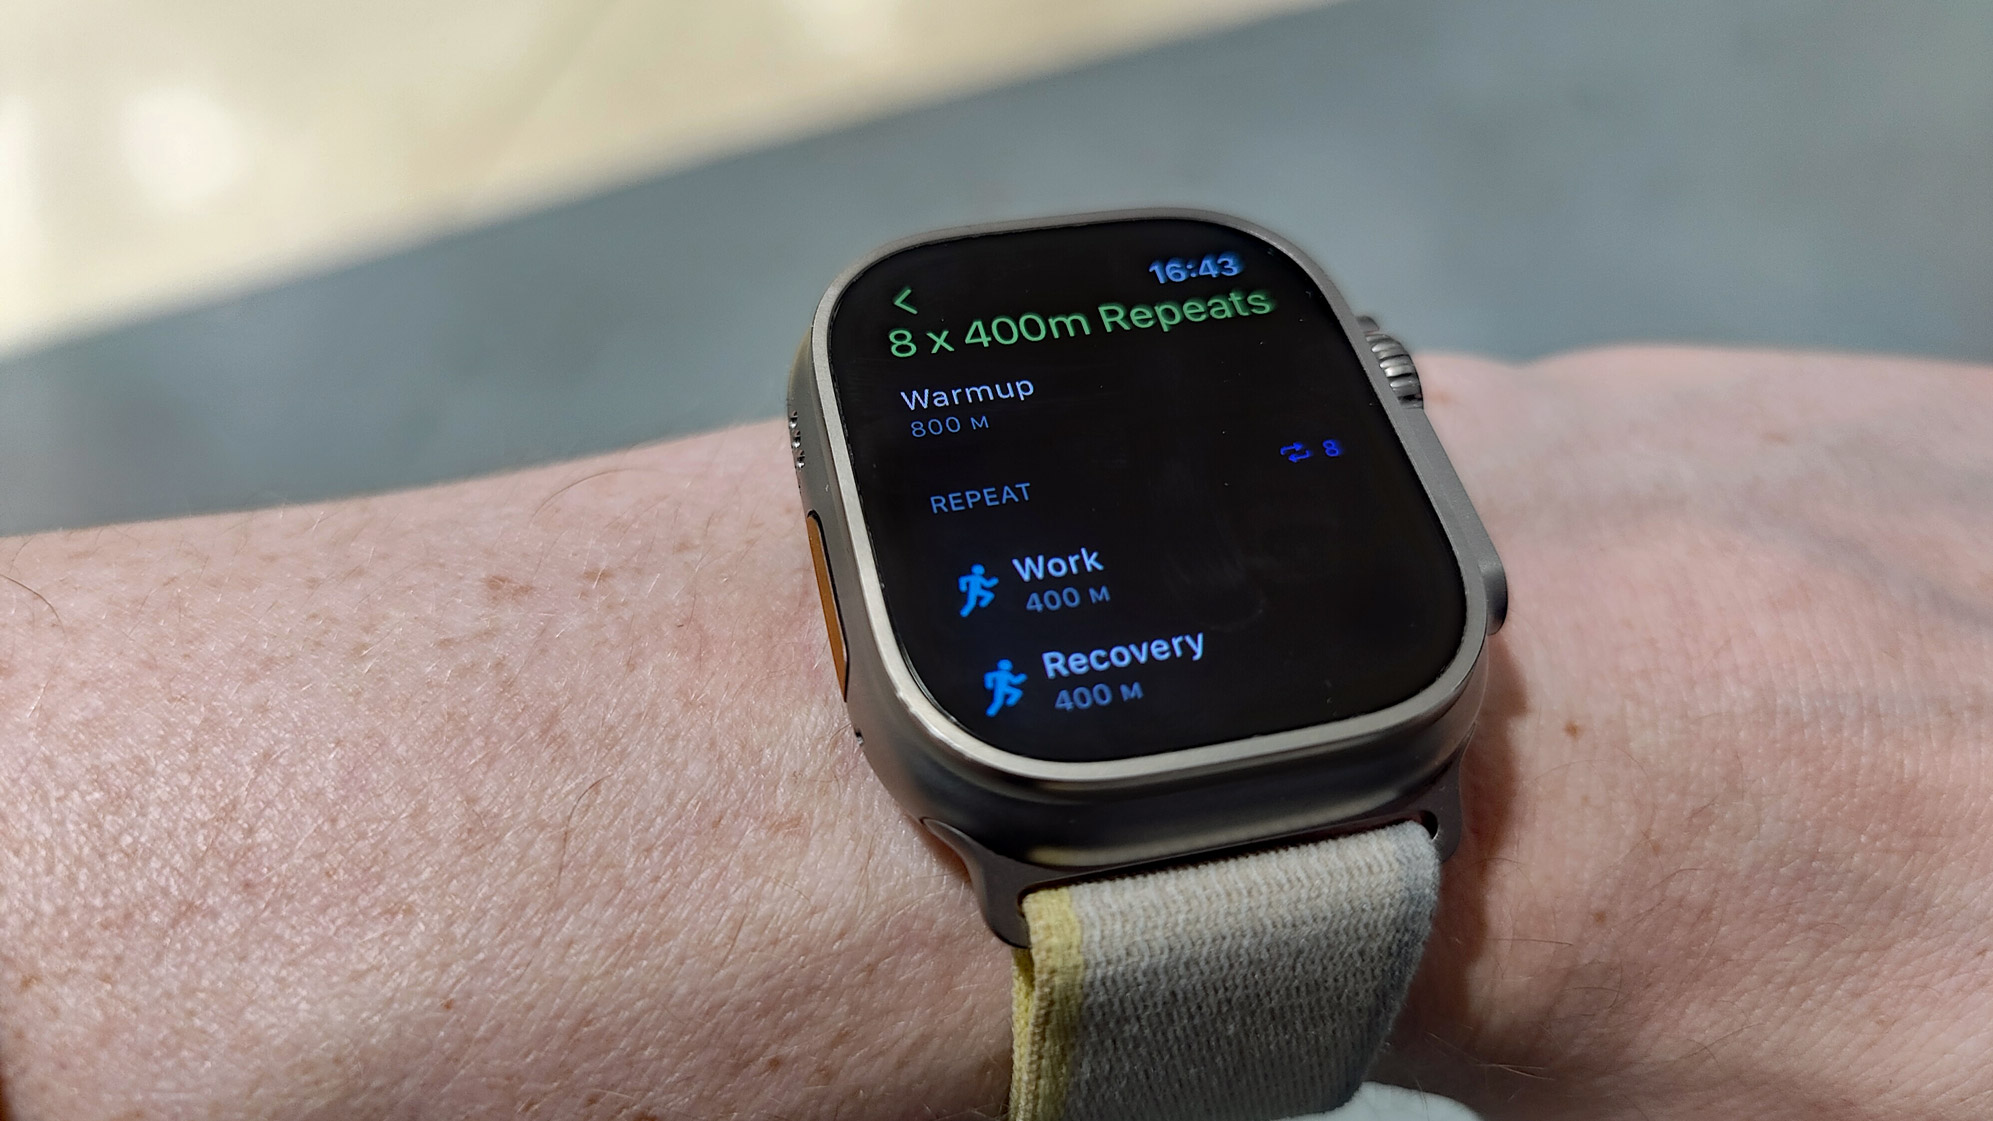
- If you wish to create multiple intervals, repeat the last three steps. As you can see in the picture below, we’ve created an interval to sprint for 400 meters, jog at a recovery pace for 400 meters, and go again for eight rounds.

2. Running stats and vertical oscillation
In order to run faster and more efficiently, it is crucial that you focus on not just horizontal movement but vertical movement as well. The latter, more commonly known as vertical oscillation, is a measure of how much your body moves vertically during each stride. If you're bouncing up and down too much as you run, that's energy we could spend going forwards. On the other hand, if your vertical oscillation is too low, it means more ground-to-shoe contact time and a lack of power and pace.
Sign up for breaking news, reviews, opinion, top tech deals, and more.
You can look at not only your vertical oscillation but also your running power, a measure of how much energy you’re putting out during your run. Most of the best Garmin watches require a heart rate monitor to use this feature, but Apple has apparently cracked it on-wrist. It also shows your stride length, ground contact time, and more in the Summary tab that shows up after you’ve completed a run.
- After finishing a run, tap on it in the Summary tab and click on ‘Show More’ next to where it says ‘Workout Details’.
- You can look at all of your running metrics there. There’s also an option to reorder the metrics according to your preferences. The option to reorder can be found right at the bottom.
3. Race Route
Race Route allows you to look at a route you’ve finished in the past to compete against yourself, using your own time like a virtual pacer. Cool, eh?
Using this feature, cyclists and runners can race against their personal best to keep things competitive. It will also tell you if you happen to go off-route as well as give you real-time intel on whether you’re ‘behind’ or ‘ahead’ of your past performance.
- Start by launching the Workout app on your Apple Watch, then scroll down until you see the ‘Outdoor Run’ section, and tap on the three dots at the top right. Doing this will take you to the Outdoor Run workouts.
- Tap on the ‘Sort’ icon at the top right and choose ‘Route’. This will sort all your previous runs by routes.
- Your past routes will essentially be sorted into two categories: personal best and most recent. Choose any of these based on your preference, and you’re all set.
4. Kickboard Detection and SWOLF Score
Apple Watches can automatically detect when a swimmer is using a kickboard. By using sensor fusion, your watch will be able to not only detect the kickboard but also categorize that as a separate stroke type in your Workout Summary tab along with stats on the distance swam.
Additionally, a swim workout, developed in collaboration with trainers and pro swimmers, is available on the watch. The workout is available for all watch users and it keeps track of your time, distance, speed, and strokes. It also allows you to set an average pace for each lap.
The SWOLF score is a measure of your swimming efficiency. It is obtained by adding together the number of strokes taken in the pool length, and the time it took to swim that length, and it’s now possible to see your SWOLF score on the Apple watch. After a swim, it will automatically calculate and display that for you in your Workout Summary, while you can also head to the Health app to check out your average SWOLF score for all of your swims so far.

5. Heart Rate Zones
Your Apple Watch can show your heart rate zones as well, in the same way as the best Fitbits.
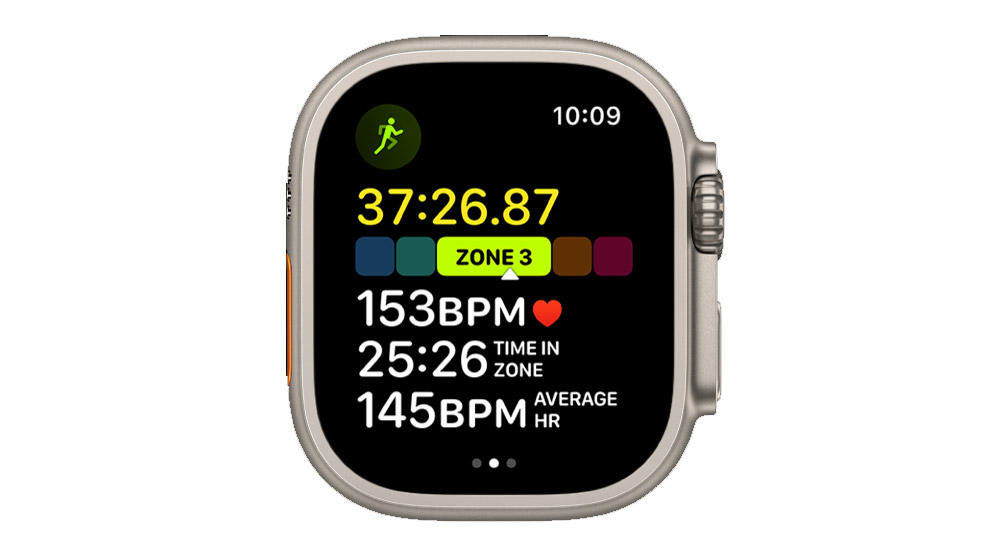
This feature is really useful if you're training for endurance exercise and want to stay in heart rate zone three of five or want to max out and get your heart pumping for a set amount of time in zone four. It allows you to see how much time you spend in each zone while running, so if you want an easy jog, for example, you’re able to see which heart rate zone you’re in and check if you’re training too hard.
Your watch will automatically create five heart rate zones, and update your average max and resting values automatically on a monthly basis.
To access your heart rate zone info, all you have to do is:
- Scroll on the page that shows you the aforementioned basic running metrics. You can also use the Digital Crown to navigate to the new metric screen.
- Users also have the option of manually entering heart rate zones. You can do this by heading to Settings > Workout > Heart Rate Zones on your watch.
Dua is a freelance technology writer who's contributed to TechRadar, PCMag and ScreenRant. She's been a technology fan since she was young, and used to pore over the latest product reviews. When not playing with or researching some new piece of tech, you might find her reading, working out or playing the ukelele.
You must confirm your public display name before commenting
Please logout and then login again, you will then be prompted to enter your display name.
