 Become a TechRadar Insider


You've probably suffered data loss at some point, whether it was an unrecoverable camera memory card or a hard drive that gave up the ghost.
There's nothing like the sensation of crawling dread when you realise what you've lost, and it's a feeling that continues to haunt you in the weeks and months that follow.
Article continues belowDéjà Dup

There's a huge range of Linux tools dedicated to the fine art of backup, from all-encompassing command line utilities to replicas of Apple's TimeMachine. They all have their own advantages and requirements, but after much testing, our favourite is a piece of software called Déjà Dup.
Its best feature is its sheer simplicity - you can get it up and running in no time at all, and restoring your data is very easy. Best of all, it enables you to do this without sacrificing any major functionality.
You can schedule backups, store incremental changes - even select storage areas and send your backup to a remote server. All stored data can be encrypted and transferred using a secure connection. This explains why Déjà Dup has become Ubuntu's default backup solution. It's installed by default in Ubuntu version 11.10 and Mint 12, which means you don't even have to open a package manager to get started.
If you're not using an Ubuntu derivative distribution, installing Déjà Dup will only require a couple of clicks in your favourite package manager. If you're using Ubuntu or Mint, Déjà Dup is the utility that's launched when you click on the 'Backup' icon in the System Settings window, which is found under the menu that appears when you click on your login name at the top right of the screen.
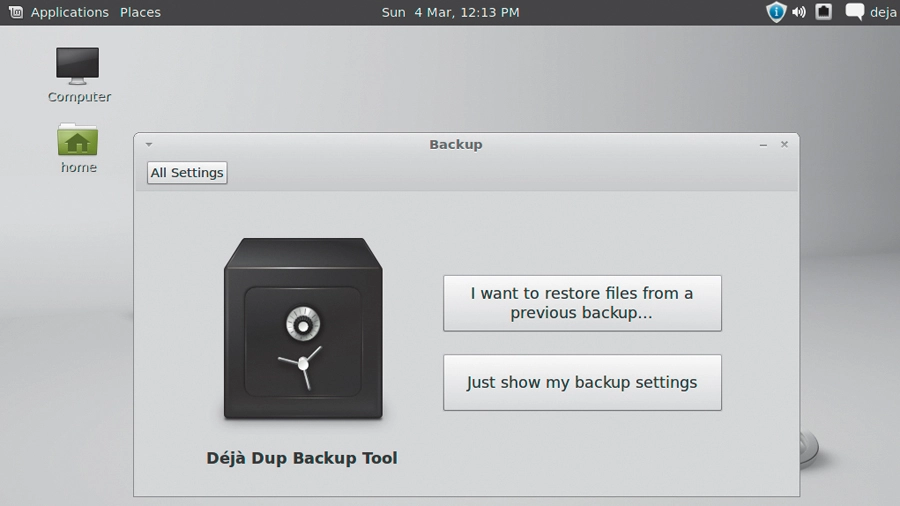
The launch window for Déjà Dup is the essence of simplicity, presenting only two options when you first run it. The first asks whether you want to restore files from a previous backup, while the second displays all local backup settings. We'll be using the second of these to create our initial backup.
Personal files

When you get to the Backup Settings window, before you let it do anything, you need to tell Déjà Dup where to store the backup, and which files and folders to save. To decide which folders to save, switch to the 'Folders' tab on the left.
This window consists of two simple lists; the one on the left contains the folders you want to include, and the one on the right for the folders you wish to exclude. By default, your user's home directory is selected to be included, and the Trash and Downloads folders are excluded by the ignore list.
This is a very sensible configuration for a single-user machine, but no good if more than one person uses the machine, or if you also want to back up data that isn't contained within your home directory. What you back up is, of course, entirely down to your configuration, and you'll need to know where your essential data is stored before you can add it to the list.
A useful first step would be to include the entire /home folder by clicking on the filesystem. This means all users of your machine will have all their personal data saved, because in Linux, users are unable to store their data anywhere else. Everything from bookmarks to music, photos and emails would be backed up. All personal configuration files, like those for a user's desktop environment or their personal settings for an application, will also be included, as these are stored within hidden folders in a user's home directory.
If you ever need to restore a configuration, restoring the complete home directory would enable a user to continue as if nothing had happened, as long as the same applications and desktops are installed.
Server files

You could ask Déjà Dup to back up the entire system by selecting the filesystem as a place, followed by 'Open'. This appears as '/' in the folder list. All your data will be saved, but a restore won't create a bootable system. This is because there's more to an installation than data - you also need to consider disk partitions and installing a boot service, for instance.
A system-wide backup like this is overkill, because a system can be recreated more effectively from the installation discs or your distribution's ISO.
One exception is if you're running servers on your machine, and have spent a lot of time building a complex configuration. Files for these kinds of setup aren't restricted to a user's home directory, and there's no standard location either.
If this is your configuration, you'll already have the specialist knowledge required to find the data you want to save. Some will be found in /etc, while others will be in /var. A Wordpress website, for example, will use a web configuration in /var/www, and a MySQL database from /var/lib. In an office, you might also want to include data from other machines.
The easiest way to manage this is to create shared folders on your local machine that other computers can mount and use for their data. You can even do this for a remote home folder, which is a great way of using a single machine to store the user data for an entire office. Just make sure you include the shared folder in Déjà Dup's backup list, or you won't just be losing personal data, but that of the whole office.
Creating the backup

With your source files selected, the next step is to generate the backup. The most important thing to consider here is where you're going to put it.
Putting a backup on the same drive doesn't make much sense (although it will protect you from yourself if you happen to delete a file by accident), and while putting a backup on a different drive on the same machine is better, it still won't protect you in the event of a catastrophic failure. A much better solution is to get the data off your machine - or even better, off the site.
There are two ways to do this. The first is to use a removable storage device, like an external hard drive. The second is to transfer the backup across a network. The latter option is more convenient because we want to automate the process as much as possible, and unplugging a drive and taking it home with you isn't that automatic. Either way, Déjà Dup can accommodate your requirements, and you can choose between various kinds of remote server from the Backup Location menu.
Make a backup

With a location selected, you're now ready to make the backup. This can be started instantly from the Overview page, but if everything works, you'll need to enable the switch labelled 'Automatic backups' and set up a schedule from the Schedule panel. We'd recommend making daily backups and keeping them indefinitely, or for as long as your backup medium has enough storage.
When you start the backup, you'll be asked to enter a password. This is used to encrypt the data file so that it can't be read by anyone else. You should also enable the 'Remember password' option if you plan on running the backup automatically.
The first time Déjà Dup runs a backup, it will store everything, whereas most successive backups will be incremental, storing only the data that has changed. Occasionally - usually once a month - Déjà Dup will create a new complete backup to ensure your data isn't dependent on a long line of incremental updates. If you take a look at the folder containing the backup data, you'll see that there are both 'full' files and 'inc diff' files for the difference.
Restoring data
Should the worst happen and you need to restore your data, the process is as straightforward as creating the original backup. Just click on the 'Restore' button from the Overview page.
You then need to select the location and the folder that contain the backup data - so if you're restoring data onto a new machine, you'll need to make sure it can access the same remote storage, that you know where on that storage your backups reside, and that you have the original password for the backup.
If you can't initially mount a remote drive, you can also copy the backup folder onto a portable drive. Déjà Dup doesn't need to have the data in its original location, as everything it needs is contained within the backup folder. Just make sure the restore function points to this.
Clicking 'Forward' will let you choose a specific time and date from the backups you've already made. For a complete re-install you'll want to select the most recent date in the list, but if you're restoring a single file that you deleted or mistakenly changed, you might want to select a date when you know the file was as you need it to be.
The next option will let you restore your files to either the same or a different location, which is useful if you want to see what's changed rather than restore a backup. Clicking on 'Forward' will then start the restore process, placing all the files within the backup into their relative locations on your system.
If you've asked for them to be restored to a different location, you'll get the entire system tree recreated from the backup folder. We'd get 'Home', for example, for the group of user folders. You can then either browse through this to get to your deleted files, or copy it into the original location to restore your configuration.