
 Become a TechRadar Insider


As OS X has matured and iOS has entered the equation, it's becoming increasingly clear that Apple's vision of the future of computing aims to ditch much of the baggage of the past.
The mouse is on borrowed time, replaced by gestural interfaces that enable you to manipulate content more easily. Also up for the chop is the entire file system, which Apple is slowly edging towards the exit, to be replaced by app-specific file sandboxes and contextual system-wide searches.
If we look back at the history of Apple's operating systems, this process began in earnest with Spotlight. In 2005, Mac OS X 10.4 introduced Spotlight, providing a central location for searching your entire Mac and also providing results in an intuitive and grouped manner.
Over time, Spotlight has wormed its way through the system. It's now used to power searches in Finder windows, to unearth messages in Mail, and for searches in various other apps. Throughout, the aim is to enable you to find information merely by typing a couple of words into a search field, rather than laboriously picking your way through myriad nested folders.
But there are issues with Spotlight. It can be slow, the Finder window interface for setting up searches isn't particularly intuitive, and if you use a cloning app (such as SuperDuper! or Carbon Copy Cloner) to regularly make a copy of your data, all the files on your external drive will also show up in Spotlight. It's all too easy to pick the wrong one, launching something on your backup rather than your Mac.
We provide some tips for taming Spotlight. We'll look at the initial settings you can define in System Preferences as well as creating custom searches that can be stashed in Finder's sidebar for later use.
How to customise Spotlight's settings
01. Prune results lists

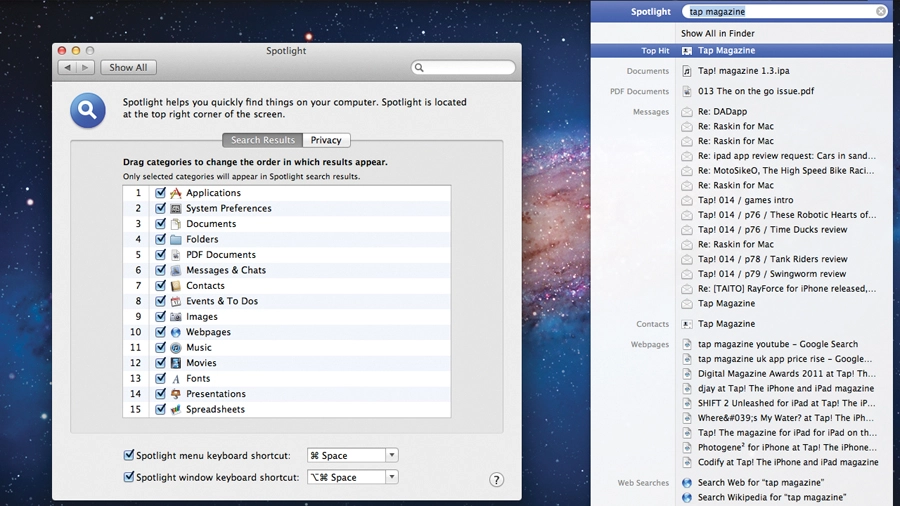
Launch System Preferences (from the Apple menu) and click Spotlight (under Personal) and then the Search Results tab. If you see document types you don't use or care to have in Spotlight results, uncheck the relevant boxes, in order to streamline the Spotlight menu.
02. Reorder categories

When using the menu bar, Spotlight search results show a 'top result' but other results are grouped by type. Drag categories to reorder them. If you often search for PDFs, drag 'PDF Documents' towards the top. If you launch apps via Spotlight, drag 'Applications' to the top.
03. Adjust key shortcuts

By default, Spotlight offers Command+[Space] for triggering the system-wide Spotlight search from the menu bar, and Option+Command+[Space] for a Finder-window search. Click the checkboxes to disable either shortcut, or use the menus to have the Spotlight shortcuts use function keys.
04. Create custom shortcuts

To use different custom shortcuts for Spotlight, click inside one of the two shortcut fields and press your shortcut. The field should change to reflect your new setting. If you stray from the defaults, ensure you don't use shortcuts that clash with any other application.
05. Block locations or drives

Spotlight indexes all it can. To block it from certain files, folders or drives, drag them into the Privacy tab within the Spotlight pane, or use the + button to add items. This is worth doing for backups; also, adding and removing a drive forces a re-index if Spotlight's gone screwy.
06. Test it out

Use your shortcut (Command+[Space] by default) to bring up Spotlight. Type a word to search for. The list will be filtered as you add more characters. You can use the cursor keys to navigate the list and [Space] to get a Quick Look preview of any selected item. Hit Return to launch.
07. Start a Finder search

Use Option+Command+[Space] (or your alternative shortcut) to bring up a Finder window with a blank Spotlight search. Type your search into the box at the top-right. To narrow further, click the + button and use the menus to choose a criteria, such as 'Last opened date is today'.
08. Save a Spotlight search

To store a search for later, click Save and give it a name. By default, saved searches are stored in /Library/Saved Searches, but you can save them anywhere. For very quick access, check Add To Sidebar and you can access your search from any Finder window sidebar.