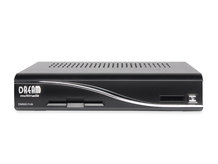
Pimp your Linux satellite box & get TV on your PC!

You may have seen reviews of several satellite receivers claiming to be 'Linux powered'. So what does it mean for you?
Linux-based receivers have taken off. Dreambox sells a complete range, while others selling similar products include Elanvision, AB-Com and DGStation. Nearly all can accommodate hard drives, while many of the latest models have two tuners and hi-def support.
Clearly, there's lots of potential with Linux, so let's look at connecting your receiver to a home network and streaming TV from your box to your network.
Project 1: Get networked
1. If you haven't already done so, connect your Linux receiver to your home network.
If you haven't yet already installed one, then doing so will help you to get the best from your receiver – and any other networkable devices in your home (PCs, games consoles and networkable media players as well as Linux receivers).
The key component is the wireless router and it will enable several devices to share the same broadband internet connection. It also allows simple home PC networks to be set up so that files can be shared and so on.
Sign up for breaking news, reviews, opinion, top tech deals, and more.
Wireless routers are inexpensive – they start at £50 or so – and are frequently given away (with easy-to-follow setup instructions) to broadband subscribers by service providers (including Sky, BT and Virgin).
Some wireless routers (notably those supplied by ISPs) incorporate the broadband modem; others connect to the modem via Ethernet. As its name perhaps suggests, a wireless router contains Wi-Fi for connection to compatible devices. Fortunately, most if not all also have Ethernet ports – and given that no Linux satellite receivers yet include Wi-Fi capabilities this is just as well.
You'll need to run an Ethernet cable of appropriate length between the receiver and the router. Note that although less convenient than Wi-Fi, Ethernet offers a significant speed advantage – important if you plan to stream video from it – and is more reliable.
In contrast, Wi-Fi is too slow for decent-quality streaming of broadcast-quality video, and has a limited 'real-world' range. On the extremities of its coverage you might experience dropouts and other connection difficulties.
Note that if you require no internet access a cheaper and simpler networking device known as an 'Ethernet hub' can instead be used (most wireless routers have a basic hub built in, with two or more Ethernet ports). But internet access will be impossible without additional hardware, and you won't be able to make the most of your receiver.
2. The next thing to do is get the receiver talking to your network. You'll usually find the relevant receiver configuration option in an 'advanced' or 'network' setup menu.
This looks quite involved at first glance, and you're asked to specify blocks of numbers (IP – Internet Protocol – and gateway addresses) amongst other things. Fortunately, all the Linux-powered receivers I've come across support a technology known as DHCP (Dynamic Host Configuration Protocol).
This allows the receiver to automatically obtain these parameters from the router, thereby adding it to your network with no manual configuration. Our recommendation is to turn on DHCP – you should then see the spaces filled in as if by magic!
You should now be able to, for example, download plug-ins or updates (if you're using a Dreambox running Enigma2, try using the 'plug-ins' main menu option).
3. Every wireless router I've used has a 'setup' page – to find out how to get to yours refer to the accompanying documentation for the setup address (likely to be a numerical IP address)
4. Access this page by entering its address into the web browser of a PC connected to your network, and look for an option called 'DHCP client list' or something similar. In some cases you'll need to enter the relevant password to get into this menu.