 Become a TechRadar Insider


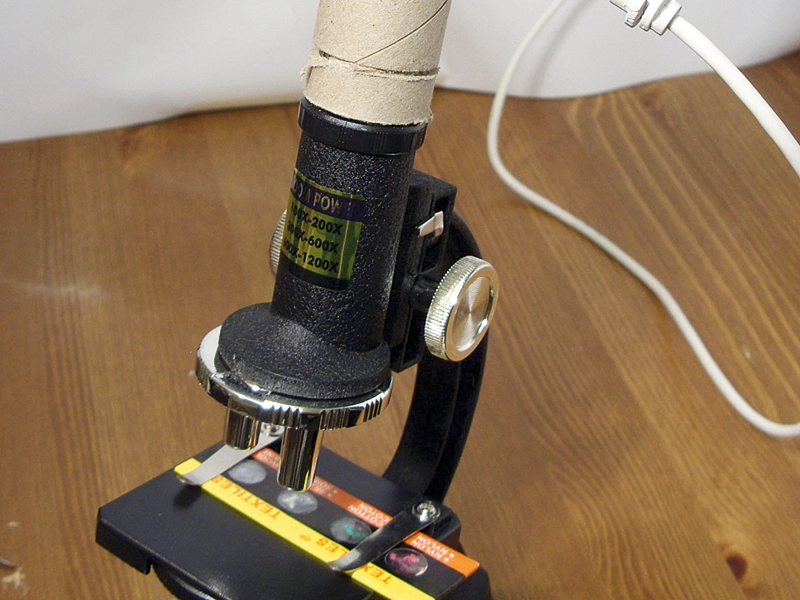
We're not sure why we have a pathological hatred of webcams, but if we're not ripping them apart, then we're trying to permanently epoxy them to other things. Our latest endeavour came about after another trawl of the bargain aisles at the local eBay when we stumbled across a cheap microscope.
It struck us that it'd be perfectly possible to capture images from the microscope onto the bare face of a webcam's detector. All that's needed is a contraption to mount the webcam in the right place over the microscope's eyepiece. Beyond that it'd be just a case of focusing the image onto the webcam's detector just as you'd focus it onto your retina.
- Microscope
- Webcam
- 25mm tubing (from tinfoil pack)
- Hotglue gun
- Hacksaw
- Stanley knife

STEP 1: The first thing is to be sure to take proper safety precautions while undertaking this build. We get our mums to look after us, which also means a steady flow of free sandwiches

STEP 2: To start we need to rip open the webcam. The plastic case is often just unnecessary fluff

STEP 3: We're just interested in the logic board and sensor. Remove any lens array that might be attached

STEP 4: The plan is to slide a suitably sized tube over the lens – typically this will be about 25mm in diameter – then mount the webcam at the end of this

STEP 5: The webcam sensor needs to be around 1cm from the eyepiece, but more importantly it has to be central. Put the tube in place and mark where the slit will need to be for the sensor to sit correctly

STEP 6: Use the Stanley knife or a hacksaw to cut a section out for mounting the webcam. You may want to add tape to the inside of the tube to create a tight final fit

STEP 7: Power up the webcam and work out where its central position is by looking for a bright spot. You may need to move the tube up and down to hit the correct focal point

STEP 8: You can add extra rings for a final fit but once you have the webcam in position hotglue the logic board in place

STEP 9: While it may not be the prettiest of sights it's a functioning beast and enables normal use of the microscope afterwards

COMPLETE: Et viola, tiny things pleasing tiny minds
Future Publishing Limited provides the information for this project in good faith and makes no representations as to its completeness or accuracy. Individuals carrying out the instructions in this project do so at their own risk and must exercise their independent judgment in determining the appropriateness of parts, equipment, sealants and other adhesives for a particular use.
Protective clothing, gloves and goggles/safety glasses should also be worn at all times, when using drills. Use of the USB microscope may void a product's warranty. To the fullest extent permitted by law, Future Publishing Limited takes no responsibility for any person relying on the information relating to this project and disclaims all liability for any errors, omissions, damage or injury to users or their equipment as a result of or relating to their making and use of the USB microscope.