How to quickly install your apps after a fresh Windows 11 reinstall with Ninite
Install your apps in record time and save yourself a load of hassle with Ninite

Sign up for breaking news, reviews, opinion, top tech deals, and more.
You are now subscribed
Your newsletter sign-up was successful

Note that Ninite installs apps using each installer’s default settings. If you want to change that (such as installing an app on a different drive), then exclude the apps you want to adjust from the Ninite installer and add them to your PC manually.
Some apps offered by Ninite are quite outdated. Launchy hasn’t been updated since 2010, for example, while InfraRecorder, ImgBurn, CutePDF, CCCP and Classic Start are all either out of date or discontinued. You should avoid installing these apps, as they might now come with unpatched security issues.
If you want more features, you should try Ninite Pro. This comes with a web-based interface that lets you manage all the apps on multiple PCs in real time. You can set automatic update policies for each app, send updates to offline machines, and more. This is a paid-for version of Ninite, and the price depends on how many machines you want to manage.
If you want to learn how to install your apps in record time with Ninite, you’re in the right place. After all, this superb little utility is tailor-made for loading up a computer with new programs. Just pick the apps you want and Ninite gets to work installing them, and there’s no need to click through any tedious installers.
Instead of downloading and installing apps individually, Ninite lets you download one package that can add them all to your PC in one go. That’s useful for quickly setting up a new PC from fresh, but it’s also a handy way to update your existing apps that are already installed. If you include any apps that you already have in Ninite’s installer, it’ll check them for updates and get them upgraded for you.
Ninite is full of clever extras, such as its ability to automatically decline any reboot requests and bundled software that comes with an app's installer. That means there’s no need to worry about bloating your computer with unwanted toolbars and other assorted cruft – Ninite tosses it out during the installation process.
That means that not only is Ninite fast and efficient, but it helps you avoid the nasty surprises you can experience when doing this kind of task manually. Once you’ve given Ninite a try, it’ll fast become one of the best productivity apps on your PC.
Tools and requirements
- The Ninite website
- The installer of bundled apps that you download from the Ninite website
Quick steps
- Choose which apps you want to install or update using the checkboxes on Ninite’s website
- Click ‘Get Your Ninite’ and save the installer to your PC
- Double-click the Ninite installer and let it add your chosen apps to your computer
Step by step guide
1. Pick your programs

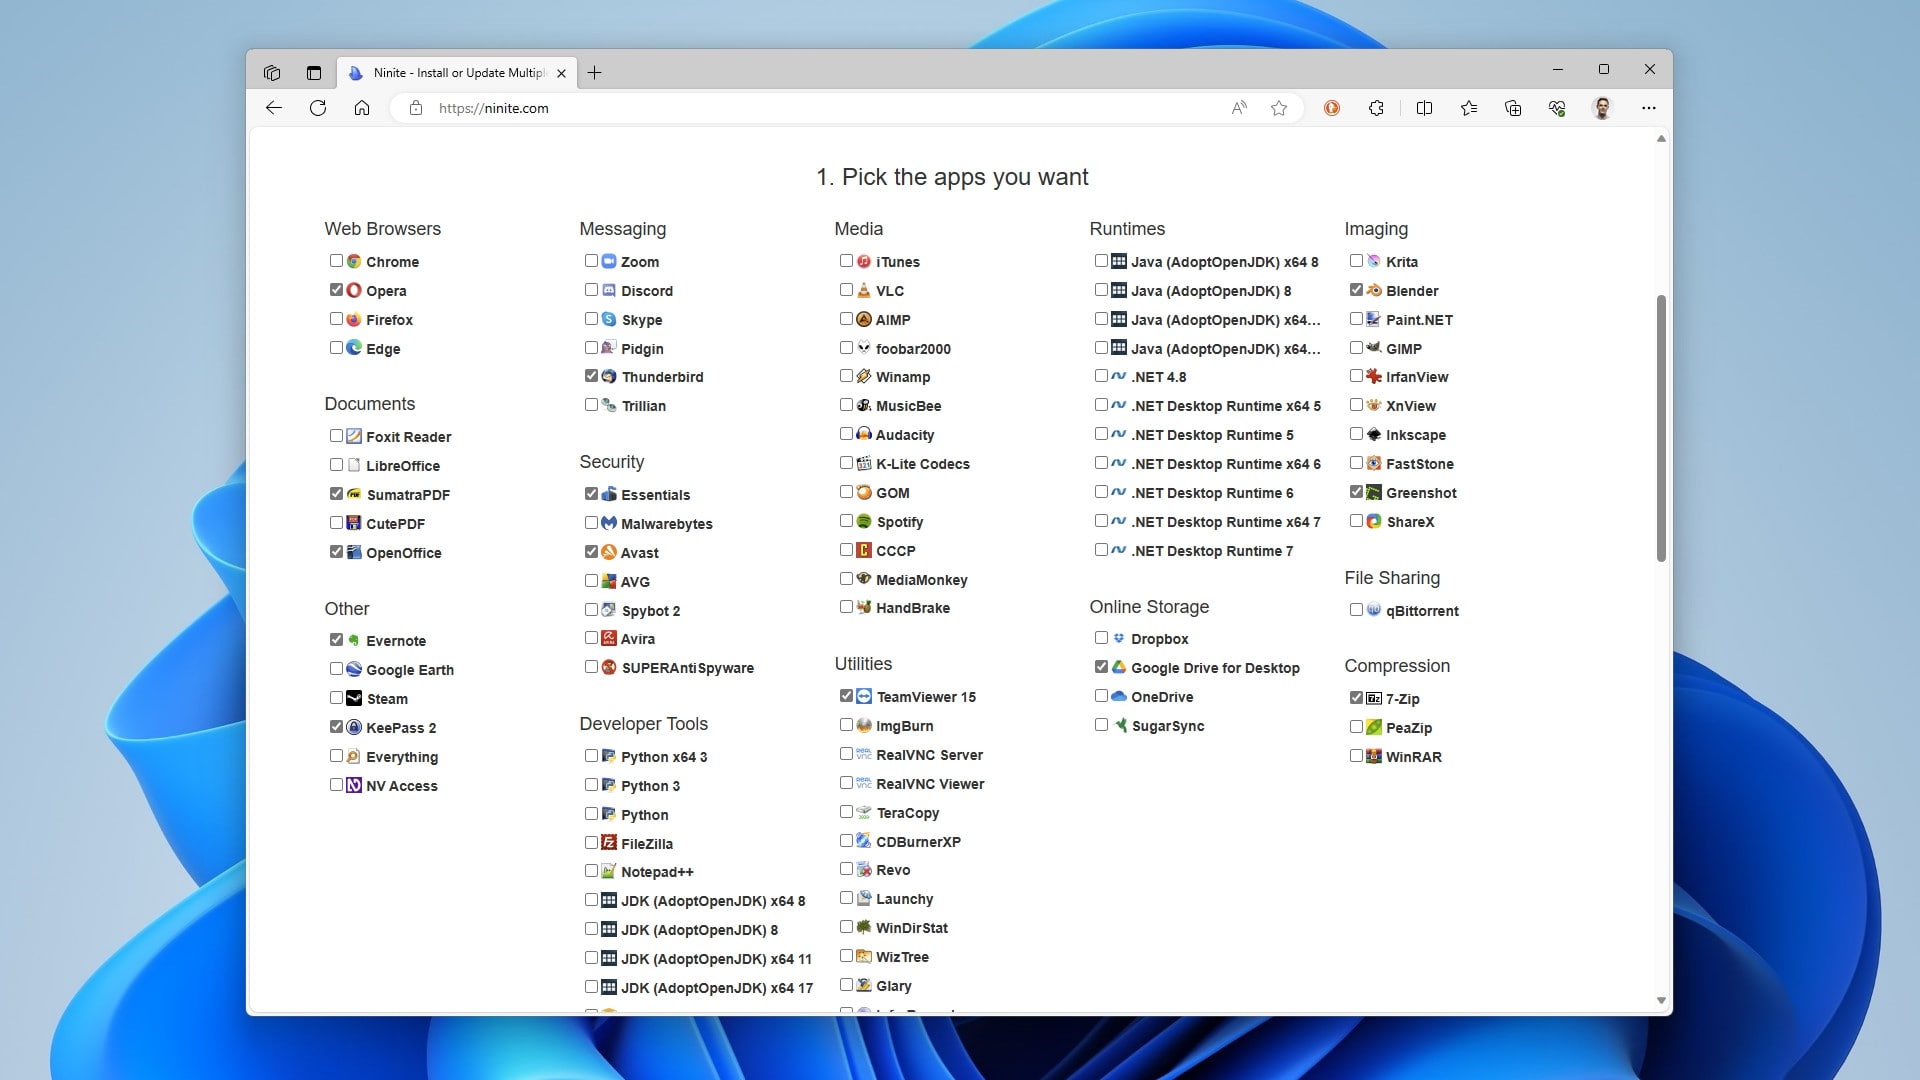
Ninite’s website has a long list of apps that it can install under the heading Pick the apps you want. Apps are organized into various categories, including Web Browsers, Security, Media and more.
If you see an app you want to be included in the Ninite installer, put a tick in the checkbox next to its name.
Once you’re happy with your selection, scroll down and click Get Your Ninite, then choose a location on your PC to save the bundled installer.
2. Install the apps

Open the folder where you saved the installer and double-click it to run it.
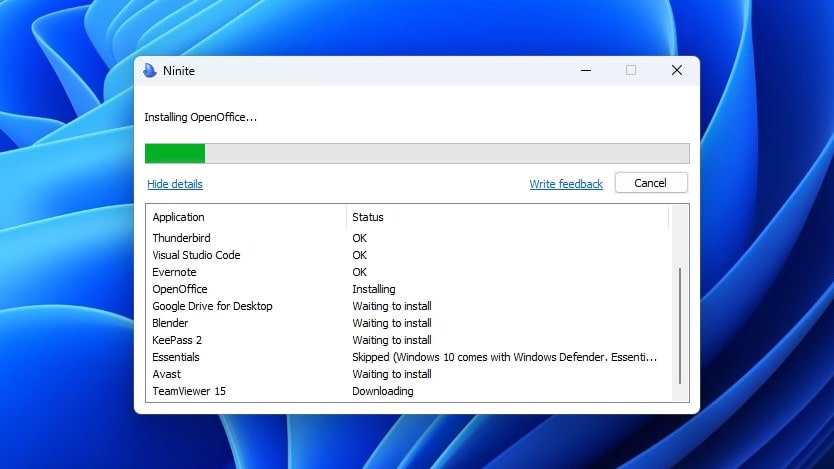
Ninite will now begin installing your chosen apps. There’s no need to click anything else, as it handles everything for you.
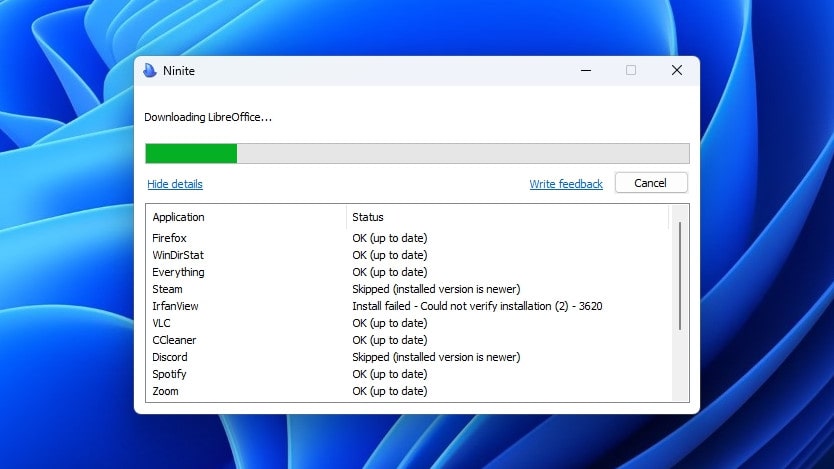
If you want to see a bit more information, click Show details. This displays a list of your chosen apps and their installation status.
If an app has been installed successfully, its status will read OK. There are some other statuses to be aware of. Ninite will tell you if the app is waiting to install, downloading, or currently installing. OK (up to date) means the app was already installed and up to date on your PC, so Ninite passed over it.

Other apps, meanwhile, might be skipped for different reasons, and Ninite will tell you why (for example, Microsoft Security Essentials is now incorporated into Windows as part of Windows Defender, and Ninite will say so). Some apps might also fail to install.
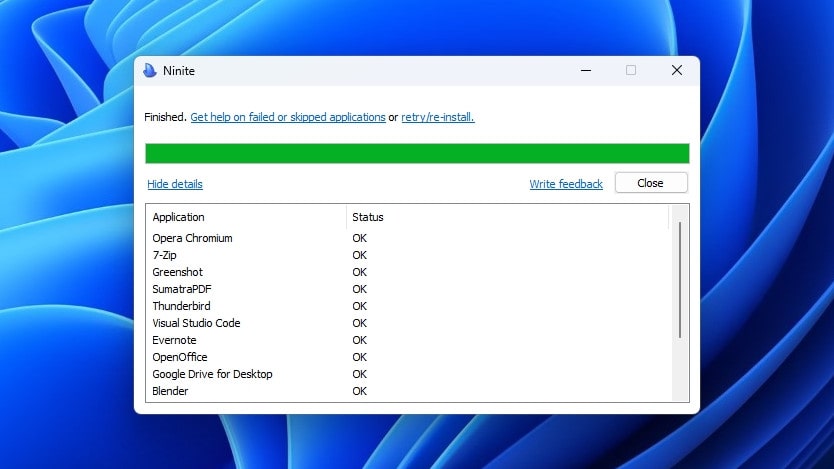
Once the app installation is complete, you will see the word Finished in the top-left corner of the Ninite app. It will let you retry if any apps failed to install, and offer help on why certain apps might have failed or been skipped over.
If everything looks good, click Close and Ninite will exit.
Sign up for breaking news, reviews, opinion, top tech deals, and more.
Final thoughts
Ninite is a very efficient way to load a new PC with handy apps. But it’s useful in many more situations than that. It’s a simple way to keep your installed apps up to date, and can quickly download and install the latest versions of your software every time you run the Ninite installer. It’s also a good way to send a package of apps to a friend, or to keep a bunch of computers updated on the latest software with just one installer.
Ninite doesn’t have every popular app out there, so you might find that some of your favorite apps are missing. However, the developer listens to app requests and adds apps if enough requests are received, so if there’s something missing from the list of programs and you want to see that change, be sure to contact the developer.

Alex Blake has been fooling around with computers since the early 1990s, and since that time he's learned a thing or two about tech. No more than two things, though. That's all his brain can hold. As well as TechRadar, Alex writes for iMore, Digital Trends and Creative Bloq, among others. He was previously commissioning editor at MacFormat magazine. That means he mostly covers the world of Apple and its latest products, but also Windows, computer peripherals, mobile apps, and much more beyond. When not writing, you can find him hiking the English countryside and gaming on his PC.