How to lock down your Windows privacy with DoNotSpy11
Protect your privacy and stop Windows spying on your with the help of DoNotSpy11, a handy and lightweight utility app

Sign up for breaking news, reviews, opinion, top tech deals, and more.
You are now subscribed
Your newsletter sign-up was successful
Windows 11 is full of telemetry tools that follow everything you do, often in sneaky and insidious ways. Yet blocking all these invasive trackers can be tricky, as they’re often scattered all over the operating system in hard-to-find places. It hardly suggests Microsoft respects your privacy.
Luckily, you don’t have to just grin and bear it. Instead, an app like DoNotSpy11 can stop Windows’ creepy behavior in its tracks, giving you a centralized location from which to regain control over your privacy. Not only that, but it also provides more fine-grained control than Windows does – even if you can find all of Windows’ privacy settings, they don’t go as far as DoNotSpy11.
This handy little app is extremely lightweight and simple to use, making it easy to change settings and disable invasive features with the click of a button. Despite the name, it also works in Windows 10, so is useful if you haven’t upgraded to the latest version of Microsoft’s operating system.
Best of all, the app is totally free and doesn’t charge you to adjust Windows settings. There is an optional paid-for Pro version, which lets you save and load profiles and shows you any changes that have been made since you last loaded DoNotSpy11, and its pricing starts at $5.
Whether you pay or not, you’ll find DoNotSpy11 to be a great way to fight back against Microsoft’s overzealous spying. The path to privacy starts here.
Tools & requirements
- DoNotSpy11
- Windows 11 or Windows 10
Quick steps
- First, create a restore point in the app in case anything goes wrong
- Use the checkboxes to disable or enable Windows features
- Click Apply to save your changes, or select Discard to reset them
- Use profiles to quickly load saved configurations (requires Pro edition purchase)
Step by step guide
1. Start protecting your privacy

Before you get started, it's a good idea to create a restore point so you can put things right in case any change you make causes problems with your PC. To do so, click Actions > Create System Restore Point.
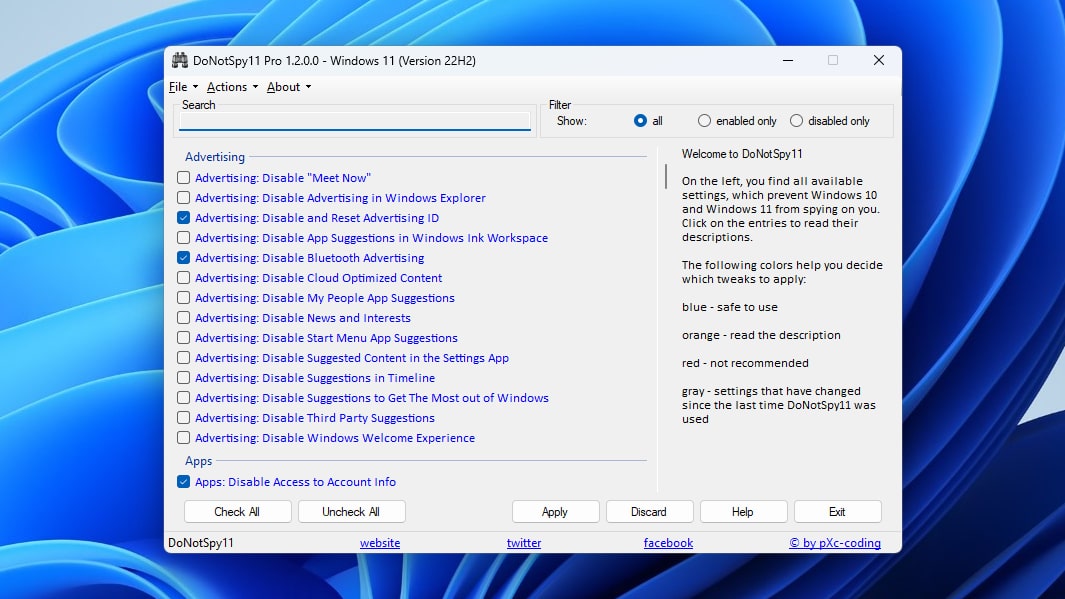
DoNotSpy11 is a fairly straightforward app. On the left-hand side is a long list of potentially invasive Windows settings and features you can disable. To do so, simply tick the checkbox next to a setting.
Once you've ticked a few checkboxes and decided what you want to block, click Apply. To revert any changes you've made, click Discard. Note that you can't discard any changes made before clicking Apply – it’s just for reverting unsaved changes.
As you scroll through the of Windows features, you'll notice that settings are sorted into various categories, from Advertising and Apps to Microsoft Office and Edge. That helps keep things organized and a bit easier to browse.
On the right are a few paragraphs of help text. They explain that any setting in blue text should be safe to disable, while you will want to click any features in orange text to check their description before disabling them. It's not recommended to disable red-text settings, and those in gray have been changed since the last time you used DoNotSpy11. If you want to show the help text again after clicking a setting, select the Help button.
Click on a setting to see more information about it on the right.
2. Filtering, sorting and extras

DoNotSpy11 has a few sorting and filtering options. In the top-right corner, click Enabled Only to just show those features that you have blocked, or click Disabled Only to just show settings that have been allowed. For instance, “Disable Activity Feed” will appear in Enabled Only if you have ticked its checkbox, thereby disabling it.
Using these filters is a quick way to view the “state of play” of your privacy settings. Just showing features that have been allowed, for instance, will reveal how your data is currently being shared with Microsoft and third-party apps.
In the bottom-left corner of the app, you can either check all or uncheck all settings. This is helpful if you want to disable all features except for a select few, for example.
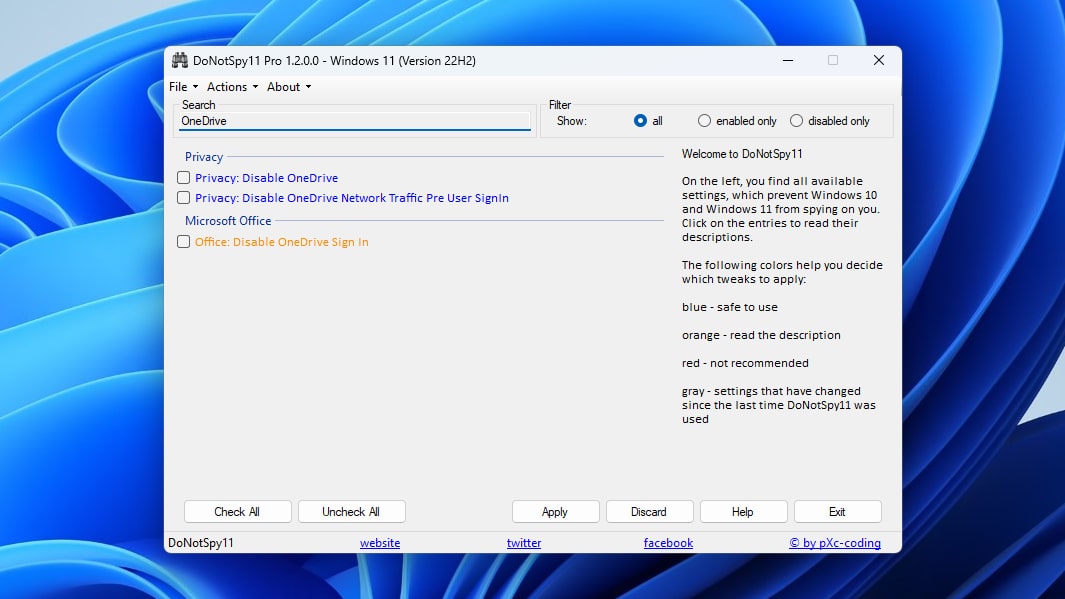
At the top of the app is a search box. The list of features will begin filtering as you start typing.
Click File > Save Profile to keep a copy of your DoNotSpy11 settings. This is useful if you want to share your configuration with someone else, or if you want to install DoNotSpy11 on another PC and would like to quickly get started with your preferred selection of enabled and disabled features.
You can load a profile by clicking File > Load Profile and navigating to the saved profile in question.
Final thoughts
DoNotSpy11 is a quick and lightweight way to protect your privacy in Windows 10 and Windows 11. It doesn't require much effort, yet it can go a long way to keeping your private data out of the hands of Microsoft and third-party app developers.
Just make sure you create a restore point before making any changes, as some options can have wide-ranging effects on how Windows works. If something goes wrong, load the restore point to put things back to the way they were.
Sign up for breaking news, reviews, opinion, top tech deals, and more.

Alex Blake has been fooling around with computers since the early 1990s, and since that time he's learned a thing or two about tech. No more than two things, though. That's all his brain can hold. As well as TechRadar, Alex writes for iMore, Digital Trends and Creative Bloq, among others. He was previously commissioning editor at MacFormat magazine. That means he mostly covers the world of Apple and its latest products, but also Windows, computer peripherals, mobile apps, and much more beyond. When not writing, you can find him hiking the English countryside and gaming on his PC.