
 Become a TechRadar Insider


Your digital music collection is a mess. How do we know? Because everyone's digital music collection is a mess!
There are lots of tools to help you delete duplicates, rename your files and update your artwork - but most clean-up tasks can be achieved within iTunes without much hassle.
So, in a crusade to purify our reader's iTunes libraries, we take you through 10 simple steps that will get things back on track.
1. Back up your library
In case things go wrong, back-up your iTunes library first. Go to "File > Library > Consolidate Library" to copy all data files to your iTunes Music folder. Next, copy the folder to an external drive or another folder on your machine. By default Windows users will find iTunes Music in \Documents and Settings\username\My Documents\My Music\iTunes\iTunes Music
2. Good riddance to bad rubbish
Now delete the music you don't want; a long job if you have to do it manually, but quick if you've been star rating your tunes. Choose "Music" in iTunes Library section, hit CTRL SHIFT + 3 to go to List view and click the "Rating" column twice to order your tunes from least to most liked. Select all your one and two star tunes, then hit CTRL and DELETE.
3. Remove duplicates manually
Go to "File > Show Duplicates" then manually delete the songs you don't need. A power tip: "Show Duplicates" matches tunes by title and artist only. Holding down SHIFT changes the command to "Show Exact Duplicates" - and iTunes will match tracks by length too.
5. Remove orphans
Sometimes, deleted files remain listed in your library. We love this ingenious. smart playlist tip from blogger Paul Mayne. Alternatively, use Songbird's The Exorcist plugin to do the deed if you want to download that.
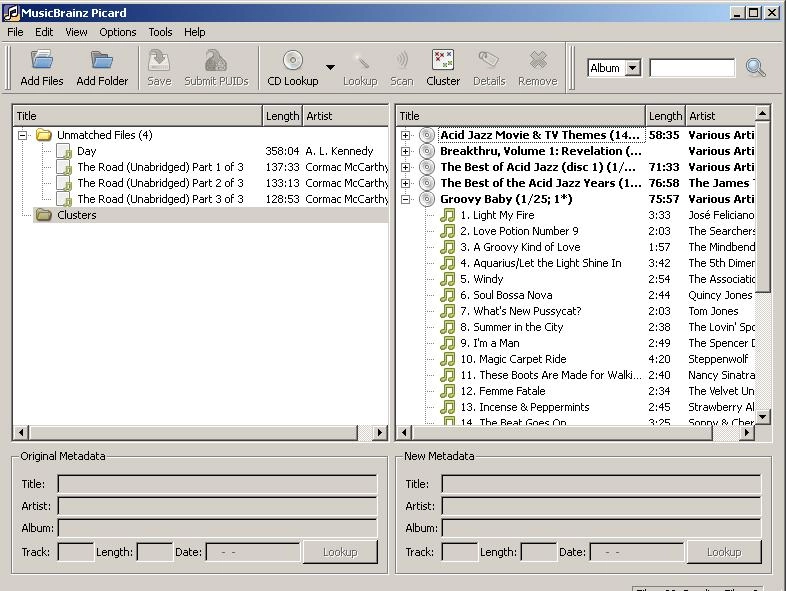
7. Fix metadata
Working with your new back-up, use the freeware tool Picard Tagger to fix any erroneous song titles, album info and other embedded meta data. It connects to the user-generated music database MusicBrainz, analysing tracks by length, title and "acoustic fingerprint". We recommend fixing one album or artist folder at a time and saving over your back-up - but only when Picard Tagger gets it right. Any songs it gets wrong or misses, you'll have to edit the ID3 tags manually when you rebuild your library.
8. Rebuild Your library
This penultimate step will fully rebuild your iTunes library - but do make sure your fixed back-up from the previous step is complete. Here's why: you'll have to shut down iTunes and delete the original old music files in your iTunes Music folder. Next, go up one folder and delete all the iTunes library files. Restart iTunes - go to "File > Add Folder to Library" and locate your clean and tagged back-up. iTunes will import the files and rebuild your library.
9. Update your album artwork
iTunes should recognise your albums and update your cover artwork automatically. If it doesn't, select individual tracks and choose "Advanced > Get Album Artwork". If your selection has the wrong artwork, right click on the track and choose "Clear Downloaded Artwork", then download again.