The ultimate guide to backing up your Mac
Protect your files forever
Time Machine is simple and effective to use, but if you have more than one Mac, you'll want to keep them all secure.
The simplest solution here is using Apple's iCloud storage service. Every Apple device user with an Apple ID gets 5GB of storage without cost, but you do have the option to upgrade to a paid month storage subscription plan of $0.99 per month for 50GB, $2.99 per month for 200GB, and $9.99 per month for 2TB if you require more space.
The idea behind iCloud is mainly to sync your files on all your Apple devices, so you have access to them whether you're on your iPhone or your MacBook Pro. However, it's also helpful when your Mac suddenly stops working. Even if none of the files and information on that computer can be restored or saved from its hard drive, you can still retrieve them as long as they are backed up in your iCloud.
This applies to all the files in your Desktop and Documents Folders and any in-app information and files for things like Photos, Notes, Contacts, Mail, Reminders, and Pages.
Sadly, iCloud won't let you automatically sync any files and folders outside your Desktop and Documents Folders – like if you have a separate folder for your Lightroom backups and files, for instance. However, you also can manually drag and drop a folder or a file to the iCloud Drive, accessible via the sidebar in Finder, which should create a backup in your iCloud.
Just bear in mind that any file you save in that drive will automatically be synced to all your other devices connected to your iCloud account. In addition, if you don't have enough space, Apple will automatically generate a shadow of those files, which you can click on to download as needed – and of course, when you've made space.
How to use iCloud

1. Set up your iCloud
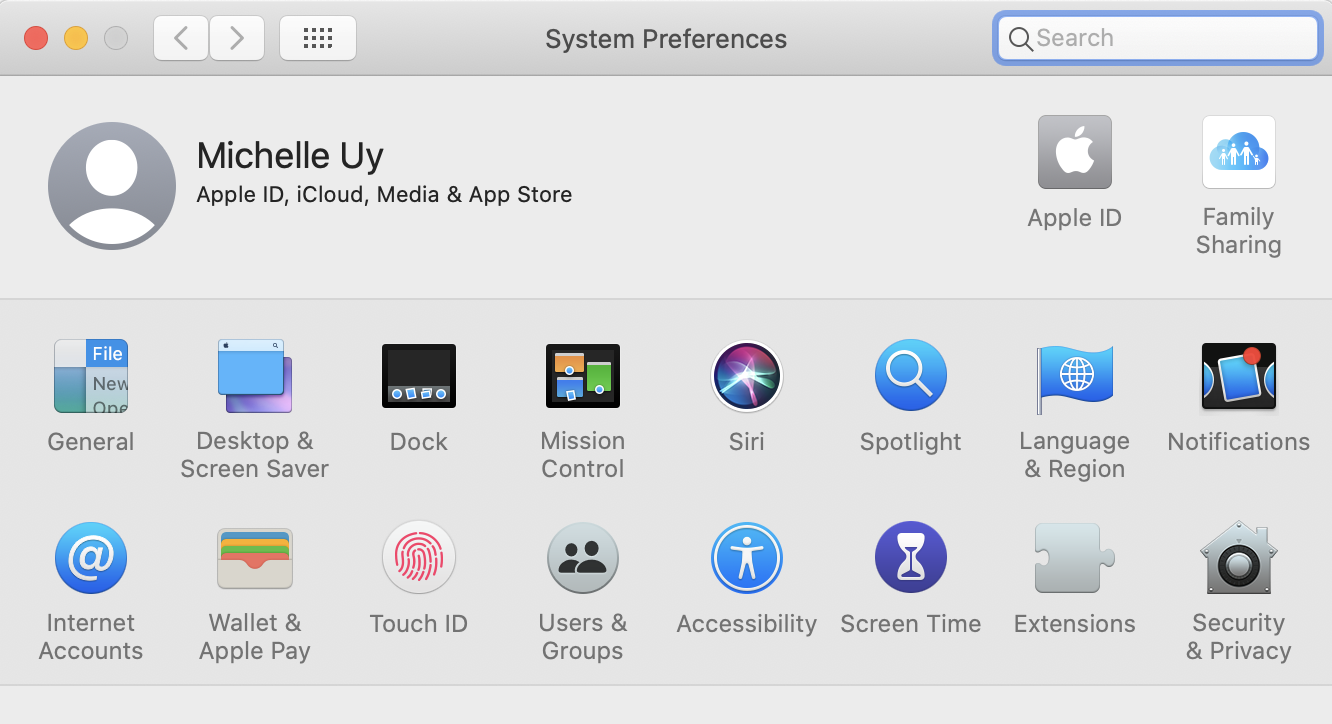
To set up your iCloud, open System Preferences and click Apple ID. If you’re not already, it’ll prompt you to sign in to your Apple ID. As soon as you’re signed in, your iCloud account should automatically turn on, and you should have 5GB of free cloud storage available.
Sign up for breaking news, reviews, opinion, top tech deals, and more.

2. Select your settings
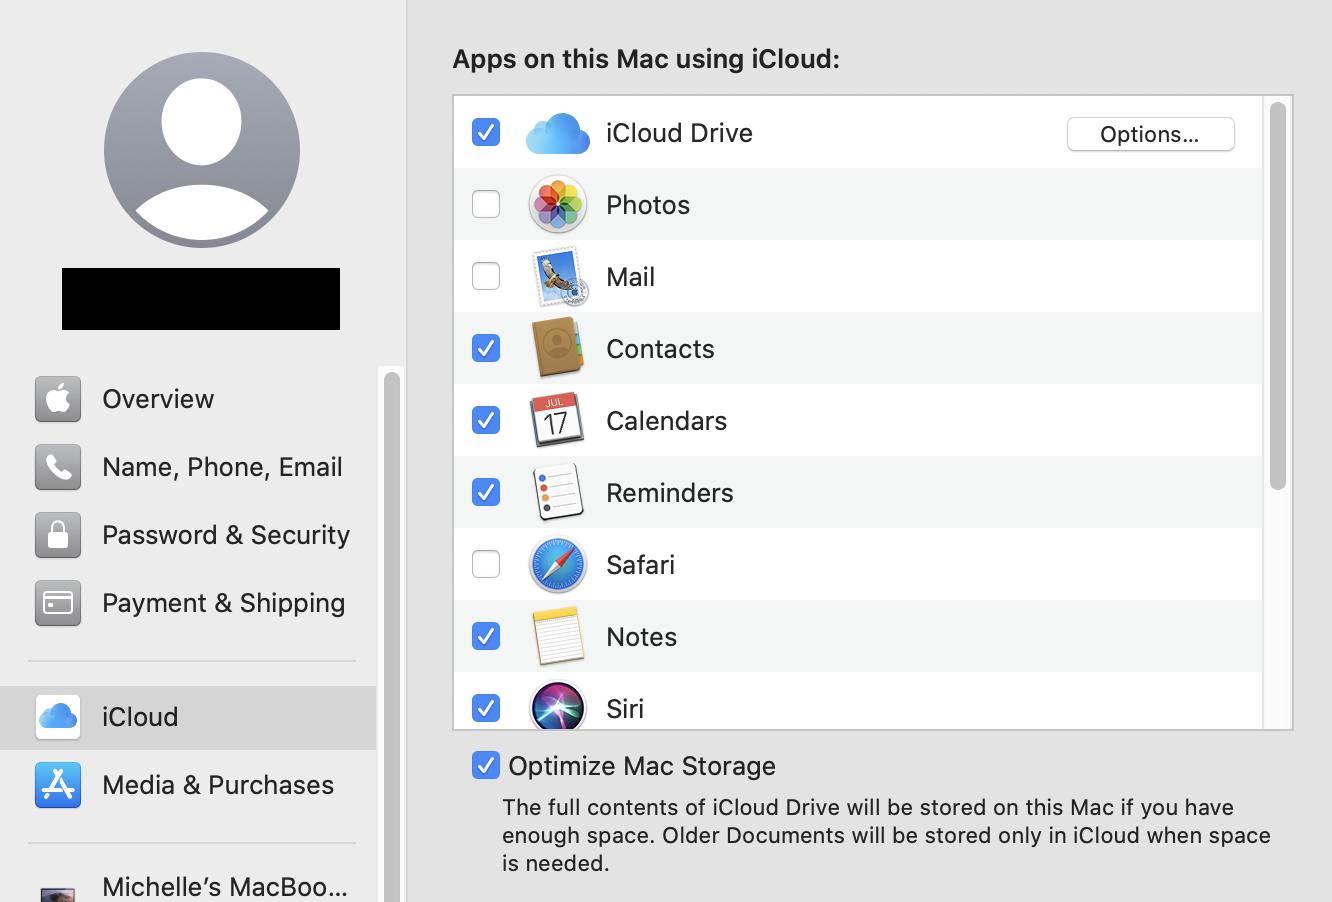
You can choose which apps, files, and folders you’d like to sync to your iCloud and your devices. Next, click on iCloud in the sidebar to go to your iCloud settings. This should list all the apps on your Mac that use iCloud, with the option to select and deselect them.
Similarly, click on the Options button next to iCloud Drive to access the apps that store documents and data in iCloud. These can be selected and deselected as well, based on your preference.
Select the most important ones like Contacts, Calendar, Mail, and Notes if you have limited space. And, if your photo-taking habits are anything like ours, we’d deselect Photos and find a backup Cloud service like Google Photos, which won’t sync 50GB or more worth of images and videos from your iPhone and your iPad. Otherwise, you’ll quickly run out of space on your Mac.

3. Optimize Mac Storage
You might be surprised at how quickly you’ll run out of space, especially when you have a lot of photos, videos, and game files. To ensure that you’ve always got enough space when you need it, check Optimize Mac Storage.
With this option enabled, your Mac will automatically remove older files in your Desktop and Documents folder from your hard drive and store them in iCloud, leaving only a “shadow” of that file that you can use to re-download later.

4. Upgrade and manage iCloud storage
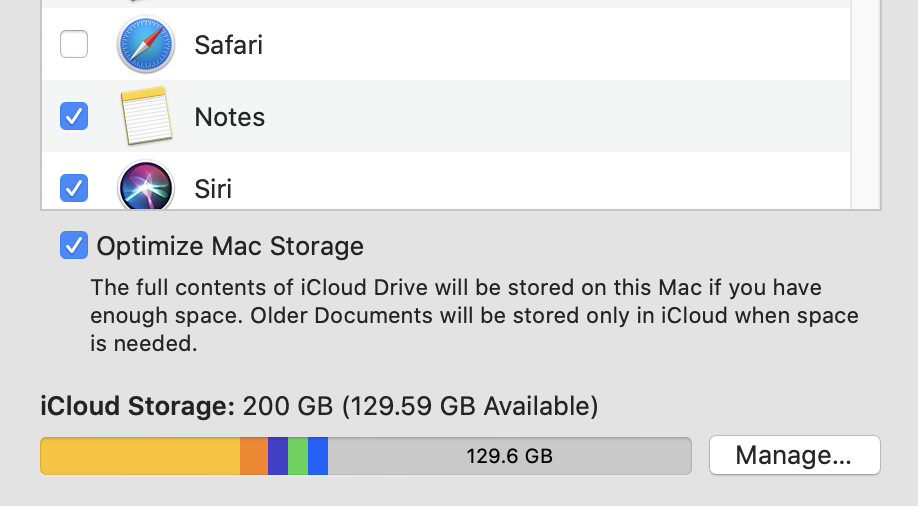
At the bottom of the Window, you’ll see your iCloud storage capacity and usage. In addition, you can upgrade to a paid monthly storage subscription plan starting at just $0.99 per month if you need more space.
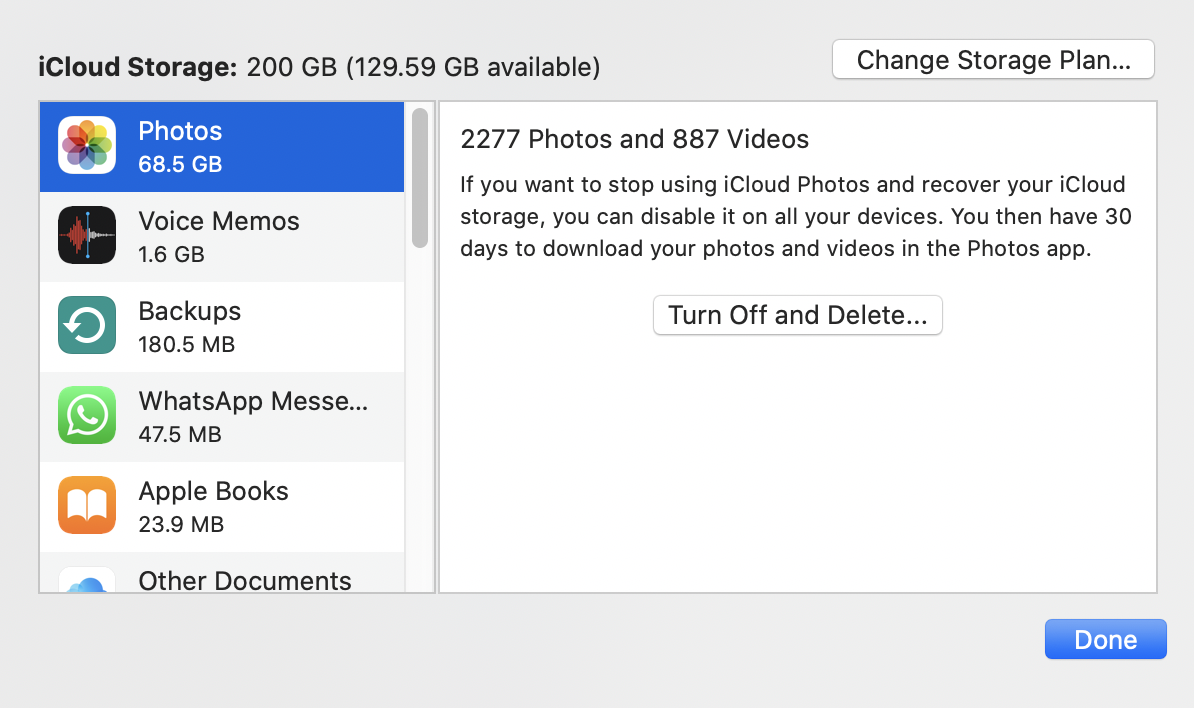
Click on Manage, then Change Storage Plan, which should give you these two subscription plan options. Select the plan that suits your needs, click Next, enter your Apple ID password, and click Buy.
You can also manage your storage when you need to free up space. On the left side, you should see the apps using up most of the space in your iCloud. Choose the app whose files you’d like to delete, and it should give you the option to turn that app off and delete its files from iCloud.
Nik is an Esperanto-speaking, pencil-bothering, manual typewriter fan who also happens to have a soft spot for tech after sufficient years in the business to know what that disk icon on the save button actually means. Never happier than when out in his campervan, coffee in one hand, ebook in the other, listening to the rain on the roof.