


Virtual reality (VR) is taking the tech world by storm, and for good reason.
Not only is it useful for things like education, but it’s also a great way to provide a much more immersive gaming experience. And, arguably, there’s no better company equipped to handle high-quality gaming than Sony.
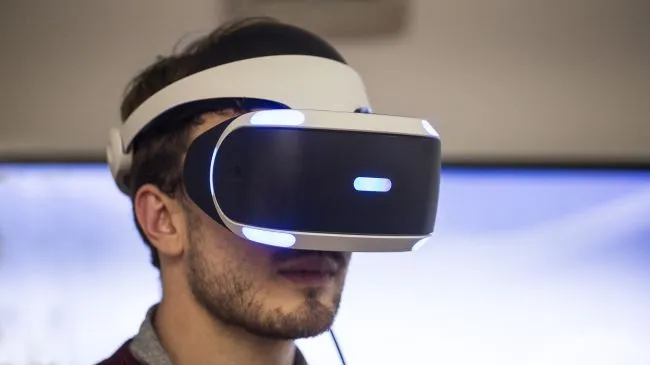
Of course, if you have gotten your hands on the PlayStation VR headset, you’ll need to set it up before you can really get sucked into any games.
Thankfully, PlayStation VR is among the easiest of the best VR headsets to set up, thanks to the fact that it’s purpose-built to work with the PlayStation 4 or PlayStation 4 Pro.
That means you won’t need to worry too much about specifications – though we’ll get into the difference between using PSVR with the PS4 or PS4 Pro a little later.
- The best PlayStation VR games are just a click away
If you’re setting up the PlayStation VR headset for the first time, we recommend setting aside at least 30 minutes to do so.
You may take a little less time setting it up, and if you’re new to everything you may take a little more – but 30 minutes should be about how long it takes for most people.
If you still haven’t bought the PSVR headset, you should note that there are actually two versions – one launch version, CUH-ZVR1, and one updated version, with the model number CUH-ZVR2.
If you just bought your headset, chances are you bought the latter, which has streamlined cables and offers pass-through HDR to compatible 4K TVs – but we’ll cover both in this guide.
No matter how tech-savvy you are, here’s how to set up the PlayStation VR headset.
- Find a great PlayStation VR deal right now!
PlayStation VR requirements
Unlike the Oculus Rift or HTC Vive, you won’t need a PC setup with very specific components to use the PlayStation VR headset. Why? Because it runs with your PlayStation 4 or PlayStation 4 Pro, so if you have a PS4 or PS4 Pro, the headset should work just fine.
In other words, there are really only two requirements to using PlayStation VR: have a PSVR headset, and have either a PS4 or PS4 Pro.
We’ll get into the main differences between using the headset with a PS4 versus a PS4 Pro later, but if you want the basic gist, it’s that the graphics will be better for games that are specifically designed to take advantage of the PS4 Pro’s extra power.
How to set up PlayStation VR
As mentioned, there are two versions of the PSVR headset. We’ll cover both here, but we’re going to start with the newer version.
To determine which model you have, you should be able to find the product code somewhere on the packaging (probably on the side). CUH-ZVR2 is the newer model, while CUH-ZVR1 is the launch model.
Setting up the PlayStation VR CUH-ZVR2 headset
1. Connect the HDMI (TV) port on the Processor Unit, or the small black box that comes with the PSVR headset, to your TV.
2. Connect the PlayStation Camera to your PS4. The camera should sit around 4.5-5 feet off the floor.
3. Connect a HDMI cable to your PS4, then to the HDMI (PS4) port on the Processor Unit.
4. Connect the USB cable to the back of the Processor Unit, then to the front of your PS4.

5. Plug the power cable into a power outlet, then to the back of the Processor Unit.
6. Connect the PSVR headset’s cable to the front of the Processor Unit. There are two connections to make here, but the cable and Processor Unit should have corresponding symbols.
7. Connect your headphones to the bottom of the headset.
8. Turn on your TV and PS4, using the standard DualShock controller.
9. Press the power button on the bottom of the front of the headset. Once the headset successfully turns on, the light on the back of the headset will glow blue.
10. Follow the on-screen instructions to properly configure the headset for you and your space.
Setting up the PlayStation VR CUH-ZVR1 headset
1. Follow steps 1 through 5 for the CUH-ZVR2 headset.
2. Slide back the connection cover on the Processor Unit and connect the PSVR headset connection cable connectors. There are two connections, but there should be corresponding symbols on the cable and Processor Unit to help you figure out which connection goes where.
3. Connect the PSVR headset and headphones to the connection cable.
4. Follow steps 8 through 10 for the CUH-ZVR2 headset.
Connecting the PlayStation 4 Move controllers
You’ll connect the PS4 Move controllers, which you might want to use with PSVR, the same way you would any other PS4 controller. In case you’ve forgotten, here’s how to do that.
1. Connect the MiniUSB cable into the Move controller, then into a USB port on the front of your PS4.
2. Hold down the PS button on the controller to pair it with the console.

You should now be able to use your PSVR headset with any VR games that you have – though if you have none, you’ll probably want to buy some.
Other things you need to know
As mentioned, there are a few small differences between using the PSVR with a PS4 versus using it with a PS4 Pro.
Thankfully, all PlayStation VR games work with both consoles, so if you’re worried about game support, you don’t need to be.
Thanks to the extra processing power in the PS4 Pro, however, the graphics will be slightly better during normal gameplay.
Apart from that, the whole system should be pretty straightforward. You’ll be able to download PlayStation VR games straight from your PS4, then experience them in stunning virtual reality.