 Become a TechRadar Insider


Thanks to Lion, lost work could become a thing of the past. Barring the failure of your Mac's hard drive, you need no longer worry about losing work if the app in question crashes.
This is because OS X Lion has two clever systems built into it: Auto Save and Versions. Provided you're using an app that has support for these two features built in, your Mac automatically saves what you do as you go along.
Article continues belowiWork '09 may also need updating: you need to be running at least Pages 9.1, Keynote 5.1 and Numbers 2.1 (check by opening the app in question and going to Pages > About Pages, Keynote > About Keynote or Numbers > About Numbers).
Step-by step: Make the most of Versions
1. Create your document

Let's create a TextEdit document. The first thing to do when you create the file is to save it somewhere on your Mac's drive, even before you start work. This will ensure Versions and Auto Save can start their work. Choose File > Save now, or press Command+S.
2. Get to work

As you write, your work is saved automatically. If you quit TextEdit, you won't be prompted to save, since your changes have already been stored. Next time you open that file, the new work will be there waiting for you. That's Auto Save in a nutshell.
3. Save a version

As you work, there's nothing stopping you from pressing Command+S or choosing File > Save a Version. This records the document, in its exact state, in the versions timeline, as shown on the opposite page, meaning you can jump back to this precise point in your work.
4. Options menu

Hover your mouse pointer over the name of your file in the top of the window and you'll see a triangle appear to its right. Click this to show a little menu. Note the Revert to Last Saved Version entry, which does what it says as well as allow you to look for an older version.
5. Revert to Saved

The last saved version takes you back to the point your file was at when you last chose to save a version (or pressed Command+S). If you haven't saved a version since you opened the file, you'll be taken back to this point. When you Revert to Saved, Lion also saves a version.
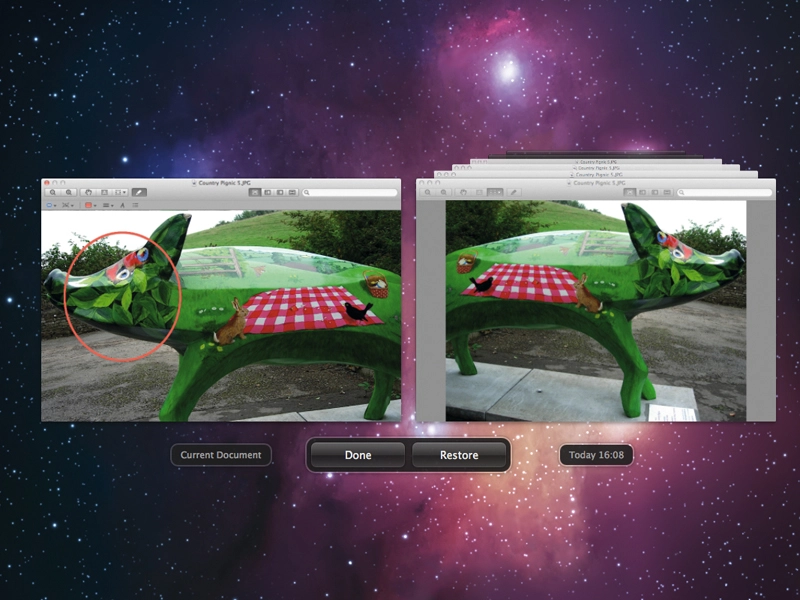
6. Browse previous versions

From the little menu we looked at in Step 4, choose Browse All Versions…. This will open up the timeline that's shown on the opposite page, with your current document on the left and previous versions on the right, giving you a quick side-by-side comparison.
7. Go back in time

Click one of the windows in the stack on the right to bring it to the front, enabling you to compare it to your current one. To move forwards, use the timeline on the right. As you hover over each notch, you'll see when that version was saved. Click it to bring it to the front.
8. Bring it back

Once you've found a version to restore, click Restore below. Remember that before doing so, your Mac will have saved a version, so if you later realise you actually want part of the content you lost by reverting, it'll be sitting waiting for you in your timeline.