How to combine multiple hard drives in RAID 0 using Windows 10's Storage Spaces feature
Make the most of your storage by melding it together
Sign up for breaking news, reviews, opinion, top tech deals, and more.
You are now subscribed
Your newsletter sign-up was successful
Ask any enthusiast with a competent desktop PC tower and they’ll tell you that one of the best advantages of a traditional rig is the easy upgradeability.
Indeed, there truly is no pleasure greater than that which results from popping a spare SATA cable onto a brand-new SSD or hard drive. Unfortunately, the thrill often stops there.
As you begin to install new apps, divvying up folders between multiple drives, seemingly basic tasks become obstructive challenges. Once you run out of storage for your overwhelming archive or Steam games, the question arises: should you move something from your current Steam folder to the Recycle Bin or start a brand-new one on a secondary drive?
For instances like this, there’s a clear-cut solution that we don’t talk about enough in the computing world. Dubbed RAID 0, a name that refers to the redundant array of independent disks (RAID) and the level zero at which it’s performed, this technique is designed to “stripe” data between multiple drives.
In turn, a RAID 0 configuration will produce a single virtual drive listed under the “This PC” section of File Explorer, effectively cutting down on all the clutter. In this tutorial, we’ll explain how to achieve this yourself in Windows 10, covering everything from the prerequisites to the final, consolidated product.
First steps to RAID 0 in Windows 10
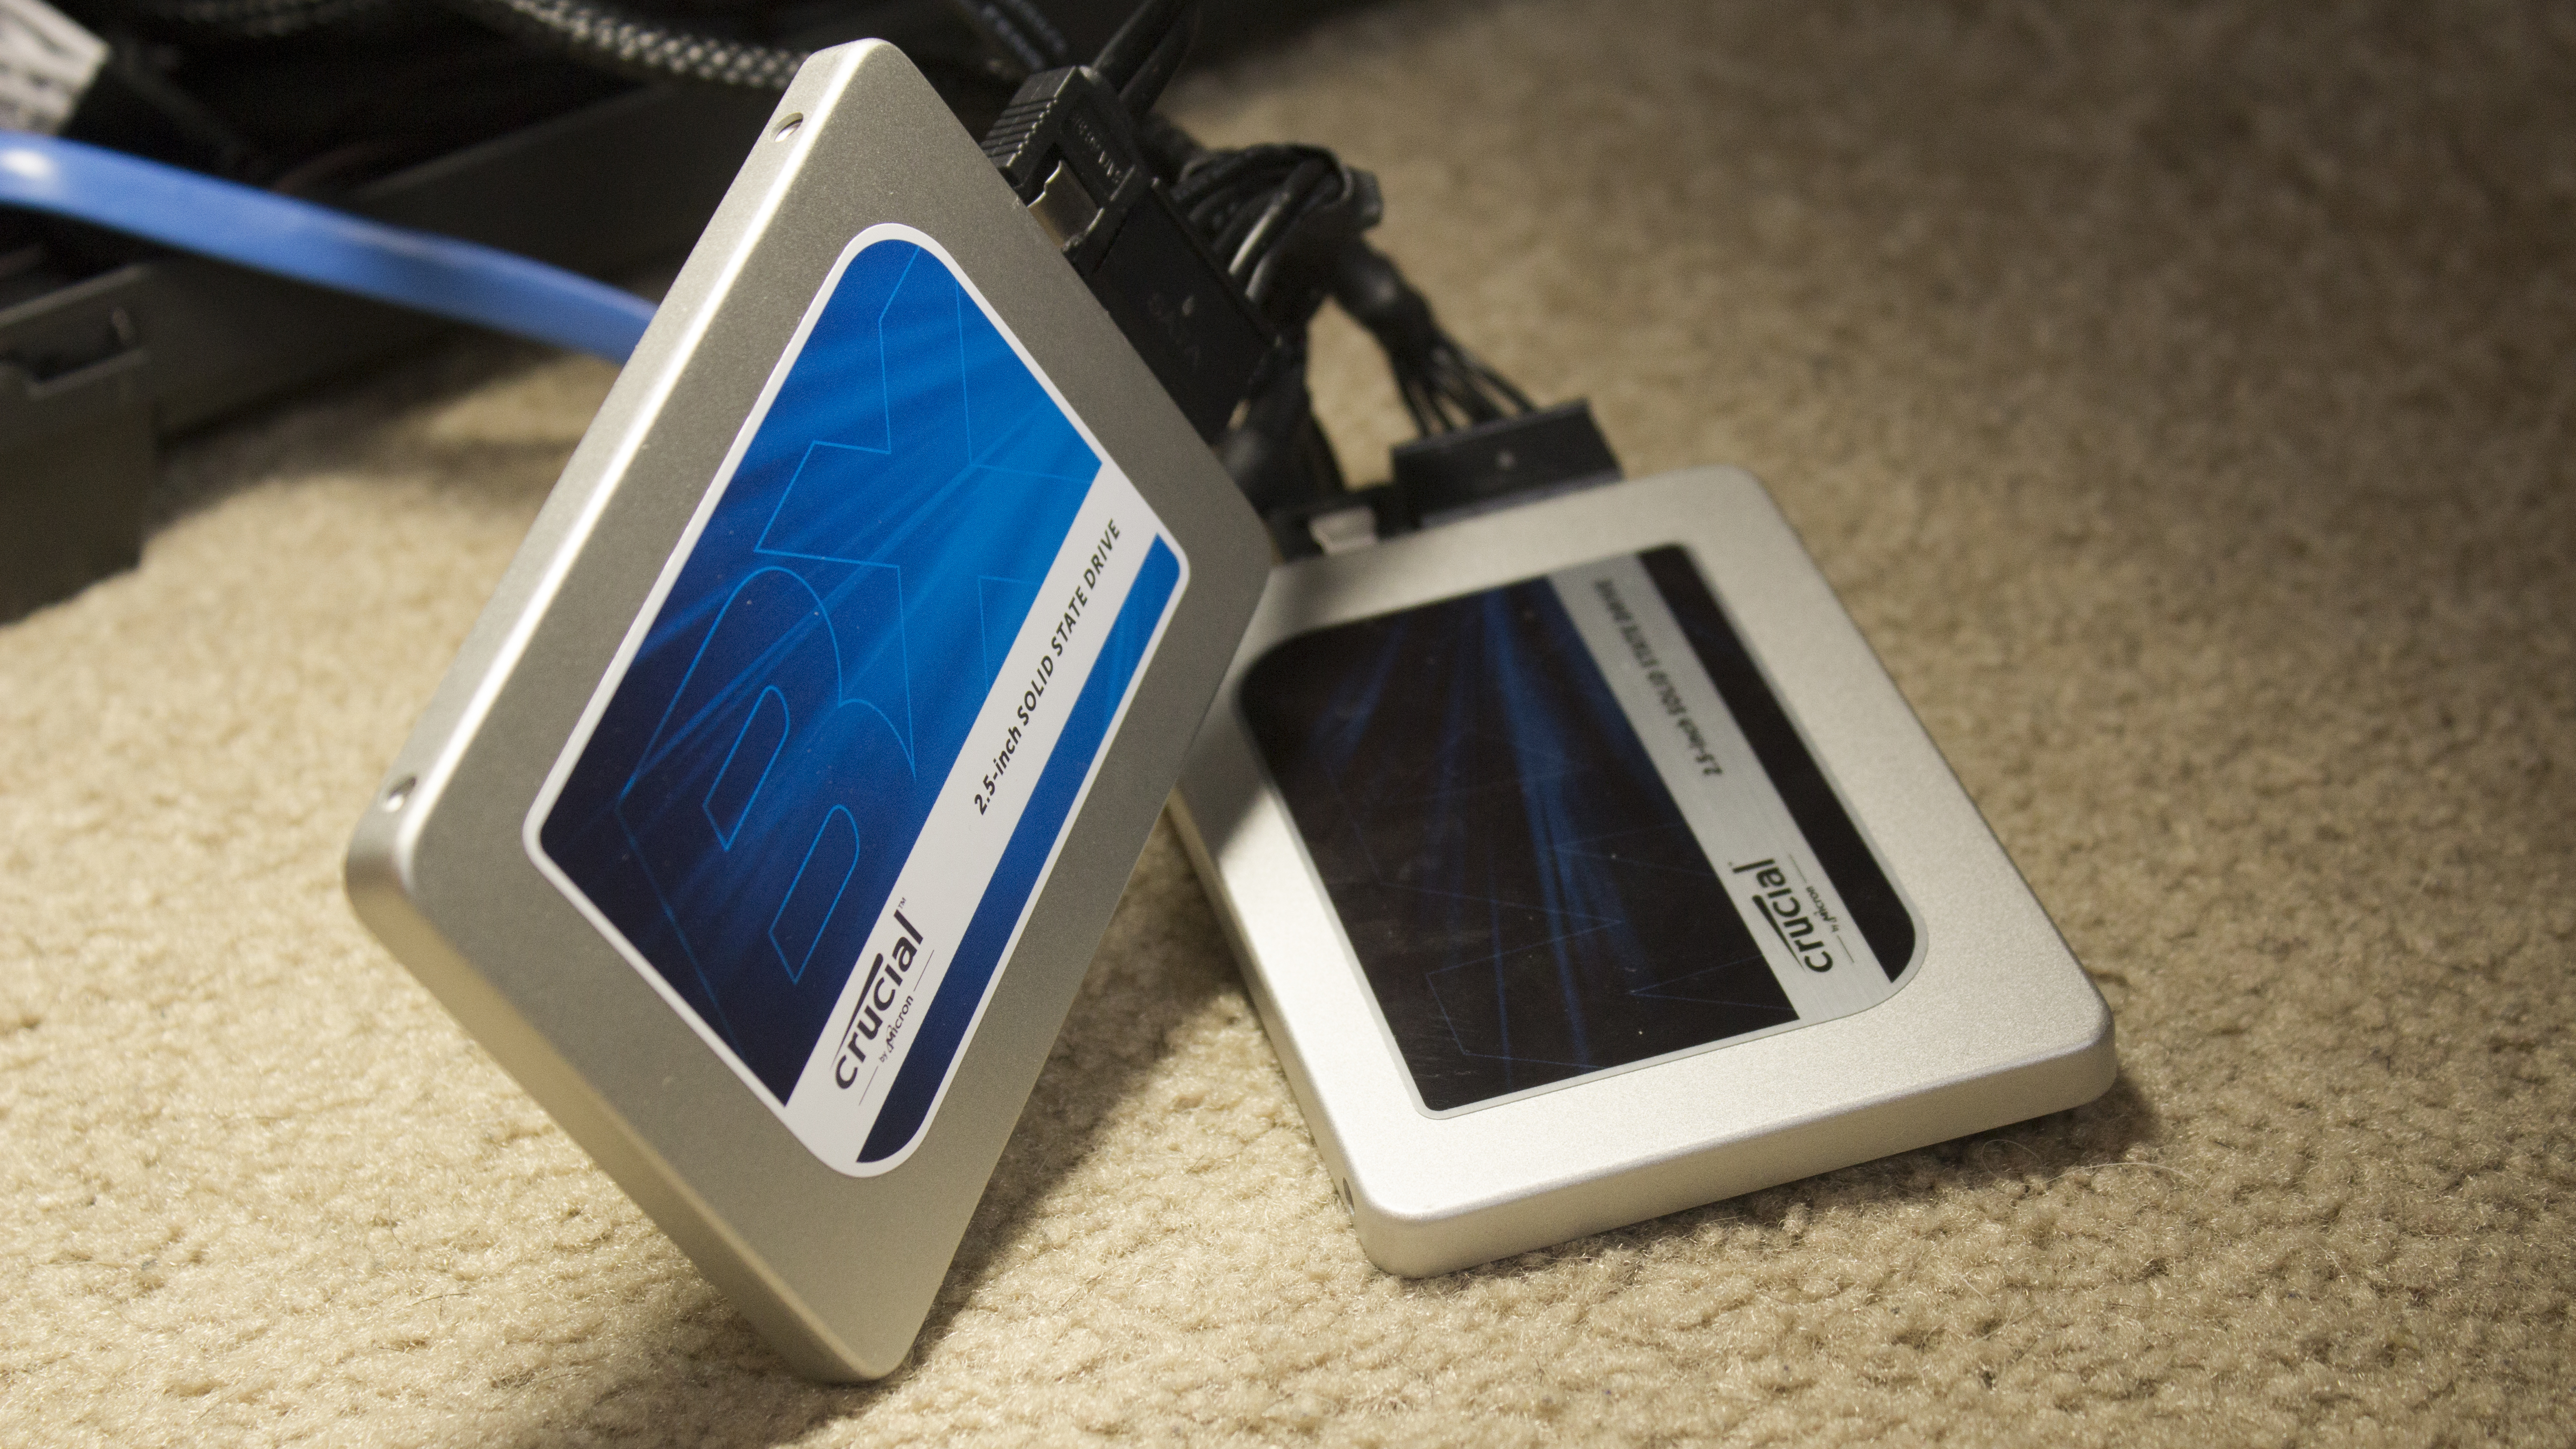
The first step in prepping your PC for some much-needed storage blending is to make sure that each of the drives you plan on unifying are the same make and model, and use the same firmware.
Of course, it’s certainly possible to fuse different drives in a RAID 0 arrangement, but it’s not ideal as the configuration will automatically assume the speed of the lesser drive.
Sign up for breaking news, reviews, opinion, top tech deals, and more.
After you’ve checked for brand solidarity, it’s absolutely essential that you relieve the drives completely of any file systems or volumes. That means, yes, you’ll need to backup everything on the drives in question prior to forging a RAID 0 array.
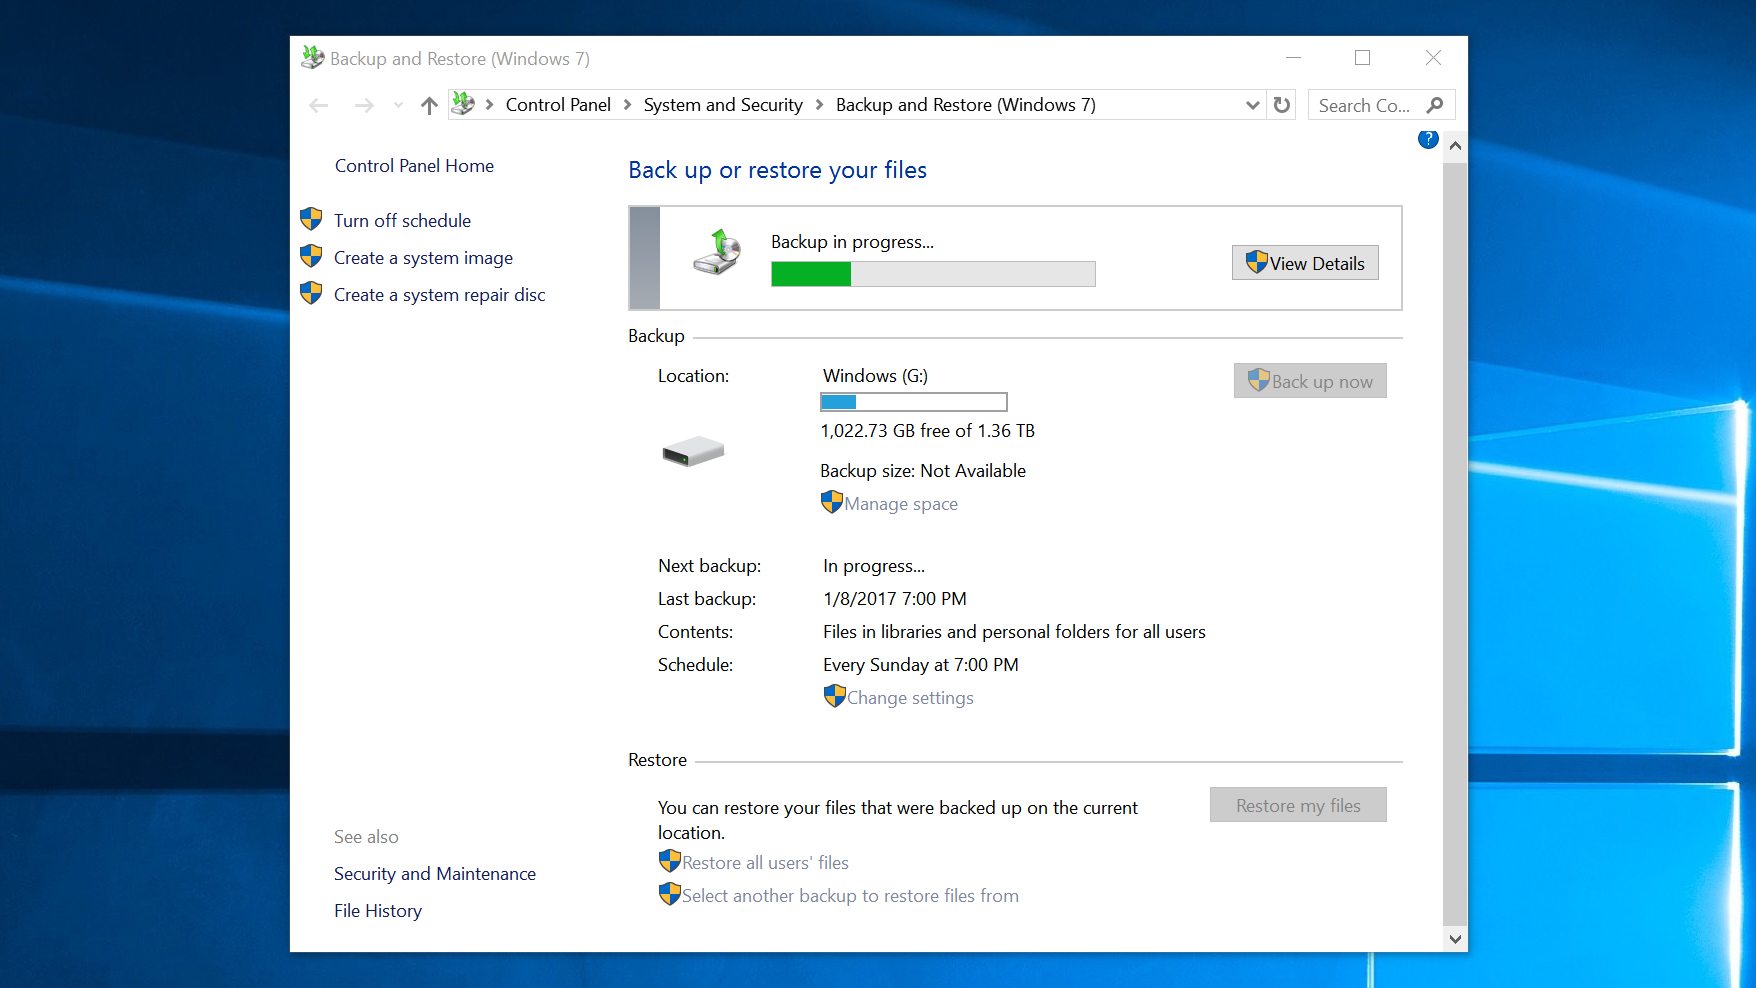
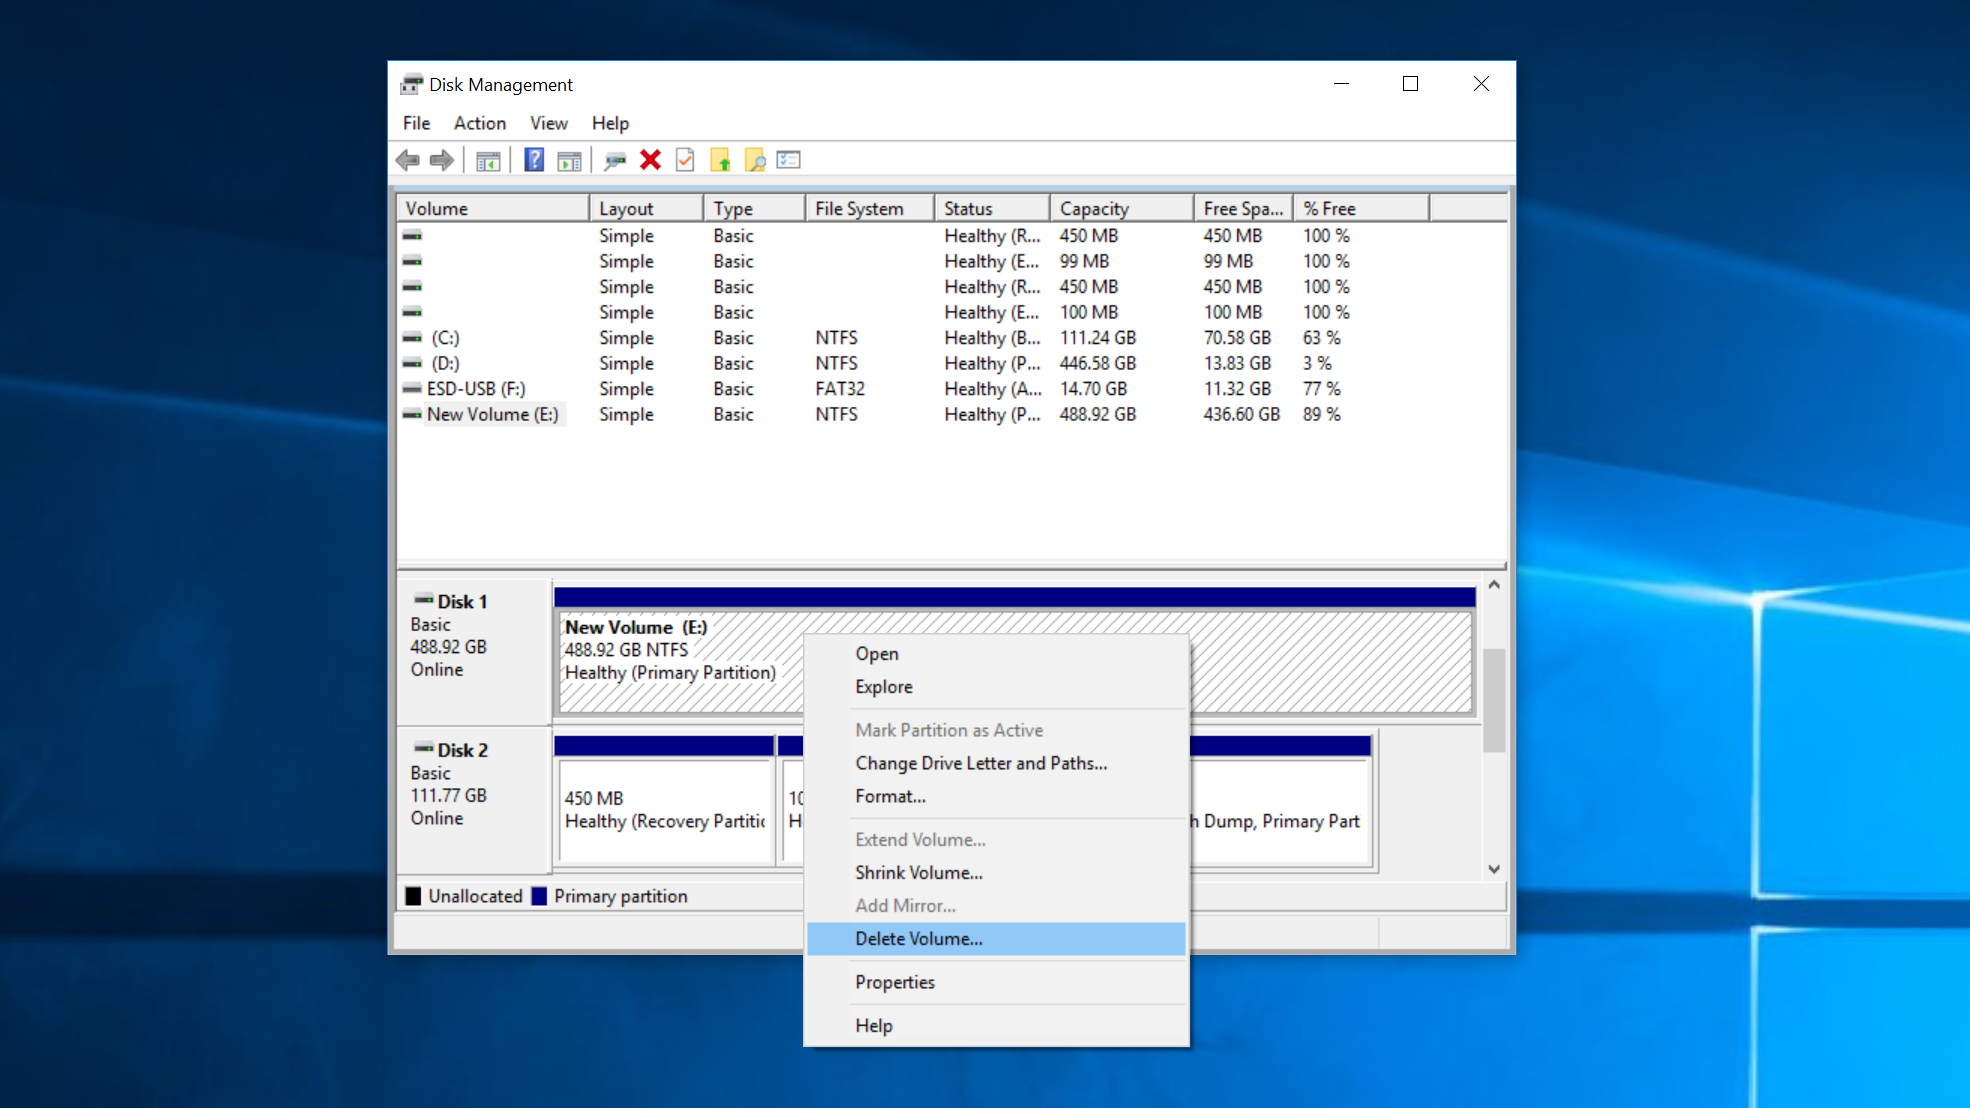
Once you’ve backed everything up, head to the Cortana search bar at the bottom left-hand side of your screen and key in 'Disk Management'. This will bring up the the option to 'Create and format hard disk partitions'.
Click that before locating the drives you wish to combine in the lower half of the newly opened window. Next you’ll want to clear any evidence to your PC that the drives still exist by right-clicking each volume followed by the 'Delete volume' command.
Pro tip: if you have a recovery volume still lingering on a previous boot drive (where an operating system was once stored), the best way to get rid of this is with outside software like MiniTool Partition Wizard. Without familiarity with the command line interface, removing these without the use of third-party apps can be unnecessarily painful.
Using Storage Spaces
Now that your drives are unallocated and your conscience is clear, it’s time to get to work. Windows 10 doesn’t call RAID 0 by name, but you’ll find the option to create a RAID 0 array under a search term called 'Storage Spaces'. Type that in the Search bar next to the Start button and simply click on the resulting match.
At this point, a new window will open, headlined by the 'Manage Storage Spaces' label. Subsequently, navigate to the Create a new pool and storage space hyperlink and click it.
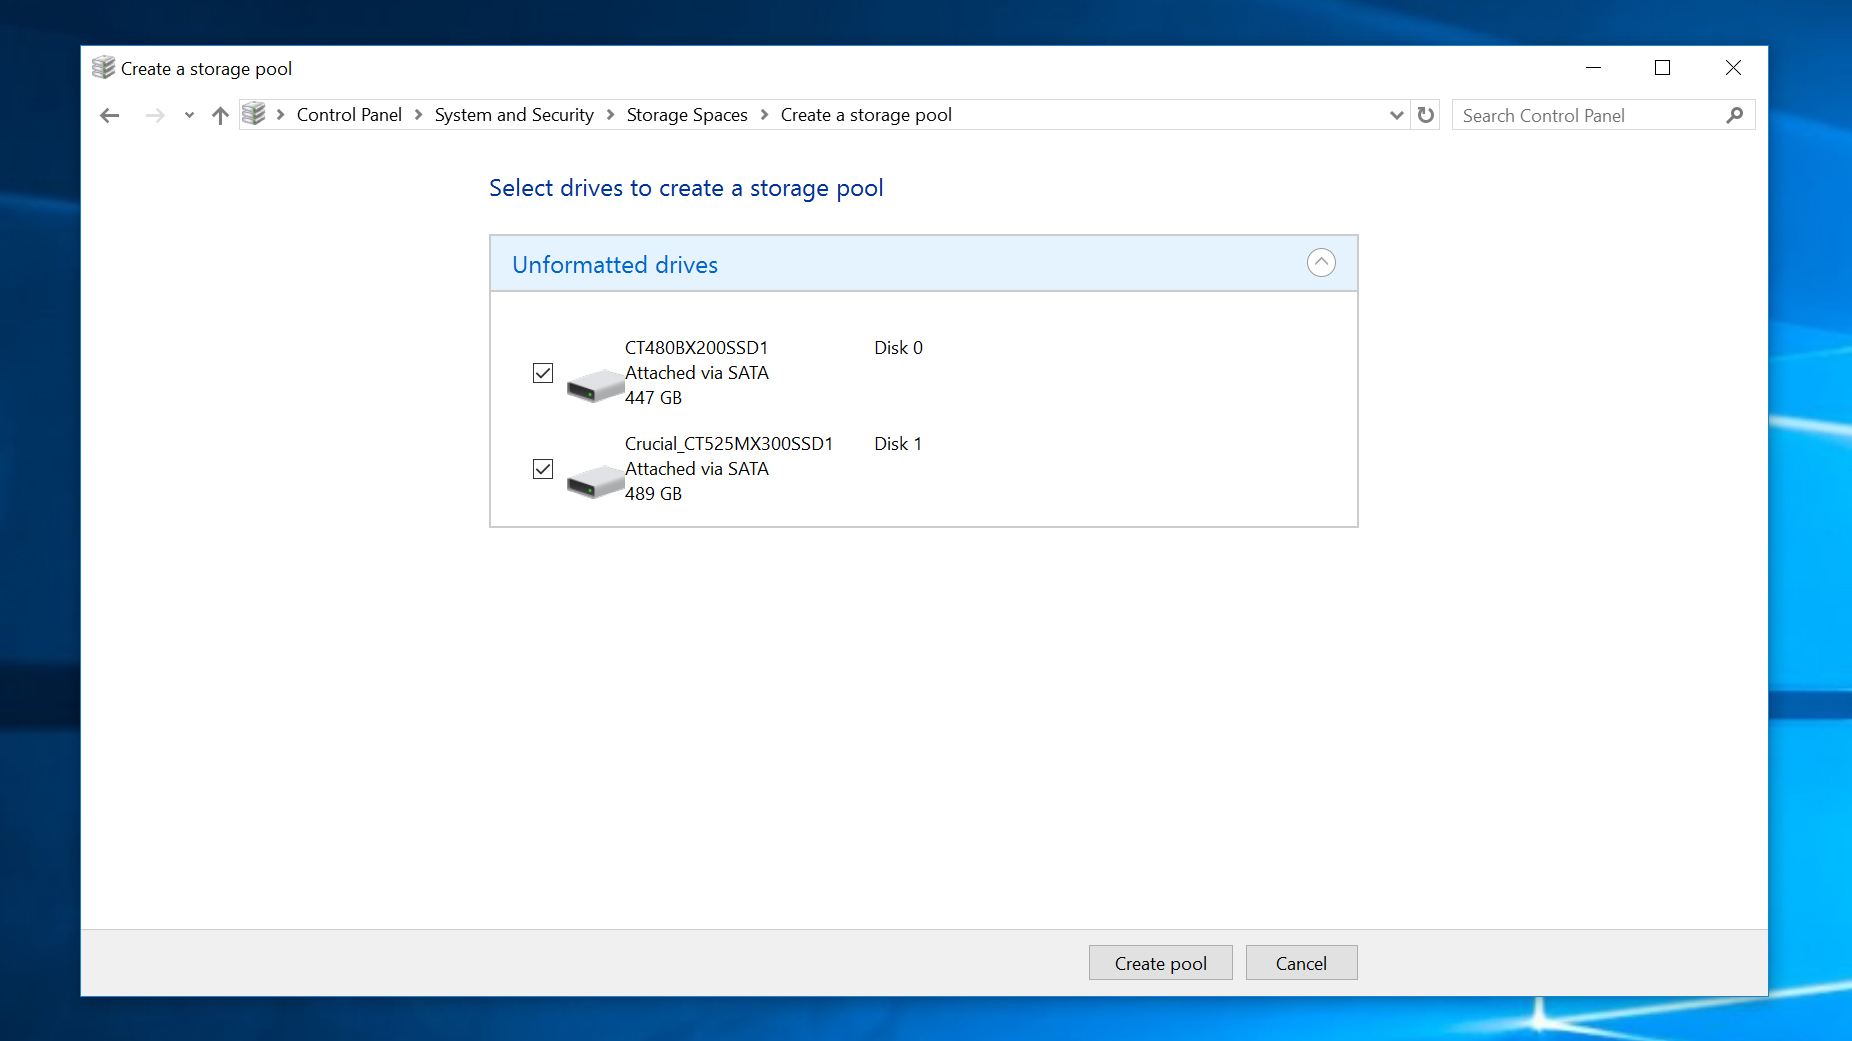
Microsoft will then ask for administrative privileges, which you’ll want to approve in order to carry out the RAID 0 array. On the next screen, verify that the unformatted drives listed are the ones you’re looking to merge and select 'Create pool'.
The next step may take a few minutes, but at the same time you don’t really have to do anything at all. So sit tight and grab a coffee or something as Windows prepares your drives to initiate their impending RAID 0 composition. On the next screen, you’ll be asked to choose a name, “resiliency type” and size for your array.
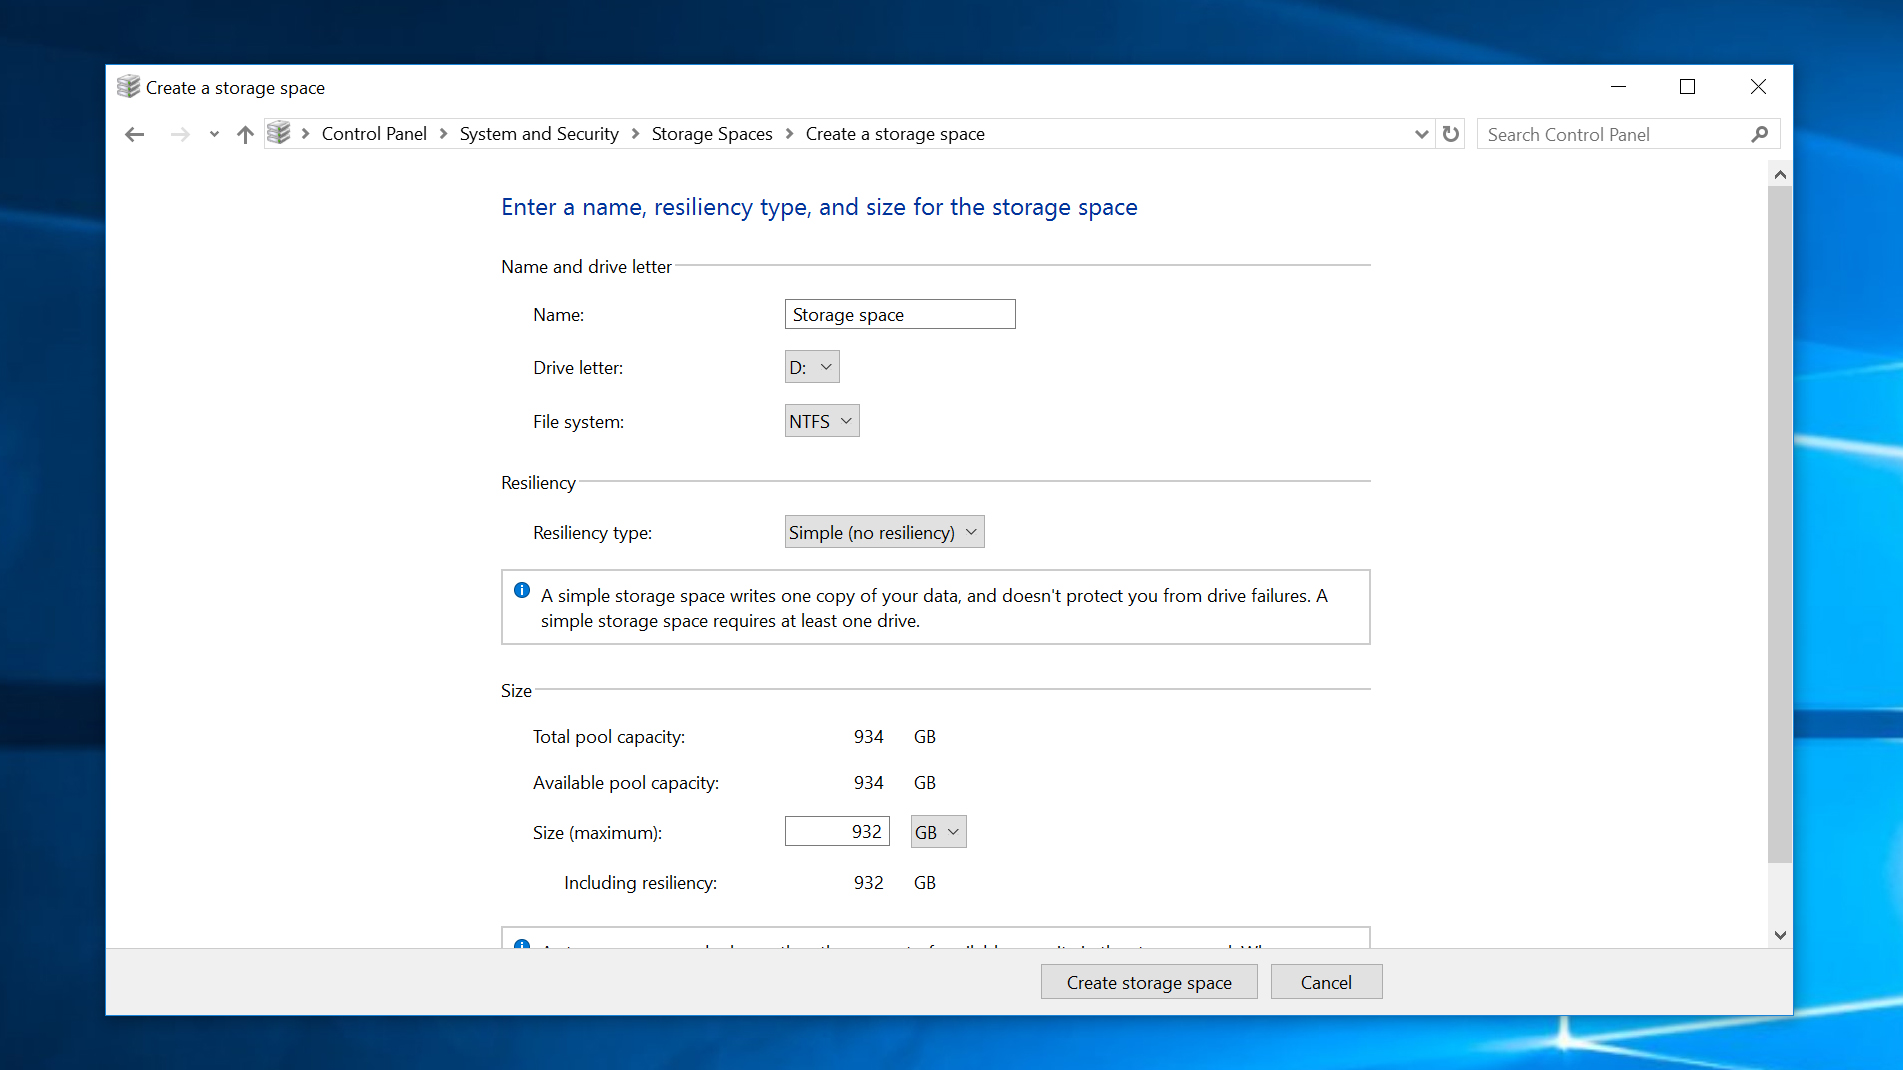
Resiliency type is just a fancy way of attributing the level that we talked about early on. In the accompanying drop-down menu, you’ll want to opt for 'Simple (no resiliency)', which is Microsoft jargon for RAID 0. The drive letter and name are only important for your own sake, personal identification and so forth. You can assign whatever you want to these sections, but it’s best to keep the file system as NTFS.
Final steps
If it’s still open, you may want to close out of the Disk management window as well as any other application that may be utilizing your drives. If you used MiniTool Partition Wizard or anything else to eradicate the volumes on your solid state or hard drive, close out of them before creating a RAID 0 array. Finally, click Create storage space to commence the procedure.
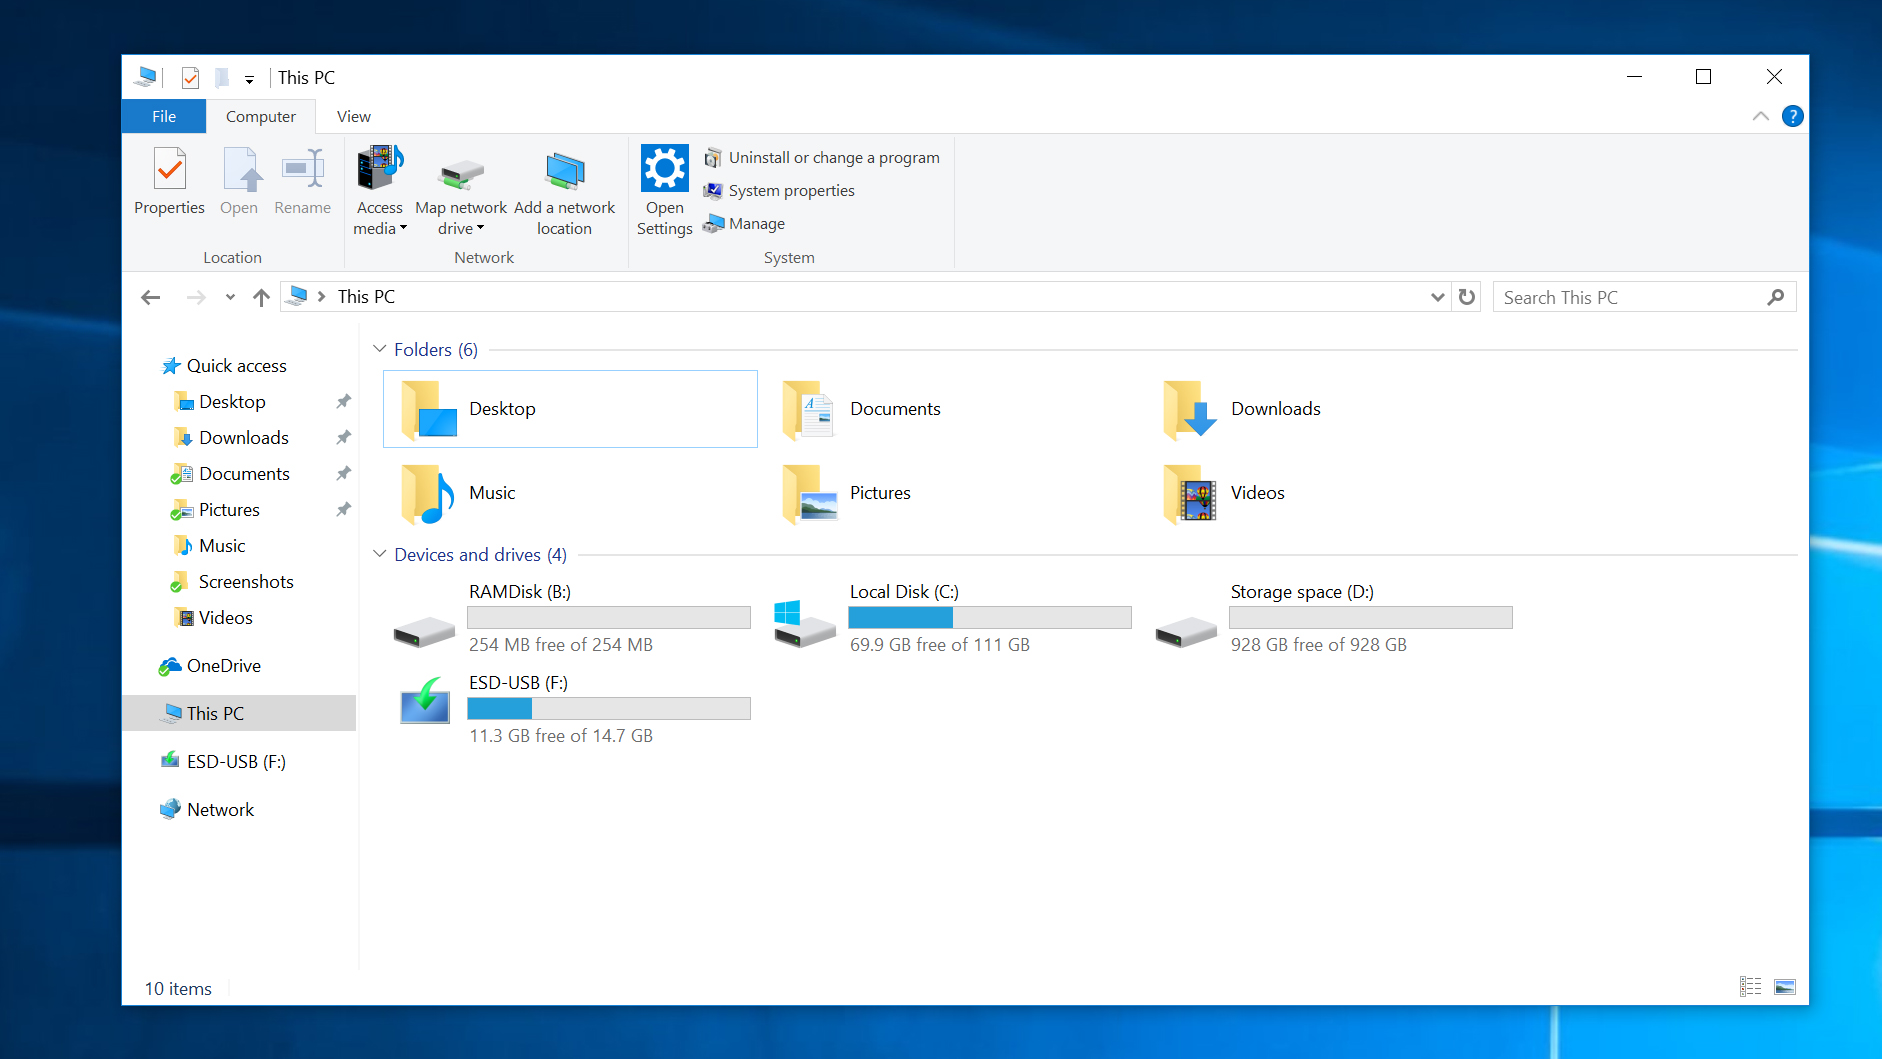
And that’s all there is to it. You’ve now established your first RAID 0 array on a Windows 10 PC. Assuming it consists of two identical drives, you can now store twice the number of files and applications on the “same” device – at least that’s the illusion presented to your computer.
If you backed up both of your drives preceding the operation, now is the time to restore that data back to your freshly conceived storage space.
