How to recycle and reuse an old hard drive
Salvage your storage
Sign up for breaking news, reviews, opinion, top tech deals, and more.
You are now subscribed
Your newsletter sign-up was successful
Once fitted in its new enclosure, connect the drive to a power source (if applicable) and your Mac or PC, then wait while it's detected. If it's a straightforward swap, and the disk isn't damaged, it should appear in Finder with all your data intact. Congratulations, job done!
However, you may see a message telling you the disk is not readable, inviting you to ignore, eject or initialise it. This means the disk is physically okay, but is formatted in a way your Mac or PC can't read. Initialising the disk will wipe it, so if there's data on the drive, you'll want to recover that first – click 'Ignore' if this is the case.
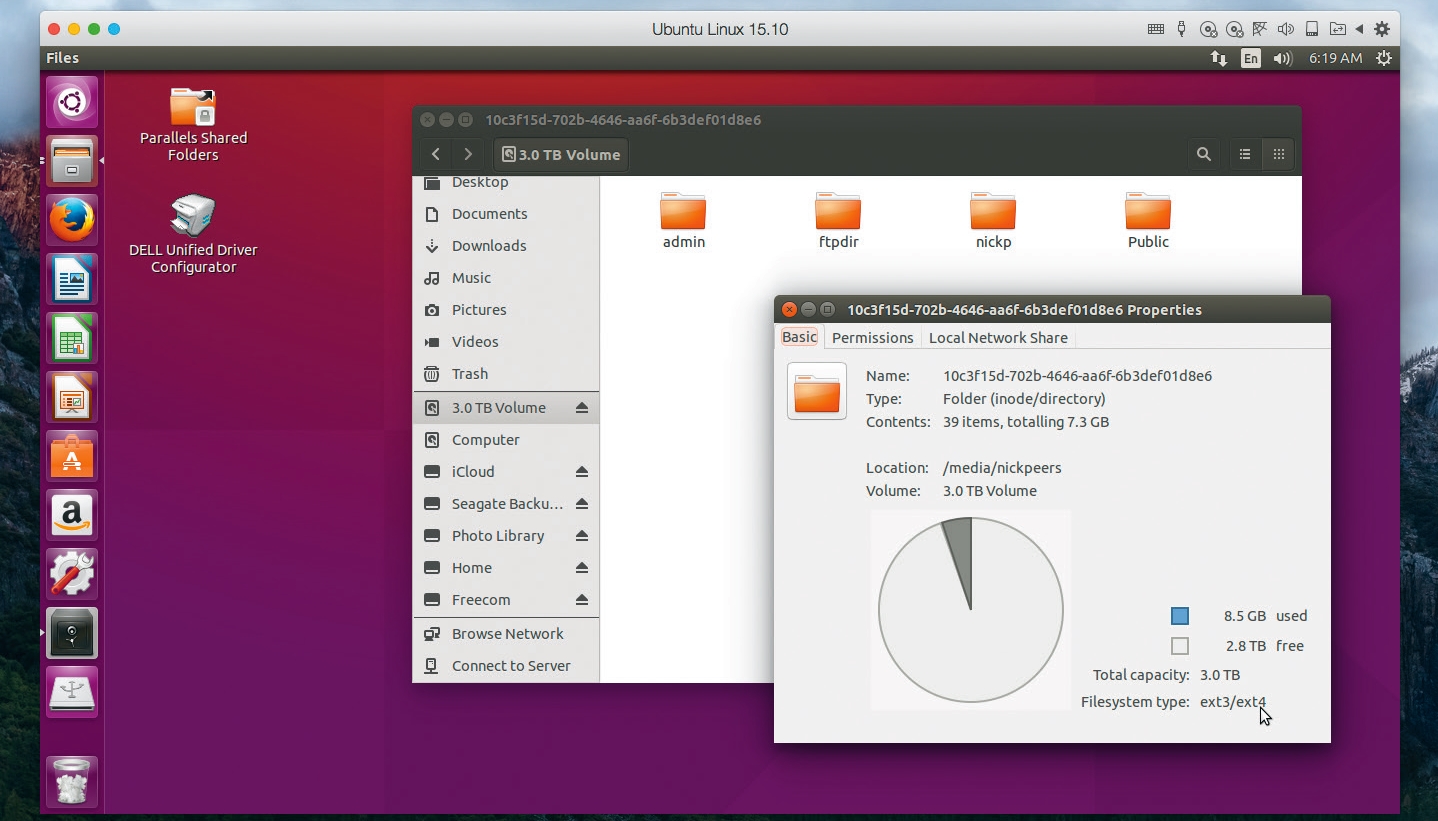
Most disks from network drives use the ext4 format favoured by Linux. If you have a virtualisation app, such as Parallels Desktop, VMware Fusion or VirtualBox, you can create a virtual machine running Ubuntu Linux, then connect the drive through that. It'll show up as readable, and you can then copy data off it to another drive.

Alternatively, you can install a virtual driver that will allow you to read the disk directly in OS X. Start by installing FUSE for OS X – during installation, make sure you enable 'MacFUSE Compatibility Layer' when prompted. After installation, return to the Fuse for OS X website, open the Wiki and select your target file system from the list – 'EXT' is a likely candidate for disks pulled from network drives.
You then need to follow the instructions to install the latest version (which is compatible with El Capitan, so ignore the warning) – we recommend installing Homebrew (brew.sh) and following that set of instructions. Although the process completed with errors for us, our ext4-formatted drive was readable in El Capitan afterwards. From here, transfer your data off the drive, then format it in a Mac-friendly format and transfer the files back. Job done.
If you're on a Windows PC, we suggest Disk Internals Linux Reader, which is a tool that will allow you to access ext4-formatted drives within Windows.
Recover your data
If your drive is 3TB or larger, it may have been formatted in an unusual way in order to make it readable on older machines. The downside is that its disk can't be accessed in any other enclosure without first wiping it.
Sign up for breaking news, reviews, opinion, top tech deals, and more.
Don't do that just yet; instead, employ the services of the Mac's best data recovery tool, Data Rescue. Download the free edition and perform a Deep Scan on the entire disk (as opposed to the only visible partition on it) to provide you with a list of recoverable files.
Note that the initial scan can take up to a day to complete, so you may want to start it running overnight and leave it to its own devices. You can click Cancel at any time to suspend the scan, or end it early to see what's been found on the portion already scanned.
However, it's best to let the scan complete to ensure it finds all recoverable files. Once analysed, you'll be able to preview the recovered files before choosing whether or not to pay to recover them. The cheapest method is Data Rescue's new 'Paperbyte' method, where you pay to recover a set amount of data ($49, about £38, AU$65) for the first 250GB). However, on larger drives, it's more cost-effective to splash out $99 (£76, around AU$130) for the standard edition, which offers unlimited recovery on up to five drives.
After recovery
Once you've recovered data from an uncooperative disk, you can then reformat it, which enables you to keep using it in its new enclosure going forward. Open Disk Utility (from /Applications/Utilities, or use Spotlight) and select the disk in question – you should find no partitions have been listed on it, making it easy to identify.
Click Info to verify this – check 'File system', which should say 'Unknown'. With the disk selected, click Erase to turn it into a HFS+-formatted disk that your Mac or PC should have no problems reading from or writing to going forward.
- Enjoyed this article? Get more tutorials, guides, and tips on how to get the most from your Apple devices inside MacFormat. Take advantage of an exclusive offer in our sampler today.