How to cancel subscriptions on your iPhone
Time to cull those money-sucking subscriptions
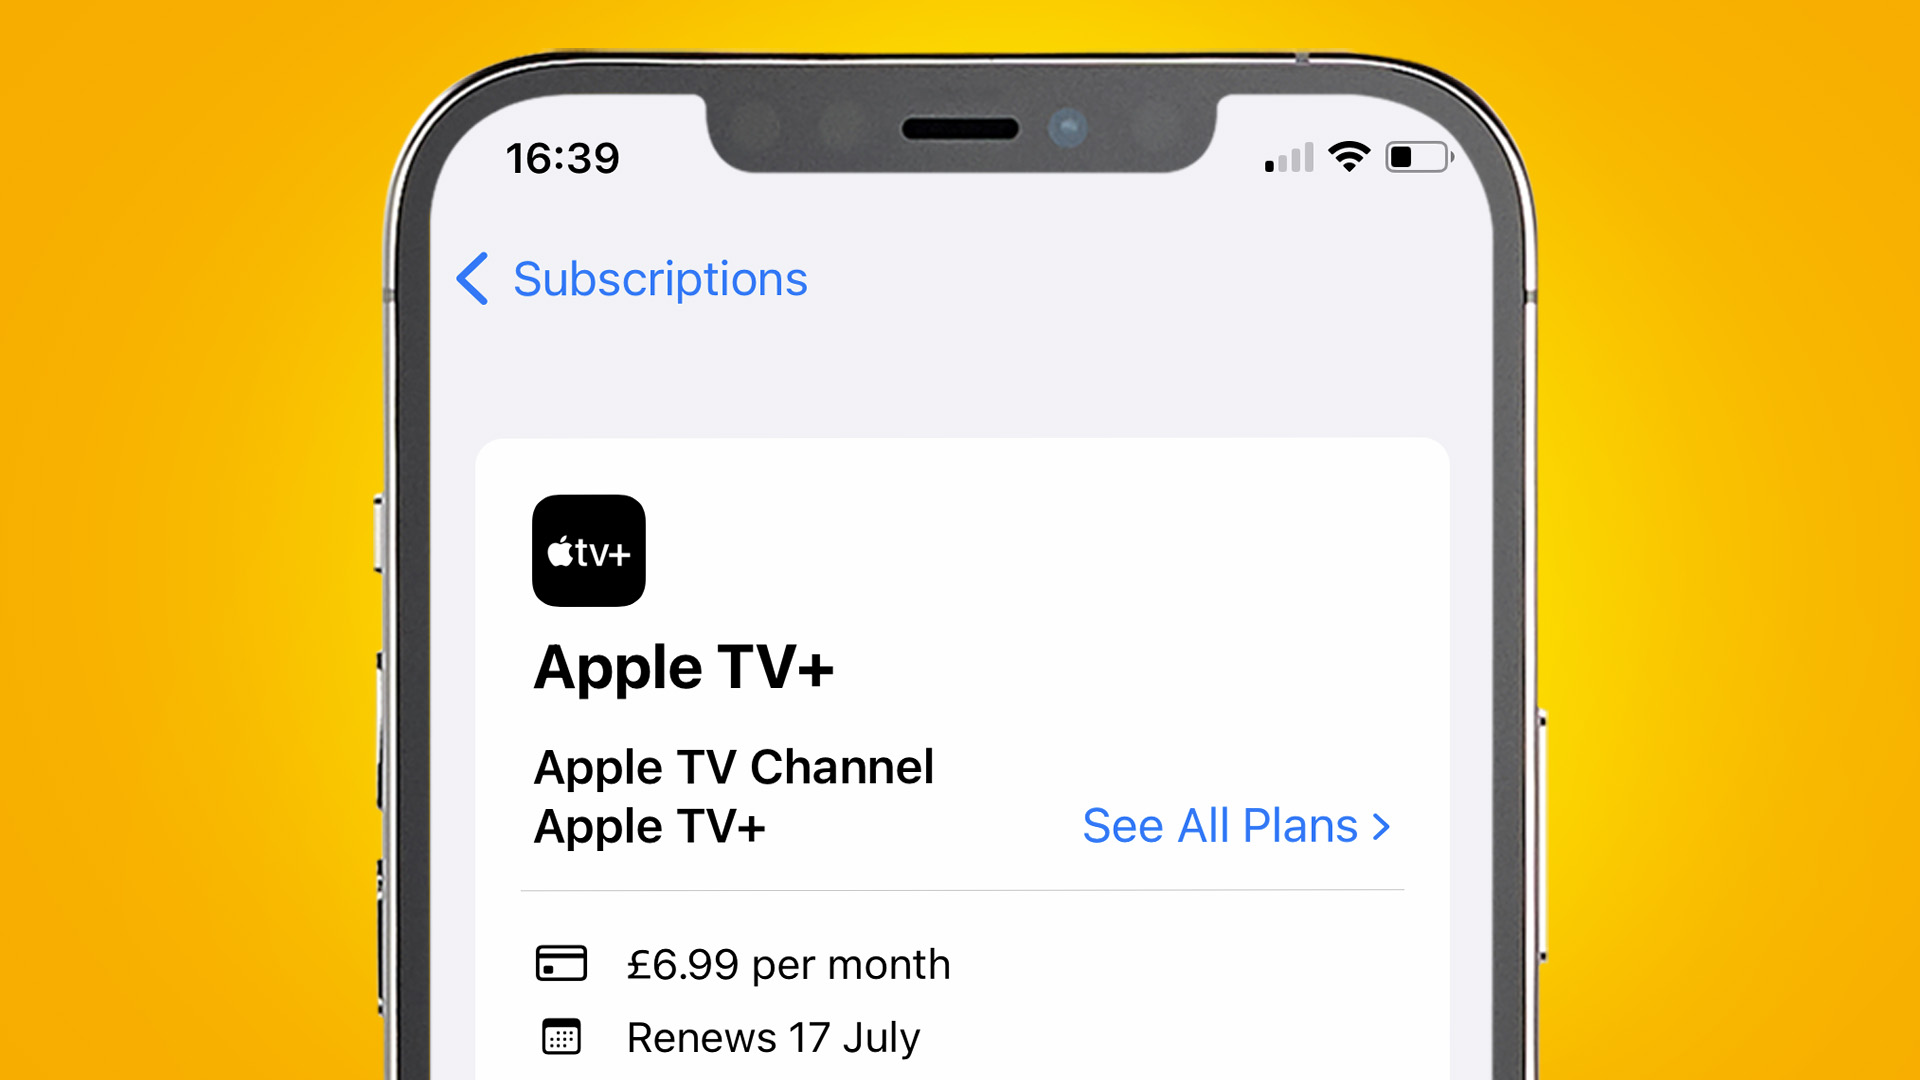
Many of us are looking to reduce how much we spend each month – and figuring out how to cancel subscriptions on your iPhone is a speedy and effective way to do just that.
Some services and apps don’t make it all that easy to cancel them. Having to make phone calls and send emails can still be part of the process even in 2023. Thankfully, none of that is necessary with cancellations made directly through your iPhone’s interface.
The process (below) is an absolute breeze. And this does not only count for services you might usually associate with Apple, such as Apple Music, Apple Fitness Plus and Apple TV Plus.
However, there are some limits. The only subscriptions you can manage and cancel through your iPhone’s interface are those you signed up with through Apple’s payments system, using your Apple ID.
At this point you may be thinking – how do I know if I did that, three years later? Don’t worry, the cancellation process we’re going to run through below will list all of the accounts you can manage through your iPhone directly. For anything else, you are best off heading to the website of that particular service, logging in and exploring the account management area.
Let’s get started with the quick and easy guide on how to cancel subscriptions on your iPhone.
Steps for cancelling subscriptions on iPhone
- Select Settings on your iPhone
- Tap your account name at the top of the Settings menu
- Select subscriptions
- Tap the name of the service you want to cancel
- Select Cancel subscription
Tools and Requirements
- Your iPhone
- An internet connection
- At least one finger (ideally)
Step by step guide for how to cancel subscriptions on iPhone
1. Enter the Settings menu
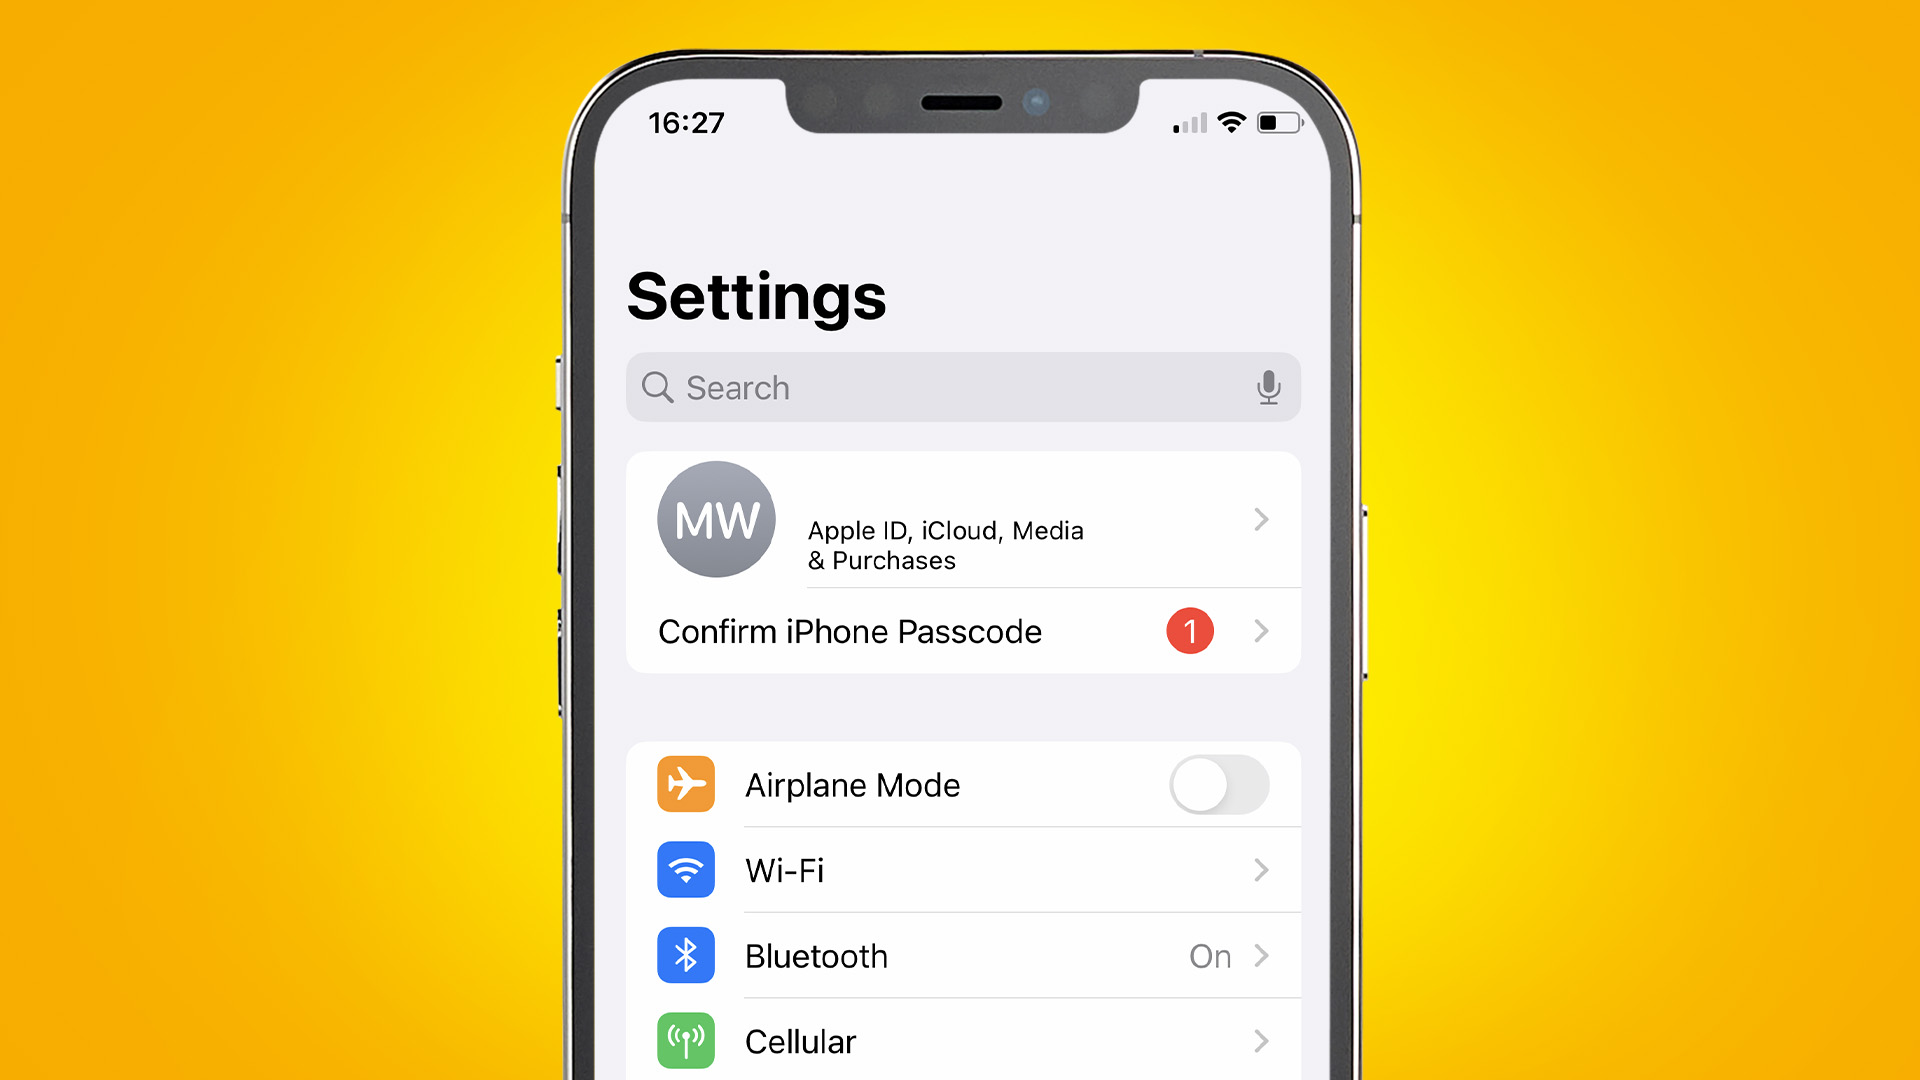
Apple-controlled subscriptions are wonderfully centralized, and live in the iPhone’s Settings menu. You probably know this icon very well. It looks like a series of cogs that are sat within each other. Tap that Settings icon and you'll see the screen above. If your iPhone is such a well-oiled machine that you have filed this shortcut away in some forgotten folder, don’t worry. From the iPhone home screen, tap the little search bar shortcut that sits just above the row of app icons at the bottom of the screen. Then type in 'Settings' using the virtual keyboard that pops up. The Settings icon should appear long before you’ve actually finishing typing.
2. Select your account
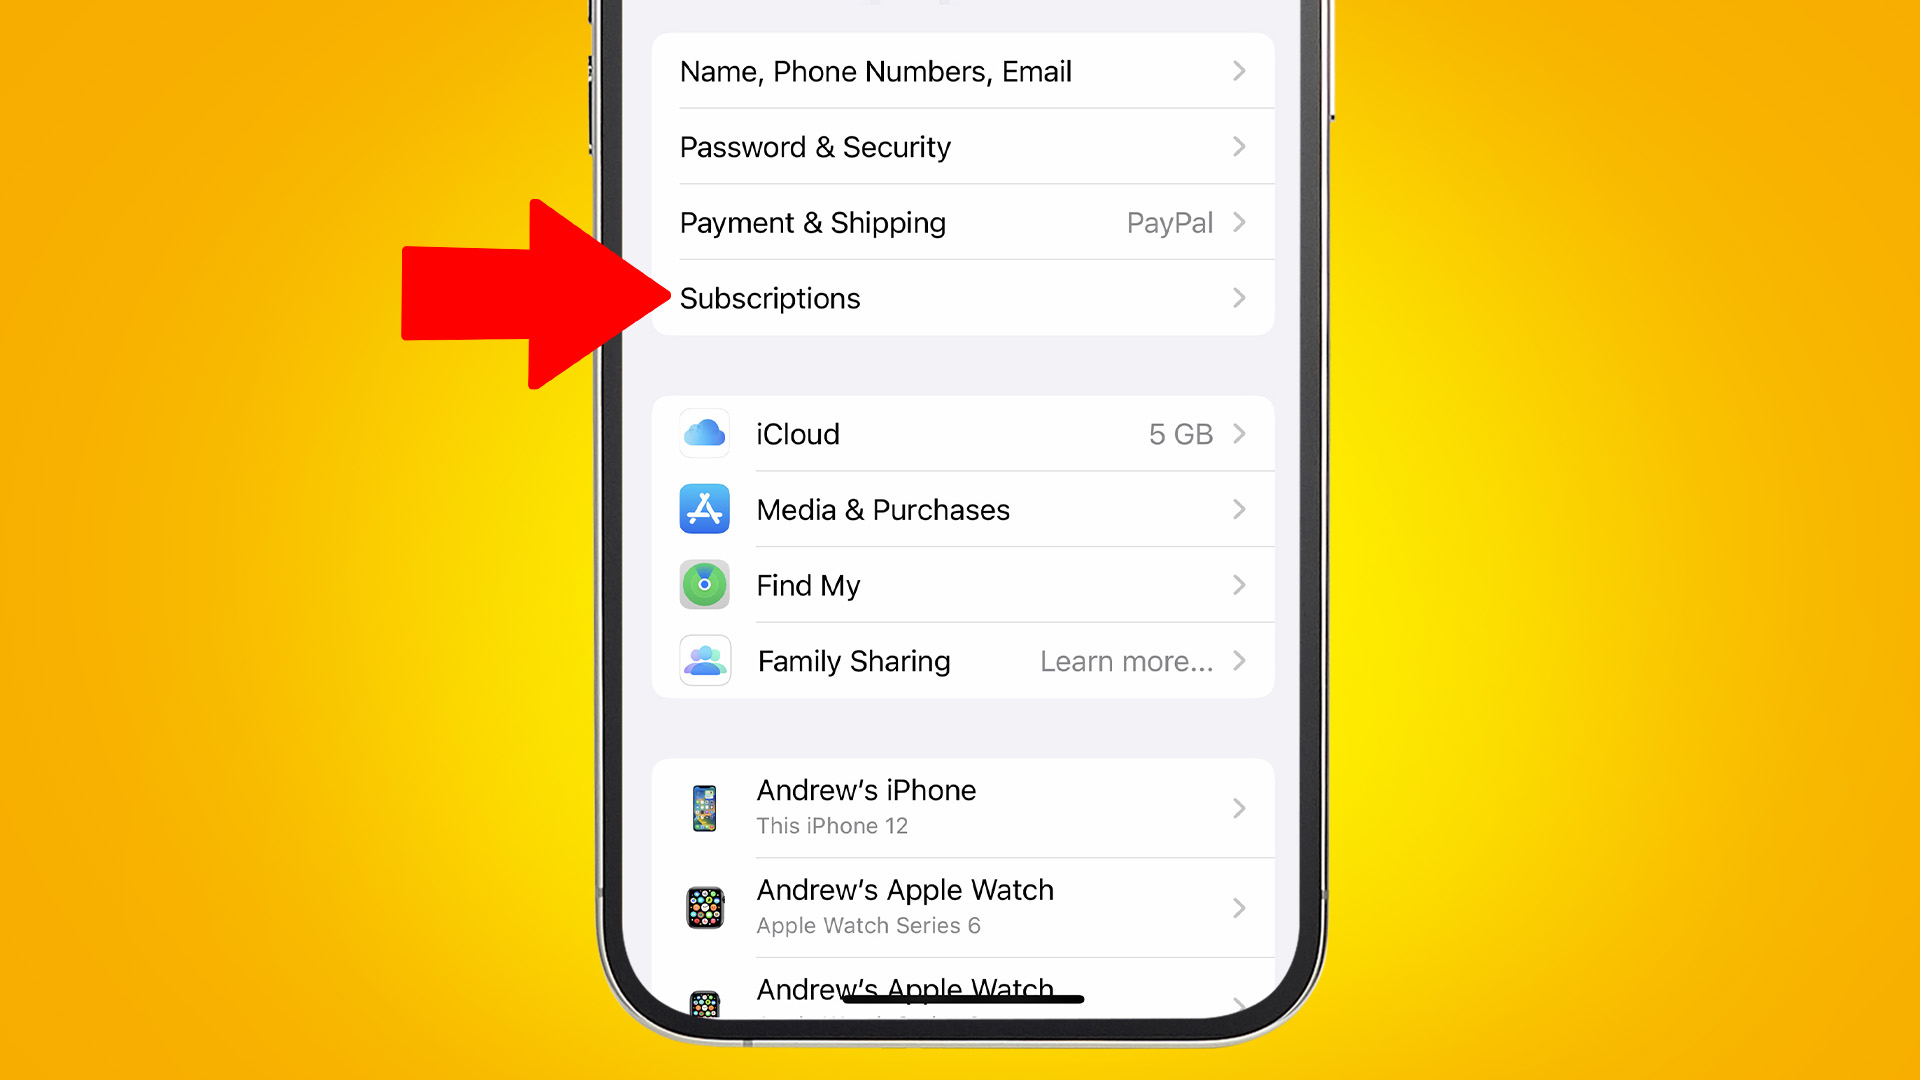
In the Settings menu? Tap the top entry representing your Apple account. It should show your name, with a subheading of 'Apple ID, iCloud, Media & Purchases' or similar – this wording can change slightly from one version of the iOS software to another. The next screen is a sort of nerve centre for your Apple ID. But all we need today is the Subscriptions option, which you should see towards the bottom of the upper menu pane. Tap Subscriptions that to go into the Subscriptions menu.
3. Picking your subscription
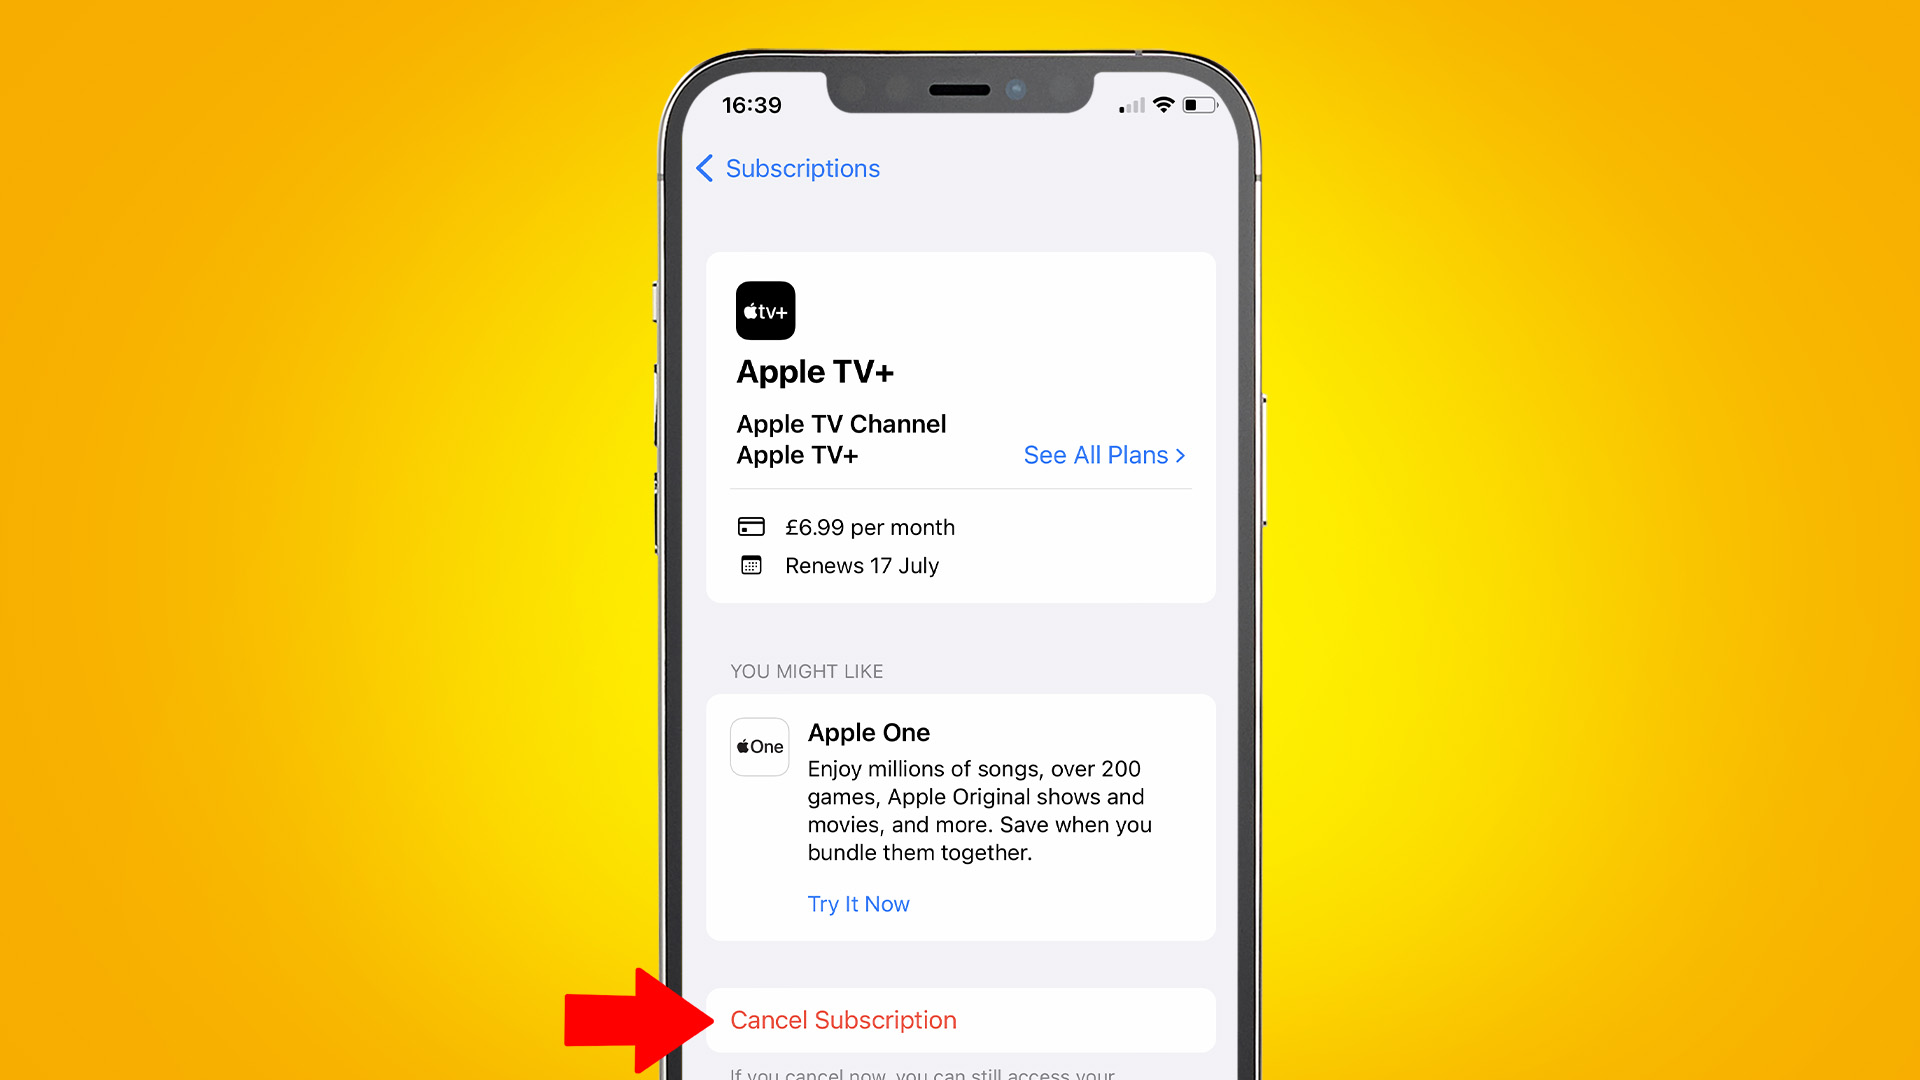
You should now see a list of all the subscriptions tied to your Apple ID, as well as any that have lapsed. Select the one you want to cancel, then tap Cancel to get rid of that subscription. This will still be subject to the usual caveats. If you have already been charged for the next month’s cycle, cancelling like this won’t suddenly refund the charge. When dealing with monthly subscriptions like Spotify, Apple TV or Netflix, it’s a good idea to cancel early because you won’t lose out on the time you’d already paid for. And it’s not as if there’s a penalty for leaving these services, as there is when dealing with a contract that comes with a minimum term attached.
4. Troubleshooting
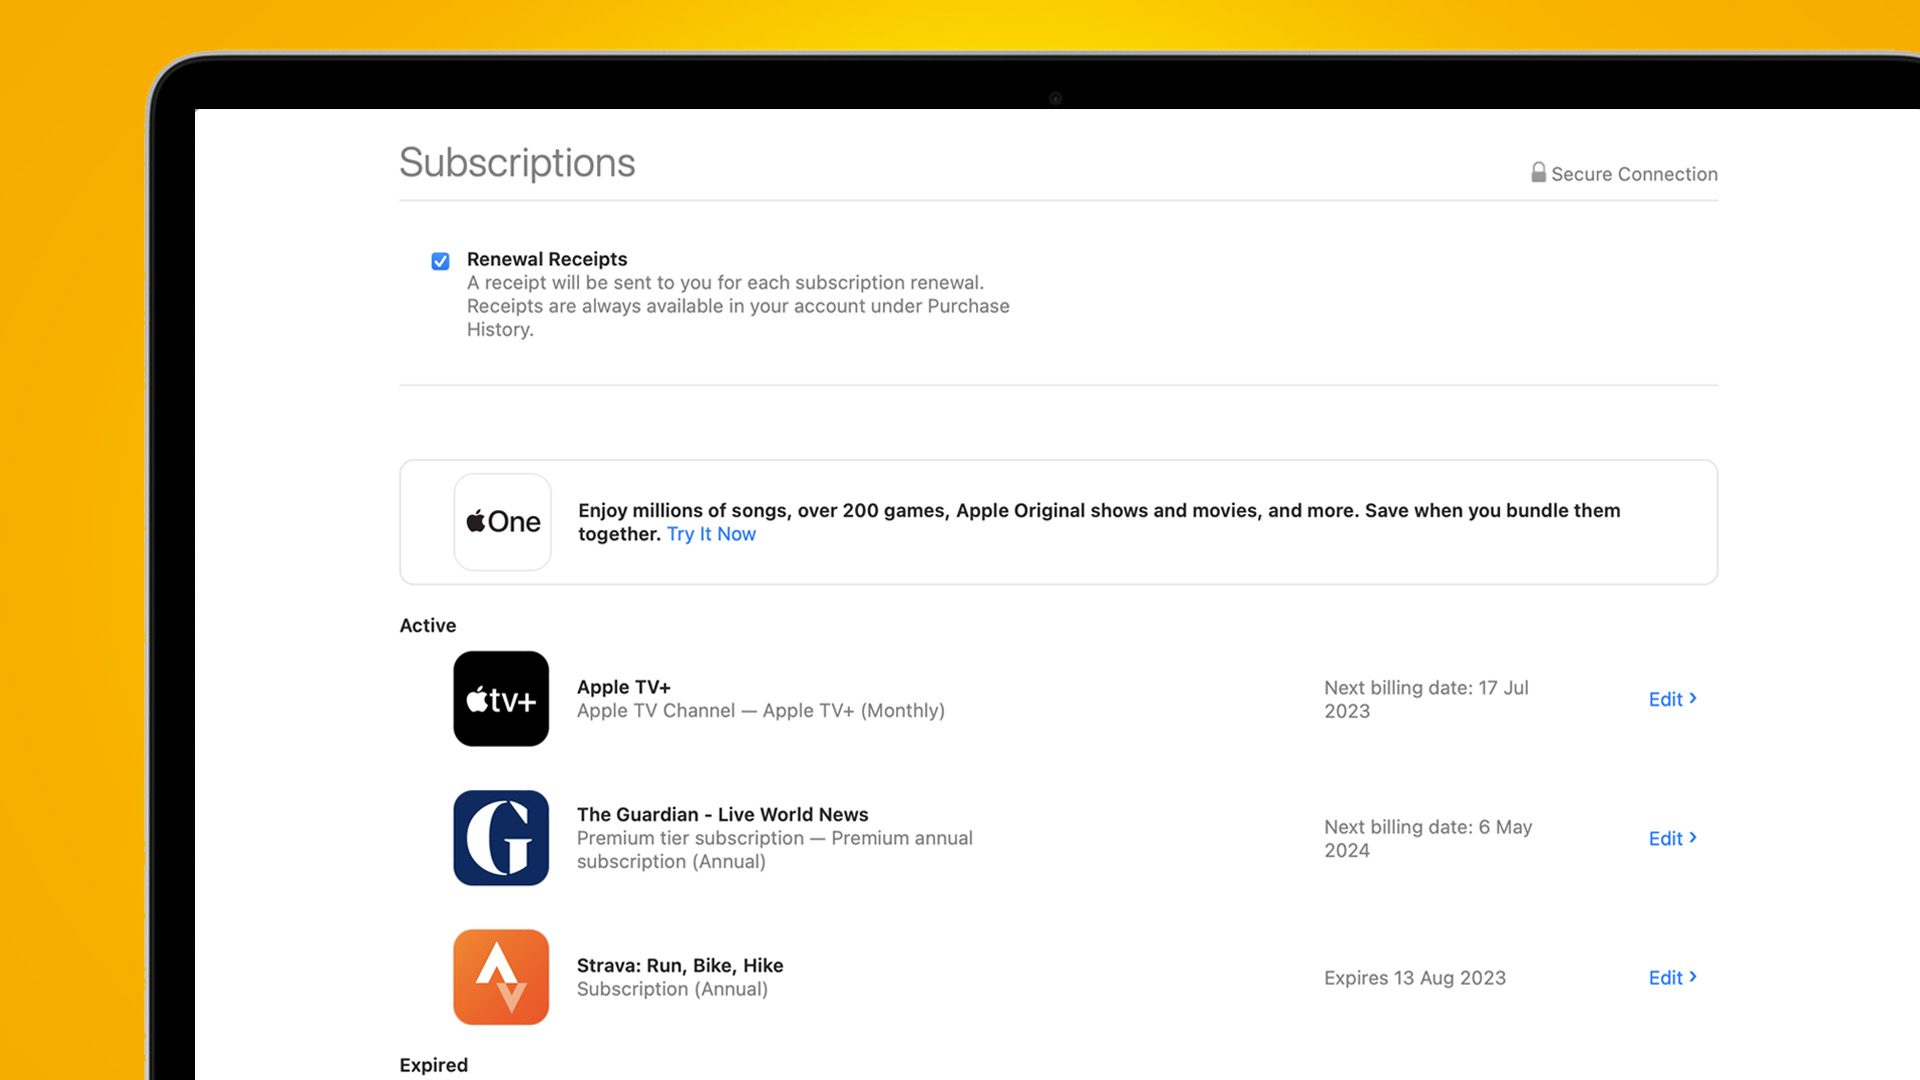
You may be wondering what to do if the subscription you expected to be on the list isn’t there? This means it is not paid through your Apple account. There are two likely eventualities here. Perhaps the account holder is actually your partner, or a member of your family? Have you identified who might actually be the account holder? Either ask them to follow the above steps on their iPhone. Or they can login through the iTunes app on a Windows PC, or the App Store on a Mac. In iTunes or the App Store Mac app? Select the account name link, then Account Settings. Under a Manage header you should should find a Subscriptions entry, and a Manage hyperlink next to it. This will take you to the screen above. Nothing there? This suggests you most likely signed up for the subscription on the service’s own website, or elsewhere. Even if you did so on your iPhone, it won’t be centralized in the manner we described above. In this case, head to the My Account section of the company’s website and login. You will almost always find an option to cancel here, more often than you will do so in the subscription service’s own phone app.
Final thoughts
Those who are big on digital subscriptions are likely to find they have some subscriptions that are easily accessible through their iPhone, and others that are not. If you joined a service with a promo that offered a few months’ access for free, it’s likely that happened directly with the provider.
Sign up for breaking news, reviews, opinion, top tech deals, and more.
There’s another good reason to shop directly with these providers too, rather than subscribing through Apple. Doing so means the content provider gets more of the money, because Apple takes a cut when handling payments. It may be worth going direct when re-appraising your subscriptions, particularly with smaller services who you want to support as much as you reasonably can.
There are other ways to manage subscriptions that don't show up using the process above, including using third-party apps like Little Birdie and Emma. For more information on those, check out our guide on five ways to avoid wasting megabucks on unwanted tech subscriptions.

Andrew is a freelance journalist and has been writing and editing for some of the UK's top tech and lifestyle publications including TrustedReviews, Stuff, T3, TechRadar, Lifehacker and others.