
 Become a TechRadar Insider


● System: macOS Mojave or newer
● Tools: a MacBook or an iMac
● Skill Level: Novice
Knowing how to screen record on a Mac is a skill that will come in handy. That's especially if you use your MacBook or iMac for work presentations or content creation - although its uses extend far beyond work stuff.
Despite having a lot of uses, it's surprisingly easy to do, too. In fact, it's so easy even a Mac newbie can do it, and we're here to show you how. You've spent a lot of money on the best MacBook or Mac on the market; learning this trick is one of the many ways you can maximize it.
Quick steps for screen recording on a Mac
- Press Shift-Command-5
- Tap either Record Entire Screen or Record Selected Portion
- If selecting Record Selected Portion, make necessary frame adjustments
- Hit Record
- Press Stop when done recording
Step by step guide for screen recording on a Mac
1. Press Shift-Command-5

To get started you need to access the Screenshot toolbar, which not only lets you record your screen activity but also take screenshots. Be sure to prep everything you need for your video beforehand, just to make your video a little cleaner and easier to follow.
Accessing it is easy. Simply press and hold Shift-Command-5, and the toolbar should appear near the bottom of your screen just above the Dock. This toolbar is separated into four sections, the first one housing the screenshots buttons and the second containing the screen record buttons.
2. Tap either Record Entire Screen or Record Selected Portion

The second section of the Screenshot tool bar will contain two buttons, the Record Entire Screen and the Record Selected Portion options.
Before you start recording, you should decide whether you want to record your whole screen or just a portion of it, the latter being the wise choice if you don't want the rest of your desktop in full display or if it contains sensitive information you don't want seen in the video.
When you've decided, tap on your choice.
3. Make necessary frame adjustments

If you've chosen the Record Selected Portion button, an adjustable frame will appear on your screen. This frame will determine the area of the screen that will be captured on video.
Make necessary frame adjustments by clicking and dragging the edges or corners.
Note that you're skipping this step if you select the Record Entire Screen option.
4. Hit Record

Once you've made the necessary frame adjustment (again, only if you've selected Record Selected Portion), it's time to record. To do so, simply hit Record on the rightmost side of the Screenshot toolbar.
5. Press Stop when done
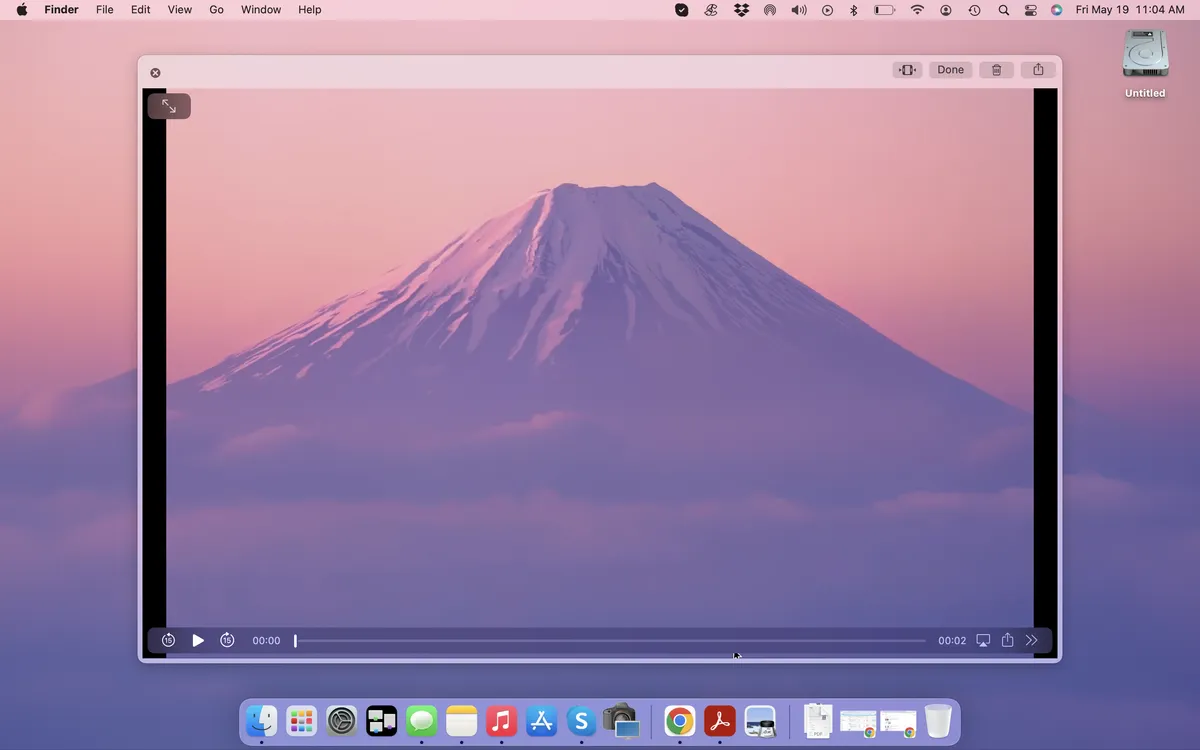
When you're done recording, simply hit Stop, which you'll find on the menu bar at the top of the screen. Your recording will automatically be saved as a .mov file on your desktop, but you will be given the chance to preview it and make edits as well.
Final thoughts
The built-in Screenshot toolbar on macOS is not only readily available to all Mac users, whether you have a MacBook or an iMac AIO, but it's also incredibly user-friendly and streamlined, which is always the case with Apple proprietary apps. So much so you don't even need to have any prior experience in screen recording or making videos to successfully use it on your first attempt.
Bear in mind that you can also use the QuickTime Player to record your screen on a Mac instead; this is really your only option if you're using a version of macOS that's older than macOS Mojave. However, what you're using is truly out of date at this point, considering that support for Mojave ended in late 2021.
We highly recommend upgrading your macOS to the latest version that's compatible with your Mac model, though if you can't, Apple has a quick tutorial on how to screen record using QuickTime Player as well.
