How to Edit Video for Free
Trim, combine and share your videos using QuickTime Player
With the likes of iMovie and Final Cut Pro available to cater for all your video editing needs, it can be easy to overlook the fact that your Mac comes with QuickTime Player 10: a free basic editor. Granted, it’s nowhere near as sophisticated as iMovie or Final Cut Pro, but it won’t cost you anything either.
QuickTime Player is perfect if you’re just starting out with editing, and for those situations where you quickly want to make some alterations to a video before sharing it with family and friends.
Say you’ve been filming your children playing out in the garden, and the bit you’d like to share is halfway through the clip you’ve recorded. With QuickTime Player, you can quickly chop off the preceding and following parts, leaving you with the highlight to share. The app also enables you to join clips together, meaning you can easily create a highlights video from an array of recordings, which is something you can’t do on an iOS device without a video-editing app. We’ll show you how on the next page.
In order to edit your video clips, you’ll first need to copy them to your Mac from whatever device you used to record them. This could be your camcorder, or iOS device. Connect the camera to your Mac using the cable it came with, and switch it on. Now click the Finder icon in your Dock, then click the Go menu and select Applications. Double-click the Image Capture icon, and you should see your camera appear in the left column under Devices. Click it and your images and videos will show up on the right. If it’s video you shot on an iPhone, iPod touch or iPad, the filename will end .MOV. Drag the clips you’d like to use to your desktop – this will make them easier to find later. Now quit Image Capture and disconnect your camera.
Before you open QuickTime to start editing, click the Finder icon, go to the Finder menu and select Preferences. Click the Sidebar button and make sure Desktop is ticked: this will save you time when it comes to opening your video clips. Now open QuickTime Player, which is in your Applications folder. If it isn’t there, go to www.apple.com/quicktime to download it for free.
What You’ll Need:
>> Some video clips
>> QuickTime Player 10
>> internet connection
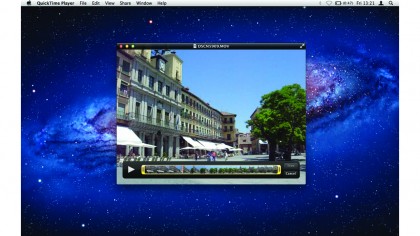
1. Open your video
In QuickTime Player 10, click File > Open File. Click Desktop on the left, then select your video and click Open. Your clip will appear with a set of controls towards the bottom. Let’s start by trimming off either end of the clip. Select Edit > Trim. A yellow bar appears at the bottom.
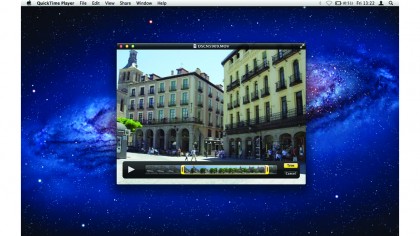
2. Trim your clip
Drag the left-hand end of the yellow bar to the right to trim the start of the clip, and pull the other end to the left to cut off the end. As you work, click the Play button on the far left to play back the clip as it will be once you’ve trimmed it. Adjust the yellow bar to suit.
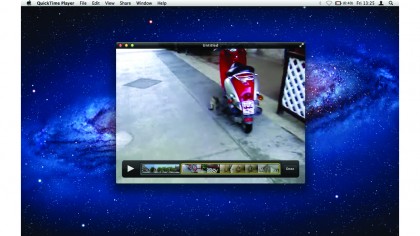
3. Add more footage
When you’ve got it just right, click Trim and the yellow bar will disappear. If that’s all you want to do, skip to step 7 to save and share your video. But let’s add a second clip to the video. Select Edit > Add Clip to End. Find the video on your Mac and click Choose media.
Sign up for breaking news, reviews, opinion, top tech deals, and more.

4. Rearrange things
Your original clip is the section on the left, and the one you’ve just added is to the right. If this is the order you’d like them in, click Done. But if you’d rather the second clip play first, drag it to the left, and the original one will shift right. When you’re happy, click Done.
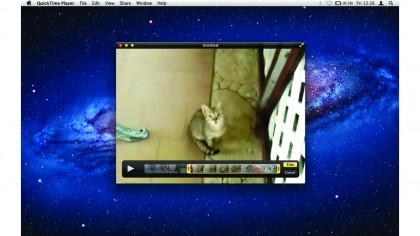
5. More advanced edits
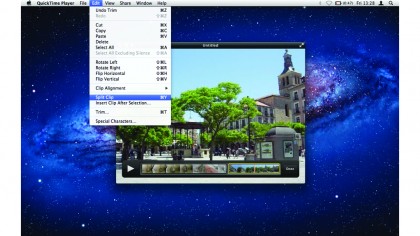
Once you’ve added multiple clips, you can rearrange, trim and split them using View > Show Clips option. To trim a given clip, double-click it and follow the instructions in steps 2 and 3. To add footage to the middle of a clip, click it once to make a thin yellow line appear around it.
6. Split clips
Press Play and wait for the red time marker to arrive at the point where you’d like to add more footage, then click Pause. Drag the marker to position it more precisely if you wish. Then go to Edit > Split Clip. You can split clips into multiple pieces and rearrange as you please.
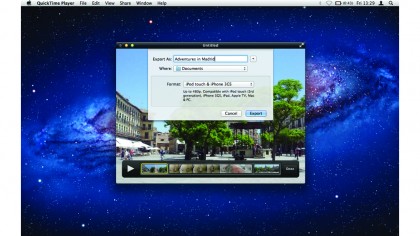
7. Export your video
8. Share it with friends
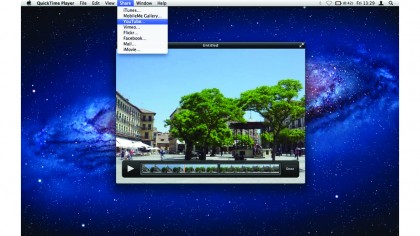
QuickTime Player also enables you to share video directly to a range of websites or other apps on your Mac. You’ll find the options in the Share menu, including Facebook and YouTube. Remember only to share videos that you have the legal rights to!
- Also check out our guide on the best video editing software