
 Become a TechRadar Insider


Despite Philips' best intentions Ambilight – a light effect around the edge of a TV screen that matches the colour of whatever you're viewing – remains restricted to its own range of TVs.
The Ambilight TVs aren't that cheap, so achieving a similar effect with a tenner's worth of LED strip, powered by USB, is something we'll happily attempt.
Okay, our cheapo version doesn't do the colour changing as impressively as the real Ambilight system does, but it will provide multi-colour lighting – if you want it – via a suitable three or four position switch and alternative colour LEDs.
The rest of the build is just a matter of constructing a suitably robust fixture from a Perspex rod and wiring the thing together. The good news is such a rod can be picked up from eBay for around £5, which is suitable for 3mm LEDs. You'll need a 10mm rod if you use 5mm LEDs.
Suitable LEDs can be picked up in packs of ten for a couple of pounds or even in packs of 100 for about a fiver. You'll want at least three high intensity LEDs; six would be best. Throw in a switch and this shouldn't cost more than £10.
If you have a spare LED torch or another item laying around, this could be a good place to harvest unused LEDs as well, though you may not have much terminal length left to play with.
What you will need:
- 8mm Perspex rod
- White LEDs
- USB cable
- Wire, glue
- Silicon, velcro
- Solder kit
- Switch
- Sandpaper, Drill
How to illuminate your games
1. Let's turn this little lot into a light strip

2. We need to roughen the surface of our rod to help defuse the light. Use a coarse grade sandpaper and give that pole a good rubbing.

3. To mount each LED, drill a suitable hole into the rod. If you plan on having multiple colours, a row for each colour will be required. We're using 3mm LEDs, so a 4mm bit works perfectly with this 8mm rod.

4. Glue all the LEDs with terminals pointing in the same direction.


5. Connect all of the negative terminals ideally with black wire. Keep each colour separate at this stage.

6. Do the same for the positive terminals using red wire. Again, keep each bank of colours wired separately.

7. For a single colour a simple toggle switch at the start of the positive wiring will do. For dual-colour combine the end of the negative wired loops together and connect each positive lead to its own terminal at the input of a double-pole switch.

8. Strip the wire back from a standard USB connection and wire the positive and negative terminals to the corresponding terminals on the switch.

9. Fix the wiring in place either with tape or heatshrink. Use velcro to fix the rod into place at the back of your TV or monitor.


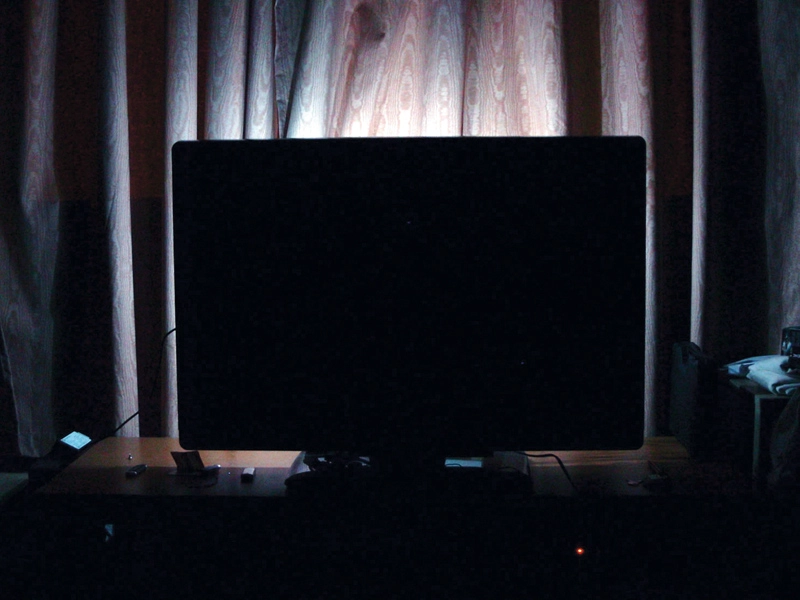
10. Just plug it in and here's the final lighting effect, this is just using three 3mm extra bright white LEDs, so adding more will simply make it brighter.
