Best Linux apps for managing your media
Organise and edit your music, movies and photos
Sign up for breaking news, reviews, opinion, top tech deals, and more.
You are now subscribed
Your newsletter sign-up was successful
Not long ago, a digital photo was a rarity, and even if you had a camera that could take them, you couldn't fit many on your hard drive. It's a similar story with music.
These days, it's almost impossible to believe that the original MP3 player, Audio Highway's Listen Up from 1997, had a capacity of 32MB, which could hold about an album's worth of audio with a low enough compression ratio. Most of our TuxRadar podcasts are larger than that, and a typical broadband connection can grab the data in seconds.
Digital video has become ubiquitous too. Since most camera devices have a video mode, you may be one of the many who like to take impromptu videos of events you find yourself in. The net result is a mess of files, formats and software sitting on your hard drive.
But Linux, and open source, is a free-flowing movement, and this means we can now take advantage of some of the best tools, transcoders and apps to help us do something with those files. These tools can give us the power to regain control of that growing library of files and folders, whether they contain images, music or video.
We've pooled our experience in dealing with media to find the best tools for the job, regardless of which desktop or distro they're built for, and we'll show you how to use them to solve the most common problems you're likely to encounter.
From command line tinkering to point-and-click authoring, there's something here for everyone.
Burning audio and video to disc
Sign up for breaking news, reviews, opinion, top tech deals, and more.
You can be sure, sadly, that your hard drive won't last forever. Even solid-state MP3 players will only last so long before your data will become corrupt and you'll have to buy a new one. And since we're about to mess about with your media collection, it's a sensible idea to back it all up first.
Backups are essential, and the most obvious method for storing your music and videos files is an optical disc – be that in CD, DVD or Blu-ray form. If all you want to do is store some files, then burning a disc containing them is as easy as dropping them into a burn folder (Gnome), or into K3b (KDE), and clicking the Burn button. No extra steps are required.
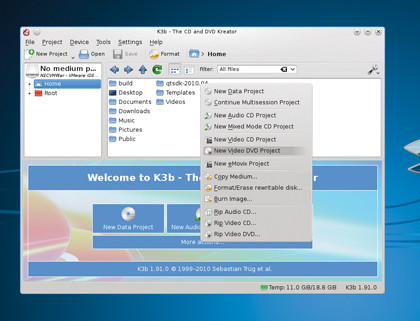
But if you want to use your optical discs for anything other than this simple form of storage, such as playing music in a CD player or watching your home movies on a DVD player, you'll need to take extra steps before the files on your hard drive will work where you want them to.
Record audio CDs
Fortunately, you don't need to worry about all the technical complexities of converting files, because both Gnome and KDE's principal burning tools can handle this for you.
When you first launch K3b, for instance, you can select New Audio CD from the quick launch bar at the bottom of the screen. This changes the display in the lower panel to a list that will hold all your tracks. All you need to do then is drag an audio file from the top panel into a slot on the lower, and arrange them as you wish.
K3b can handle most common formats, including MP3 (with Lame installed), Ogg Vorbis and Flac.
Gnome's Brasero follows a similar process. The launch screen asks what kind of disc you'd like, so select Audio Project and use the Add button in the toolbar to add audio files, which will then be converted for burning on to a music CD.
An audio CD's capacity is measured against the maximum duration of all the tracks you add, rather than the size of the audio files themselves. Here, K3b has an advantage over Brasero, because it shows the current length of your audio CD in a timeline at the bottom of the window. This means you can easily see how much more time you've got, and if any of your tracks push the total length too far.
Brasero, on the other hand, simply displays the total length of your tracks, with no warning as to whether this might be too long for your media. But because a typical CD can fit between 74 and 80 minutes, it's not that difficult to work out for yourself.
Video discs
Burning video content on to a disc that will play on a DVD player is slightly trickier. This is because video often has an interactive menu and chapter divisions. Add to these the specific audio and video format requirements of the DVD standard, and it quickly becomes complicated.
But before delving into DVD creation, consider a different format. Many DVD players and even games consoles will play a variety of video file types on a range of media, which may mean that all you have to do is convert your video into the correct format, burn it to a disc, and use your player's menus to play it. This might save a lot of wasted effort, and might even result in a video that's of better quality that a DVD, especially if you output your files with a high-definition MKV profile from Handbrake, for instance.
Step by step: Create a DVD with Bombono
1. Video format
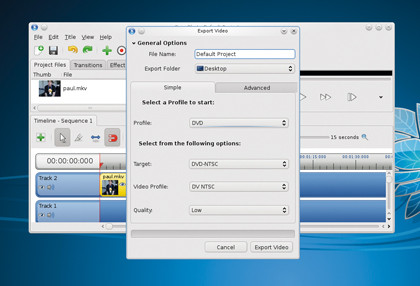
When you export your video from a tool such as OpenShot, select either MPEG2 or DVD format for the output.
2. Import files
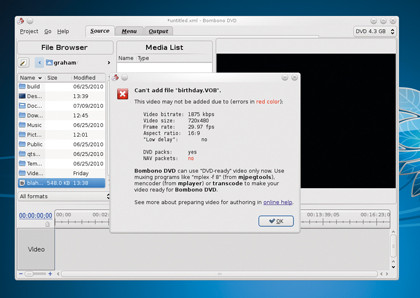
Launch Bombono and import your video media. If there are any problems with the import format, you'll need to re-encode files.
3. Create menus
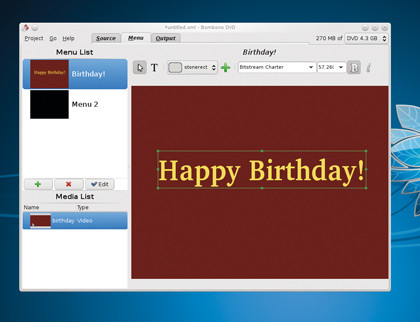
From the Menu page, click the Plus sign to add a menu. Drag movie files to link their launch to an element, then burn from the Output tab.