Raw Masterclass
The power of raw
Sign up for breaking news, reviews, opinion, top tech deals, and more.
You are now subscribed
Your newsletter sign-up was successful
Join the club
Get full access to premium articles, exclusive features and a growing list of member rewards.
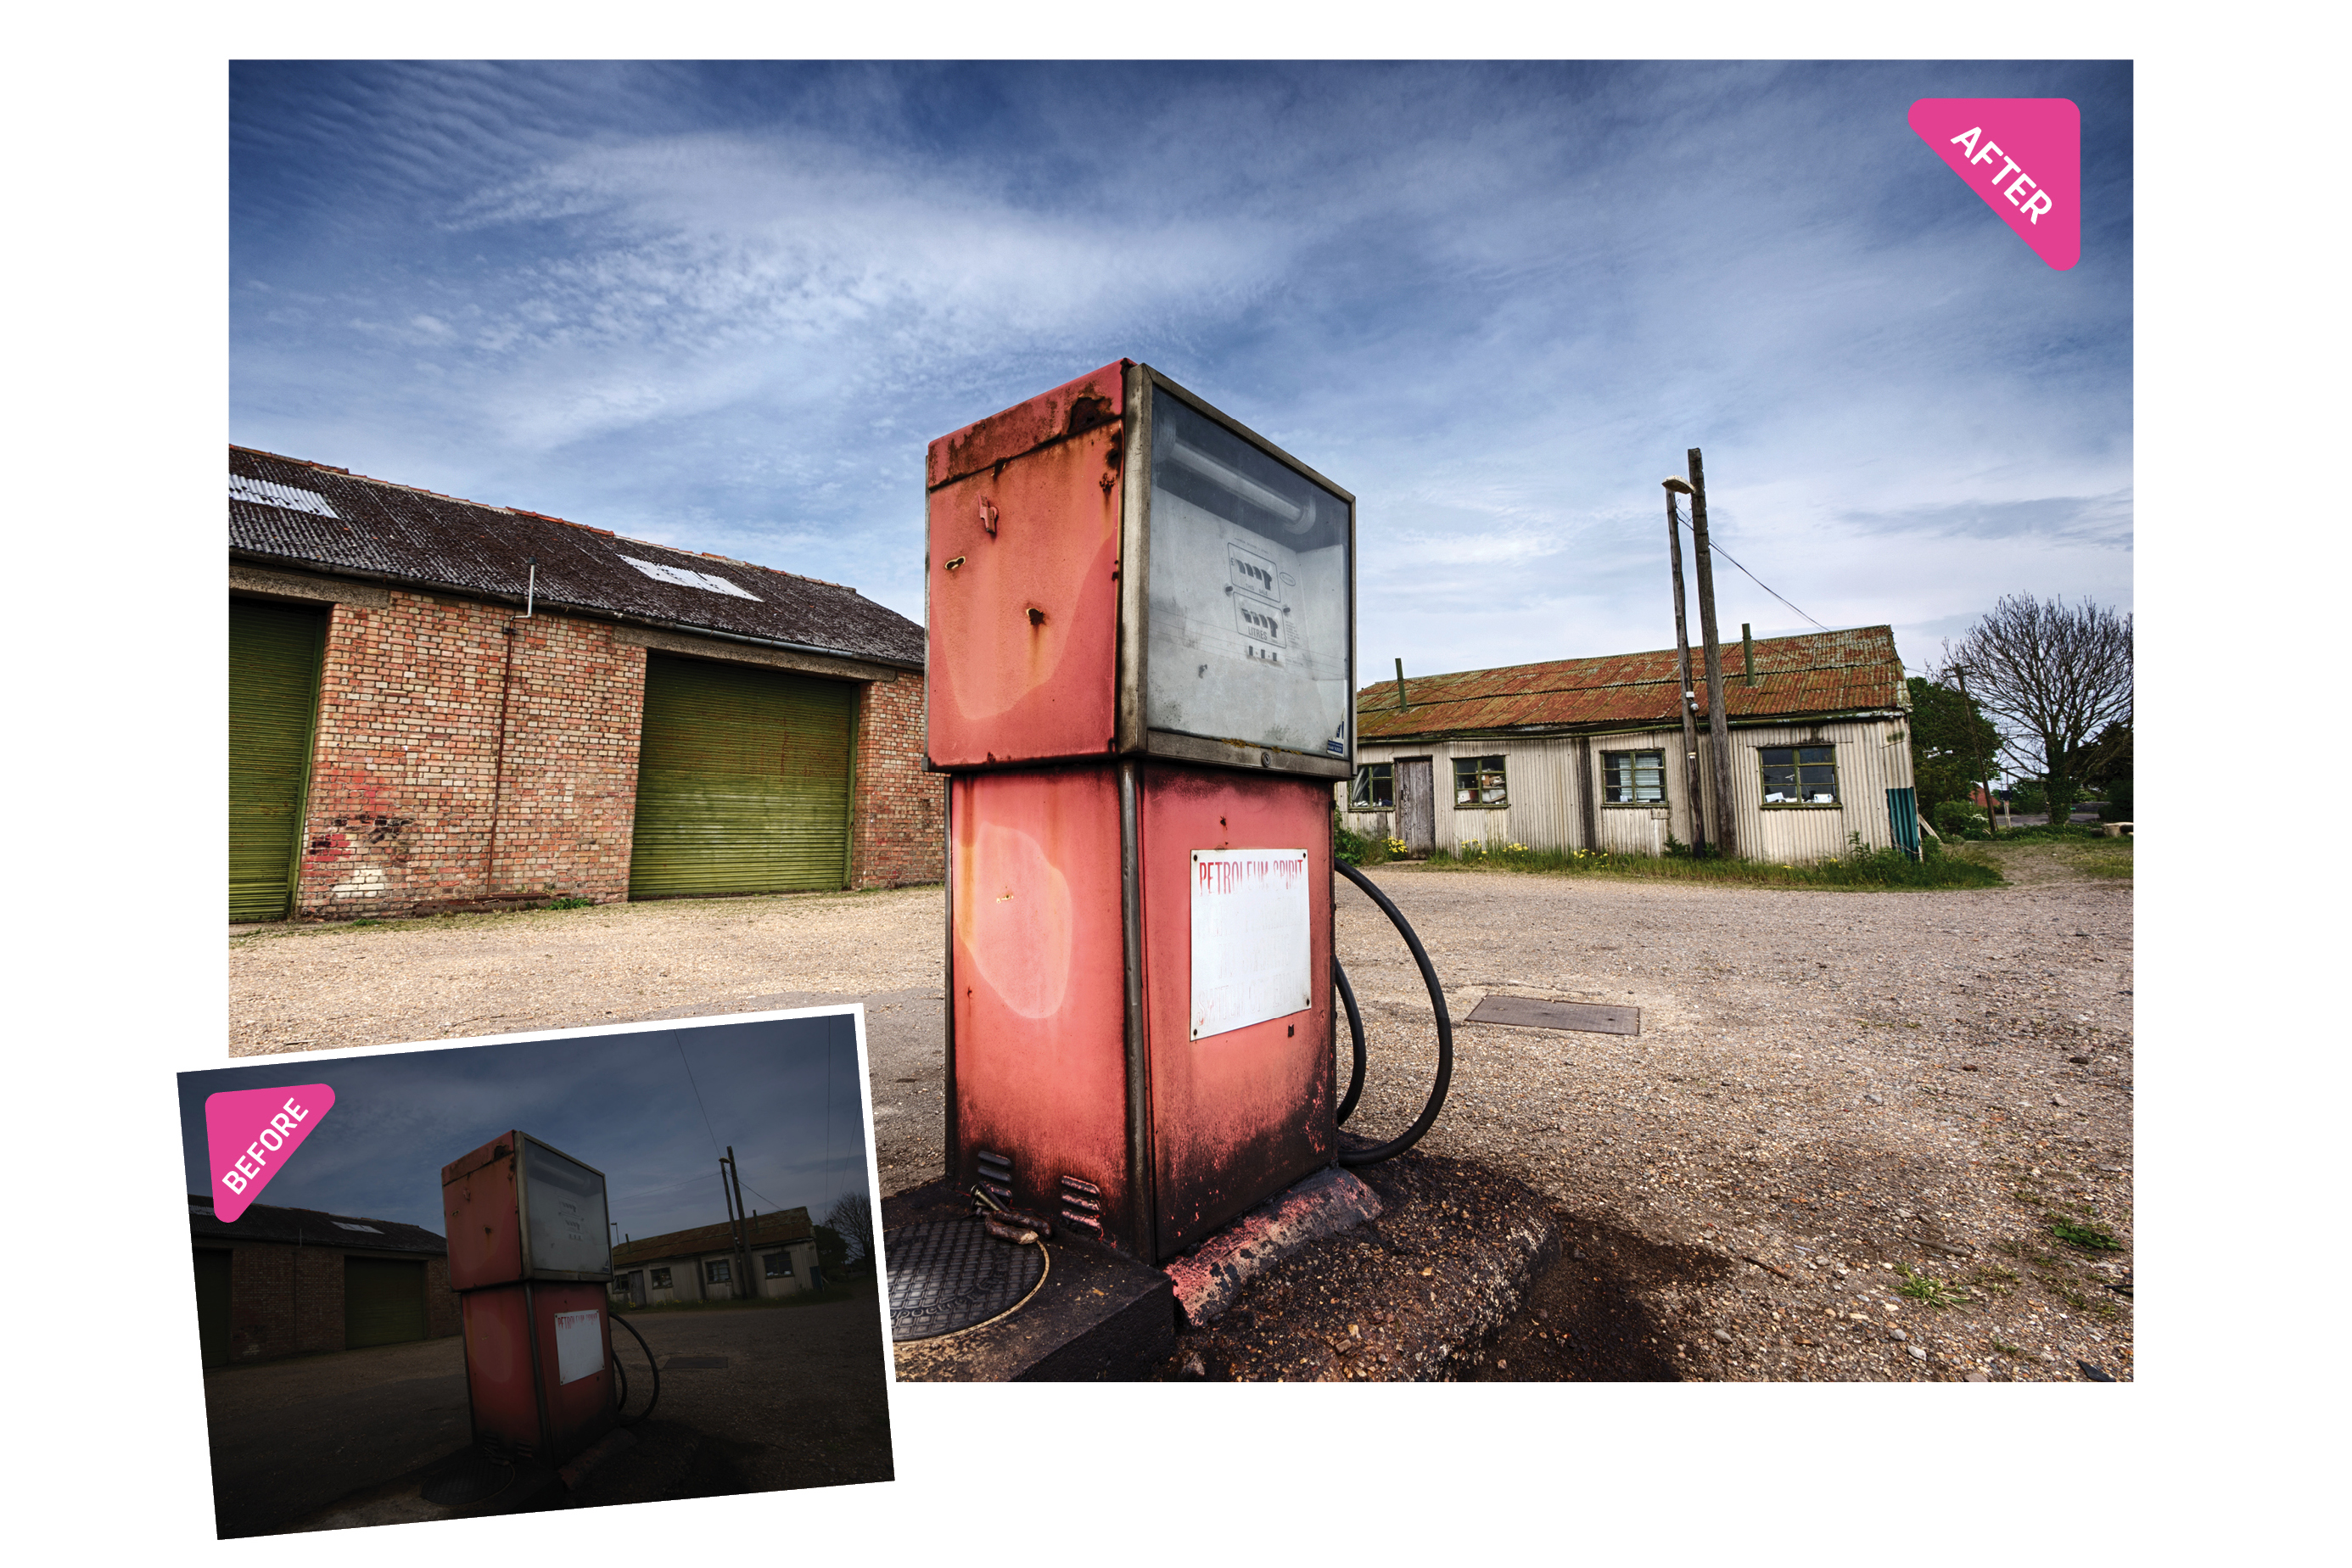
Raw files take advantage of the dynamic range available to the camera sensor, and record a great deal of detail, plus much more colour information than a JPEG. This means that if one of your shots is one, two or even three stops over- or underexposed, there's a high possibility of rescuing the image and making it look as if it had been perfectly exposed.
Here we'll work with an underexposed image because the recovery looks more dramatic than with an overexposed shot. But if you would like to work on overexposed images, in step one reduce Exposure rather than increasing it, and only recover the Highlights. For the rest of the steps, you simply need to generally reduce Exposure where we increase it.
Step by step: Edit a raw file
1. Make basic adjustments
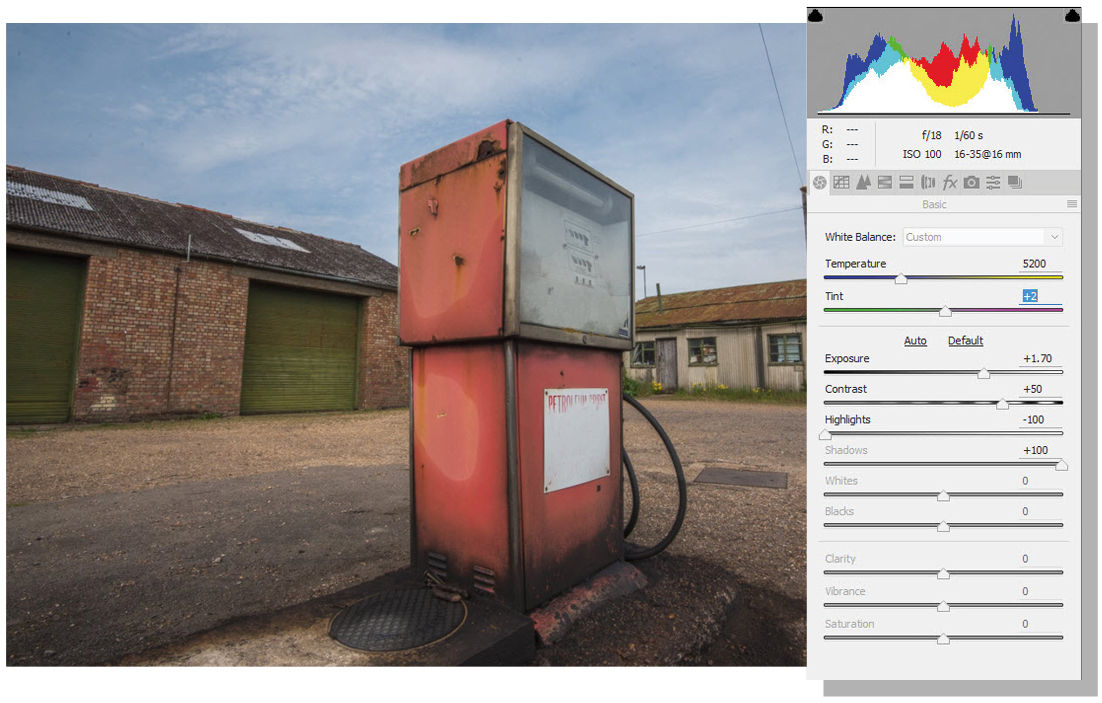
Open your underexposed image. When the ACR window opens, increase Exposure until the sky is the correct exposure – rich in colour and full of detail. For this shot we set Exposure to +1.70. Next, increase Contrast to 50%, then drag the Highlights slider down to -100 and Shadows up to +100 to recover all detail in these two areas.
Article continues below2. Add an 'ND grad' effect
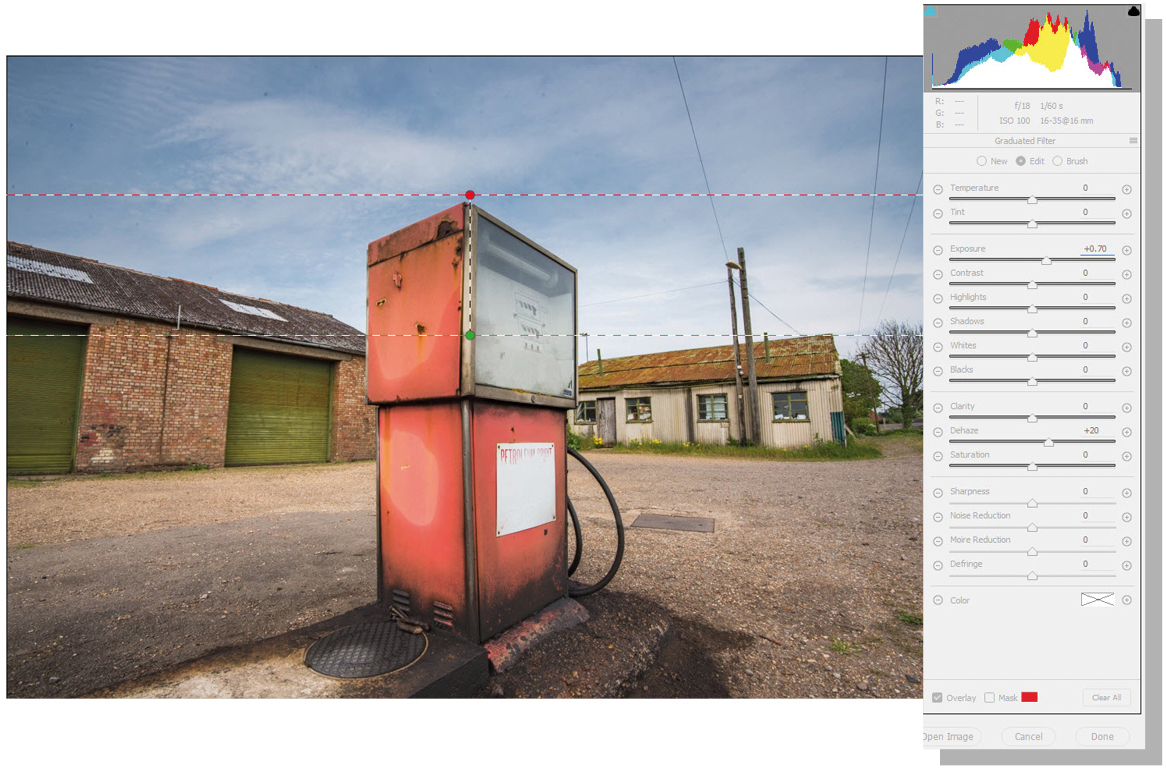
Go to the main toolbar and click the Graduated Filter icon; it's an upright rectangle that graduates from black at the top. Hold down Shift to keep the guide locked, click near the top of the ground and drag up. Next, increase Exposure using the sliders on the right to lighten the darker ground. We set Exposure to +70.
3. Refine the adjustments
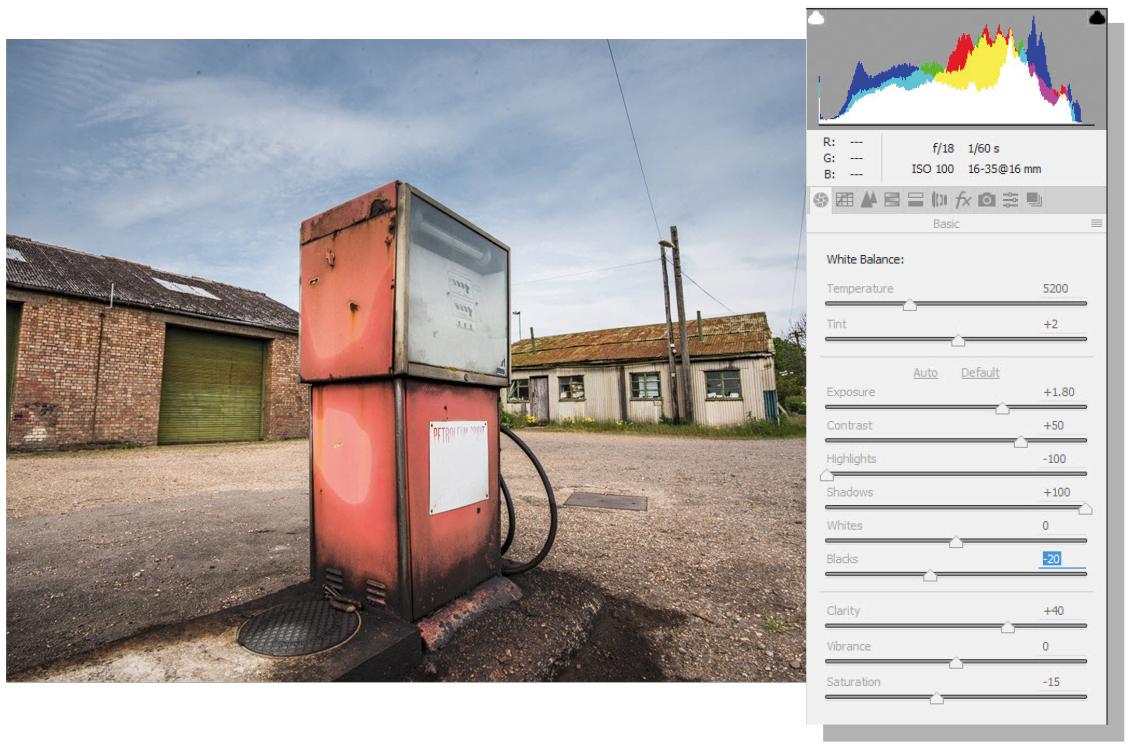
Now the overall image is balanced in terms of exposure, it's time to fine-tune settings. We increased Clarity to +40 to boost mid-tone contrast and make detail appear sharper. Saturation was also reduced to -15 to knock out a bit of colour, while Exposure was then increased to +1.80. Blacks were reduced to -20 to make darker tones less washed out.
4. Apply corrections
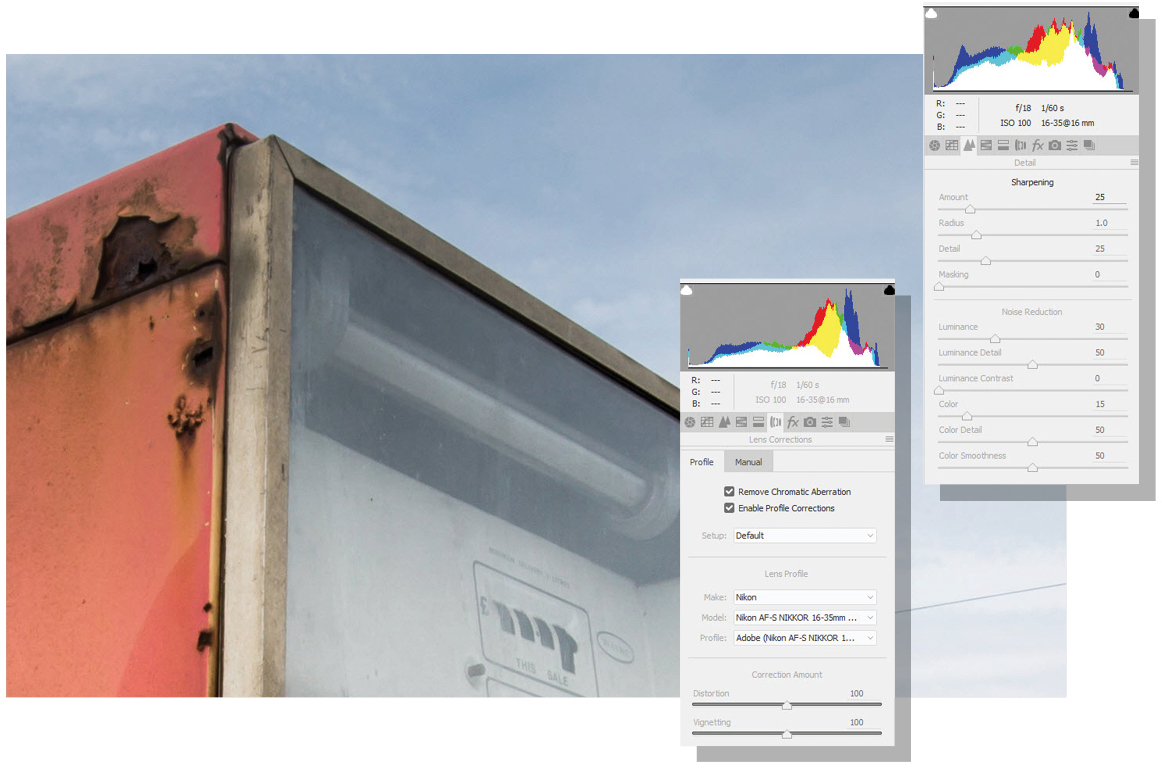
Zoom into the image and scroll around to look for noise. If grain is present, click the Detail tab, identified by two triangles. Under Noise Reduction, drag Luminance to the right until the grain disappears. Now click the Lens Correction tab, and tick Remove Chromatic Aberration and Enable Profile Corrections to compensate for lens flaws.

Sign up for breaking news, reviews, opinion, top tech deals, and more.
Current page: Raw Masterclass: Exposure recovery
Prev Page Raw Masterclass: Introduction Next Page Raw Masterclass: Local adjustments
James Abbott is a professional photographer and freelance photography journalist. He contributes articles about photography, cameras and drones to a wide range of magazines and websites where he applies a wealth of experience to testing the latest photographic tech. James is also the author of ‘The Digital Darkroom: The Definitive Guide to Photo Editing’.
 Become a TechRadar Insider


