


Chroma keying is the term used for shooting video against a blue or green screen, making the background color transparent, and superimposing it over a still image or another video.
It's widely used in TV and movies, with actors filmed in front of a colored backdrop in a studio, which is then replaced with footage shot on location elsewhere, but you can use the same technique at home and it's much easier than you might expect.
There are several free video editors capable of chroma keying, but out favorite free video editor Lightworks tends to give the best results. Here's how to do it.


1. Record your video
First, you need a green or blue background to shoot against. As we’ll explain later, it doesn’t have to be a very specific shade, but it needs to be substantially different from the subject you’re shooting. You might have seen occasions when a weather presenter’s tie has appeared transparent during a broadcast. This is because the material was too close in color to the backdrop, or the key wasn’t quite set accurately enough.
You can make your own backdrop using a sheet, or a large sheet of paper or card. If you’re planning to make videos frequently, there are inexpensive chromakey backdrops available that include a frame to hang the cloth from. If space is limited, collapsible screens are also available starting at around US$40. These screens are also handy for photography.
Good lighting is essential. You need make sure that the screen evenly lit so the color is consistent. It's also important to ensure your subject is far enough from the screen to avoid shadows and color spill (when the blue or green backdrop reflects off your subject).

2. Import and trim
Once you've shot your video, download and install Lightworks. It's free for personal use, but you’ll need to register for a free account if you want to use it for longer than 30 days.
Click the button marked Create a New Project, give it a name, and select a frame rate (you can find this by right-clicking your recorded video and selecting the Details tab). Here we're using a still image as a background, but you can also use another video. Import this the same way.
Click the Edit tab and drag your video from the Project Contents panel onto the V1 track of the timeline below. If there's unwanted footage at the beginning or end of your clip, right-click it and select Trim In or Trim Out, then use the yellow handles to change where the clip starts and finishes.
Right-click the preview window marked Sequence #1 and select Tracks > Add Video. Drag your video clip into the V1 track and your still image into V2. Click and drag the right-hand side of the image in the V2 track until it's the same length as the video.

3. Set the key
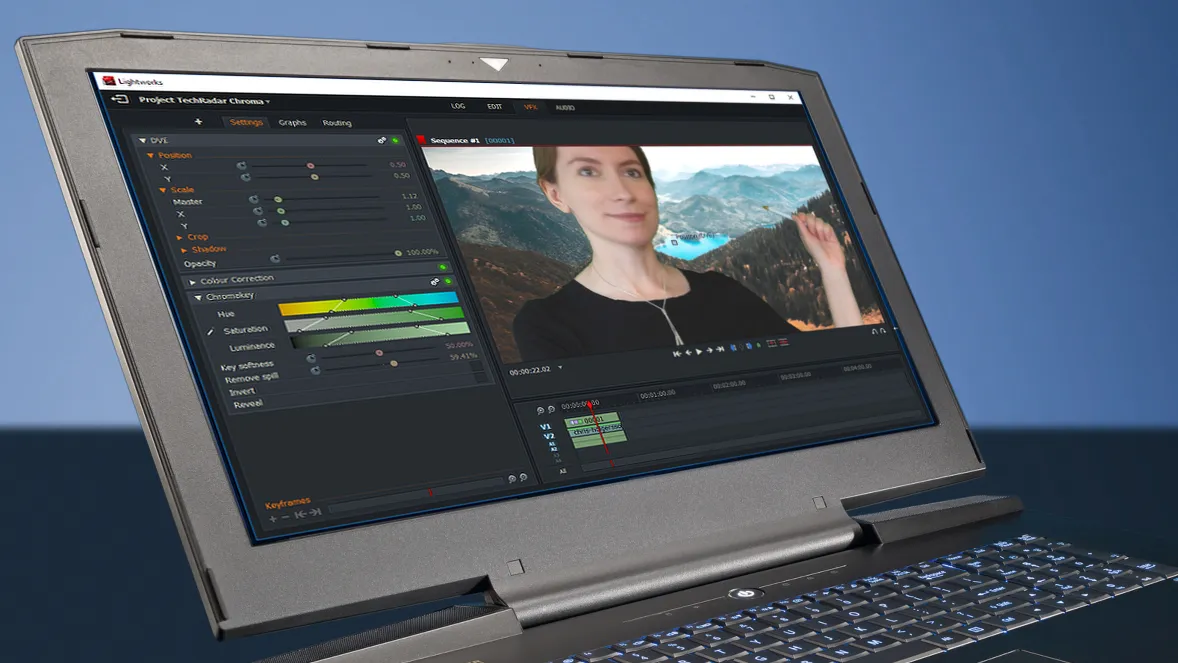
Now click the VFX tab, select the V1 track in the timeline and click the tab marked with a plus icon. Click the Favorites drop-down menu and select Key, followed by Green Screen. Click Add Effect and you'll see a new panel of settings under the color correction wheels.
Use the eye dropper tool on the left to select the background you want to remove. This will typically do quite a good job by itself, but it will need a little fine tuning. Try sliding the Saturation and Luminance sliders and adjusting their steepness using the handles that appear when you move your mouse over them. You'll notice that each adjustment you make has a knock-on effect on the changes you've made with the other sliders; it's a matter of balancing all three to achieve the best effect, preserving detail while minimizing spill.
To see how the filter is working, click the 'Reveal' box. The white areas are the parts of the video that will be removed, and the black areas are the parts that will remain.
The Remove Spill slider will add a purple tint to neutralize green tones in areas that need it.

4. Tweak and export
Once you're happy, you can use Lightworks' other VFX tools to make other changes like color correction and cropping. When you're done, return to the Edit tab, right-click the preview window at the top right and select Export.
The only two export options you'll see in the free version of Lightworks are Vimeo and YouTube, but this is a little misleading. These will save the video to your PC or Mac in a MP4 format, but they won't do the uploading for you unless you check the appropriate box.
Select a destination folder and name for your video file and click 'Start'. The processing will begin, and you'll see a progress bar at the top right. This task will run in the background so you can continue working on your project, and you'll be notified when it's complete.
- We've also highlighted the best video editing software
