How your Mac can help you through school, college and university
Tips, tricks and apps
Sign up for breaking news, reviews, opinion, top tech deals, and more.
You are now subscribed
Your newsletter sign-up was successful
Grab free lectures and teach yourself or your kids by creating a lesson plan
Do you ever think you would like to study a particular topic in your free time but never get around to it? Do you want to find a way to make your kids' learning a little more fun than just bashing away at books?
Your Mac offers up a wealth of options when it comes to making learning not only easier but fun too. Whether you're using a laptop, an iPad or a 27-inch iMac, there are exercises and tools to make use of your kit in an educational way.
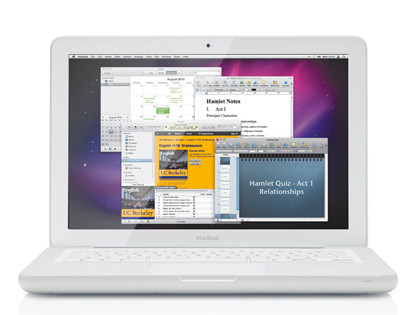
In this tutorial we're going to show you how to make the most of the lectures available on iTunes U (most of which are free) and how you can use pre-existing applications on your Mac, as well as the iWork suite, to harness this potential and create a structured learning environment.
There are so many different topics available to study for free on iTunes U, from history to healthcare and, in this example, we'll be getting to grips with UC Berkley's English 117S Shakespeare course. This is an audio-only course, although there are plenty of video lectures available too.
Video podcasts do take up a lot more room by comparison to their audio equivalents, so if you're short on space it might be an idea to clear out your hard drive of unwanted fluff before you begin downloading your lectures. (Let's not forget though that audio podcasts offer the added benefit of being listenable in pretty much any situation, both at home when you're doing chores or even when you're out and about town.)
Of course, there's nothing to stop you from substituting the lectures we use in this tutorial with any you fancy, or something that plays an important part in your children's curriculum.
Sign up for breaking news, reviews, opinion, top tech deals, and more.
Lectures don't have to be downloaded from iTunes U either: you're free to use any source you wish, such as YouTube EDU, however with the ability to download and sync podcasts to any device, iTunes U lectures offer a little more flexibility than the alternatives do up front. So get your thinking caps on, it's time to learn something new using the power of your Mac and iWork. hoW to / Plan your learning
01. Find your course

There are thousands of lectures available on iTunes U so head to iTunes, access the iTunes Store and click on iTunes U to find a course you're interested in. Once you've found one, click its title to be taken to its page, where you can download the audio or video lectures.
02. Download lectures
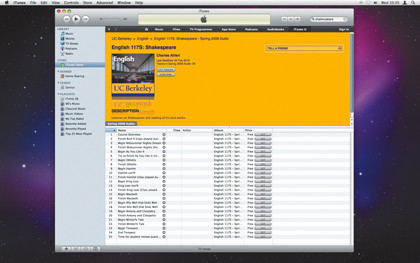
In most cases, you'll want to click on the Subscribe button in order to download all of the lectures in a course and any that may become available in future. Once done, click on iTunes U on the left-hand pane in iTunes to see your downloaded lectures and access more.
03. Plan your study
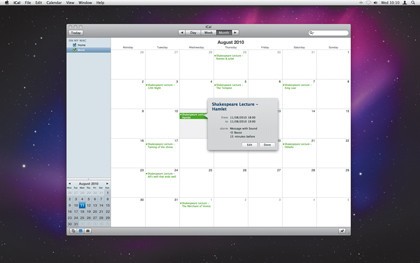
Depending on how many lectures you plan to listen to or watch and the duration of your course, you'll need to allocate some time to your study. Do this by creating an iCal event and alert to remind you it's study time. You can even set an alarm if need be.
04. Study time!

Lock out the rest of the world to listen to your lectures at your chosen time. While you listen, make notes you think are important in a text editor like Text Edit or you could even use Pages' Outline mode to structure your notetaking first and fill it in as you listen.
05. Extract the facts
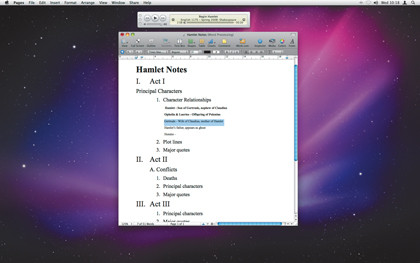
After you listen to each episode you'll no doubt have a large collection of notes. Tidy them up and highlight key facts in bold. To help you do this, check the website for your chosen course to see if course notes or curriculum information is available for you to reference.
06. Create a Keynote quiz
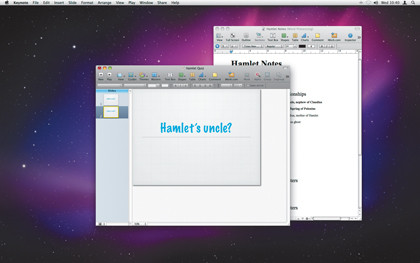
Open up Keynote and choose a default slideshow theme. Now enter a question on the first slide based around a key fact you highlighted in your notes. Now duplicate this slide by selecting it and pressing Command+D or choosing Duplicate from the Edit menu.
07. Add your answers
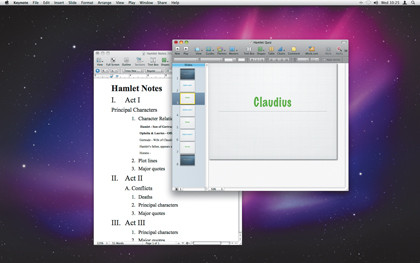
Delete the text from your duplicate slide and add the answer in its place. In order to differentiate the two, change the text colour of your answer as we have here. Continue this process for all of your questions and include extra slides to divide sections of questions.
08. Test yourself

When you've finished your questions and answers (which will also have helped you learn), click the Play button to run the slideshow and note how many questions you answer correctly. Save the presentation to add new questions and for testing at a later stage.
-------------------------------------------------------------------------------------------------------
First published in MacFormat Issue 225
Liked this? Then check out
Sign up for TechRadar's free Weird Week in Tech newsletter
Get the oddest tech stories of the week, plus the most popular news and reviews delivered straight to your inbox. Sign up at http://www.techradar.com/register
Current page: Plan your learning with iTunes U
Prev Page Secondary school, GCSEs, A-Levels and beyond