What to do when your iPhone is disabled
Regain access to your device swiftly
Sign up for breaking news, reviews, opinion, top tech deals, and more.
You are now subscribed
Your newsletter sign-up was successful
Understanding what to do when your iPhone is disabled can save you from the fear of being locked out of your device.
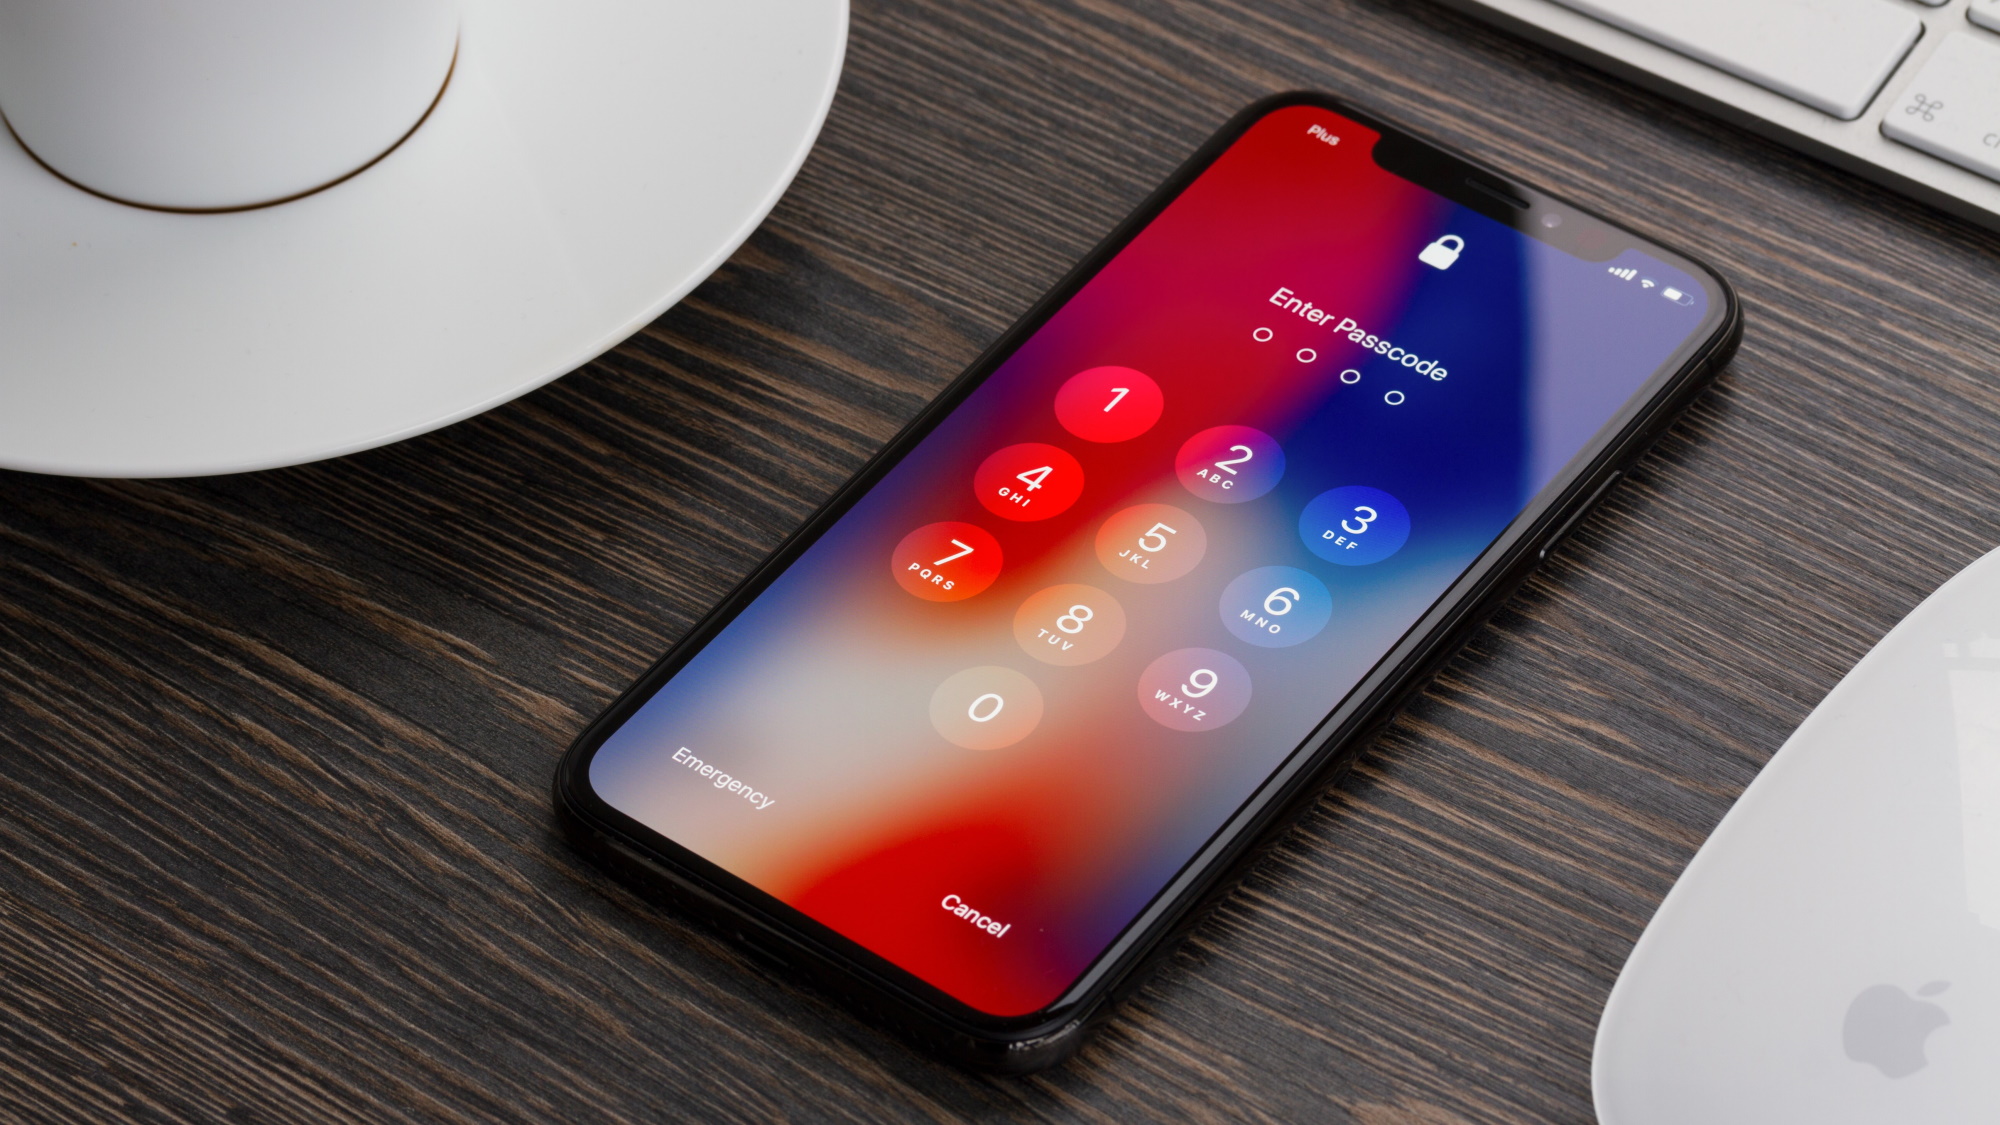
An iPhone gets disabled because of multiple incorrect passcode attempts. Inputting the wrong passcode a few times disables the iPhone for a minute, with subsequent incorrect attempts increasing the timespan to up to one hour. And owing to Apple’s robust security measures, there’s no way to unlock a disabled iPhone without the passcode.
However, you can regain access to your iPhone with recovery methods. Although these methods will wipe your device, you can restore the content using the latest backup.
In this step-by-step guide, we’ll go over how to unlock your iPhone when it’s disabled. And once you’re done recovering your iPhone, consider these best iPhone antivirus apps to enhance your security.
Tools and requirements
- A Mac or Windows computer with iTunes
- A USB cable to connect your iPhone to the computer
Steps for recovering your disabled iPhone with a Mac or Windows computer
- Turn off your iPhone.
- Enter recovery mode by pressing and holding the relevant button (side button for iPhone 8 and later, volume down button for iPhone 7, and home button for iPhone SE 1st gen and earlier).
- Connect the iPhone to a computer with a USB cable while holding the relevant button until the computer and cable icon appear on the iPhone.
- Locate your iPhone on Finder or iTunes.
- Click Restore.
- Once the device restarts, set it up.
Step-by-step guide to recover your disabled iPhone with a Mac or Windows computer
1. Turn off your iPhone
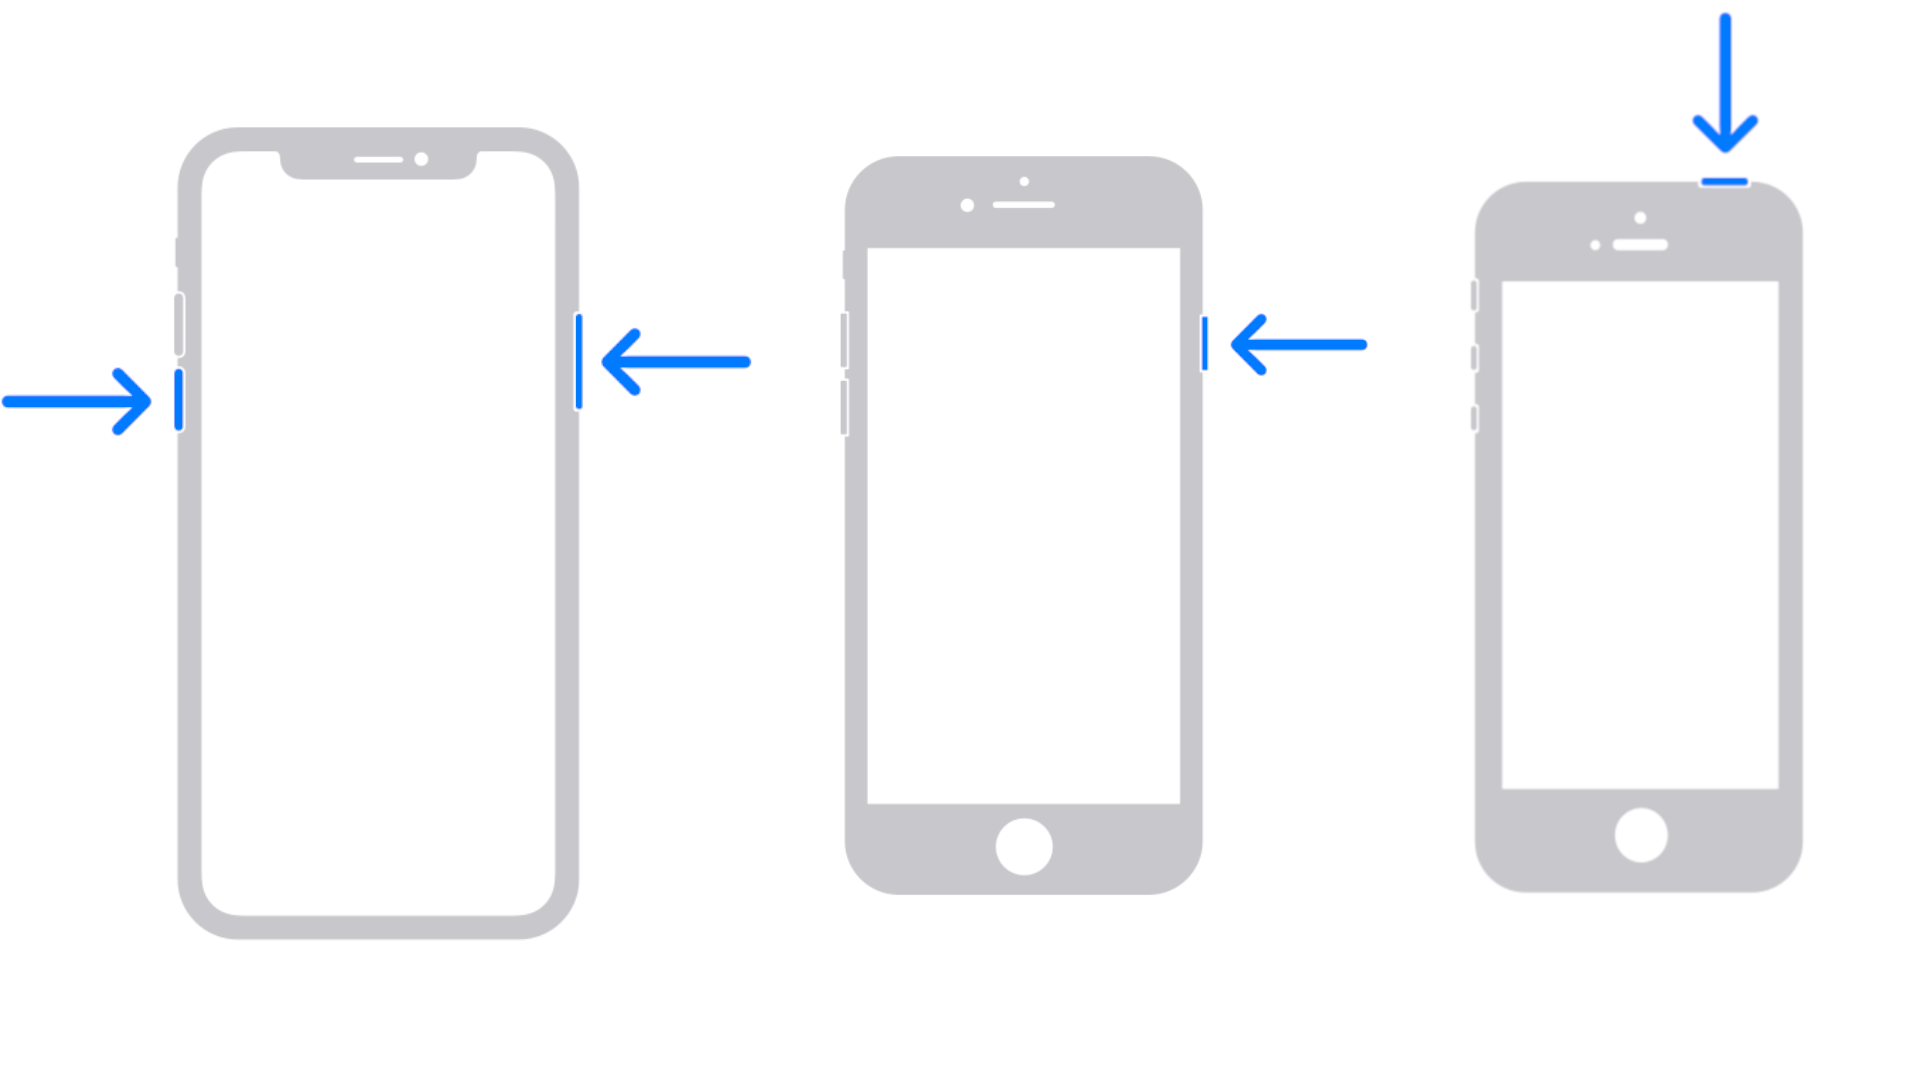
Turn off your iPhone using the relevant buttons for your model.
For iPhone X, XR, 11, 12, 13, 14, or later: Press and hold the side button and the volume down button until the power off slider appears. Drag the slider to turn off the device, and wait 30 seconds to confirm it’s turned off.
For iPhone SE (2nd or 3rd generation), 8, 7, or earlier: Press and hold the power button till the power off slider appears. Drag the slider to turn off the device, and wait 30 seconds to confirm it’s turned off.
2. Enter recovery mode
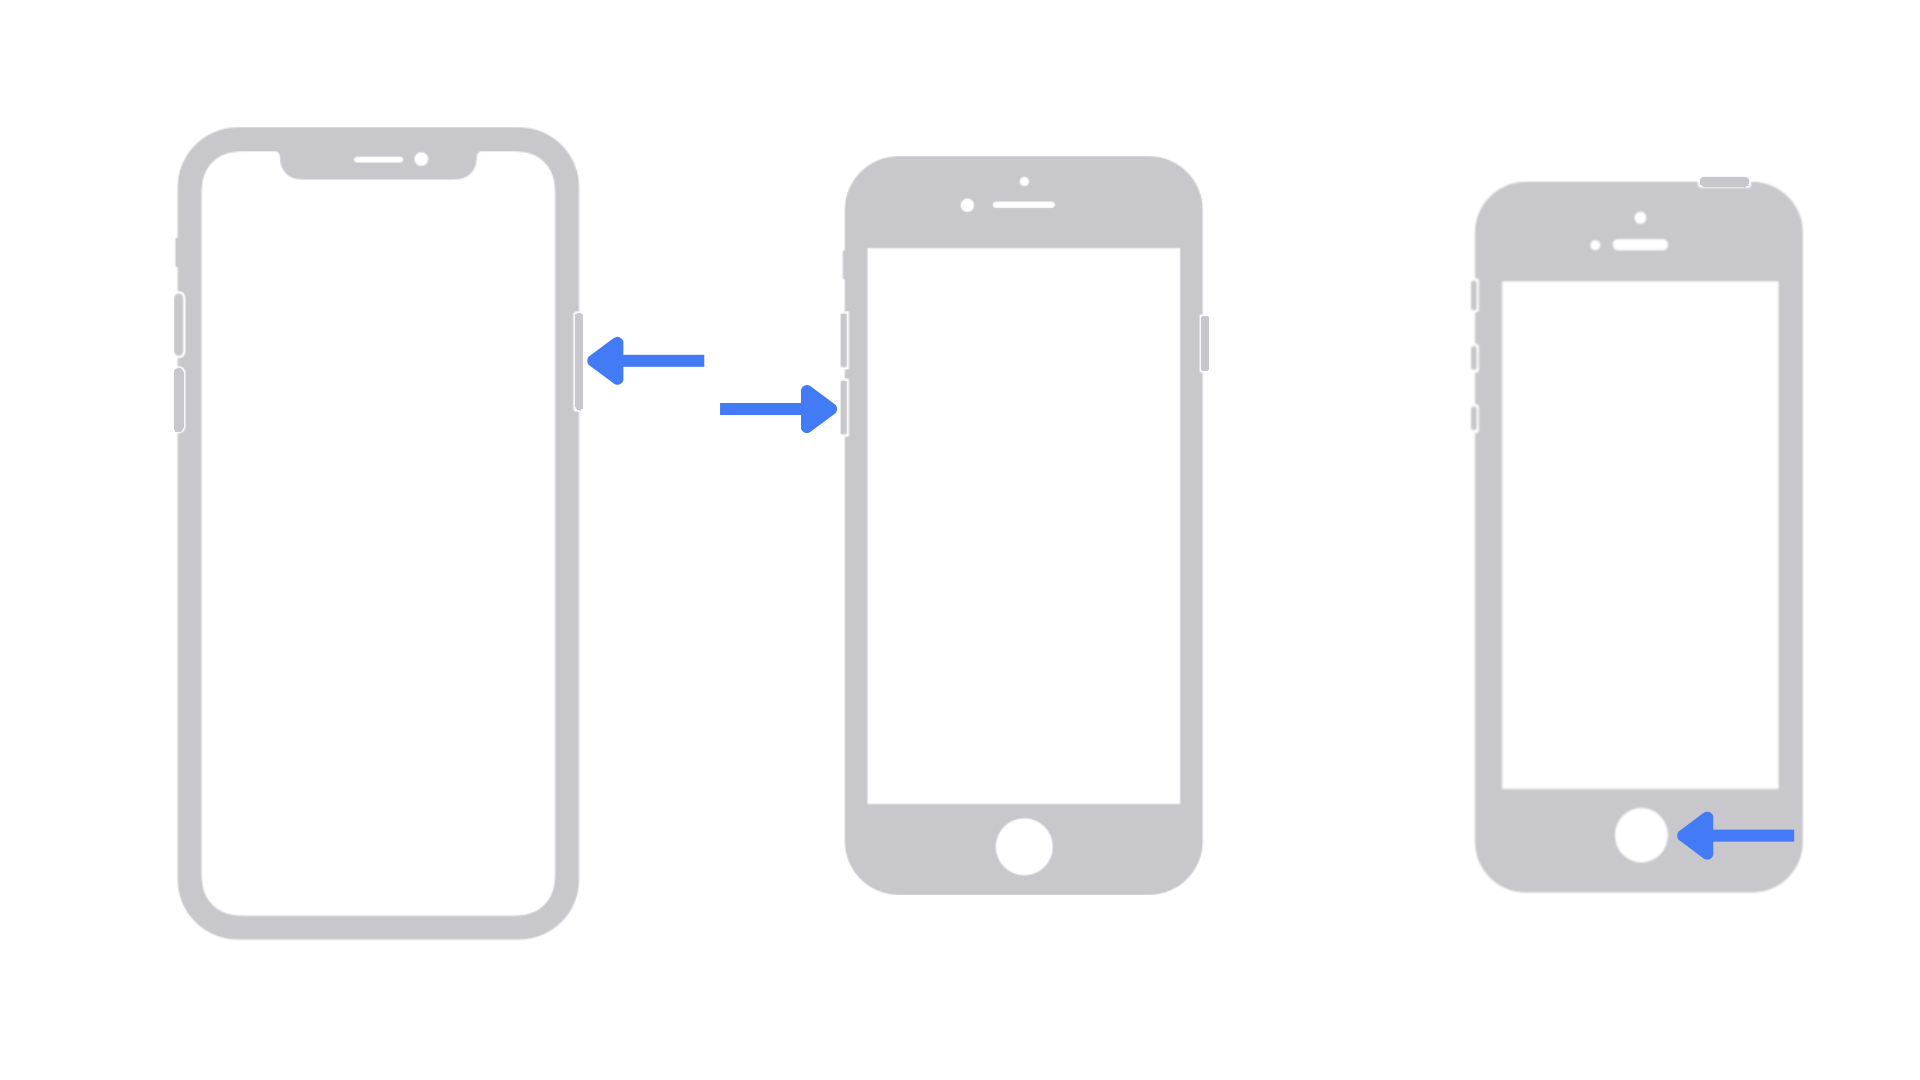
Depending on your iPhone model, put it into recovery mode using the relevant button:
- Press and hold the side button for iPhone 8, X, SE (2nd and 3rd generation), or later.
- Press and hold the volume down button for iPhone 7 (and 7 Plus).
- Press and hold the Home button for iPhone SE (1st generation), iPhone 6s, or earlier.
3. Connect your iPhone to a computer
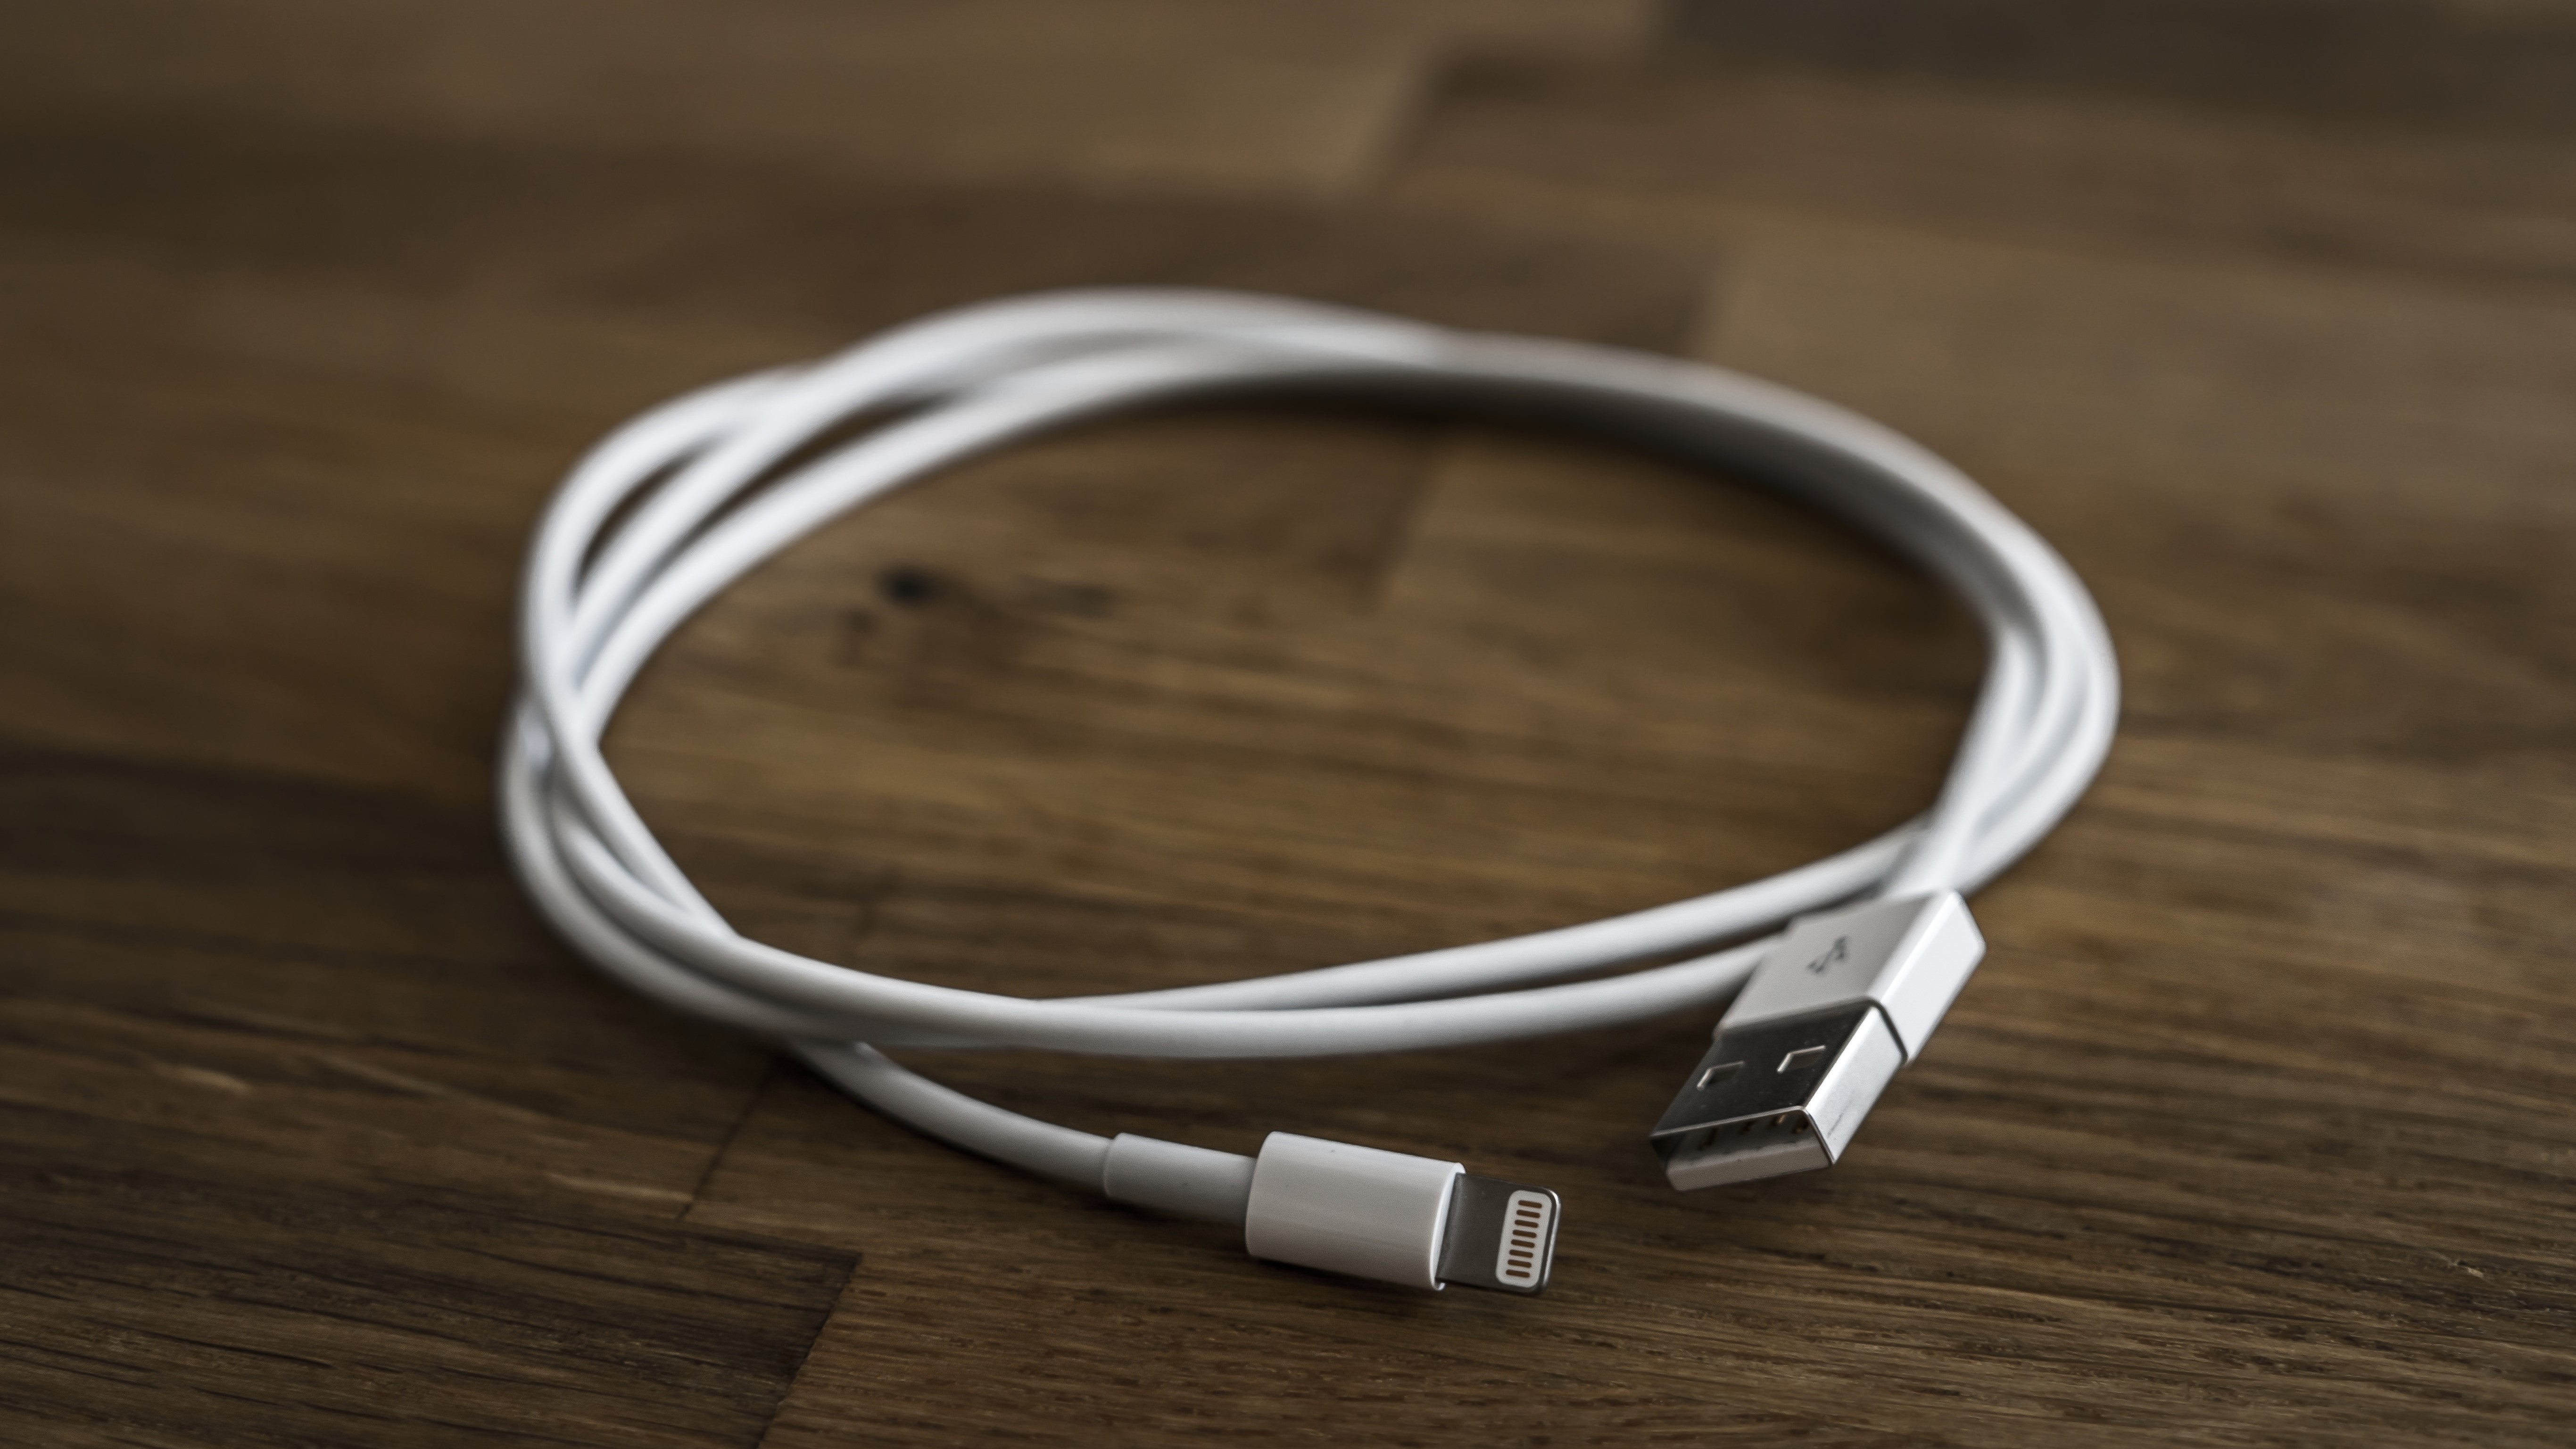
While holding the relevant button, connect your iPhone to the computer using a cable.
Keep holding the button when the Apple logo appears, and don’t release it until the computer and cable icon appear.
4. Restore your iPhone
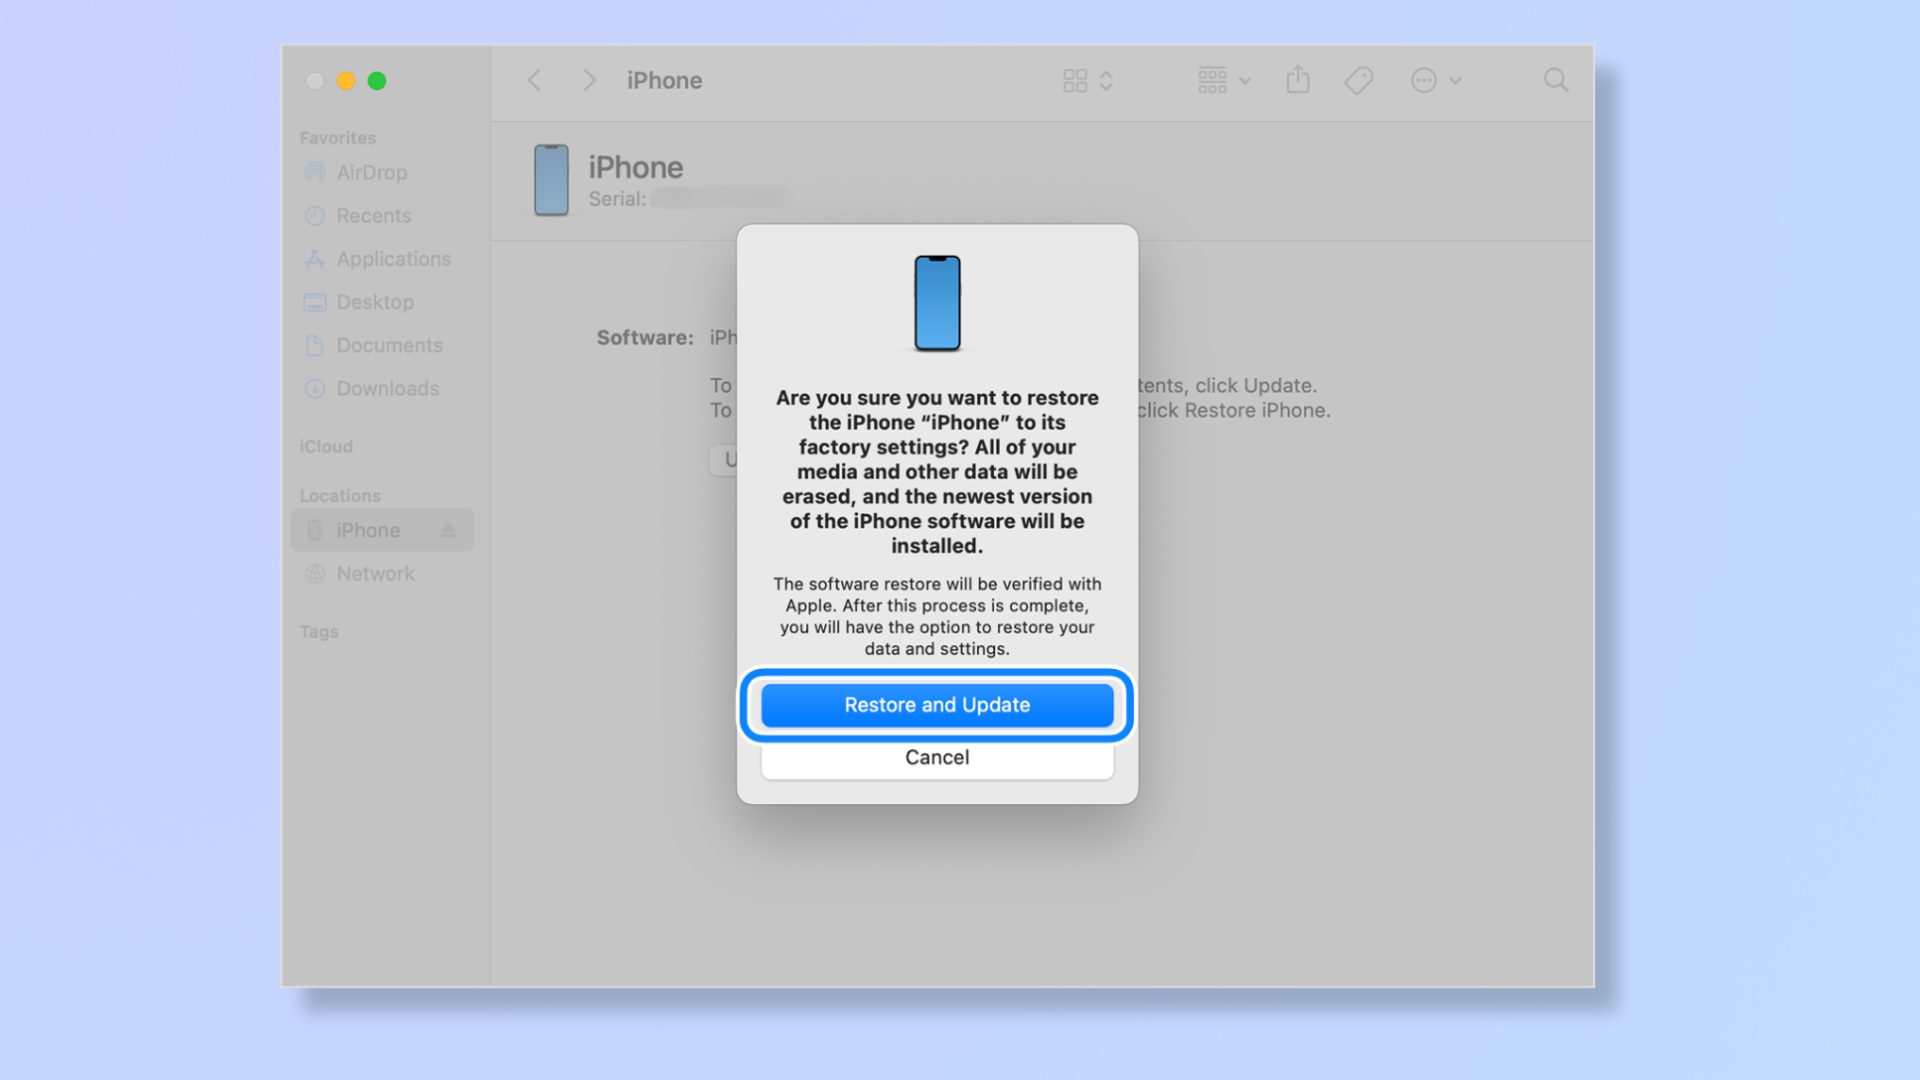
Find your iPhone in the Finder or on iTunes.
Select Restore when you get the option to choose between Restore and Update.
Once complete, your device will restart, and you can set up your iPhone and use it.
Tools and requirements
- iCloud access
Steps for recovering your disabled iPhone with iCloud
- Visit icloud.com/find and log in.
- Select the disabled iPhone.
- Click Erase This Device and follow the prompts.
- Set up your iPhone and restore a recent backup.
Step-by-step guide to recover your disabled iPhone using iCloud
1. Visit iCloud on the browser
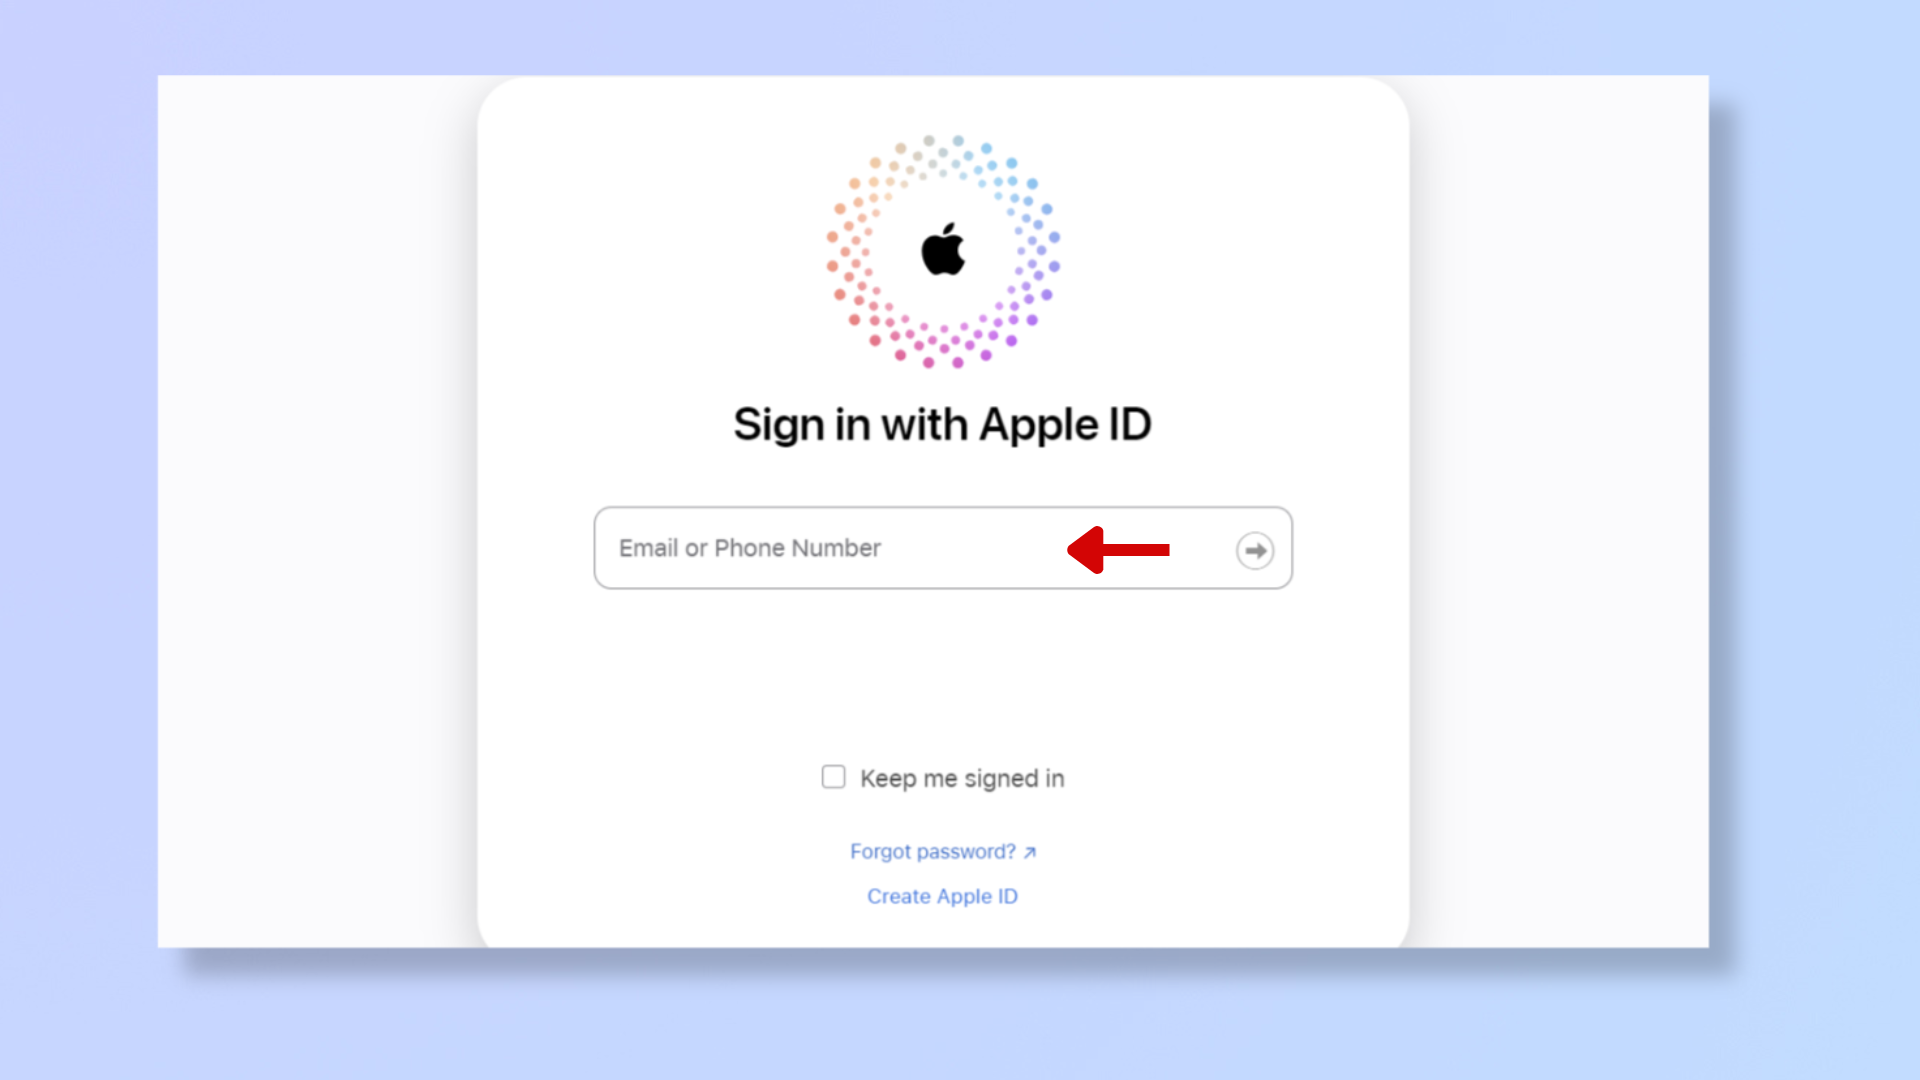
Open a browser on your computer, navigate to icloud.com/find, and log in.
2. Select the disabled iPhone and Erase
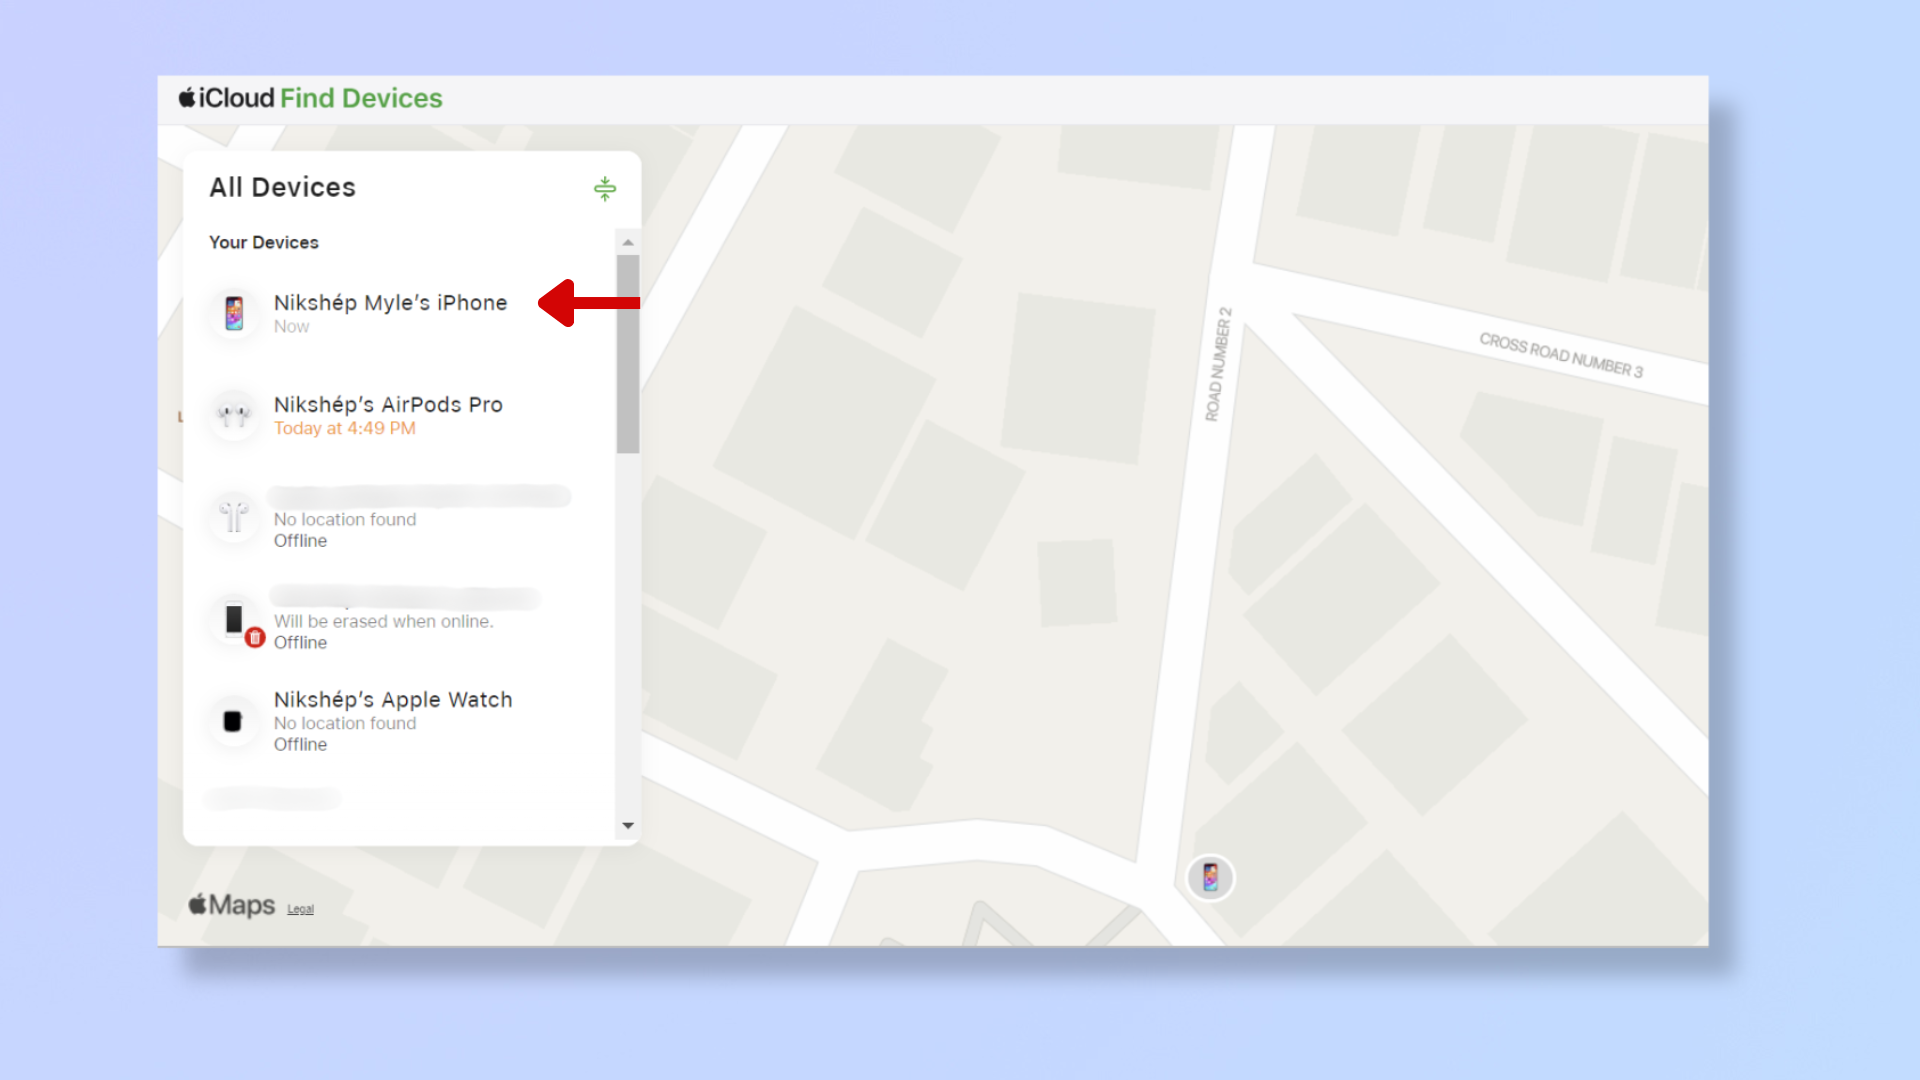
Click the disabled iPhone, select Erase This Device, then click Next and follow the onscreen prompts to wipe your device.
Afterward, go through the iPhone setup process and restore the device using your recent iCloud or iTunes backup.
Final thoughts
A disabled iPhone can appear daunting, but you can swiftly regain access to your device with the steps above. In case the steps didn’t work for you, you’ll want to consult a specialist at an Apple Store (or a verified third-party service) for support.
For more iPhone tips, explore our guides on how to show the battery percentage on your iPhone, how to use the new NameDrop feature, and how to make Contact Posters in iOS 17.
Sign up for breaking news, reviews, opinion, top tech deals, and more.
Nikshep Myle is a freelance writer covering tech, health, and wellbeing. He has written for popular tech blogs like Tom's Guide, GadgetReview, SlashGear, and Creative Bloq, and has extensively reviewed consumer gadgets. When he’s not writing, you’ll find him meditating, gaming, discovering new music, and indulging in adventurous and creative pursuits.