How to screen record on an iPhone
How to capture the on-screen action on iOS devices
Sign up for breaking news, reviews, opinion, top tech deals, and more.
You are now subscribed
Your newsletter sign-up was successful
Screen recording on an iPhone is pretty simple, but you need to take a few steps to make it easily accessible.
While Apple makes some of the best phones on the market, it's certainly easier to find the screen record feature on Android phones. Below, we've started our step-by-step guide with instructions on how to set up a shortcut by adding it to your Control Center to make the process quicker the next time you need it.
Whether you want to capture a Facetime session with a loved one, that moment you stole the win in a game, or content to be used in your latest TikTok or Instagram Reel, here's how to make sure you never miss a moment.
Steps for how to screen record on an iPhone
- Open the Settings app and navigate to the Control Center menu
- Find the option for Screen Recording and click the green '+' symbol
- Open your Control Center
- Tap the record button
Step-by-step guide
1. Head to the Control Center menu in Settings
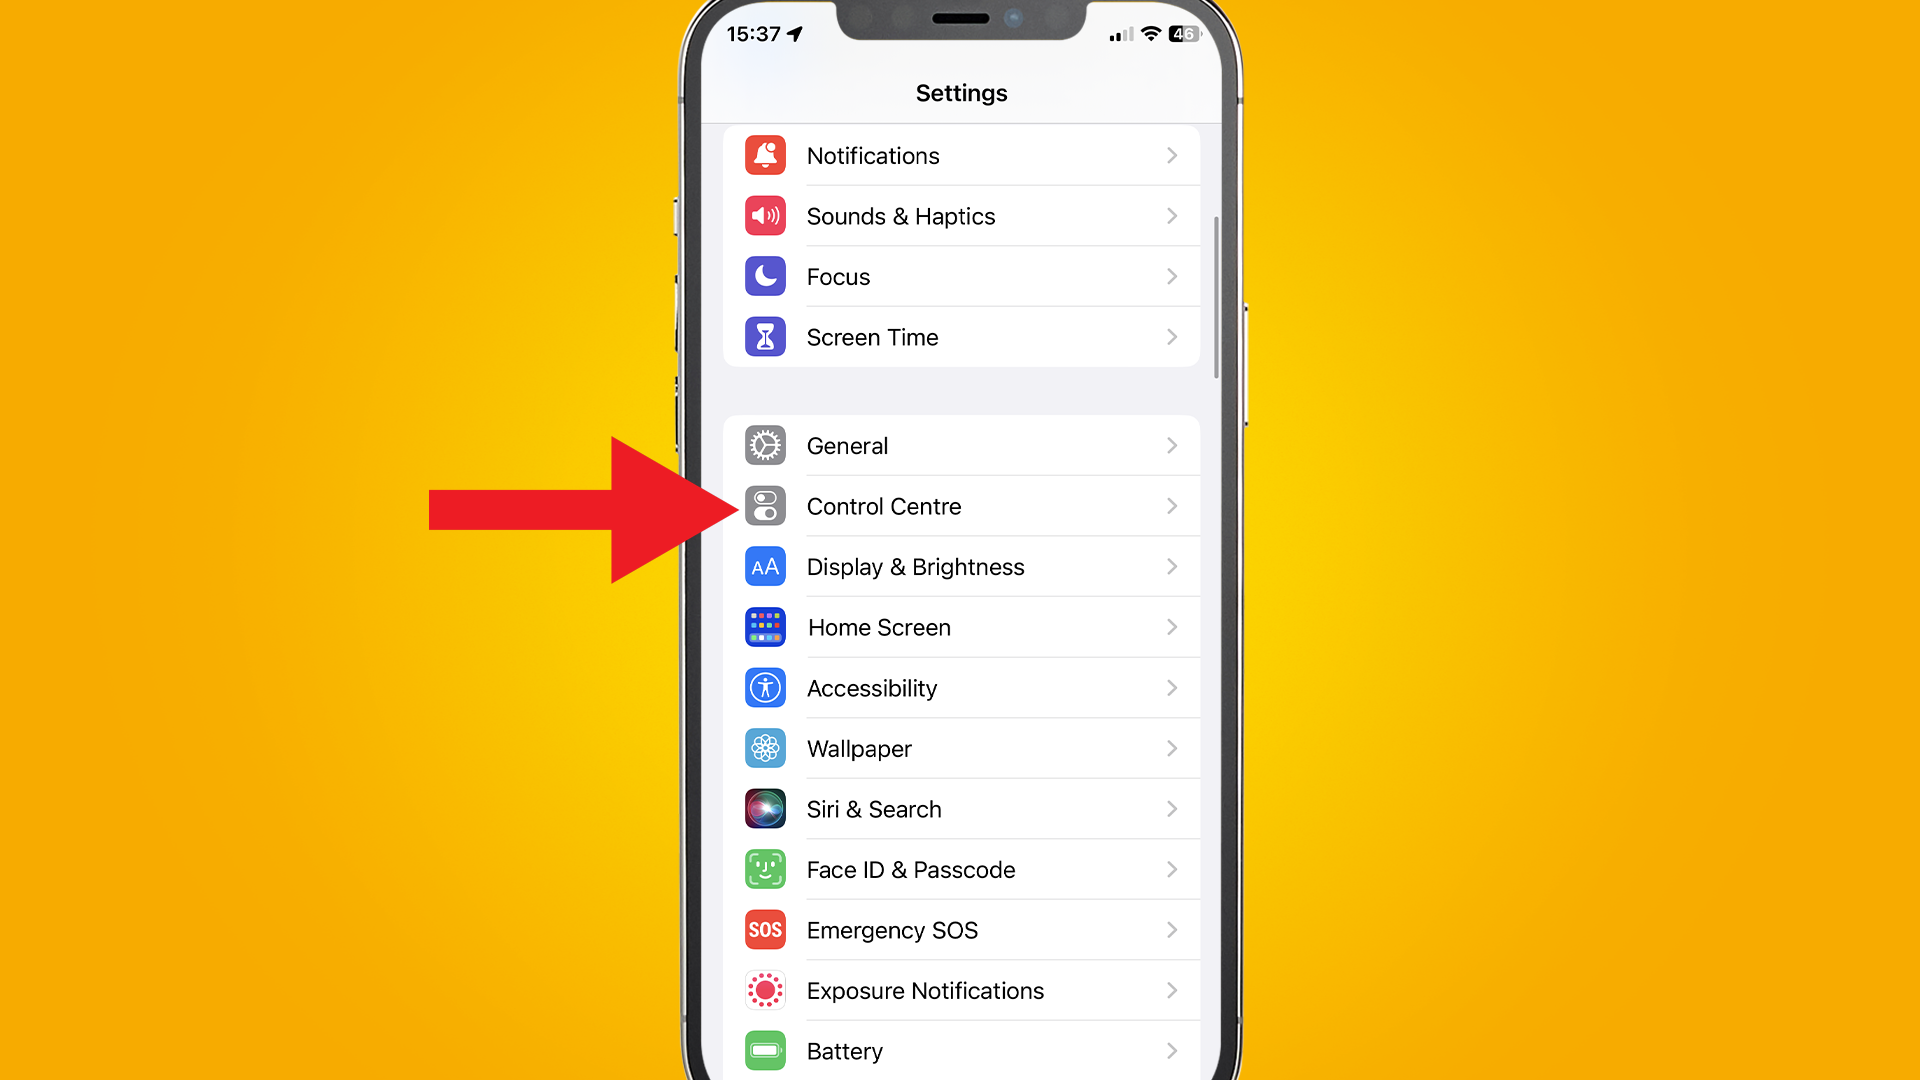
First up, you'll want to open your Settings app on your iPhone, which should be on your home page. If you're stuck, it's the gray logo with a cog on it, and if you've just activated your phone, it should be on the penultimate row on the far right.
Next, scroll down to the third group of options and find the one called Control Centre.
2. Add Screen Recording to your Control Center
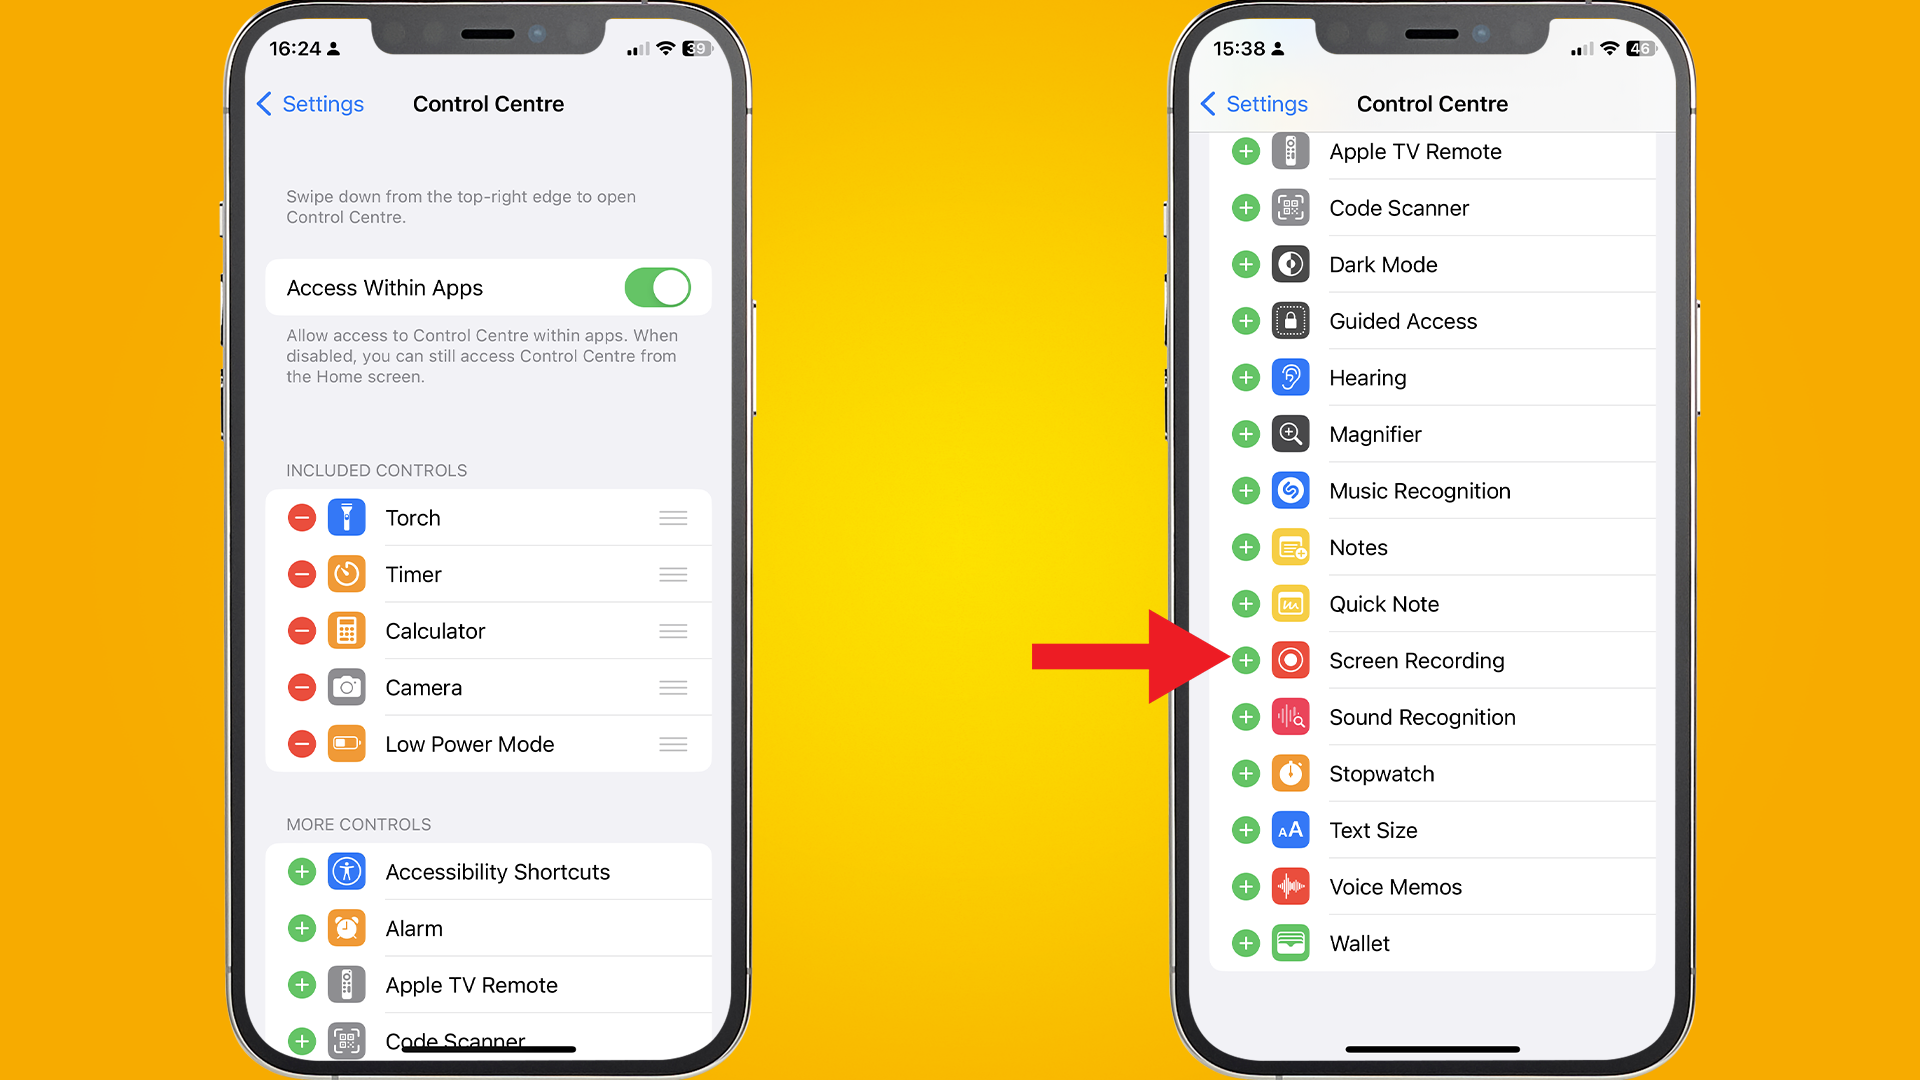
If you scroll down past the group titled Included Controls to the second group called More Controls, you'll find one for Screen Recording.
Click the green '+' symbol and it will move up to the Included Controls center. While you're here, check out the other useful tools you can create a shortcut for, and add any others that you want quick and easy access to.
3. Head to your Control Center
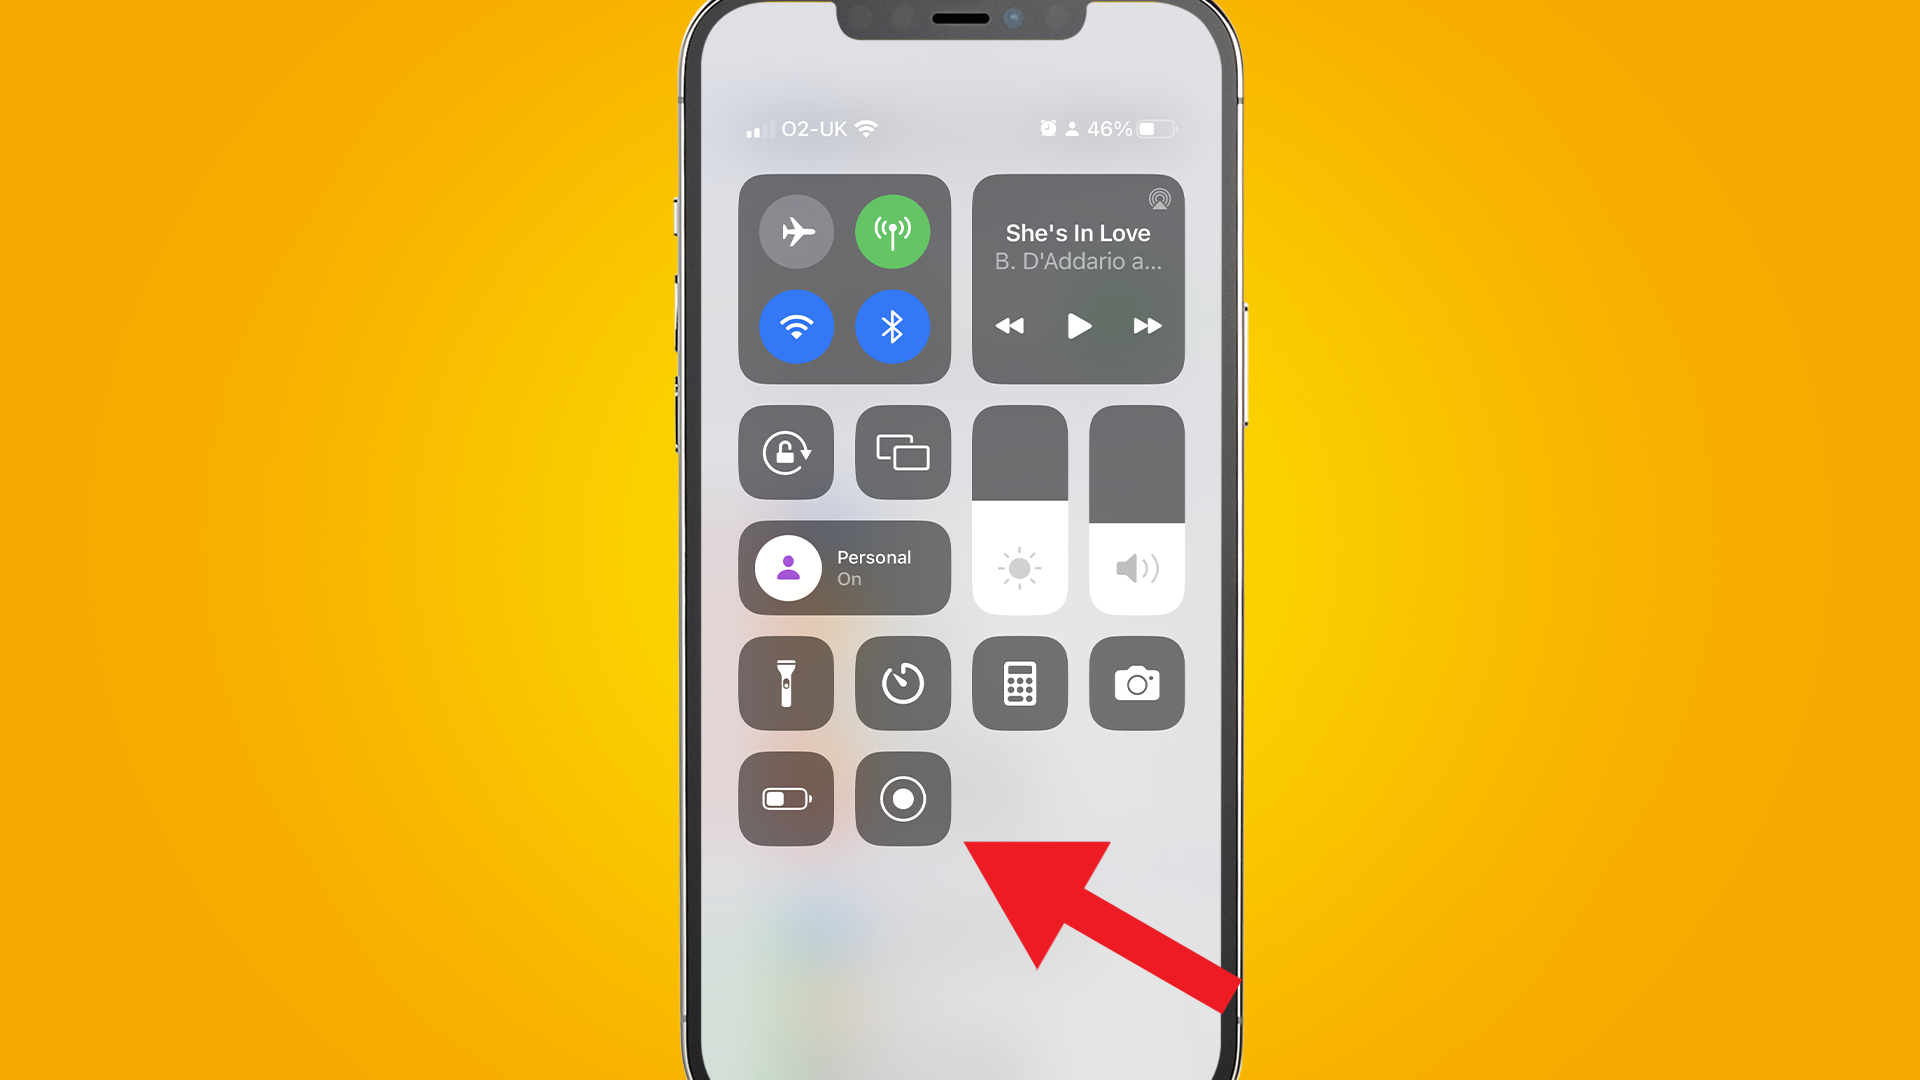
If you haven't used the Control Center before on an iPhone, you're in for a treat – it's a really useful interface.
Simply swipe down from the top-right corner of your iPhone (iOS 12 or later) and you'll find quick controls for your connectivity, screen lock, brightness, and volume, as well as whatever shortcuts you chose in the previous step.
4. Tap the Screen Record button
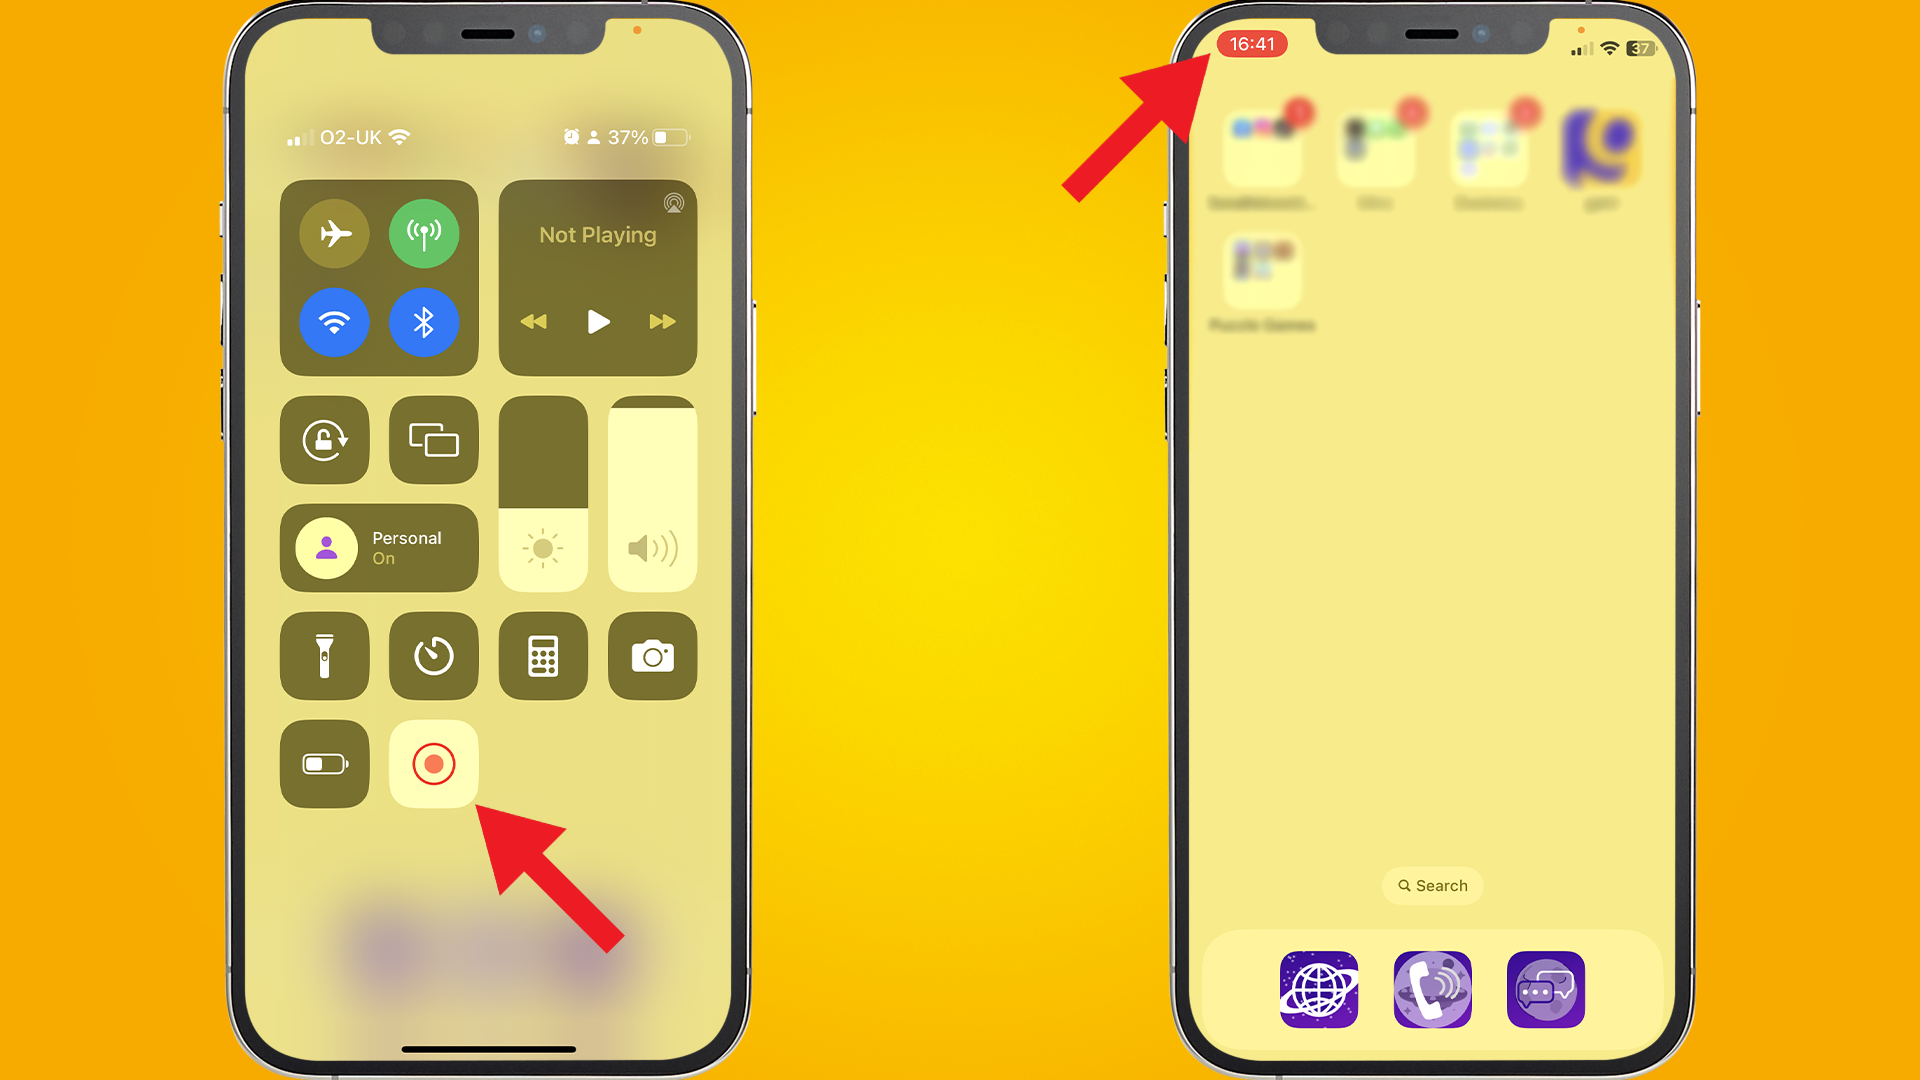
Now you're all set to start screen recording on your iPhone. Tap the icon featuring a white dot with a concentric circle surrounding it, and a three-second countdown should commence before the icon turns red, signaling that it is now recording.
Once you've finished capturing your footage, simply return to the Command Center by swiping down from the top-right corner of your screen and tapping the Screen Record button once more, which will instantly halt the recording. Tapping the red bubble that appears around your phone's clock will work, too.
5. (Optional) Turn on in-built microphone
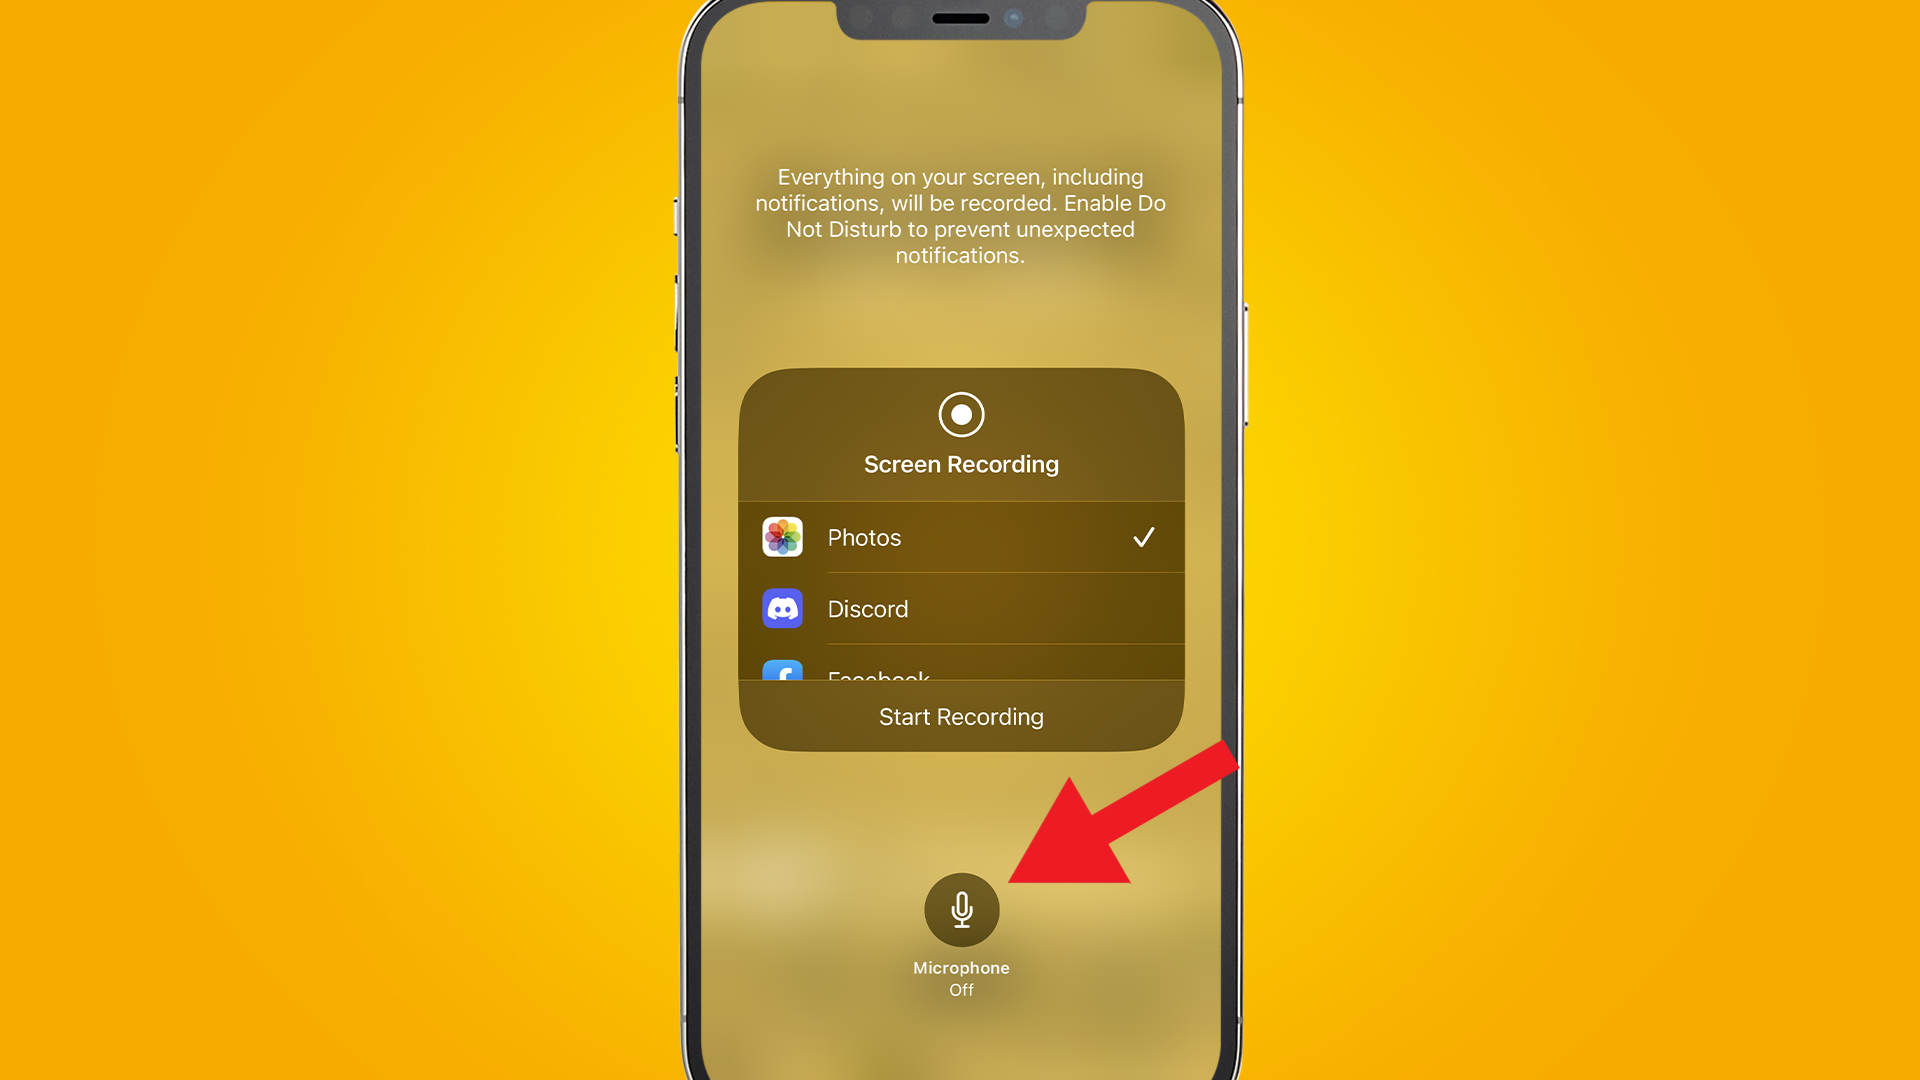
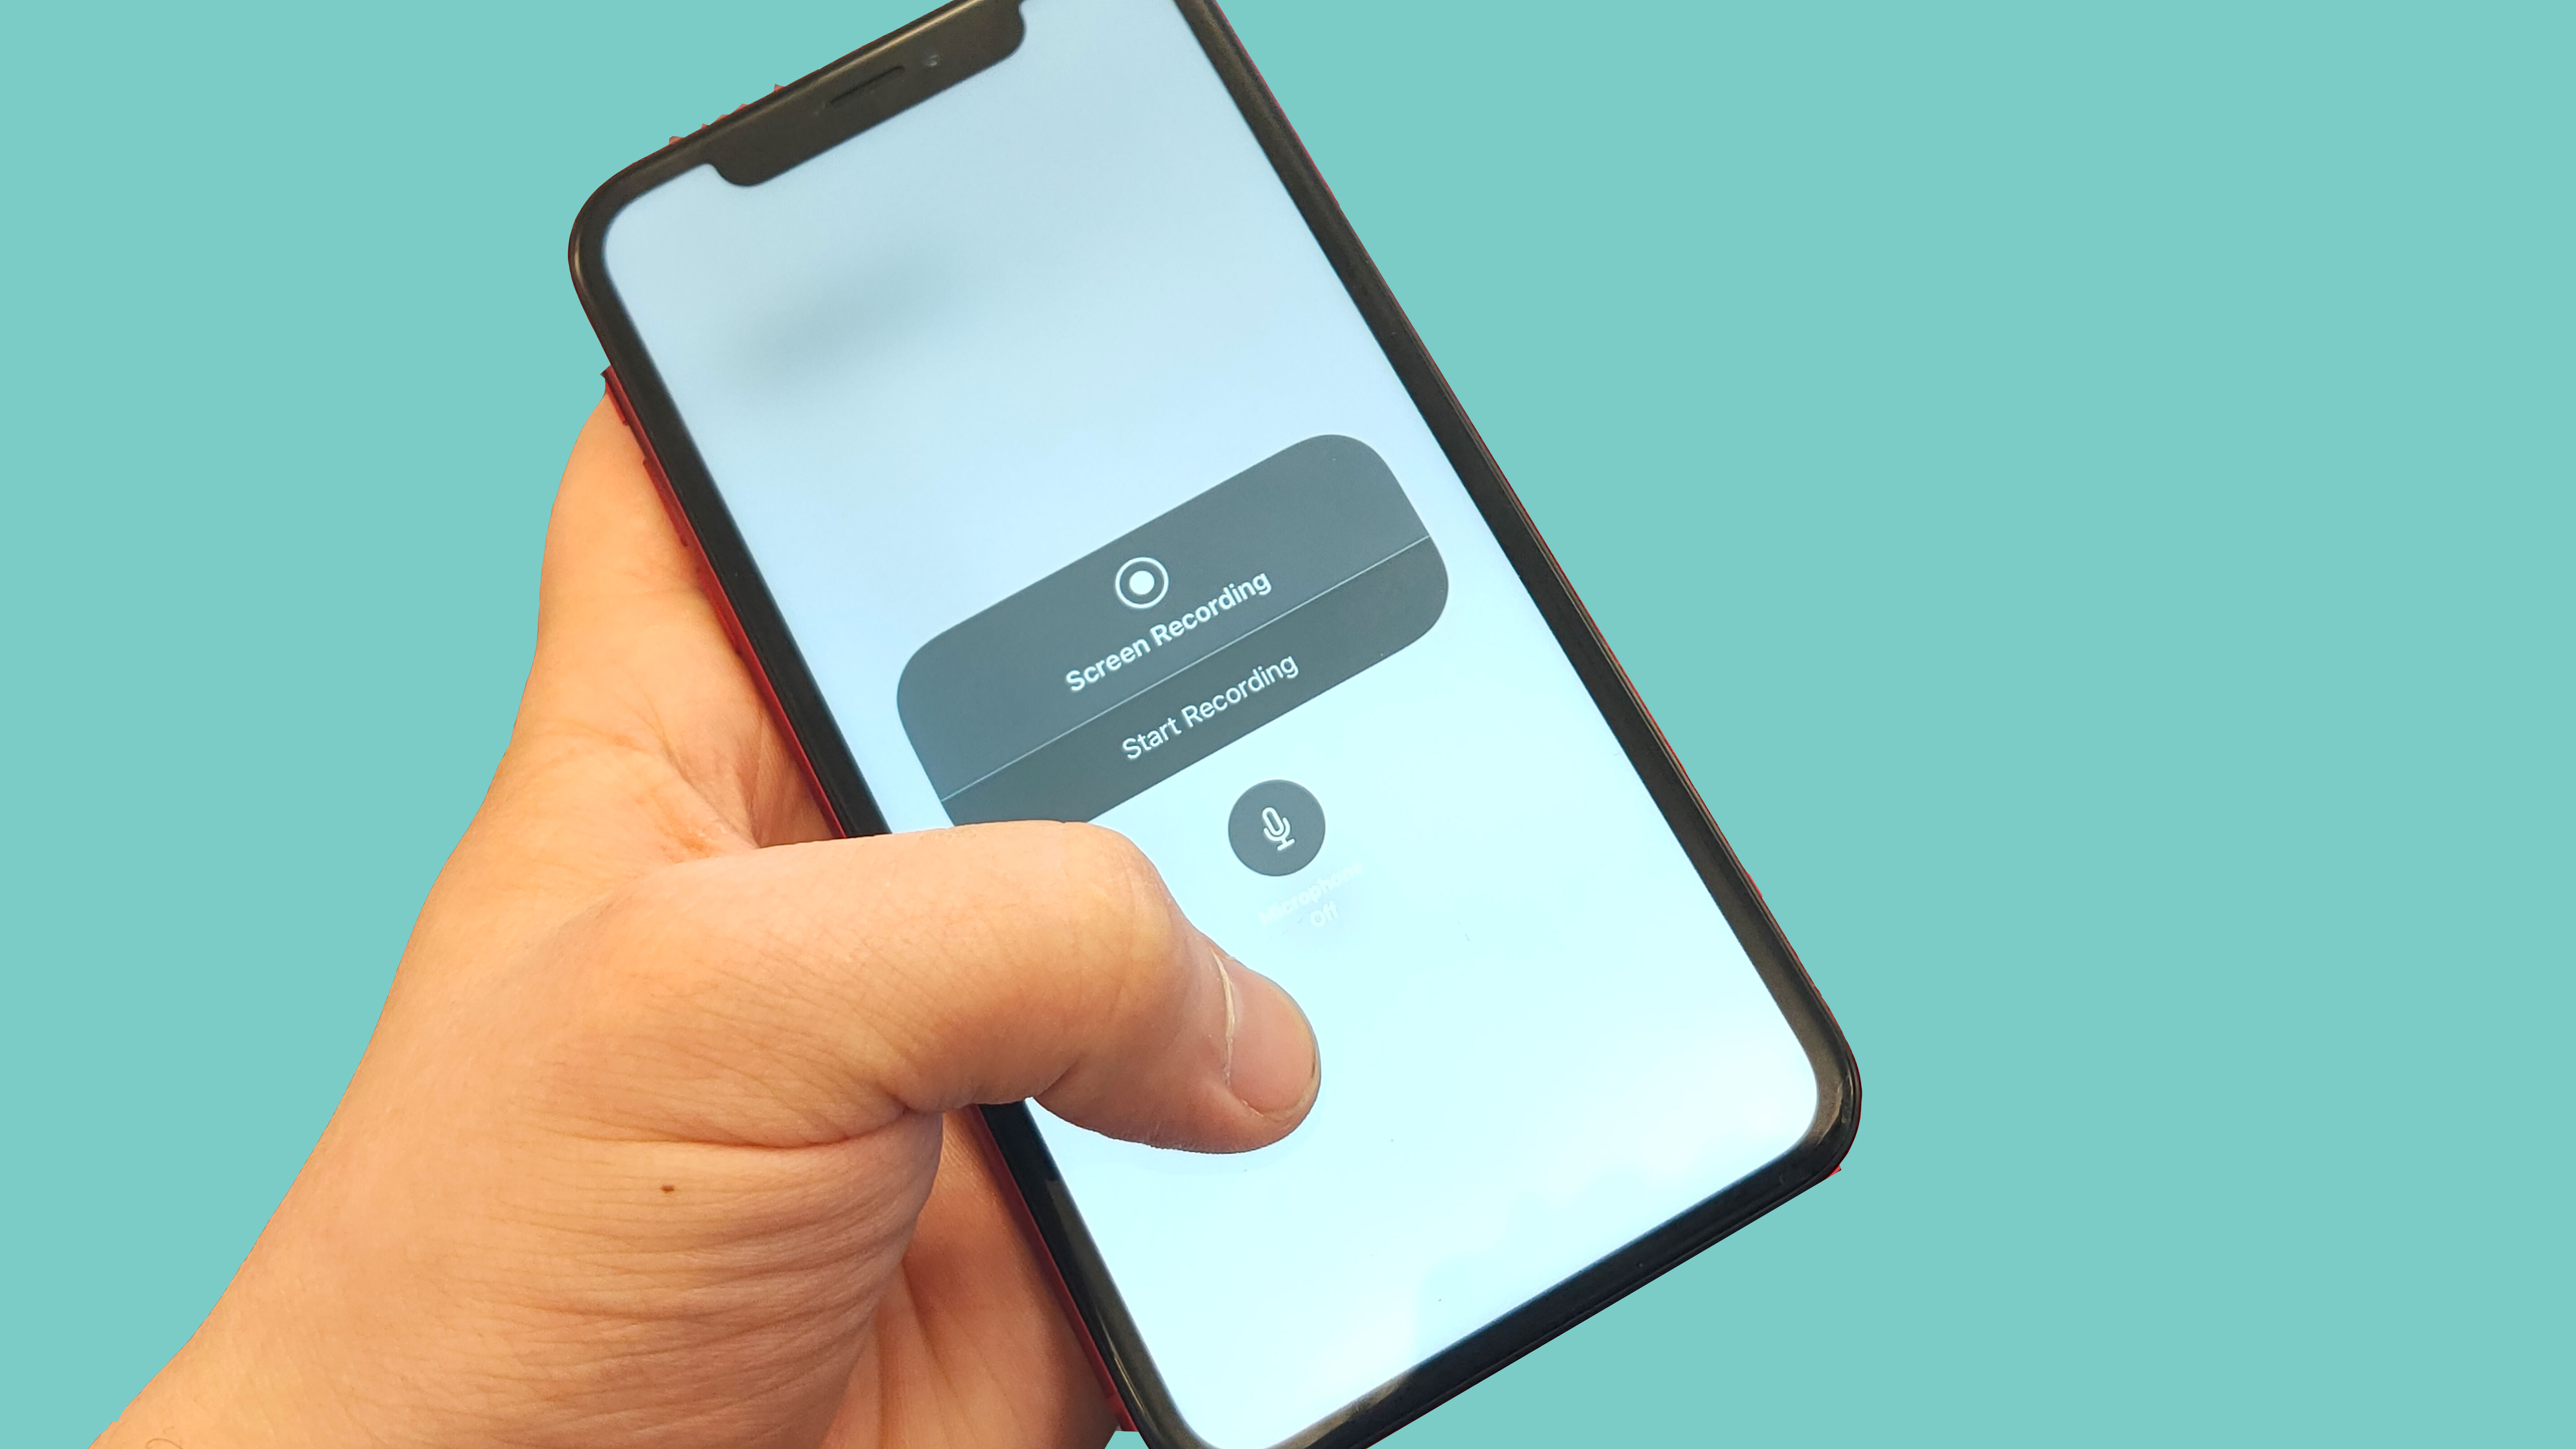
If you also want to record audio from your iPhone's in-built microphone, press and hold the screen record button before recording, and you'll find a button at the bottom of the screen with a picture of a microphone.
Tap this to switch it on, and your recordings will now pick up audio from the in-built microphone, too. It's worth noting that you might want to turn down the in-app volume of whatever you're recording so your voice can be heard over the top.
FAQs
Where do I find screen recordings on my iPhone?
Once you've finished and ended the screen recording, a banner will pop down notifying you that your video has been saved to the Camera Roll. You can either click this banner or manually open the Camera Roll app (the white tile with a rainbow-colored flowery motif) to watch, edit or share your footage.
How do I take a screenshot on an iPhone?
How you screenshot your iPhone will depend on what model you're using. Check out our rundown of how to take a screenshot on an iPhone, including the 'secret' back tap method.
Final thoughts
It took Apple a while to jump on the screen recording train, and even then it's not made it particularly easy for first-time users to find the feature.
However, once you've set up your shortcut, it's quick and intuitive to use, and the results rarely, if ever, suffer from any latency or quality issues.
Sign up for breaking news, reviews, opinion, top tech deals, and more.

Josephine Watson is TechRadar's Managing Editor - Lifestyle. Josephine is an award-winning journalist (PPA 30 under 30 2024), having previously written on a variety of topics, from pop culture to gaming and even the energy industry, joining TechRadar to support general site management. She is a smart home nerd, champion of TechRadar's sustainability efforts as well and an advocate for internet safety and education. She has used her position to fight for progressive approaches towards diversity and inclusion, mental health, and neurodiversity in corporate settings. Generally, you'll find her fiddling with her smart home setup, watching Disney movies, playing on her Switch, or rewatching the extended edition of Lord of the Rings... again.