How to fly your DIY Raspberry Pi drone
Flying your own drone
After quite a bit of work your drone should now be at the flying stage and with a bit of practice and quite a few replacement propellers you should have your creation airborne.
Don’t worry if it takes a while to get to grips with the controlling this drone as at present it’s about as raw as it gets and lacks any of the niceties of the expensive commercial drones you can by on the high street.
Just because you built the drone yourself it doesn’t means that you can’t rely on a few of the more advanced features to help stabilise flight and make the whole flying experience a little easier. The first essential is to fit GPS.

The cheapest option is to purchase the GPS unit at the same time as the PXFMini, otherwise search around for the ‘UBloxNeo8M’.
It’s unlikely that you’ll find it with the right connectors so a little creative wiring will be needed to attach the right ones to connect to the PXFMini.
The PXFMini uses a new type of connector these are set out by the latest dronecode Autopilot standard. They’re almost identical to the standard DF13 four- and six-pin and are called JST GH and again these come in both 4- or 6-pin. Knowing this will save you time and money when buying a GPS unit for use with the PXFMini as the majority of GPS units use DF13.
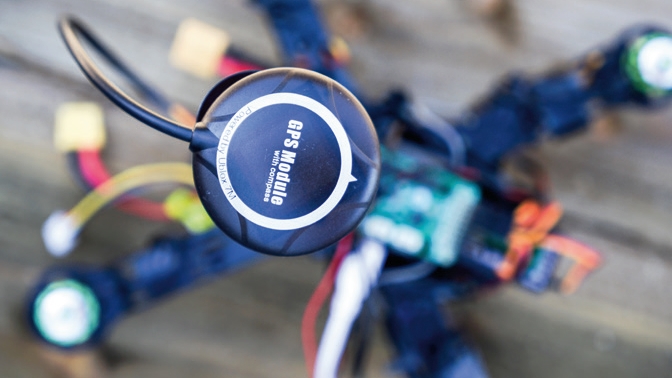
Once purchased and fitted with the right connectors, the GPS unit can be plugged into the top of the PXFMini using the two connectors, one for power that goes to the four pin and the other to data. After connecting the GPS power up the drone and you’ll see the GPS lights illuminate.
Sign up for breaking news, reviews, opinion, top tech deals, and more.
In order for the PXFMini to take advantage of the additional data that the GPS will provide you’ll need to wait for the GPS to pick up the satellites which can take a couple of minutes. You’ll see the yellow LED flash once full connection is made.
GPS mounting
The GPS module is a sensor and works by picking up a series of satellites that map the drone’s location. As the drone we’ve built is quite small it won’t be as accurate as larger craft, but it will still have a positive effect on the quality of flight possible.
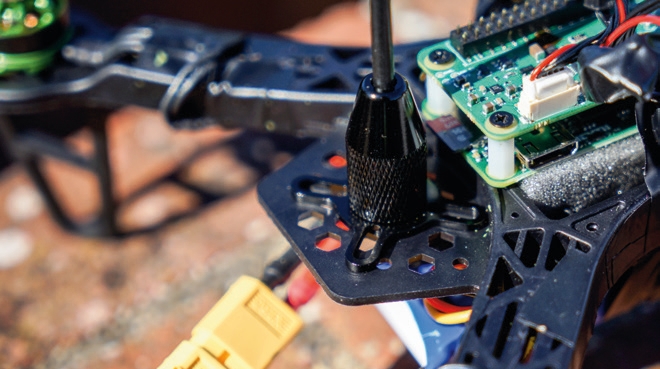
Mounting the GPS module can be an issue as it can be difficult to find a place on the drone that doesn’t get in the way of the propellers. Also take into consideration that every few flights your drone will need recalibrating, and this will involve you placing the drone on its back so the GPS pole will need to be removed.
Once connected to the drone the GPS needs to be mounted. Unlike all other components that need to be packed onto the frame and bound in tight, the GPS module needs to be mounted proud of the craft so that it gets a good clear view. The separation from the rest of the electronics also helps to avoid any magnetic interference that’s caused by the ESC and motors.

Finally, it’s important that the wires are all tucked in and wrapped away from the spinning props to ensure your drone doesn’t impersonate a brick in mid-flight when flapping wires are accidentally shredded.
Once mounted you will need to repeat the compass calibration in the Initial Setup > Mandatory Setup > Compass. After re-calibrating you are ready to fly.
To check that the GPS is working use Wi-Fi to connect to the drone and, making sure it’s a bright day, power-up and leave the drone outside for a couple of minutes. On your computer navigate to the APM config/tuning > parameters window and check that the follow GPS perimeters are:
Min Sat => 6 and HDOP < 2.The Linux operating system used by the PXFMini and Raspberry Pi Zero means that further sensors can be added and configured through the APM Planner 2.0 software.
The Pi Zero is a great way to get started but take a look at some of the more powerful options, including the Erle Brain 2. However, the drone is just one project that can be created with the PXFMini— intelligent boats and cars can all be built using the same system.
- Enjoyed this article? Expand your knowledge of Linux, get more from your code, and discover the latest open source developments inside Linux Format. Read our sampler today and take advantage of the offer inside.