How to use Split View on a Mac
How to use Split View on a Mac to work more productively in macOS
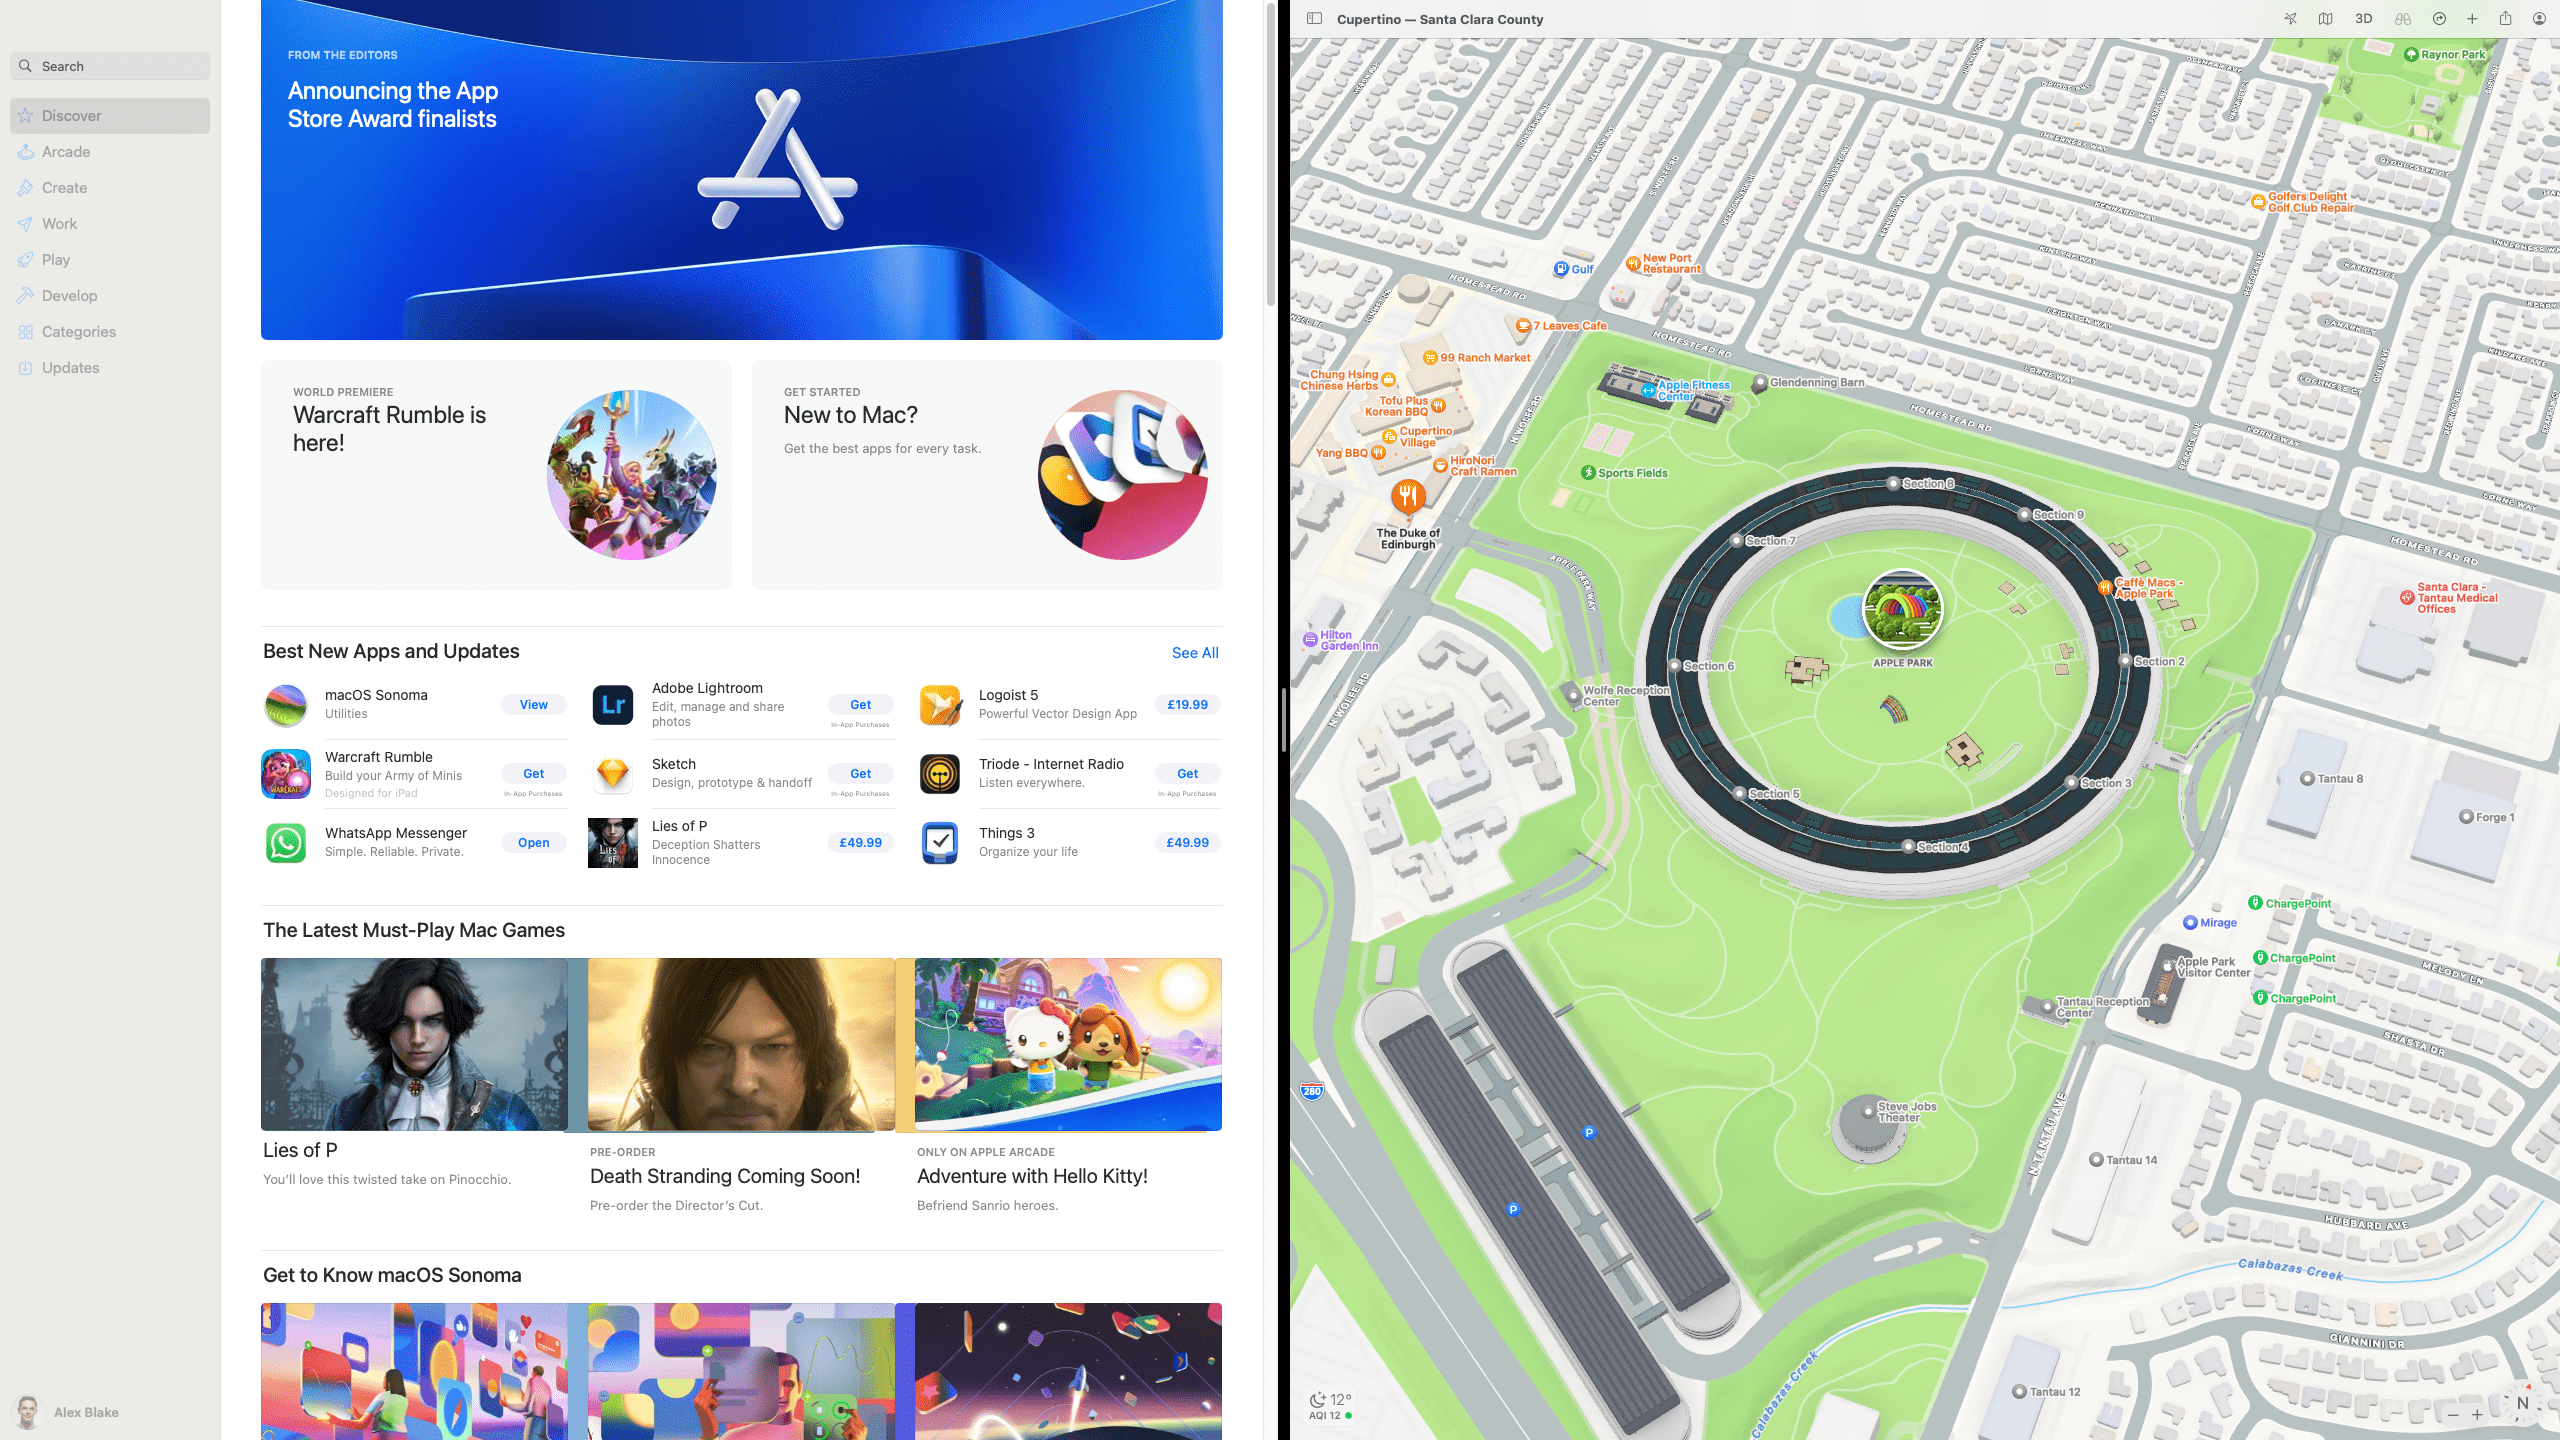
Whenever you want to interact with an app’s green maximize button, make sure you click the app first to bring it into focus. Only in-focus apps will give you the extra options (like Move Window to Desktop) that help you get more out of Split View.
Apple’s macOS operating system is full of helpful ways to boost your productivity, and one of the best is Split View. This lets you run two windows side-by-side in full-screen mode, helping you focus exclusively on the things you need to get done and block out distractions.
But there’s more to Split View than just running apps next to each other. You can also adjust the size of each window, swap their positions, and share content between them. The idea is you get to set up the ideal workspace for everything you’ve got to do.
To activate Split View, you need to use what are known as an app’s ‘traffic light’ buttons, which are used to close, minimize or maximize windows. You’ll find these in the top-left corner of any app window, and in Split View’s case, it’s specifically the green button we’re interested in. Hover your pointer over it and you’ll find some hidden options that are vital to Split View.
Follow along with our guide and you’ll quickly learn the ins and outs of Split View in macOS, putting a helpful productivity tool at your fingertips from here on out. Let’s dive in and learn how it works.
Tools & requirements
- OS X 10.11 El Capitan or later
- At least two open apps
Quick steps
- Hover over an app’s green maximize button and choose which side of your screen to tile the app to
- Select another app to run alongside it
- Exit Split View by hovering over the green button and picking Move Window to Desktop
- You can share content across Split View apps by dragging and dropping items from one app to another
Step by step guide
1. Set up Split View
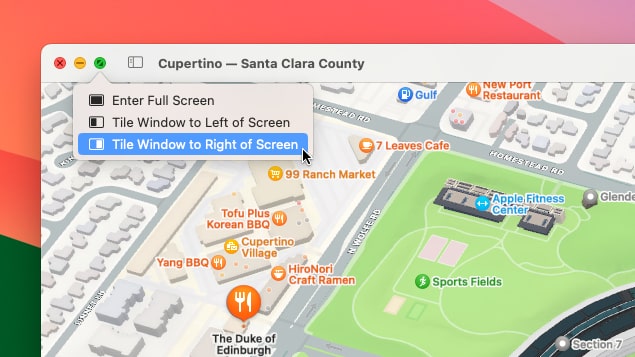
Move your pointer over the green maximize button in an app’s top-left corner.
A menu appears with three options: Enter Full Screen, Tile Window to Left of Screen, or Tile Window to Right of Screen. Pick either the second or third option.
When you do, your app will move to fill half of your Mac’s screen. On the other side, you will see the floating windows of your other open apps.
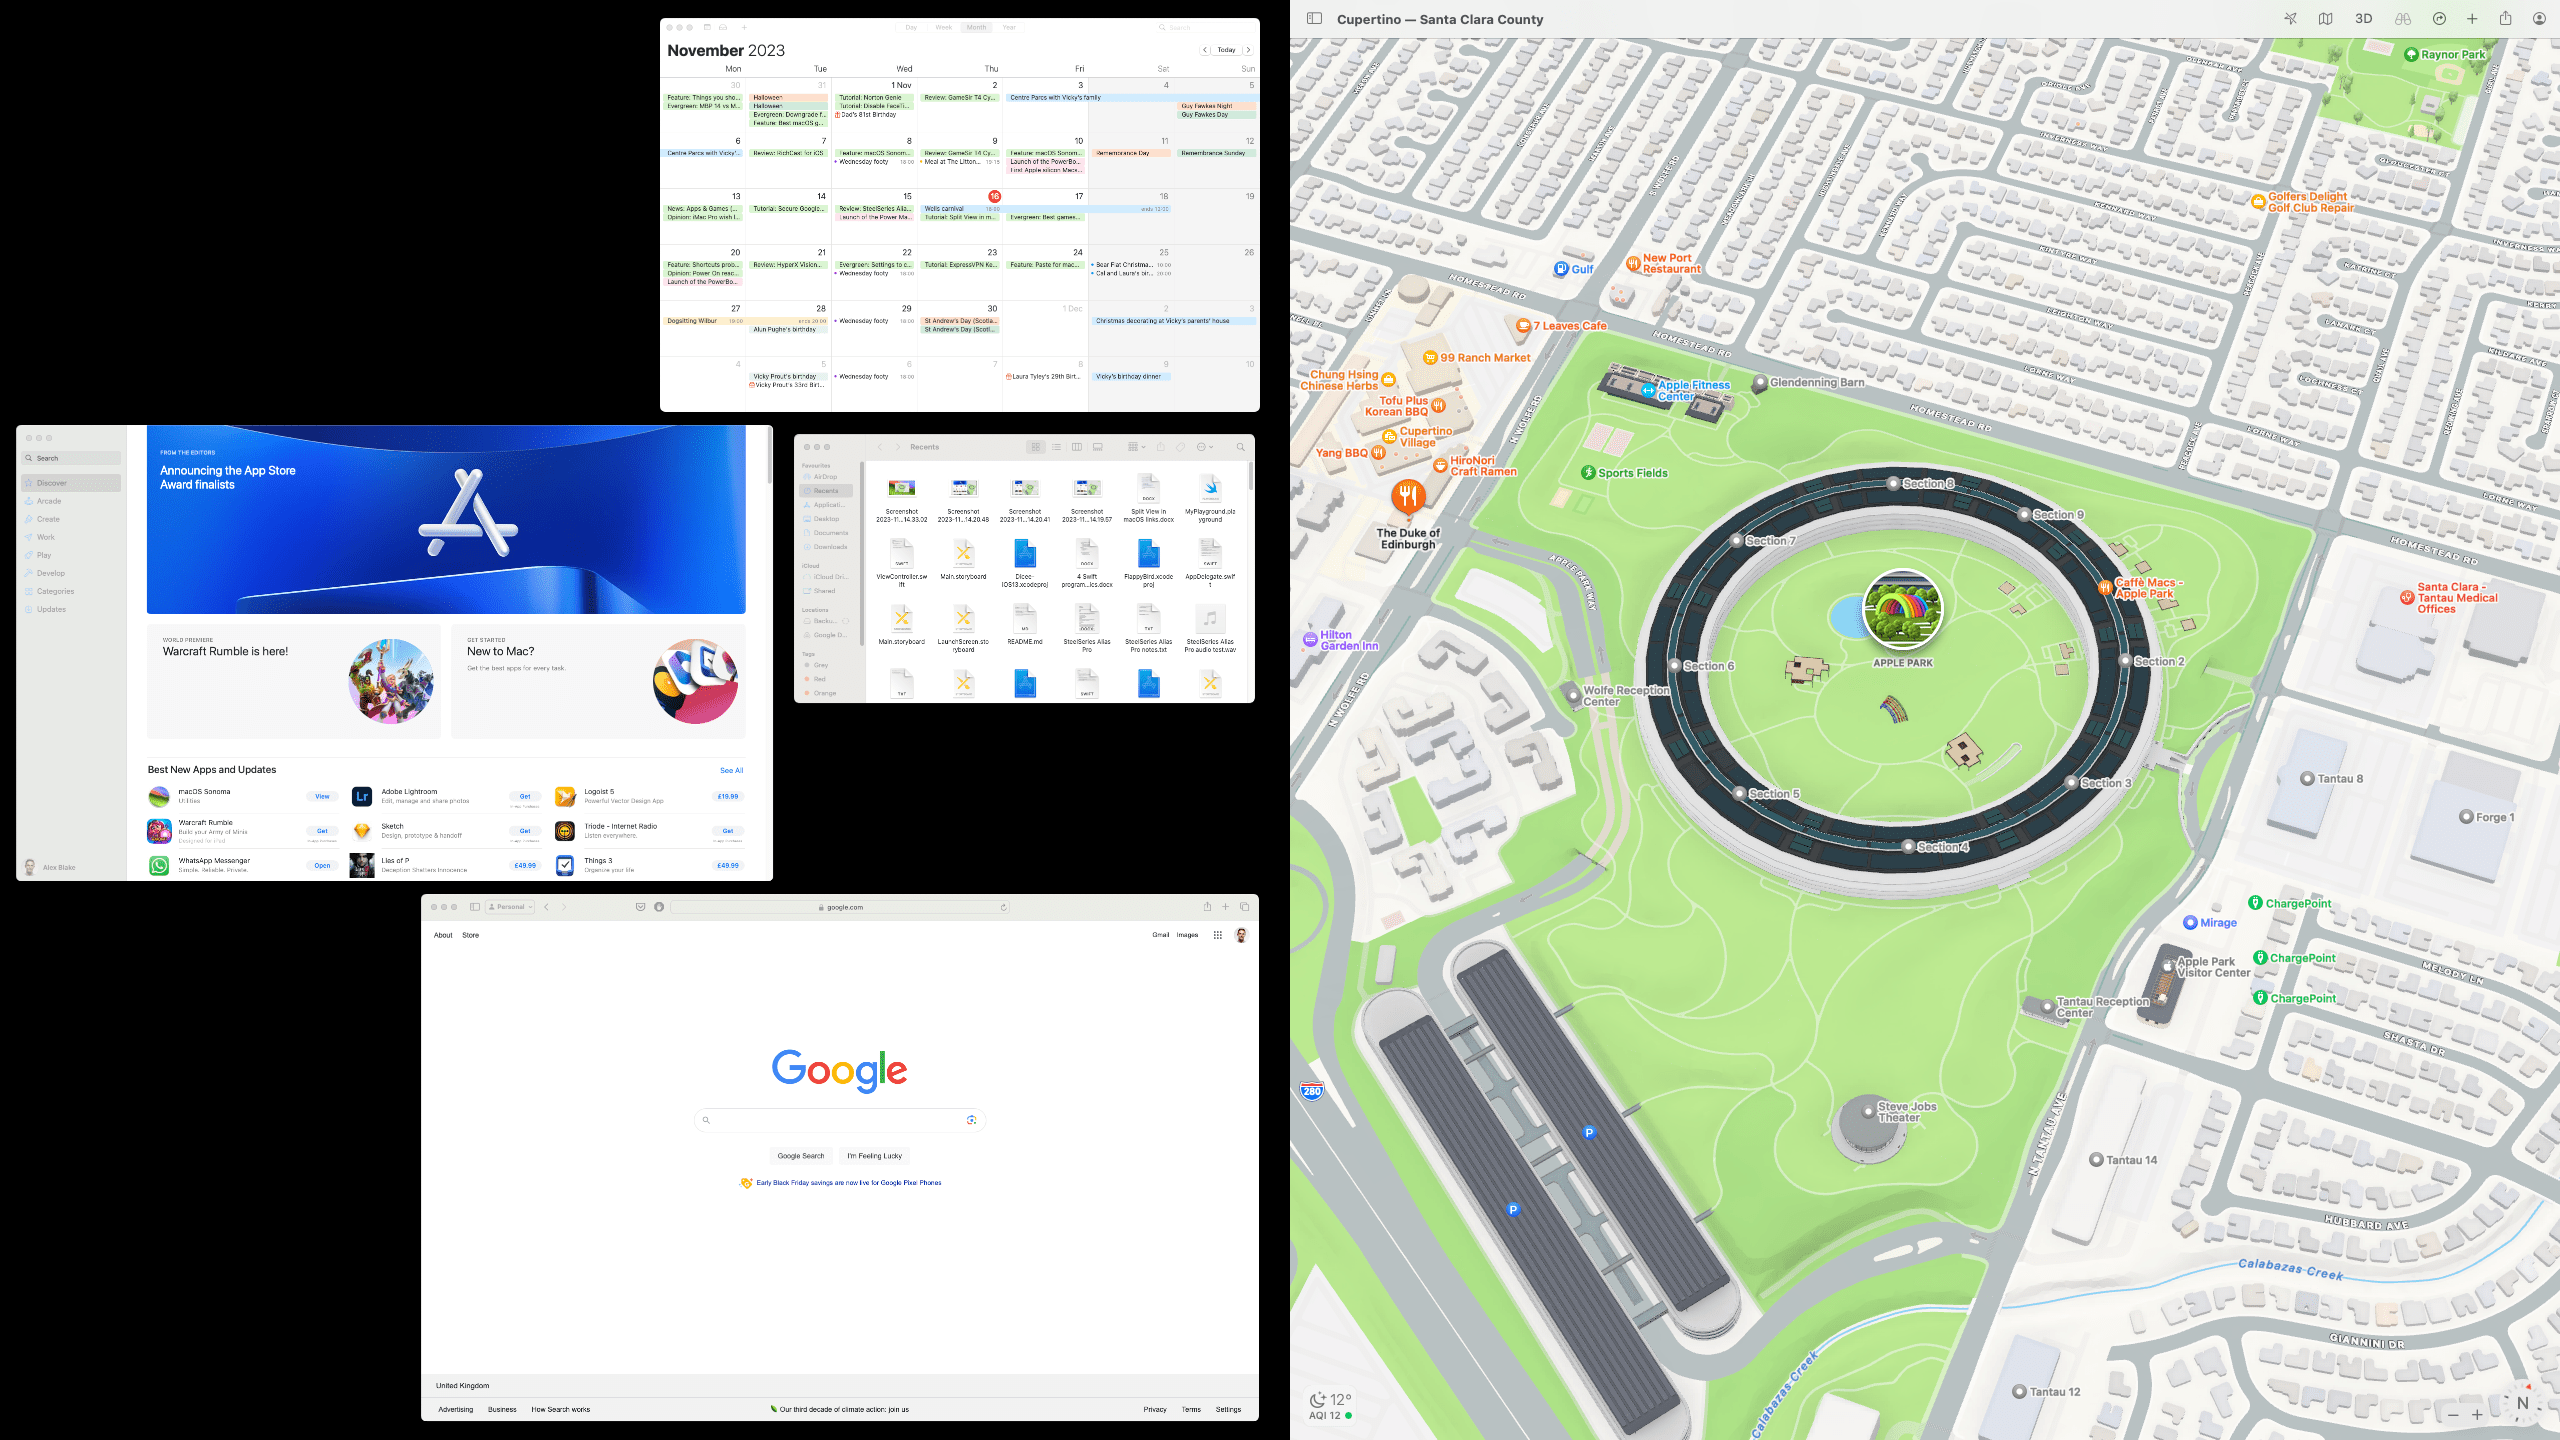
Just select the other app you want and it will join Split View on the other side of your screen.
If you have an app in full-screen mode, you can still make it enter Split View. Press Ctrl+Up to show Mission Control, then drag an app window onto the full-screen app shown at the top of the display. You’ll see whether it will be loaded onto the left or right side of Split View thanks to the small preview window.
2. Adjust Split View windows
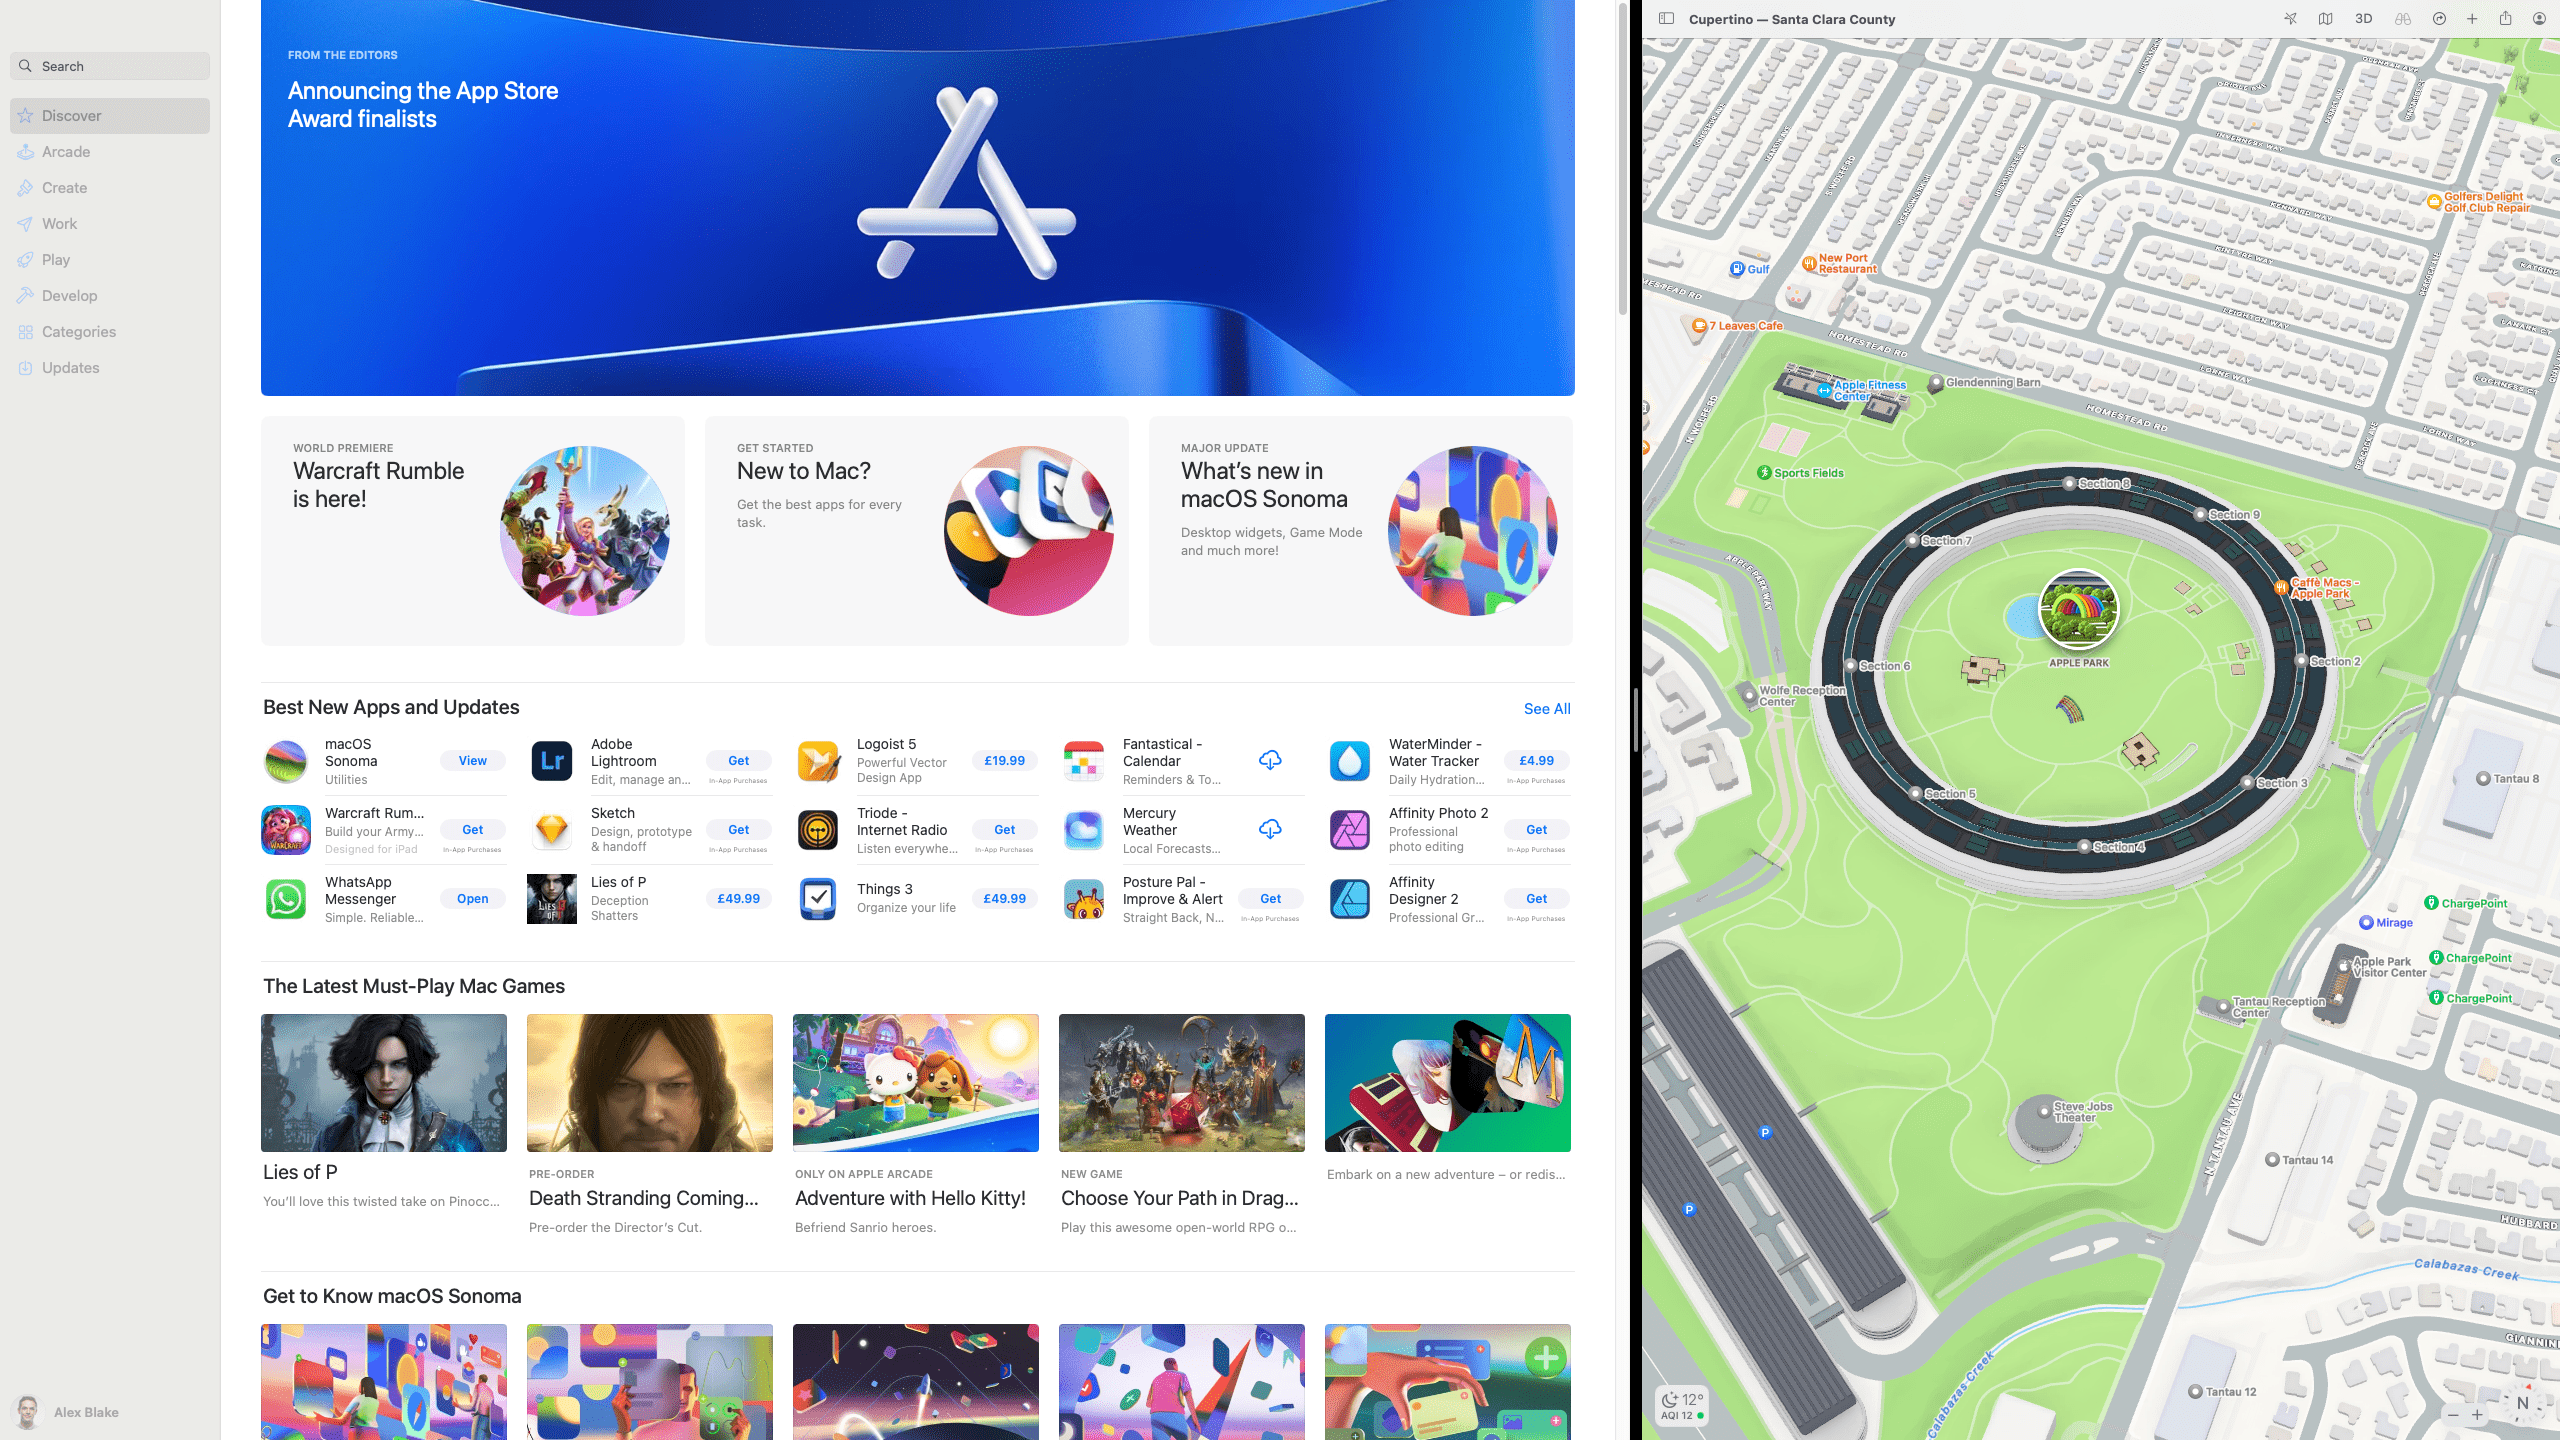
You don’t have to settle for Apple’s window arrangement – you can adjust things in numerous different ways.
You’ll notice that there is a black vertical line between the two apps you’re using in Split View. Click and drag this to change the size of each Split View app and how much of the screen they take up. You can double click the line to return your apps to their original sizes.
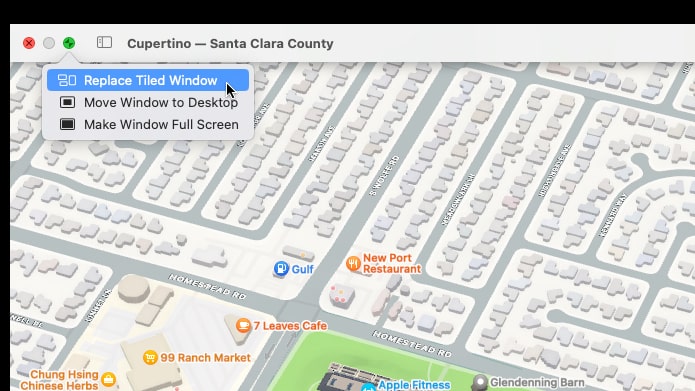
If you want to replace one of the apps in Split View, doing so is easy. Click the app window, then move your pointer to the top of the app so that the traffic light buttons appear. Now hover your pointer over the green button in the app you want to swap out and select Replace Tiled Window. Choose an app to replace it with and you’ll have your new Split View arrangement.
Sign up for breaking news, reviews, opinion, top tech deals, and more.
To move an app to the other side of your screen, simply click and drag its title bar and move the app across.
3. Exit Split View
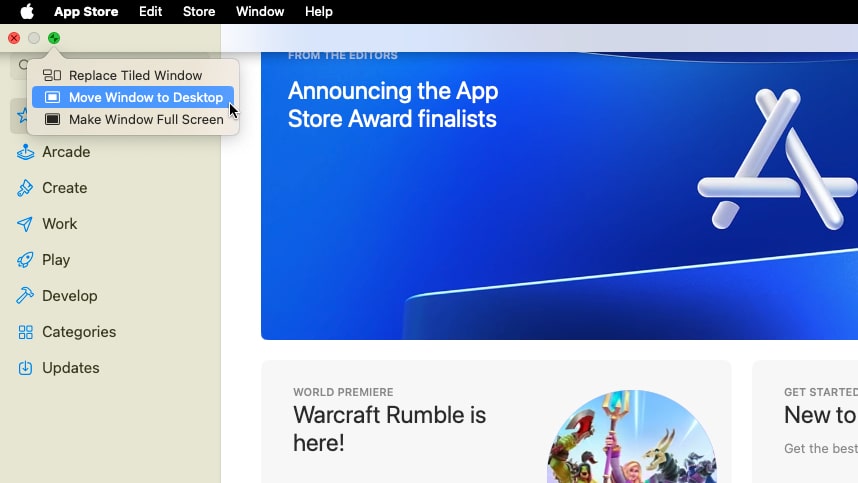
Exiting Split View is a little more clunky than entering it, but it’s still easy enough to understand.
Click an app in Split View, then hover your pointer over its green maximize button. Now, select Move Window to Desktop. This will restore it to its previous size before it entered Split View.
The other app that was in Split View might seem to have disappeared, but it’s still available – it’s just in full-screen mode on another desktop space.
You can get it back either by pressing Cmd+Tab to find it, or by entering Mission Control (Ctrl+Up) and picking it from the desktop spaces at the top of your screen. Alternatively, use a three- or four-finger swipe on a trackpad to move through desktop spaces, then minimize it out of full-screen mode.
4. Share content between windows

You can move content between some apps that are in Split View mode.
Doing this is as simple as dragging and dropping content from one app to the other. For instance, you can drag and drop an image from a web browser into a Notes document. Or you can move text from a word processing file to a Keynote presentation.
This is a helpful way to share content across files you are working on without having to switch between apps or copy and paste anything.
Final thoughts
There’s a lot to Split View in macOS, and it can be a helpful way to work between multiple documents.
It’s flexible too, as you can resize windows, replace them and rearrange them. Most ways of working with Split View windows are intuitive and simple to pick up. Once you’ve mastered it, it could become an integral part of your working day.

Alex Blake has been fooling around with computers since the early 1990s, and since that time he's learned a thing or two about tech. No more than two things, though. That's all his brain can hold. As well as TechRadar, Alex writes for iMore, Digital Trends and Creative Bloq, among others. He was previously commissioning editor at MacFormat magazine. That means he mostly covers the world of Apple and its latest products, but also Windows, computer peripherals, mobile apps, and much more beyond. When not writing, you can find him hiking the English countryside and gaming on his PC.