When it comes to exposure, most photos will benefit from a few slider tweaks in the popular image editing software Lightroom's Develop module to reveal more tonal detail.
The Basic panel's Exposure slider makes global adjustments that evenly lighten or darken tones across the whole photo. This works well if the entire image is under- or over-exposed, but if you use the Exposure slider to lighten under-exposed shadows in a high-contrast image, you may clip (blow out) correctly exposed highlights. Similarly, if you try to claw back highlight detail with the Exposure slider, you may plunge the shadows into darkness.

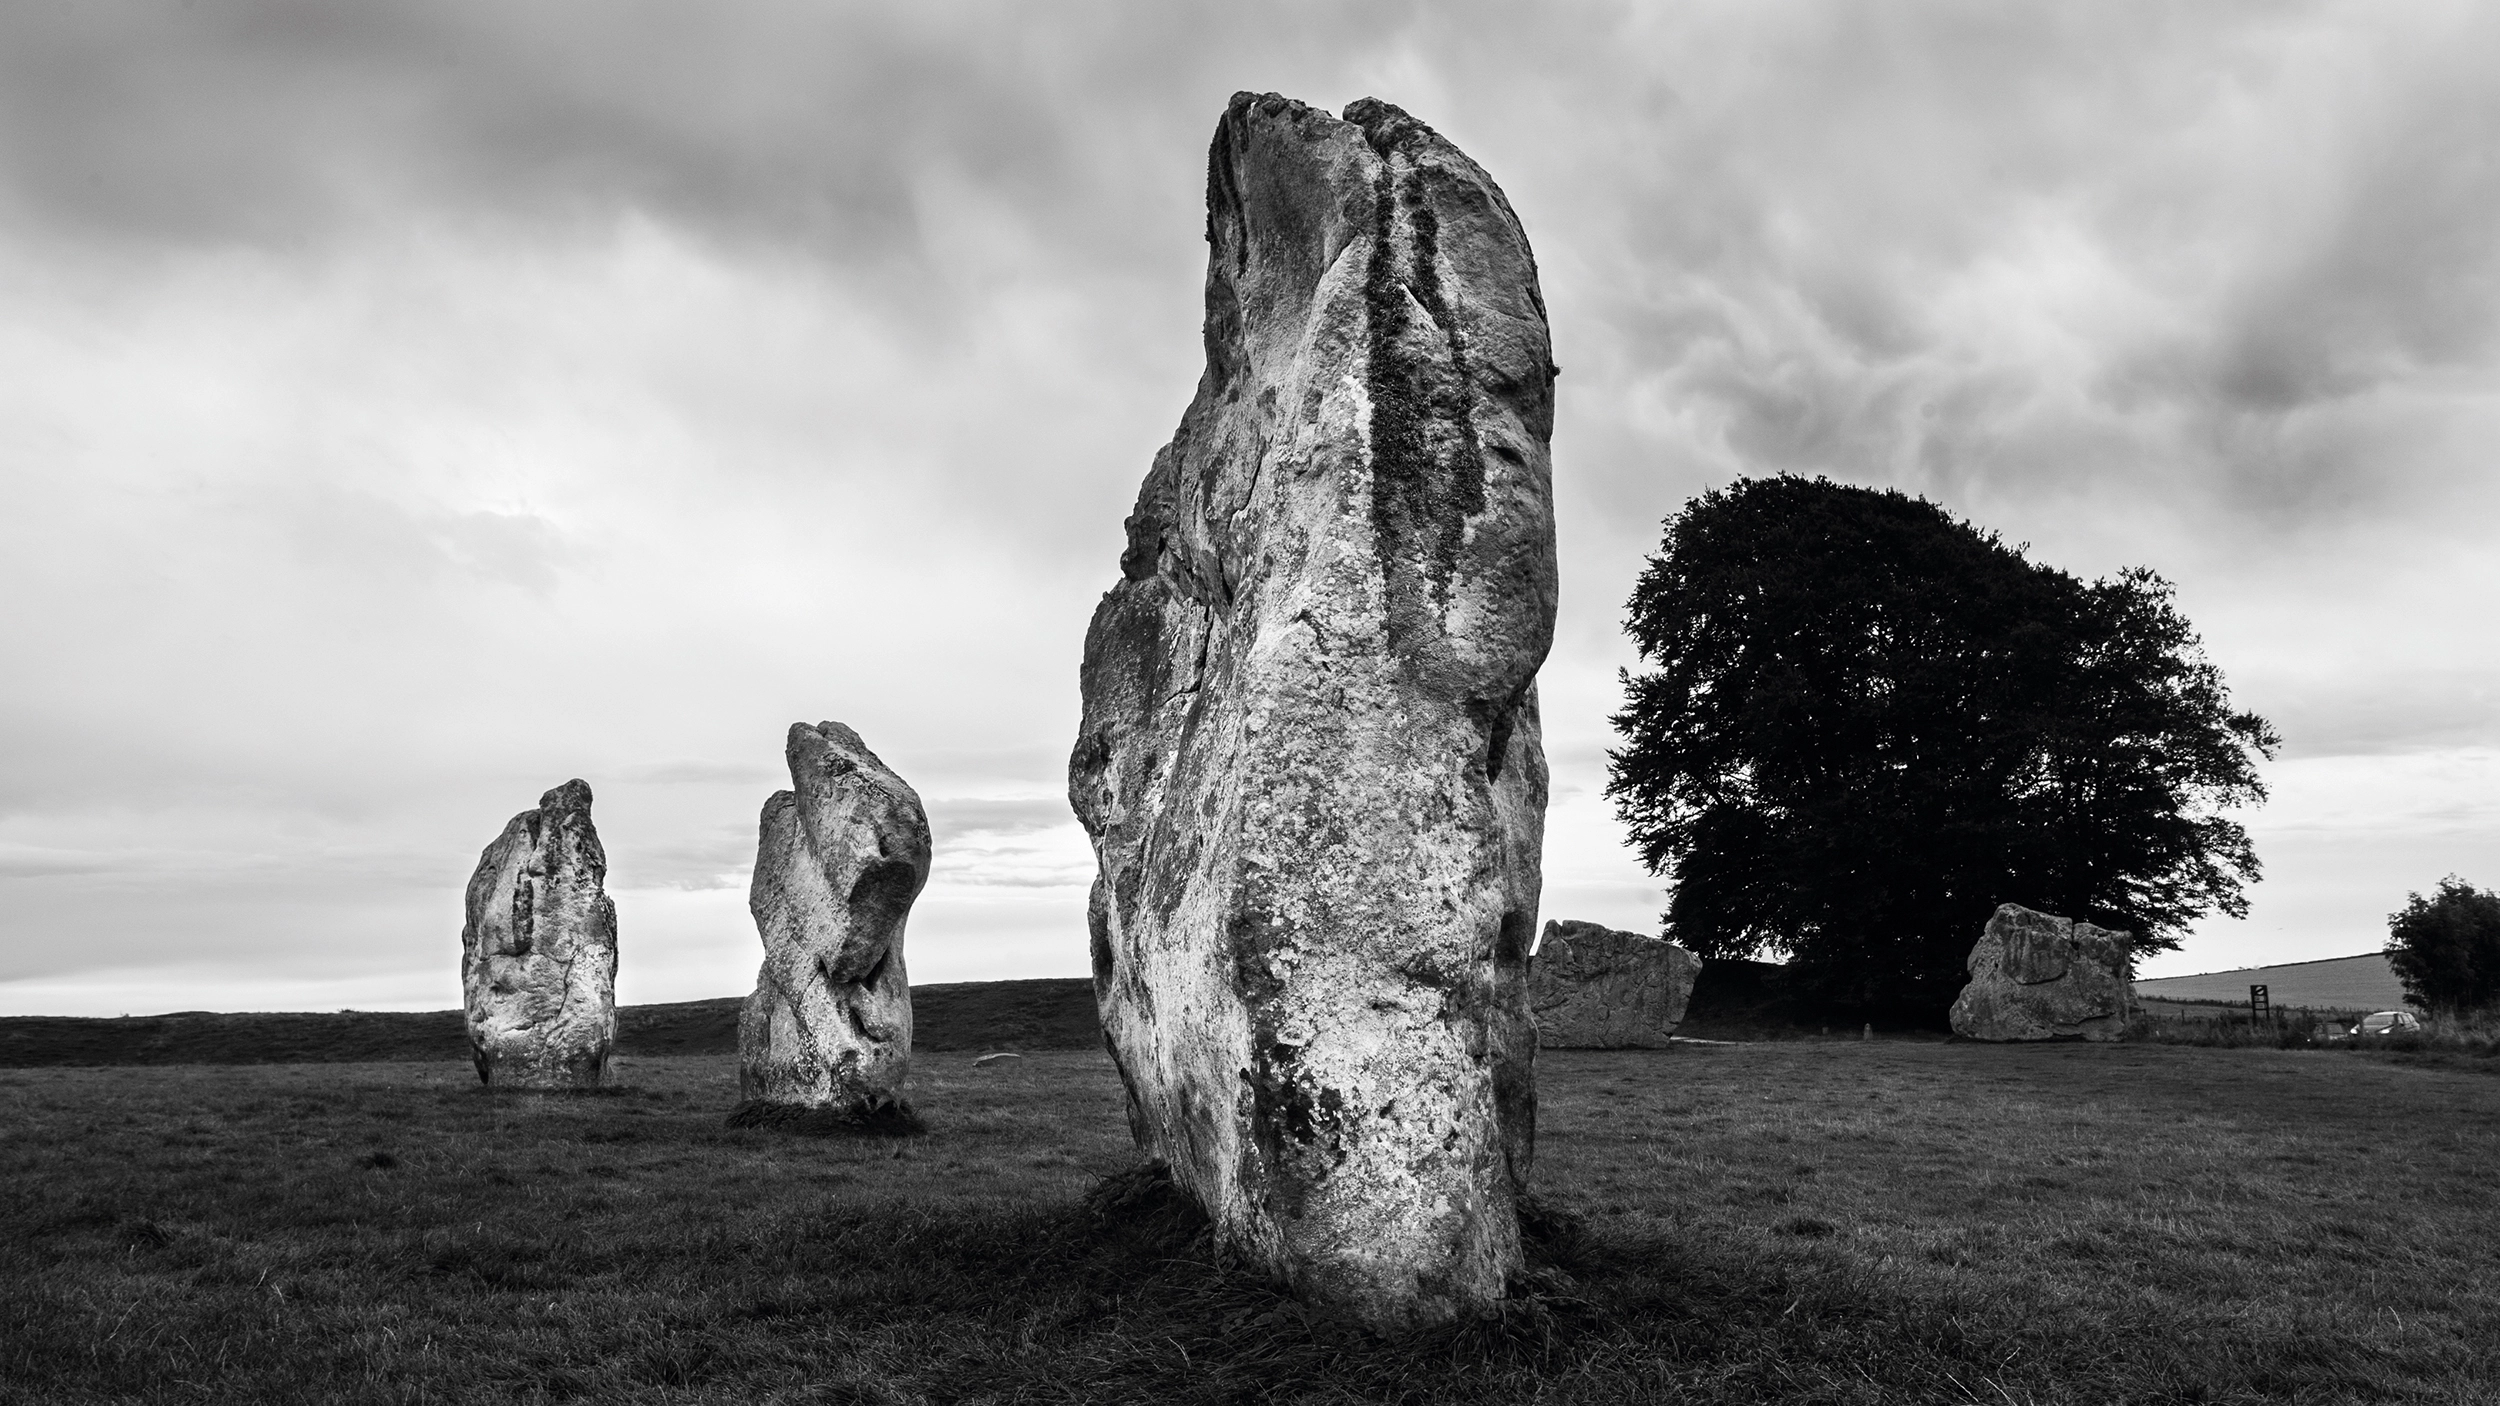
In our first image the camera has metered for the brighter sky, so we're losing detail in the stones. We'll demonstrate how to use the Adjustment brush to make precise tonal adjustments to irregular shapes, so that you can achieve a more balanced exposure in a high-contrast scene. With the Adjustment brush you can dodge (lighten) or burn (darken) any area. Here's how...
Step-by-step: Dodge and burn
1. Brighten the image

Once the image is in Lightroom's Develop module, we can make some general adjustments in the Basic panel. Clicking on the Black & White tab to convert to mono, we can see the shadows lack contrast and detail. This can be corrected by dragging Exposure up to +1.25, and the Contrast slider to +62. To restore detail in the highlights, Highlights need to be reduced to -91. Pushing Whites to +26 provides a wider range of tones.
2. Boost the contrast

The big gap in the middle of the histogram indicates a lack of midtone detail, so we'll drag the Clarity slider right to a value of +34. This increases midtone contrast and begins to reveal the texture in the stones. After using the sliders to improve the contrast and reveal detail, we can make more targeted tonal adjustments with the Adjustment brush.
3. Dodge the stones

Clicking on the Adjustment brush icon, or pressing K on the keyboard, a new panel of sliders will appear. From the Effect menu, we'll choose Dodge (Lighten). Increasing Exposure to 0.72 and setting the brush Size to 15 and Feather to 50, we can then click to place an Edit pin on the largest stone. We can then paint over the stone to lighten it, before setting Contrast to 46, Shadows to 59 and Clarity to 39.
4. Create a mask

Tapping the left square bracket key a few times to reduce the brush size to 9 (or drag the Size slider left), we can then paint with the Adjustment brush over the background stones using the same settings to lighten them. To see which areas a particular Edit Pin is controlling, move the mouse over the pin. A red mask will appear over the edited areas.
5. Target the clouds

To restore cloud detail, we now need to make a separate adjustment. In the mask section, we'll click on New. In the Effect section, we'll click on the drop-down menu and choose Burn (Darken). Dragging the Exposure slider left to -0.74, we can start to build up the adjustment in incremental strokes. We'll click to place a pin on the sky.
6. Burn the clouds

Tapping the right square bracket key a few times increases the brush size to 15, so we can then paint over the clouds to darken their midtones, avoiding the the stones. To give the clouds even more impact, we'll push Contrast to 45, Shadows to -78 and Clarity to 58. This teases out even more texture and detail, dragging Exposure to -0.89 for more impact.
This feature was originally published in N-Photo Magazine, to subscribe, click here