40 iLife tips and tricks you may not be aware of
Cool iLife features you probably don't use
Make your website look better than ever with iWeb
31. Copying logos
Adding a logo to your pages is a great way to perpetuate your branding across your site, but have you noticed that many websites use their logo to link back to their home page? You can do this yourself very easily.
Click on your logo to select it then go to the Inspector's Link tab (second from the right), tick the Enable as Hyperlink box, choose One of My Pages from the Link To menu and select First from the Page menu.
If you did this for the first page, you can then copy and paste your logo onto every other page and its position and the link will be preserved.
32. Adding to the footer
By default, every web page you create with iWeb has a footer – a place at the bottom of your page that contains any information you'd like. No matter how much data you add in the main body, the footer will always remain at the foot of the page.
Sign up for breaking news, reviews, opinion, top tech deals, and more.
But moving an existing text box, photo or other object from the main body to the footer appears to be impossible. No matter how much you drag, this action merely extends the main body's size rather than adding it to the footer.
To move your selection into the footer area, you have to Command-drag rather than simply drag.
33. Removing the footer
But you may have no need for the footer at all and would quite possibly like to remove the Made on a Mac logo as well.
You can select it and delete it manually, or go to Insert > Button > Made on a Mac instead, but this still leaves you with an empty footer that you could do without. To remove this section from your page, go to the Inspector and select its Page tab (first on the left).
Select the Layout section and type 0 in the Footer Height field.
34. Resizing your page
You can use the Inspector tab to alter the dimensions of your page, especially its width, since most modern computers can cope with a width much greater than 700 pixels. You could also resize it to make your site more compatible with the iPhone if you so wished.
There's one problem with all this though – it only affects the page that you're currently working on. If you want to change the dimensions for your whole site, it's best to do this at the very start and duplicate the existing setting by Ctrl-clicking on it and choosing Duplicate, rather than creating a whole new page every time. This way you don't have to type in all your custom dimensions again.
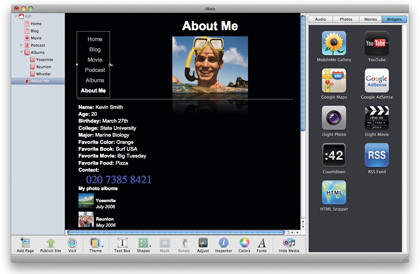
35. Vertical navigation
If you're going to customise your page, why not change the most obvious part: the navigation menu?

If you click on it to select it, you'll find two resize handles – one to the left, the other on the right. Drag either towards the other to alter its dimension. As you do, the menus will start to appear one below the other. You can then move the whole thing to the left or right of your page.
As the navigation menu resides in the header section of your page, making it vertical will result in a much bigger header. You can drag items to it from the main body to fill it up using the same method described for the footer section.
36. Clickable numbers
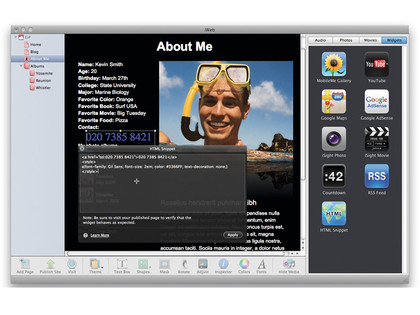
Speaking of iPhones, wouldn't it be great if you could tap on your phone number when viewing your page on your mobile device so you could quickly dial it? This involves the use of an HTML Snippet (found in the Widget section of iWeb).

To drag one to your page, access the Snippet window, and then type in the line of code:
Once you've entered that, click Apply, and your number will be instantly tappable.
37. Customise snippets
When adding text to a Snippet, the style never seems to match the rest of the site. But have no fear, you can change it by adding the following code to it:
a{font-family: Gil Sans; font-size: 1em; color: #3366FF; textdecoration: none;}
You can of course change the font name, size and colour to any style or colour that you want to match your own preferred style.
The colour codes can be found in OS X's Colour Palette window in the Web Safe Colours section.
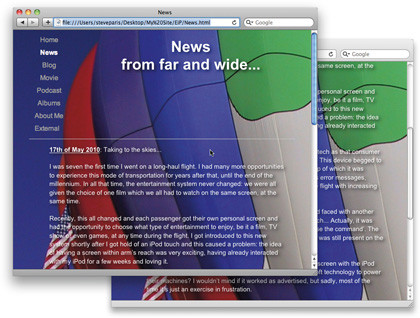
38. Static backgrounds
By default, if you add a background image to your site, it'll scroll down as you scroll down the text.

To keep the image static, do the following: go to the Page Inspector and add your image to the Browser Background section.
Next, save your site to a folder on your Mac. Open up the file using TextEdit as described in Step 40. Use the Find command to locate 'repeat scroll'. Change it to 'repeat fixed' and save the file. Your background will now remain static.
39. External navigation links
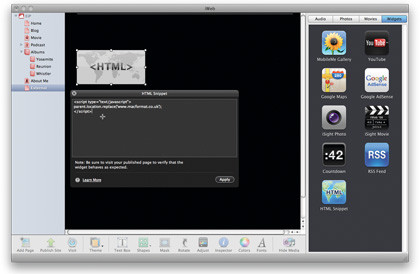
The navigation menu only links to pages within your own site. There's no obvious way to link to an external page – but you can manufacture one.

Create a new blank page and give it a relevant name. Next, remove all content from it and drag an HTML Snippet onto it and type in this code:
parent.location.replace('[The External Webpage URL]');
The page will appear in your navigation menu since it exists in your site, but as soon as you click on it, that code will handily reroute your command to the external web page URL you typed in.
40. Working on the code
If you've got any coding experience, you may wish to get your hands on the HTML code to tweak a few things here and there. You actually don't need a fancy program to do this, as TextEdit will do fine. But if you use it to open an HTML page, TextEdit will translate and display the content as if it were a web browser, which is not what you want.
Instead, open TextEdit and go to File > Open. Select a file you wish to view from there, but before you do anything else, make sure the Ignore Rich Text Commands box is ticked. Now open it and you'll see the proper code.
-------------------------------------------------------------------------------------------------------
First published in MacFormat Issue 223
Liked this? Then check out 40 cool OS X tips to save you time and effort
Sign up for TechRadar's free Weird Week in Tech newsletter
Get the oddest tech stories of the week, plus the most popular news and reviews delivered straight to your inbox. Sign up at http://www.techradar.com/register
Steve has been writing about technology since 2003. Starting with Digital Creative Arts, he's since added his tech expertise at titles such as iCreate, MacFormat, MacWorld, MacLife, and TechRadar. His focus is on the creative arts, like website builders, image manipulation, and filmmaking software, but he hasn’t shied away from more business-oriented software either. He uses many of the apps he writes about in his personal and professional life. Steve loves how computers have enabled everyone to delve into creative possibilities, and is always delighted to share his knowledge, expertise, and experience with readers.
