Turn your PC into a retro gaming console
Do you long for the glory days of the Amiga? Fancy playing those old SNES games again?
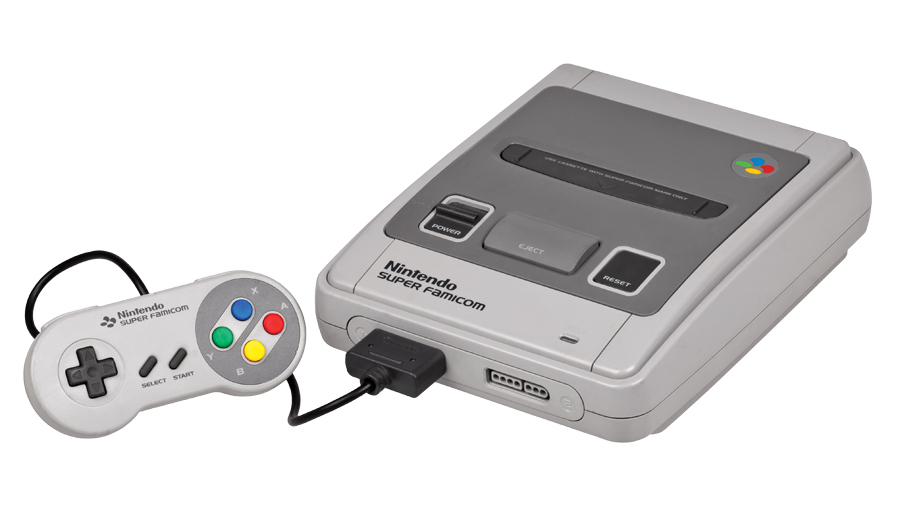
Computers are brilliant at pretending to be other computers. Providing your CPU has enough oomph, and your RAM banks have enough space, you can turn your PC into almost any other computer or video game console released over the last few decades.
Of course, it's not exactly the same - you'll have to be creative if you want to recreate the look, feel and smell of the original machine. But a decent PC can run programs written for a vast range of platforms, all thanks to the abundance of open source emulators on offer.
Essentially, an emulator is a program which creates virtual hardware, into which you can load the original software. If you think of the Amiga, for instance, in its real form it's a Motorola 68000 CPU and a bunch of supporting chips. An emulator provides virtual versions of these chips, enabling you to load the original operating system and programs into it, and as far as the programs are aware, they're running on an original machine.
Writing emulators is tough work, as most classic hardware has undocumented peculiarities, but thanks to the industrious efforts of some hacking teams, we have plenty to play with.
And there are good reasons for emulating: You can run older programs of which there's no Linux version. You can use your old software if the original machine has given up the ghost. You can play classic games (with arguably more depth than today's bland FPSs). You can try classic computers without having to buy them. You can see how things used to be in the olden days, when Effy was still young.
In this feature, we're going to look at some of the most popular classic computers and consoles, and show you how to get them working in emulated form. We'll be using Ubuntu here, but all of the emulators are open source and may be available in your distro's package repositories.
Note, however, that to get many of these emulators working, you'll need original ROM images for the software built into the machines (eg the Amiga's operating system).
Sign up for breaking news, reviews, opinion, top tech deals, and more.
This is something of a legal grey area; many would argue that if you own the original machine, you shouldn't be stopped from making a file copy of the ROM data (or searching for it on the internet).
But while ROM images abound on the internet, they usually contain copyrighted code, so we're not going to tell you how to get them. We hope you'll understand!
Commodore Amiga
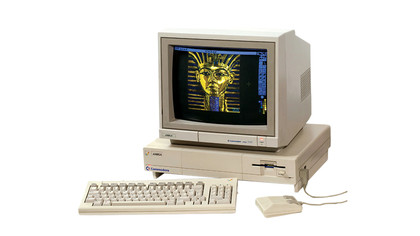
Hugely popular in the late eighties and early nineties, the Amiga was a remarkable machine for its time, offering graphics and sound capabilities way beyond the PC. Its GUI operating system provided pre-emptive multitasking while most PC users were fiddling with the DOS prompt, and it was a great machine for gamers.
Unfortunately, Commodore was completely feckless when it came to marketing and strategy, and by the late nineties the Amiga line was effectively dead. Still, most LXF writers have fond memories of the machine, and in many ways this magazine is the spiritual successor to Amiga Format.
Due to the Amiga's extensive use of custom chips, writing an accurate emulator is a difficult job. The best-known is UAE, which began life as the 'Unusable Amiga Emulator' because it couldn't even boot. Today, the U stands for Unix, but UAE runs on a range of other platforms.
There are loads of forks doing the rounds on the internet, the most popular of which are E-UAE and PUAE. You can get the former from the Ubuntu (or Debian) package repos with:
sudo apt-get install e-uae
Once it's installed, run e-uae to pop up the interface. Most emulators make you fiddle around with command-line switches, so we're glad that E-UAE provides a nice pointy-clicky GTK alternative.
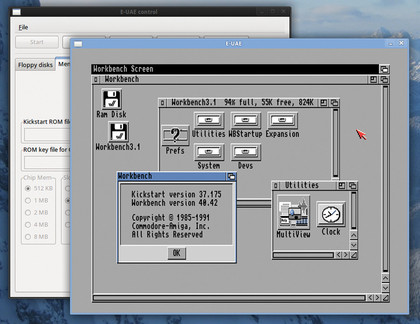
The first thing you'll need to do is find a ROM image for Kickstart, the firmware in the Amiga that's responsible for the bootloader and key OS functions. Under the Memory tab in the E-UAE GUI, select its location on your system; then get hold of a Workbench floppy disk image in ADF format, and select it under the Floppy Disks tab.
Once you're done, hit Start. After a few moments, the Workbench desktop will appear. Welcome back to the glory days! You can now return to the E-UAE interface and insert more floppy disk images.
If you power off the machine, you can change various hardware settings, such as the amount of memory and the type of CPU that the virtual Amiga has.
In use, you might find that the mouse behaves strangely - to fix that, switch to full-screen mode with F12+S (and press again to switch out).
E-UAE performs well with games, as well as 'serious' software, and by default you can use the numeric pad as a virtual joystick. Use 8 and 2 for up and down, 4 and 6 for left and right, and 5 to fire. To boot a game, select its ADF image file as the first drive and restart the virtual Amiga.
Atari ST
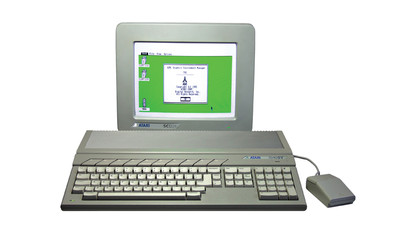
While not as powerful as the Amiga, Atari's effort was a popular alternative, and won fans in the music industry thanks to its inclusion of MIDI ports. It was based on the same CPU as the Amiga line (the Motorola 68K), so many games were ported between the two platforms, with the Amiga version usually having better graphics.
Unfortunately, Atari couldn't market its way out of a paper bag, and spent all its resources working on the ill-fated Jaguar console, so the ST line died off in the mid nineties. A few crazy German fans made some clones, but today the remaining ST scene is focused on emulation.
Hatari is an excellent ST emulator available in the Ubuntu package repositories. When you first run it, you'll see an error message that /usr/share/hatari/tos.img can't be found. TOS is the operating system built into the ST, so get a file version of it and copy it into that location (you'll need to be root for write access to the directory).
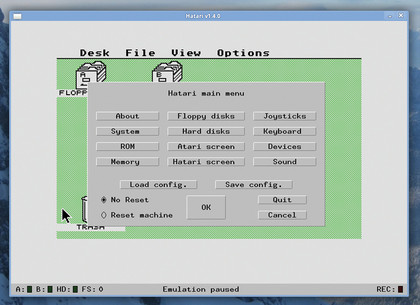
Run Hatari again and you'll see the classic green GEM desktop. Press F11 to switch between normal and full-screen modes, and F12 to bring up the graphical configuration panel. You can insert floppy disk images, change the type of ST being emulated and set up a virtual joystick.
One awesome feature of Hatari is the ability to record AVI videos from the action on the screen. Go to the Hatari Screen options in the settings, and click Record AVI. This will slow down the emulator considerably, but when you're done, click on Stop Record and you'll find hatari.avi in your home directory.
Another option is Aranym (http://aranym.sf.net). Instead of being a clone of an ST, this provides ST-like emulated hardware with a mixture of replacement TOS and GEM components on top. It's useful for running some later, more demanding ST and Falcon programs.
Sinclair ZX Spectrum
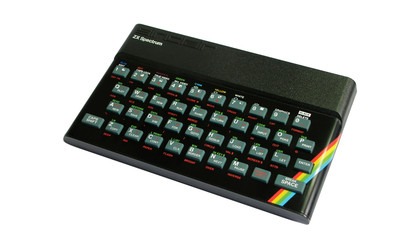
Booooo-bip, booooo-bidibipibibippy… everyone who was anyone in the 1980s remembers the Speccy tape loading sound. And the colour clash, the gritty, buzzy sound effects, and rubber keys on the 48k model. The Spectrum was hugely popular in the UK, but was somewhat trumped by the Commodore 64 in the rest of the world.
Never mind, though - we still got to play such classics as Elite, Manic Miner and Mercenary with the machine's limited horsepower. You can still pick up old Speccys on eBay and similar sites for a reasonable price, but the old machines are starting to break down.
Fortunately, there are plenty of emulators that do an accurate job. One such is Spectemu, which emulates the 48k model. Ubuntu and Debian users can install it via the package spectemu-x11. This pulls in the package spectrum-roms, which contains the mini operating system built into the 8-bit machine. This code is still under copyright from Amstrad, but as a nice gesture the company has given emulator developers permission to ship ROMs. So no hunting on the net is necessary - hurrah!
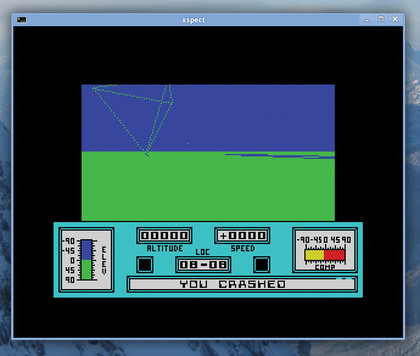
Run the emulator from a command prompt with xspect, and keep an eye on the terminal window, as this provides lots of output and help. Inside the emulator, for instance, press Ctrl+H and you'll see a list of key commands. To load programs, you hit the F3 or F4 keys in the emulator window, then switch focus to the terminal window and enter the filename.
But why two different commands? Well, Speccy programs are normally distributed in two different formats: memory snapshots and tape images. The first is just a chunk of data to fill the machine's RAM banks, and has the extension Z80 or SNA. To load these, use F3.
For tape images, which represent the original audio cassettes, and typically have a .tap ending, first you need to enter LOAD "" in the Spectrum window (hit J, and then press Shift+P twice). Hit Enter to get the virtual Spectrum ready, then press F4 and enter the tape filename in the terminal window. A tip if you have no sound in the emulator: install alsa-oss and run aoss xspect.
If you want a more advanced emulator, especially for software that requires the later machines, try Fuse (http://fuse-emulator.sf.net). It even emulates Russian Spectrum clones.
- 1
- 2
Current page: Retro gaming: Commodore Amiga, Atari and Spectrum
Next Page Retro gaming: C64, Sega Mega Drive and SNES