I couldn’t buy a PS5 so I built my own console – and lost my mind in the process
Was it worth it?
Sign up for breaking news, reviews, opinion, top tech deals, and more.
You are now subscribed
Your newsletter sign-up was successful
Towards the end of 2020, when Sony’s PS5 launched and rapidly sold out, I had one of my all-too-rare Very Good Ideas – instead of buying a new console, I’d build one myself.
The logic was (kind of) pretty sound. For a start, getting hold of a PS5 was proving to be impossible – and many people are still having trouble getting hold of one.
I’d also recently upgraded the GPU in my main gaming PC to an Nvidia RTX 3090. This meant I had an RTX Titan, still a phenomenal graphics card, sitting in a drawer. Any PC I build with that is going to easily out perform the PS5 or Xbox Series X.
Finally, the backlog of PC games I have is huge. Why buy a PS5, then buy yet more games, when I had countless games sitting on my Steam, Epic Games Store and many other accounts? Also, let’s face it, neither the PS5 or the Xbox Series X’s launch lineups were mind blowing. There was nothing there I’d feel I’d be missing out with sticking with PC – literally in the case of the Xbox, as Microsoft is releasing all its games on PC as well.
Perhaps most importantly of all, building your own PC is fun. Sure, it’s also time consuming and frequently frustrating, but the level of satisfaction you get from picking the parts and putting together the perfect gaming PC for your needs just can’t be beaten in my opinion. I also liked the idea of challenging myself by trying to build a gaming PC that’s as compact as possible, while also being powerful enough to blow way the new consoles. I’ve built loads of PCs in my time, so the idea of mixing it up a bit was pretty exciting to me.
There were other things to consider as well – as a living room PC that will offer a console-like experience, I needed to make sure I had controllers and keyboards that I could comfortably use from the couch, get a dedicated user interface so I could launch games using just a controller, and hook it up to my surround sound system.
Along the way I had a lot of fun, while also facing stock shortages, BIOS issues and a million Blue Screens of Death. I almost lost my mind several times, but I’ve ended up with an amazing gaming PC that sits beneath my 4K TV, and allows me to play modern AAA games like Assassin’s Creed Valhalla and Cyberpunk 2077 better than any console will. It’s proof that PC is the best platform – as well as the most annoying – to game on. Here’s the whole sorry saga.
Sign up for breaking news, reviews, opinion, top tech deals, and more.

Planning is everything
This first step is easily the most important, and it can make or break your gaming PC build. The more planning you do in advance, the smoother the build should be... In theory, that is.
When it comes to building a compact gaming PC, that planning is even more important, as you’ll need to make sure that everything you decide to put in the PC isn’t just compatible, but also physically fits.
What this build also proved is that as well as planning in-depth before you start, you also need to be flexible. If something doesn’t work out, then you should be able to pivot to try something else, rather than giving up entirely. Also – keep your receipts. If you need to return something because it’s not right or doesn’t fit, you’ll need these.
Planning ahead also means making sure you have the right software to hand as well. Before I began, I made sure I had a bootable USB drive with Windows 10 on it, so I could install it on the new PC. Find out how to do this with our How to install Windows 10 via USB guide.
I also downloaded the latest BIOS release for the motherboard I settled on. This may seem like overkill, but there was a good reason for me doing so – and I am so glad I did. I’ll explain more in a bit.
Once I had in mind what I wanted from the PC – for it to be powerful yet compact enough to sit behind/under my TV – and had the software ready, I then used the hardware I already had to pick the rest of the components for the PC.

Picking the parts
Putting together any PC means making sure all the parts fit and work together. Because I wanted to use a GPU I already had – the RTX Titan – this then informed many of my decisions. For a start, it meant that I would need a gaming case that was compact, but could still fit in a full-size graphics card.
Because of that, I initially went with the Silverstone RVZ03-ARGB case. What I loved about it was how compact it was, while still supporting a full size GPU.
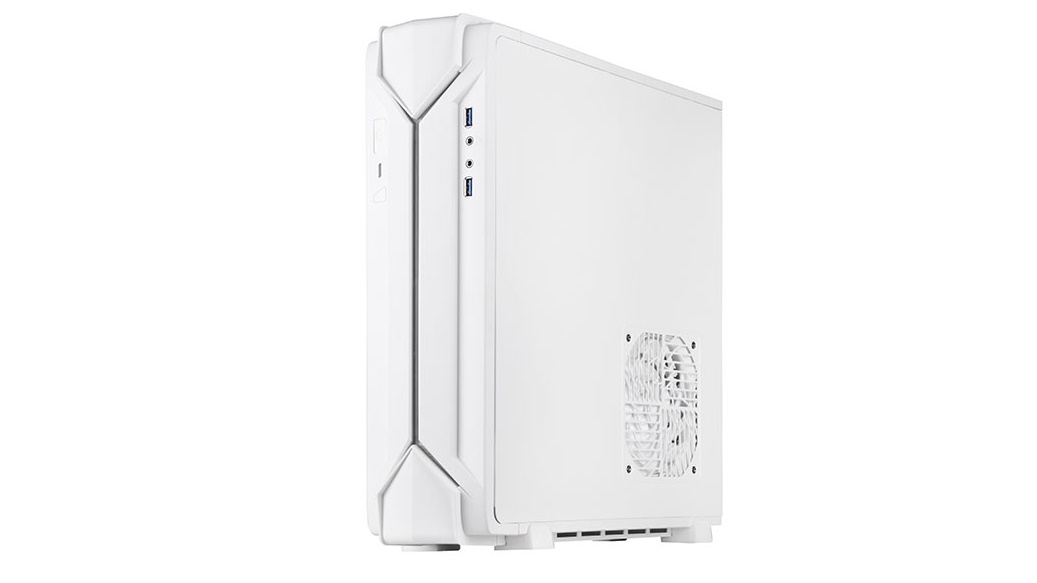
With the case settled on, it meant I had a better idea of what sort of hardware would fit inside it. As it supports a Mini-ITX motherboard, I knew what size I needed. I was also keen on using a new AMD Ryzen 5000 series processor (partly because the new consoles run on AMD hardware, and partly because I’d not done an AMD build for AGES) which further narrowed my choices.
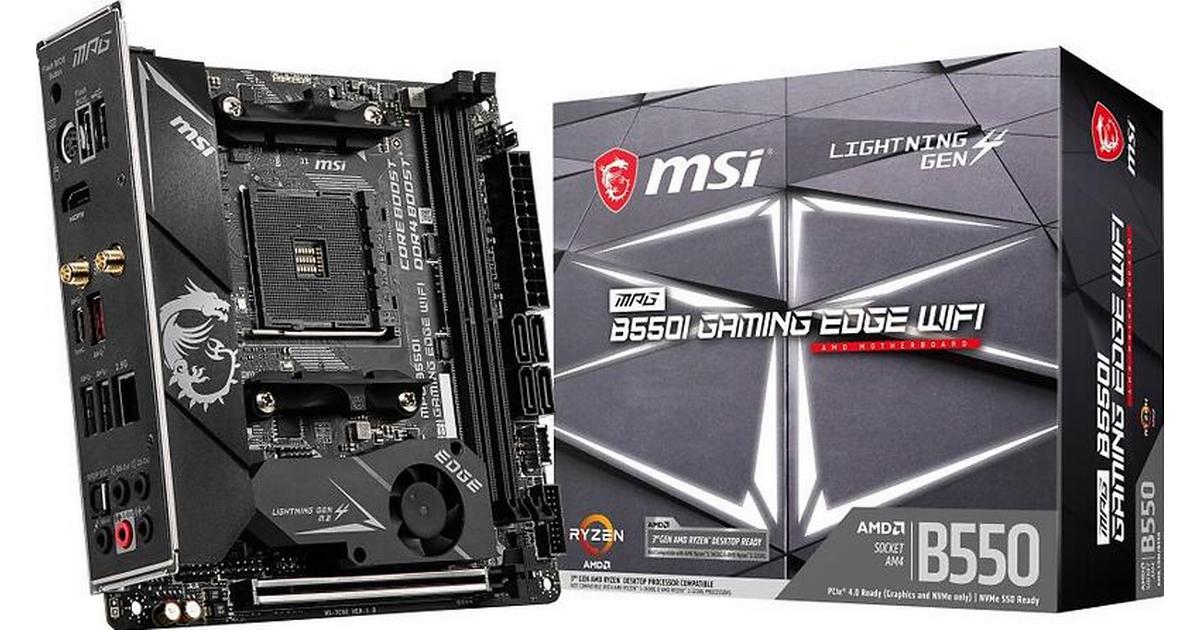
In the end, I went for the MSI MPG B55OI Gaming Edge WiFi motherboard, which had everything I needed in a size that would fit snugly in the chassis.
For the CPU, I then went with the AMD Ryzen 7 5800X, an excellent 8-core processor that we rated highly for its gaming prowess. While the AMD Ryzen 9 5900X is higher specced, I felt we didn’t need it for this PC, which would be purely for gaming. The 8-core design would mean it was closer to the PS5 and Xbox Series X processors, and it ran cooler than the more powerful 5900X. When it comes to compact PCs, keeping things cool is extremely important. As I was to discover later (spoiler alert).
Speaking of cooling, the CPU and chassis meant I had to find a cooler for the processor that was compact enough to fit inside the case, but powerful enough to keep the 5800X from overheating.
This proved to be quite tricky, as the Silverstone RVZ03-ARGB only supports coolers shorter than 83mm – and no water coolers. Finding a cooler that would fit was a bit difficult, but I finally went for the Noctua NH-L9a-AM4 chromax.black low profile CPU cooler.
The rest of the components also fell into place. For RAM I went with 16GB of HyperX FURY DDR4 RGB. Again, as the PC I was building was going to be a gaming PC only, so I felt 16GB was plenty.
I also had two NVMe SSDs, the Samsung 980 Pro 1TB PCIe 4.0 NVMe M.2 and Adata XPG Gammix S50 Lite 2TB PCIe 4.0. Both of these are PCIe 4.0, which the MSI MPG B55OI Gaming Edge WiFi supports, so I knew I’d be getting very fast boot and load times – something the PS5 boasts.
A nice thing about going with NVMe SSDs is that they connect directly into the motherboard (the MSI MPG B55OI has two of these ports). This means I didn’t have to install them into the chassis and trail cables to the motherboard and power supply like I would have had to with regular SATA SSDs. This would make installation easier, and fewer cables in the chassis would mean better airflow – essential for a compact PC.
Finally, I went with the Silverstone PP08 PSU, which would fit perfectly in the Silverstone RVZ03-ARGB case. This PSU was modular – which means you only plug in the cables that you need. This is particularly handy for compact builds where space and airflow is at a premium, as it means you can leave out unused cables.
With the specs settled on, I ordered the parts. The thing is, the PC I ended up with looked quite different to my initial plans…

The waiting game
For anyone who has built a new PC recently, you’ll have found that some components are pretty hard to get hold of. Luckily, I already had a GPU for the build – if I was trying to get hold of a new RTX 3080, for example, I’d probably still be waiting to get one. Not much use if you’re building a PC because you can’t get a PS5.
While plenty of the components came quickly, I did have to wait for the AMD Ryzen 7 5800X. Despite ordering it as soon as it went on sale, it took around a month and a half to come. While I waited, I built as much of the PC as possible, but with the CPU being such a central component, there was only so much I could do before it arrived.
Pro tip: build as much as you can outside the case
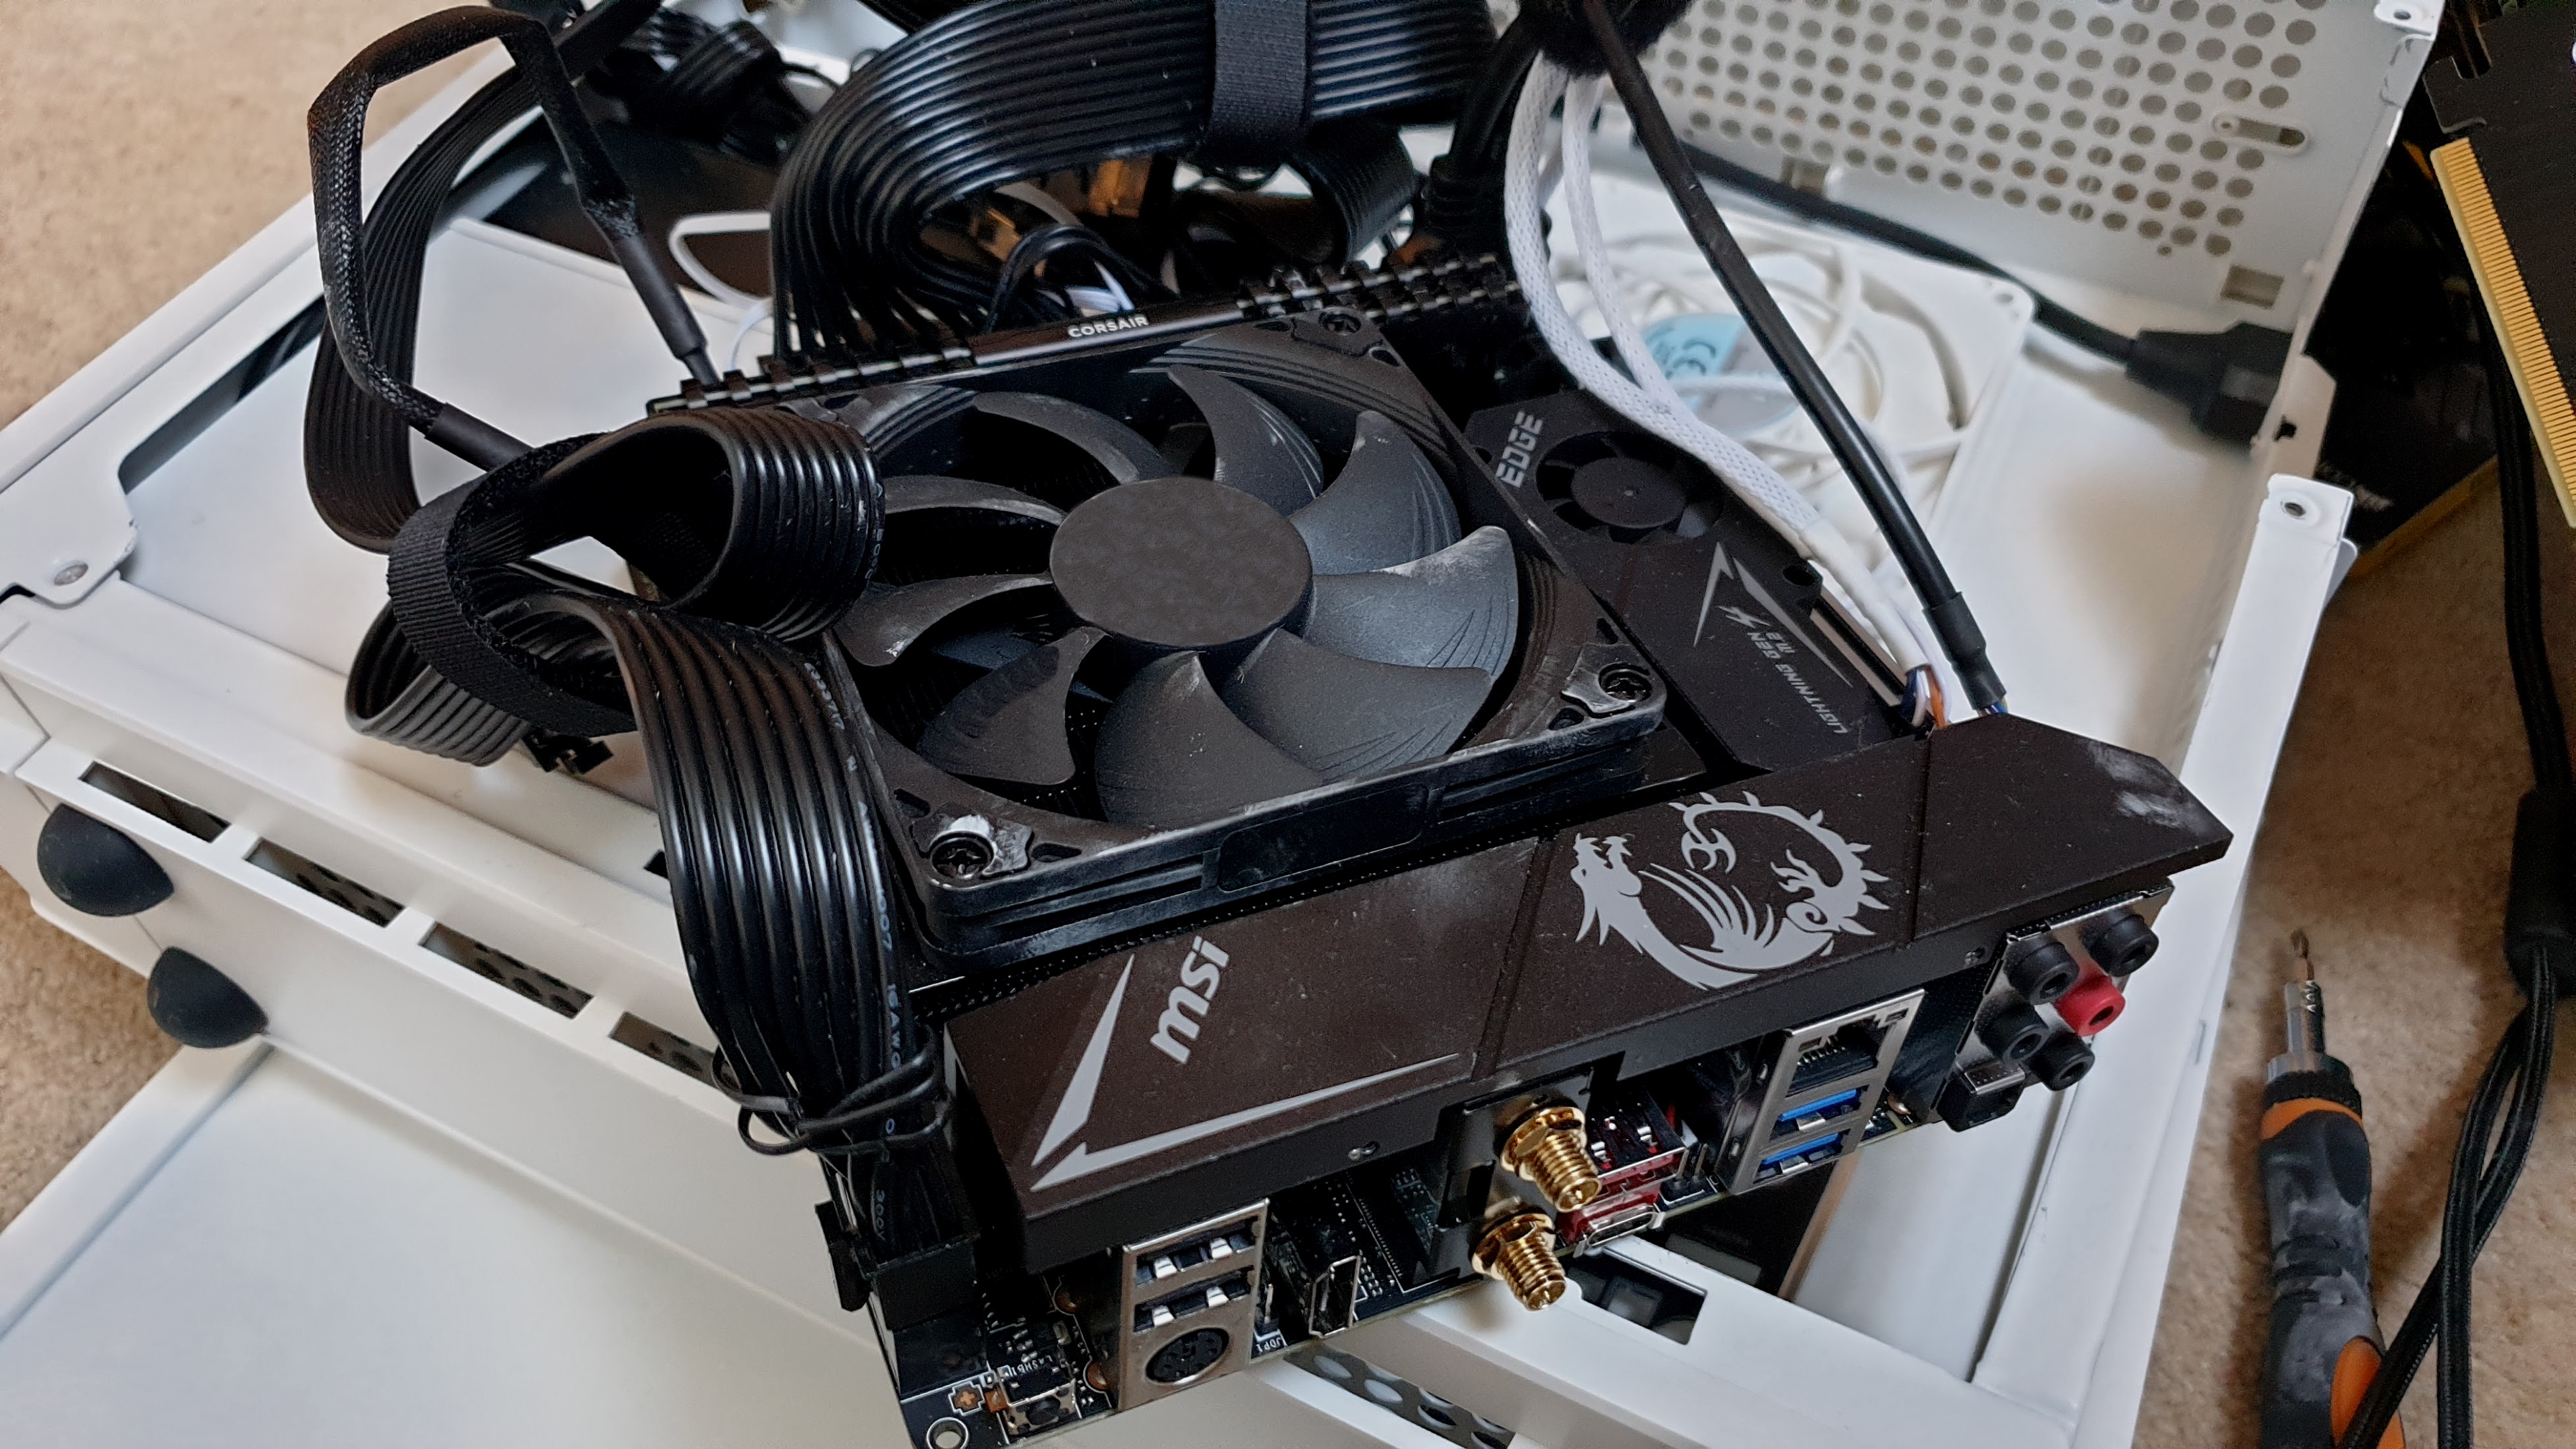
In any PC build, you should insert as many of the components into the motherboard before installing the motherboard into the case, as it makes life so much easier – and with certain components like M.2 drives and CPU coolers, you can only install them when the motherboard is outside the case anyway.
This is especially important in small form factor builds, as once the motherboard is installed, you won’t have a whole lot of space to work in.
So, I slotted in the M.2 drives into their respective ports, installed the RAM and inserted the CPU. After carefully applying a small pea-sized amount of thermal past to the CPU, I then installed the Noctua NH-L9a-AM4 chromax.black CPU cooler and attached the fan cable to the motherboard.
It all looked great, but before I installed the motherboard into the case, I put the PSU in first, as the layout of the case would have made it tricky with the mobo already there. No matter how many builds you’ve done before, it’s always worth looking at the manuals, as they can give you an idea of the order you install the components.
Once the PSU was installed, I then screwed in the motherboard. This was the trickiest part so far, as the case really is compact, and getting to all the mounting screws was a bit difficult, especially as I was using a screw driver without magnetised tips – so the screws often fell off before I could get them in the hole.
After a bit of effort and a few choice swear words, the motherboard was safely attached. I then attached the case fans to the motherboard, along with an aRGB controller which would allow me to tweak the colors of the LED stripbar that runs down the front of the Silverstone RVZ03-ARGB. Finally, I attached the power and USB headers from the case to the motherboard. It was all relatively simple, and I felt particularly smug about going for M.2 SSDs only, as it meant I didn’t have to install any SATA drives and hook them up to the motherboard either.
Then, it was time to install the GPU. Because of the design of the Silverstone RVZ03-ARGB case, the GPU doesn’t slot directly into the motherboard. Instead, it attaches to a riser, allowing it to lie horizontally. It takes a little more effort than simply slotting it directly into the motherboard, but everything went together well. Once installed, I routed the power cables from the PSU to everything, and tried my best at cable management.
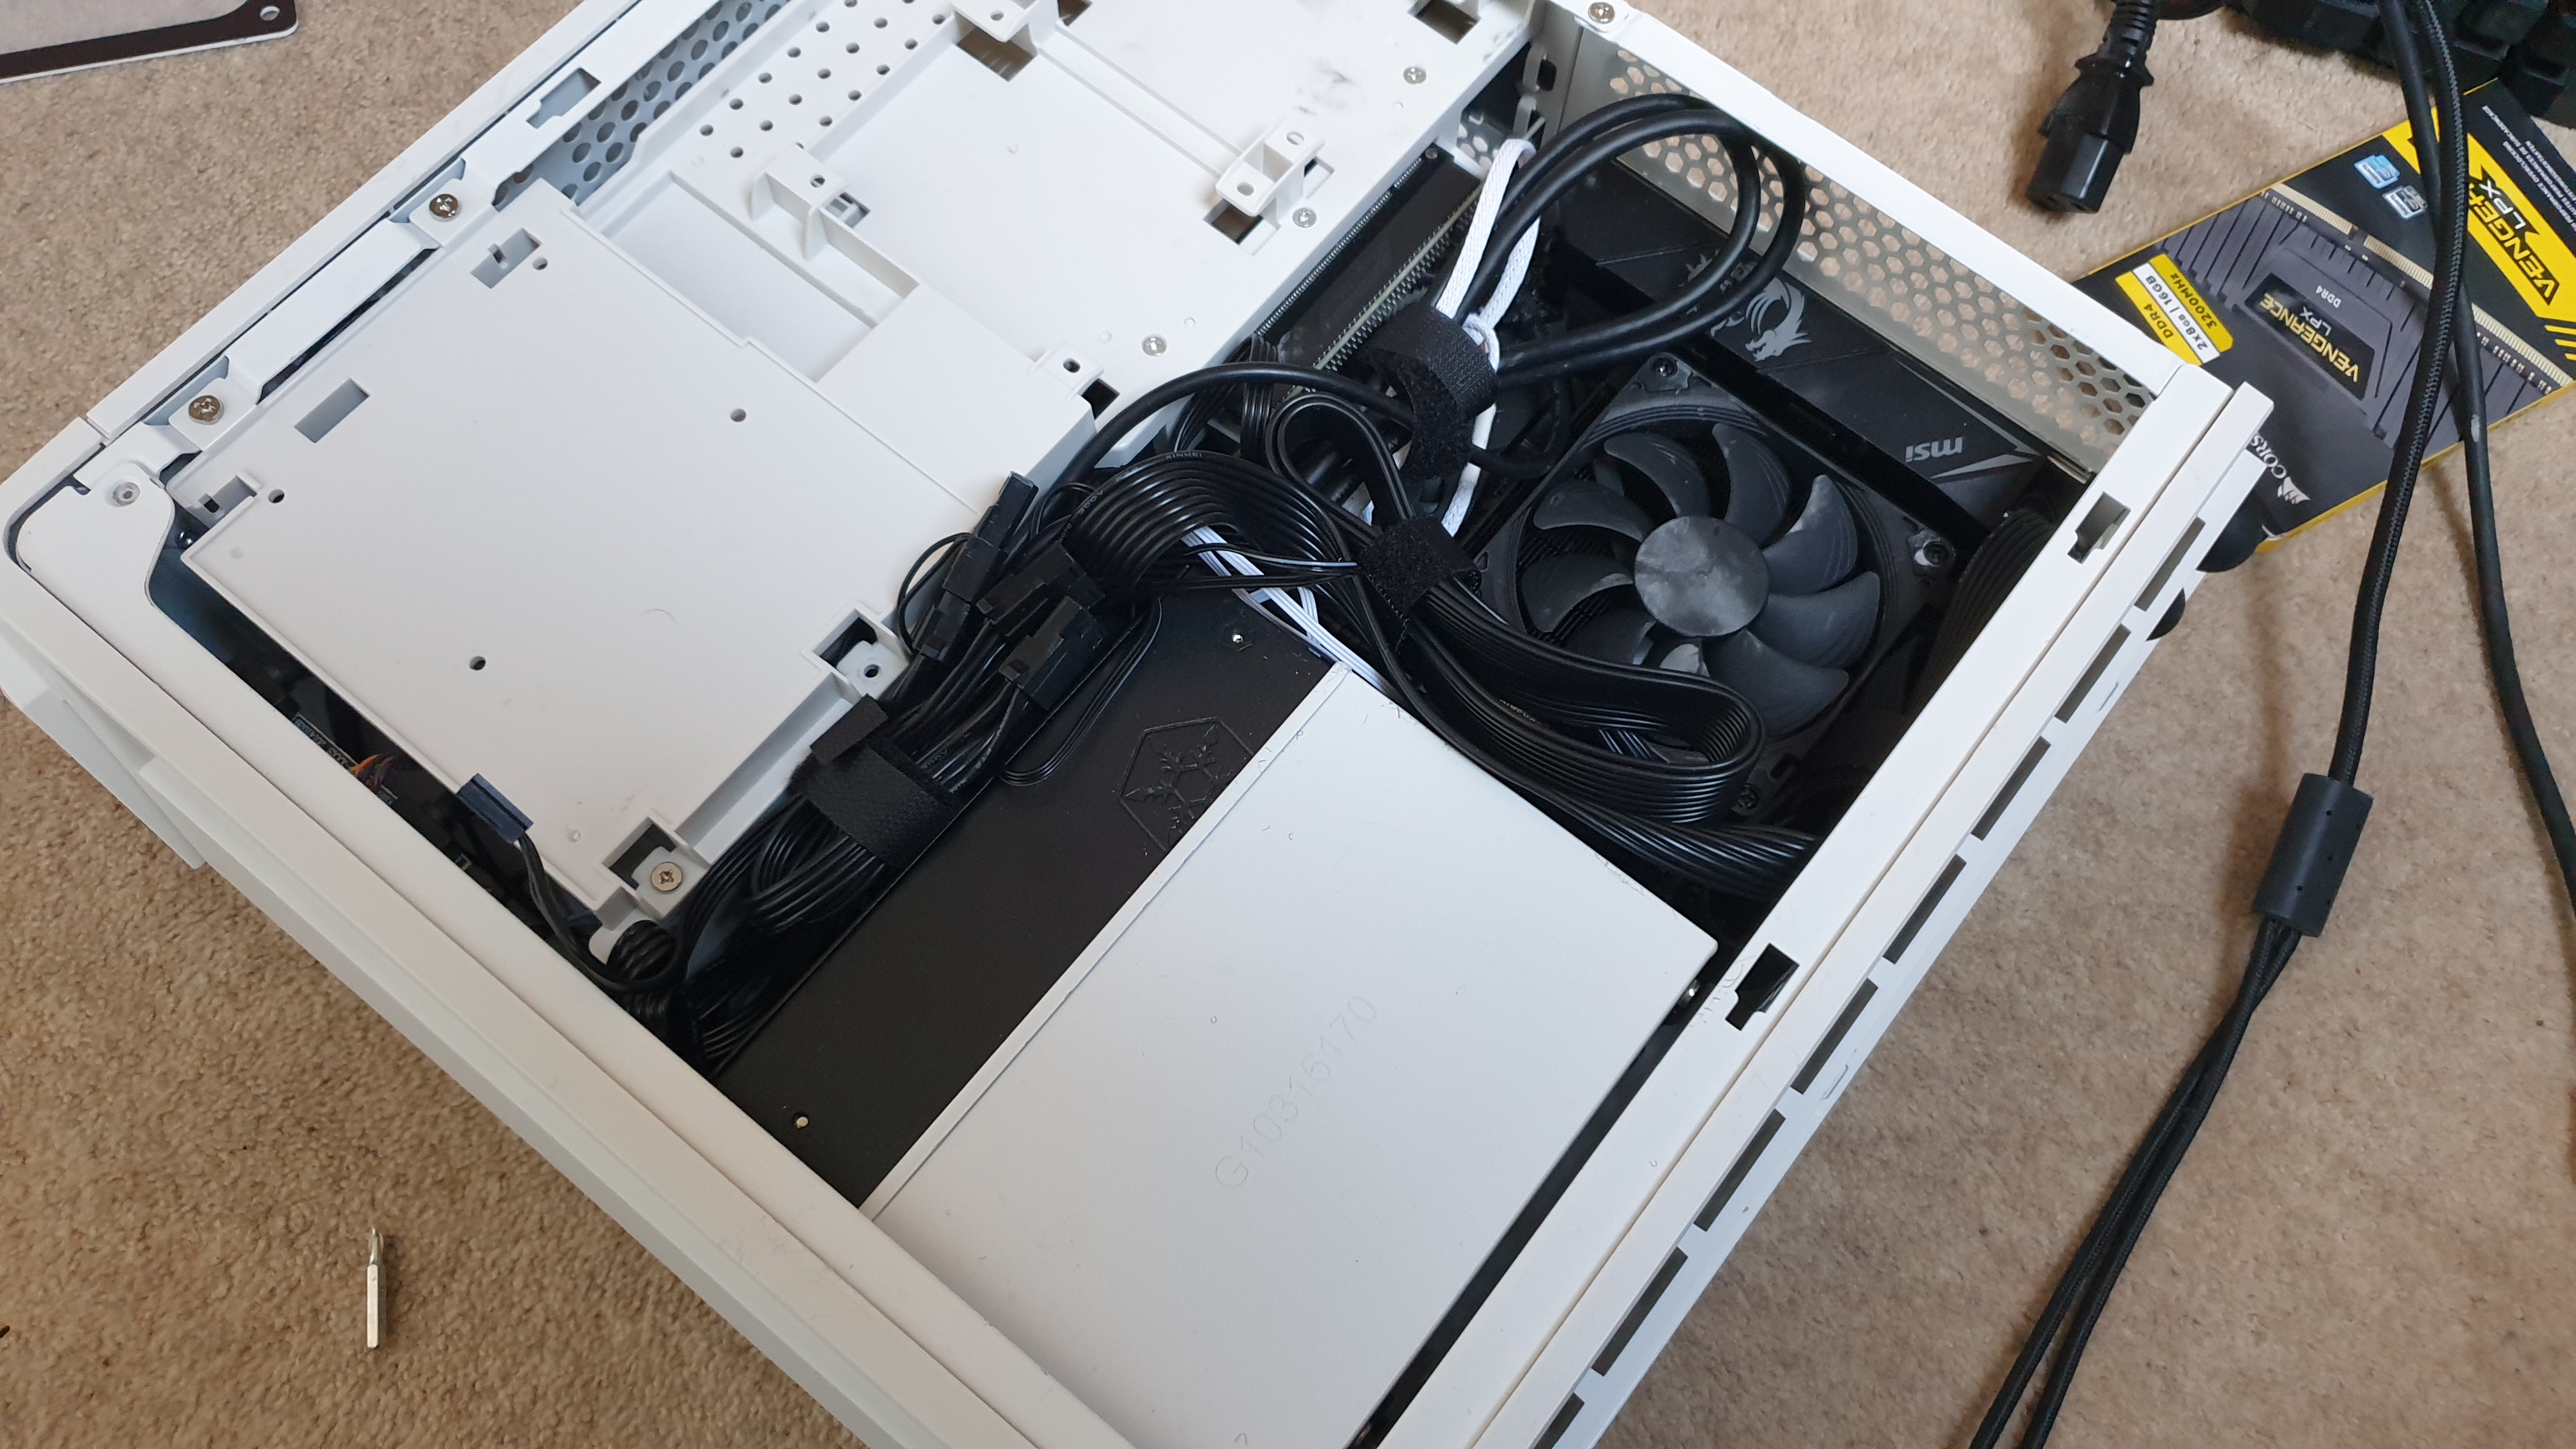
In the small case this was extremely difficult, and meant a lot of cables were tied up with Velcro and stuffed into any available space, making sure the case and CPU cooler fans had clearance. Certainly not ideal, but it at least allowed me to close the case – and with no Perspex windows, the nest of cables would not look so shameful.
On the outside, though, the PC looked great. The Silverstone RVZ03-ARGB isn’t the best looking case in the world, but it looked smart and compact. Most importantly of all, it was around the same size as the PS5, and could easily sit behind my TV.
So, I hooked it up to a power source and monitor and turned it on. And that’s when the troubles really started.

No post blues
The first time you press the power button on a PC you’ve just built is both thrilling and tense. If all goes well, you’ll either see the BIOS screen or the interface for installing an operating system if you’ve installed a bootable USB.
If it doesn’t, then you’ve now got a long task in front of you for troubleshooting the problems. And that’s what happened here.
The lights of the case turned on, and the fans kicked in (loudly) – but nothing came up on screen. At first, I worried that the GPU may not have been seated correctly, though I was pretty certain it had been. I didn’t really want to open up the case again and reseat the GPU, as that would involve a LOT of unscrewing things. I tried the onboard graphics of the motherboard. Still nothing.
Thankfully, before I started opening up the PC, I remembered that the motherboard was originally designed for Ryzen 3000 series CPUs, and while it supports Ryzen 5000 processors, like the one I installed, it needs a BIOS update. I'd already put the latest BIOS on a USB, and the MSI MPG B55OI Gaming Edge WiFi motherboard has a handy feature where you can plug in the USB stick with the BIOS update into a particular port, then press a button to automatically update the BIOS. This allows you to do it without the PC posting. A few minutes later, and the BIOS was updated. The PC restarted, and it posted! I was then able to install Windows 10 using the bootable media I'd already made.
Having thought ahead and prepared those USBs really paid off in the end. It was also a good lesson in not overthinking any issues.

It lives! And dies!
Windows 10 installed without an issue, and for a few moments I was happy - it looked like this tiny PC was good to go. Sadly, as I began to install various essential tools, such as drivers, Steam and other apps, the PC would suddenly crash, spewing the dreaded Blue Screen of Death all over my monitor. Great.
These Blue Screen errors seemed random. Sometimes they’d happen before I could even log into Windows 10. Sometimes, they’d wait a while, cruelly making me think that maybe the issue was fixed. They could happen when the PC was working hard, or when it was sitting idle. An app or task that would trigger one of these errors one moment, would run fine the next.
In short, it drove me a little loopy. Thankfully, the Blue Screen of Death errors were on screen long enough for me to take some notes, including a phrase that still sometimes appears unbidden when I close my eyes at night: “WHEA Uncorrectable Error.” If I ever die (scientists are working on ways to ensure this never happens), there’s a good chance my tombstone will read “Killed by an WHEA Uncorrectable Error.”
So, I started researching what the hell a WHEA Uncorrectable Error was, all the while acutely aware that if I’d just bought a bloody PS5, I’d be happily playing games. But having fun is over rated. Googling Windows error messages is living.
My research showed that this was a worryingly common issue with Ryzen 5000 CPUs, and their issues with RAM. I spoke to MSI, who suggested updating the BIOS to a new version (there was a beta version available), then offsetting the CPU voltage and fixing the RAM voltage.
Who needs to swing around New York as Spider-Man, when you can spend hours messing around with BIOS settings? I love PC gaming sometimes.
However, it seemed to do the trick. The PC became stable. I ran some benchmarks and stress tests, and there wasn’t a hint of a Blue Screen. ‘Yippie!’ I cried to myself. ‘At last I can play some games!’
Everything was plain sailing from there, I thought.
Hahaha. Oh boy.
It wasn’t.

Feeling the heat
After packing up the PC, installing it behind the TV, and installing some games, I fired up Assassin’s Creed: Valhalla to test it out.
At first, things went well. The game played well, it looked great on my big TV, and I was running it at proper 4K with Ultra settings applied – way above what the PS5 and Xbox Series X can manage.
I was even starting to have some fun. Then, the PC restarted.
This time, there were no error messages or warning. It just restarted. I launched the game again, and after only a few minutes, the PC did it again. This time, an error message appeared before Windows 10 even booted (never a good sign if your BIOS decides to pop up a warning message). My heart sank, as in the back of my mind, I had almost expect this. The CPU was getting too hot, and the PC was turning itself off to protect it.
While the error message suggested that it may be due to the cooler being incorrectly seated, deep down I knew this wasn’t the case. It was the case. The PC case.
As I mentioned earlier, keeping everything cool is very important when building PCs, and it’s a big challenge in smaller PC builds. Unfortunately, the Silverstone RVZ03-ARGB was just too compact, and airflow wasn’t good enough. The RTX Titan is a GPU that likes to run hot, and that hot air wasn’t get pushed out of the case well enough, while cool air wasn’t being brought in. It meant that the Noctua NH-L9a-AM4 chromax.black CPU cooler just wasn’t up to the task either. Now, I should stress that it’s not the fault of either of these products. They are both excellent, and would make a brilliant small form factor PC with more modest hardware.
But they weren’t suitable for the build I was going for. There was no way to fit in a more powerful cooling solution, so I had the difficult decision to go back to the drawing board (sort of) and get a bigger case that would allow for better airflow. It means it wouldn’t be as compact as a PS5, but I was going to still try to make it as small as possible.
I was also getting renewed appreciation for Sony’s and Microsoft’s console designers, and how they managed to make such relatively compact consoles.
New case, who dis?
I really didn’t want to start from scratch, so I looked around for a case that would allow me to keep the majority of the PC I’d just built, remain compact enough for the living room, while also offering more space for airflow and a more robust CPU cooler. Not too much to ask, eh?
Thankfully, there are a huge amount of brilliant PC cases out there that come in all shapes and sizes. By far the best thing about building a PC is the sheer amount of choice you have.
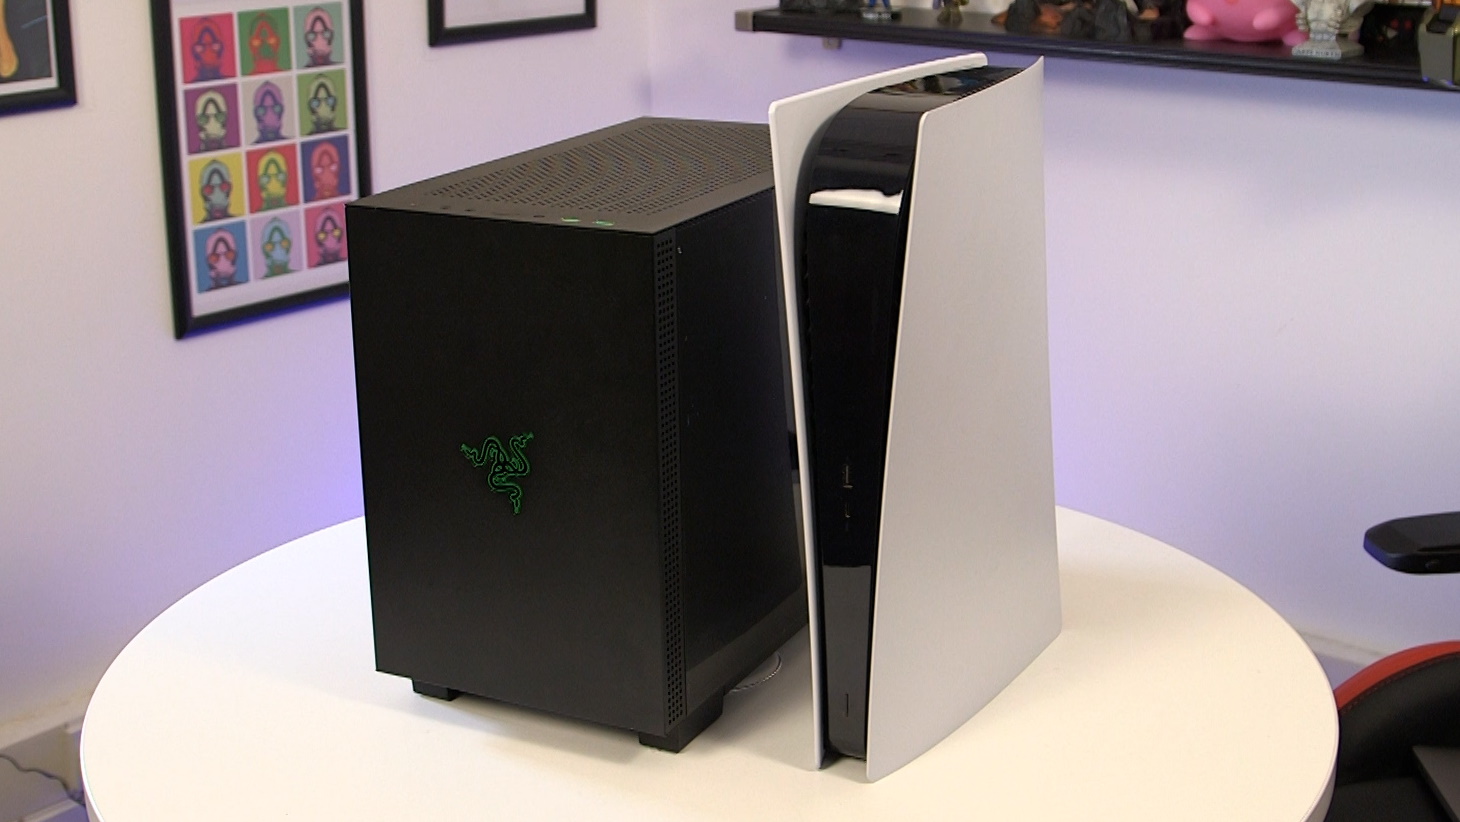
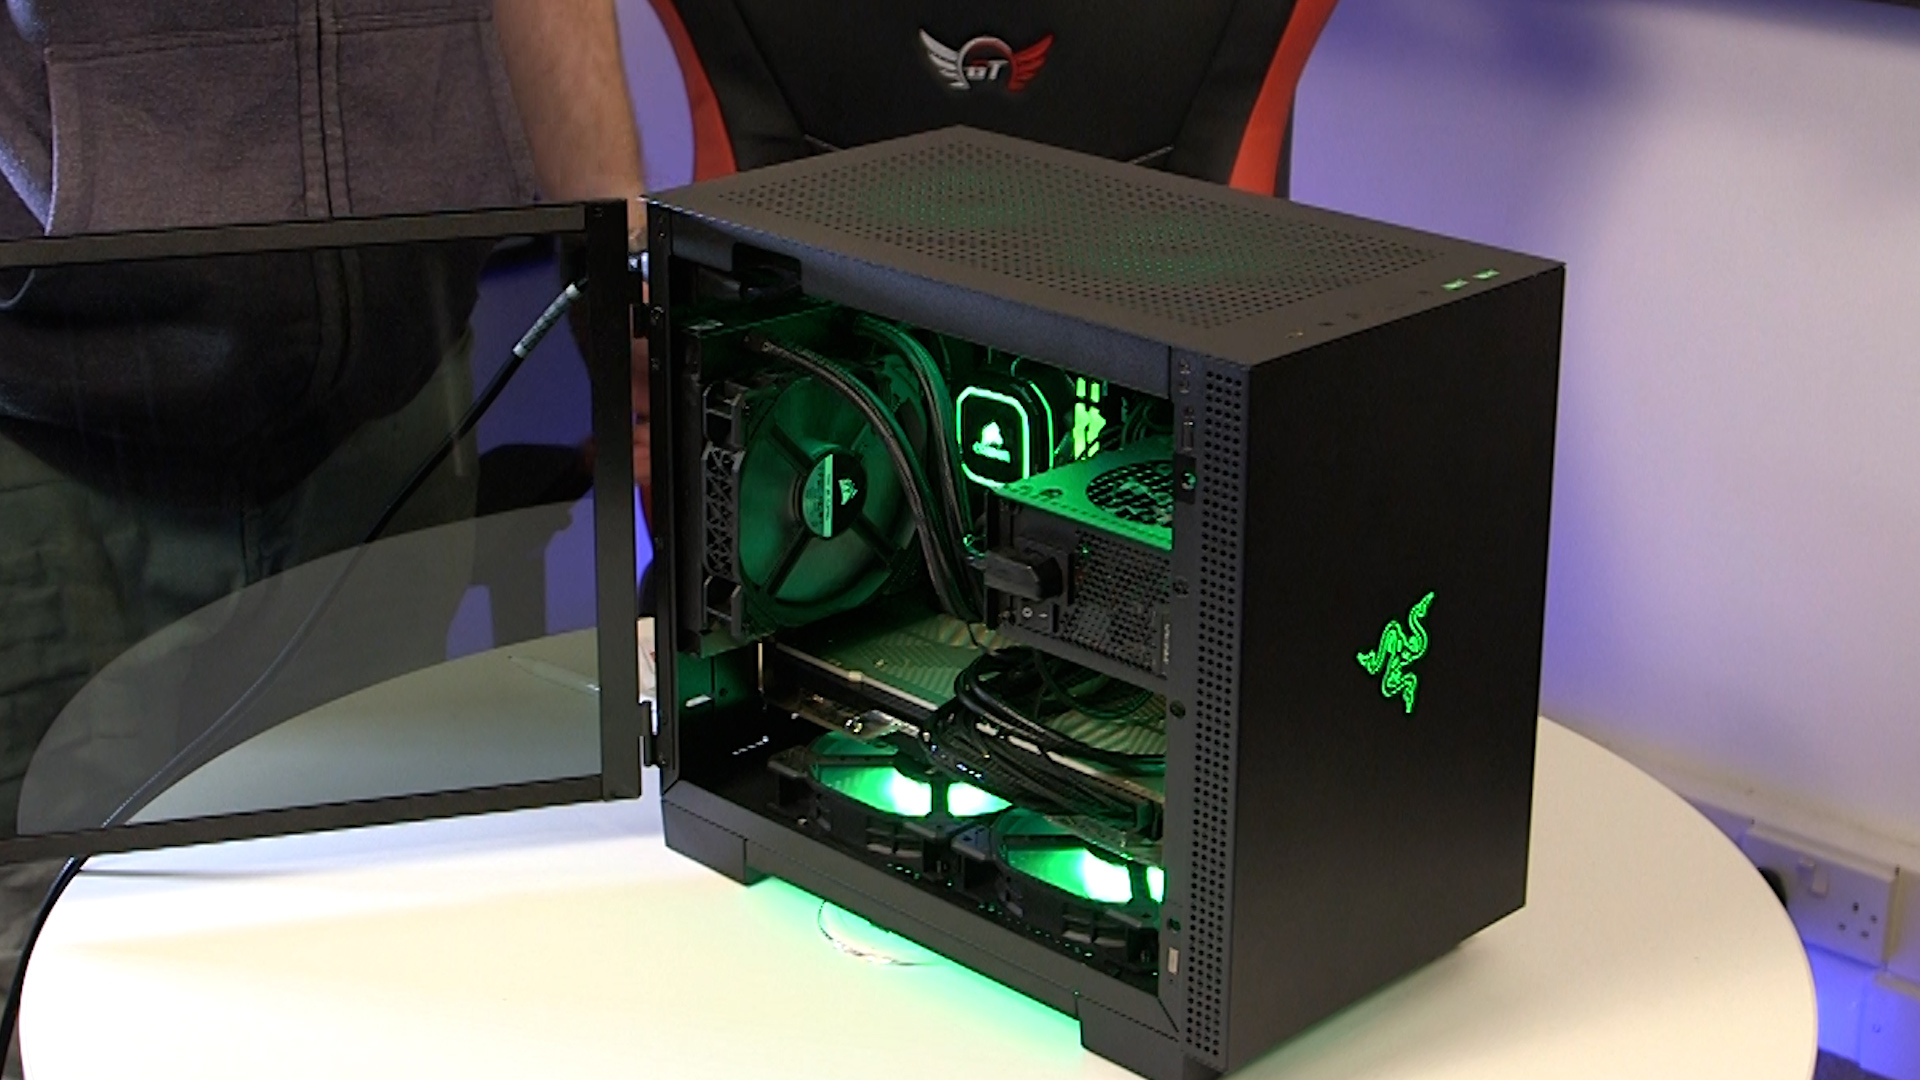
In the end, I settled for the Razer Tomahawk Mini-ITX. Not only did it look fantastic, but it offered enough space to house a large graphics card (even enough room for an RTX 3090, if I wanted to relocate that in the future), and a CPU water cooler. I took some measurements and found that even though it was quite a bit larger than the Silverstone RVZ03-ARGB case, it was still compact enough to be placed in my TV unit and away from my 2-year-old daughter’s little monkey hands.
However, with dimensions of 12.66 x 8.12 x 14.46-inches (321.5 x 206.2 x 367.2 mm), it was quite a bit larger than the PS5 (though shorter). My initial goal of making a super-powerful PC that was the same size or smaller than Sony’s console had to be ditched. Instead, my goal changed to making a compact powerful PC that would still fit under my TV, and would actually bloody work as well.
Thankfully, moving most of the components over to the new case was relatively easy – and the extra space made installing the motherboard much easier in the Razer Tomahawk Mini-ITX.
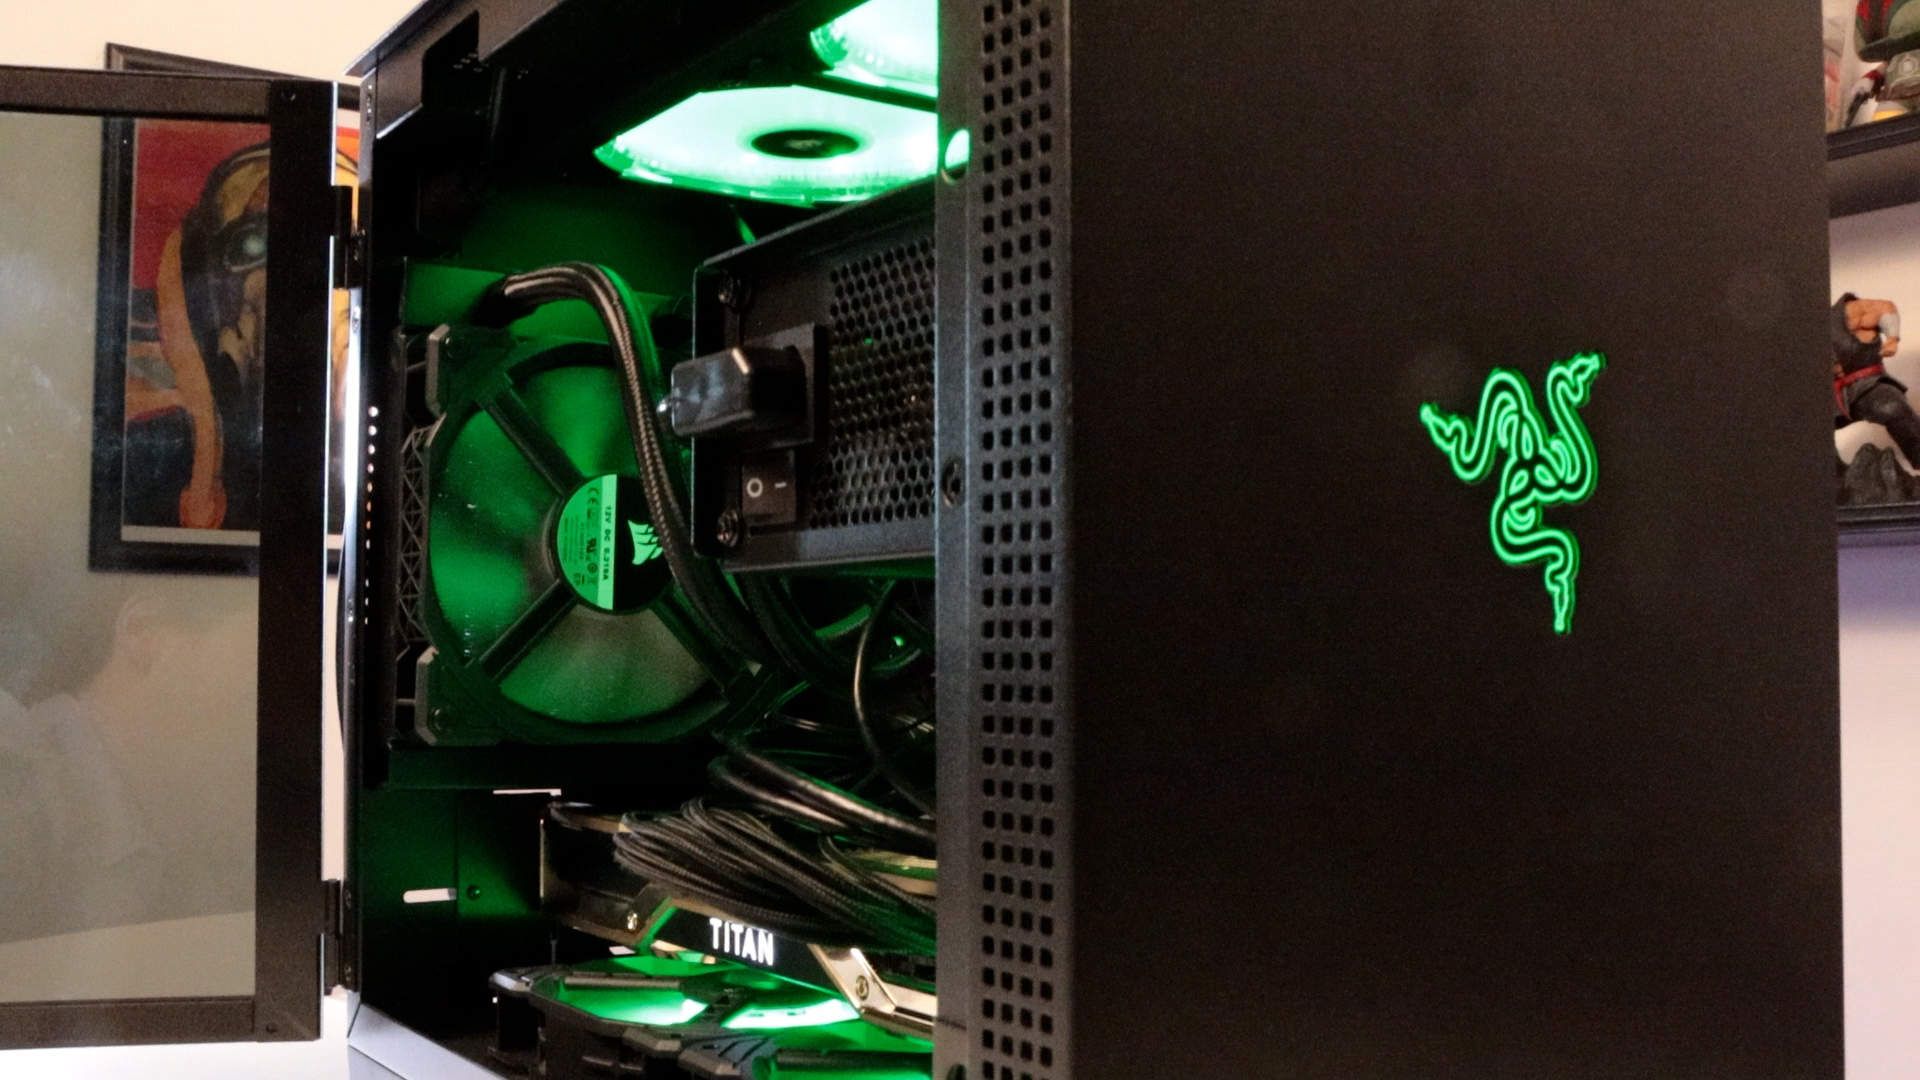
It also allowed me to swap out the CPU cooler for the Corsair iCUE H60i RGB PRO XT Liquid CPU Cooler. This is an all-in-one liquid cooler that remains compact enough for small builds, yet still does an excellent job of keeping the processor cool. As airflow still remains at a premium in the case, I thought a liquid cooler would be more suitable, drawing in cooler air from outside the case over a radiator which then keeps the liquid cool (which in turn helps keep the CPU cool). After removing the old cooler and wiping off the thermal paste, I reapplied some paste and attached the Corsair iCUE H60i RGB PRO XT Liquid CPU Cooler, which had a much easier clip mechanism for AMD chips.
I also had to change PSUs, as the Silverstone PP08 PSU wouldn’t fit in the new case (despite the case itself being bigger). The Razer Tomahawk Mini-ITX supports SFX and SFX-L PSUs, which are smaller than standard ones.
As with so many components at the moment, PSUs are in short supply, so I went with the Corsair SF600. It’s a great PSU, but at 600W it means I may need to get a more powerful one in the future if I upgrade the GPU. But doing some calculations, it was plenty for the current build.
As with the previous PSU, it’s also modular, so it allowed me to keep cables to a minimum.

Keeping cool
Because of the issues with thermals I’d already encountered, I didn’t want to take any chances when it came to keeping the PC cool. I had a few extra Corsair fans lying around from a previous build, and I bought a few more just to be on the safe side.
And now the fun began! Thinking about airflow! Take that, PS5 players and your Sackboy Adventures (or whatever it's called)! Here I am thinking about the direction that air should be moved, like I am the god of wind or something.
So, I placed two 120mm fans at the bottom of the case, below the GPU, to draw cool air in from outside the case. These two fans should also help keep the RTX Titan from getting too toasty. I then added another 120mm fan to the front of the case, which would again pull in cooler air from outside.
As I mentioned, the Corsair iCUE H60i RGB PRO XT Liquid CPU Cooler also comes with a 120mm fan, which is attached to the back of the case, and draws in air from there.
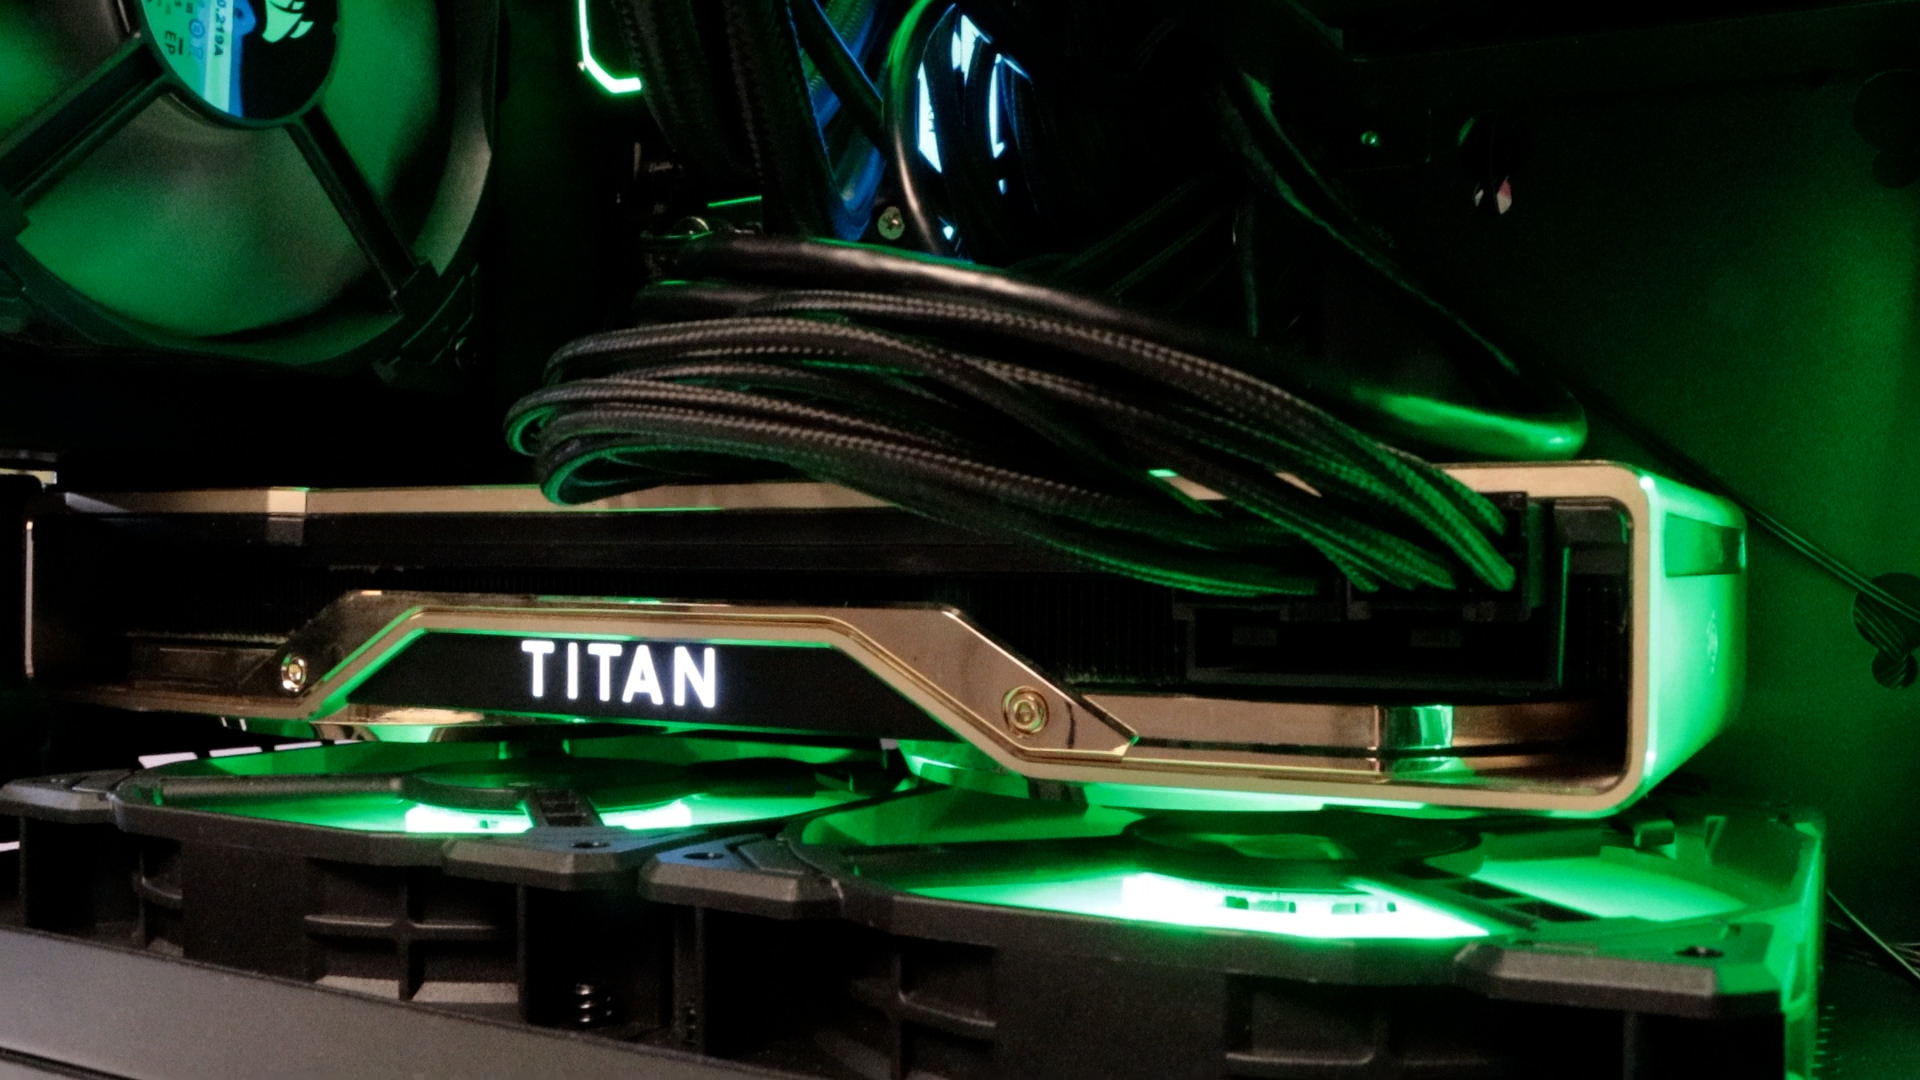
Finally, I placed two 120mm fans at the top of the case, this time as exhausts to push the hot air out of the case, and help drag the cool air from the bottom fans upwards and over the components. See? Fun!
To prove that I was DEADLY serious about airflow, I hooked all of the fans (except the CPU cooler fan) to a Corsair Commander Pro. This is a small unit that sits inside your case and connects to the internal USB header of the motherboard. The Corsair fans then get hooked up to that, and through the iCue software in Windows 10, you should get greater control over speeds and temperatures than if you just plugged the fans into the fan headers in a motherboard.
The Corsair Commander Pro also comes with two temperature sensors, which I placed at the bottom and top of the case, giving more information over the ambient air temperatures in the case, rather than relying solely on the temperature sensors of certain components.
With the iCue software installed, I was able to set up individual fan curves for each fan (or groups of fans), along with the CPU cooler, to kick in at certain speeds when either the components or temp sensors recorded a certain heat level.
By plotting the graphics, I was able to keep fan noise as low as possible, but for the fans to kick in enough to keep the PC cool when things started getting hot. After hours, days, even months with this PC, I’d still not properly played a single game. But weirdly, I was actually having fun.
While installing everything into the case, I needed to make sure cables were carefully routed around the back. Not only does this help with airflow, but the Razer Tomahawk Mini-ITX has tempered glass sides. This lets you show off your lovely components, but means a tangle of cables could also be seen, revealing my shame.
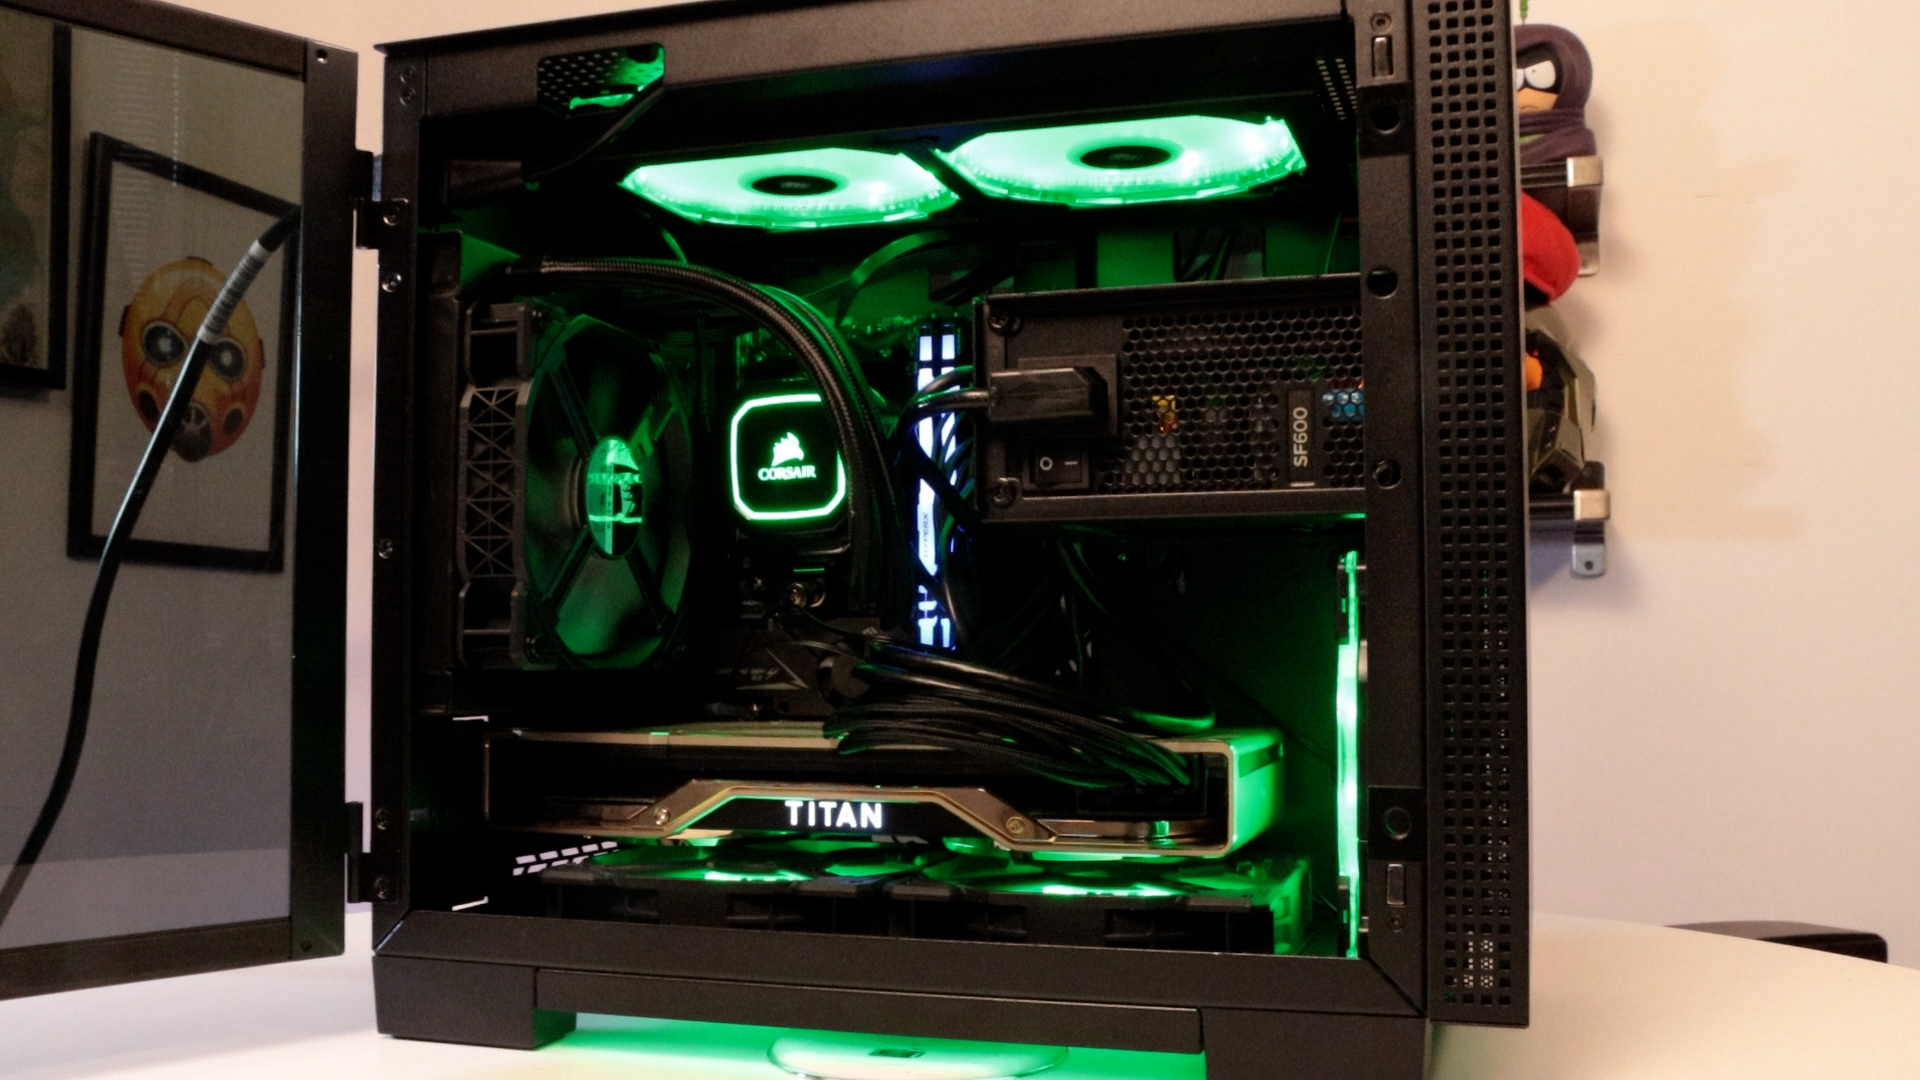
The Razer Tomahawk Mini-ITX has space behind the motherboard to route (and hide) cables. While this is fine, it means storing all the wires there can be quite tricky. Oddly, that side of the case also has a glass door, so your nest of hidden cables still gets put on display.
After a few frantic minutes of trying to close the case against all the cables (and maybe one or two ‘choice’ words uttered under my breath), the PC was finally finished! I hooked it back up to my TV, launched Assassin’s Creed: Valhalla, and played for a good hour or so. Everything seemed fine, the fans kicked in a bit loudly, but checking temperatures, everything was under control.
The sense of relief, and accomplishment, was immense. I now had a fantastic looking compact PC that was able to power the latest games at 4K with ease. Now, there was just a little bit more tinkering to do (as there always is).
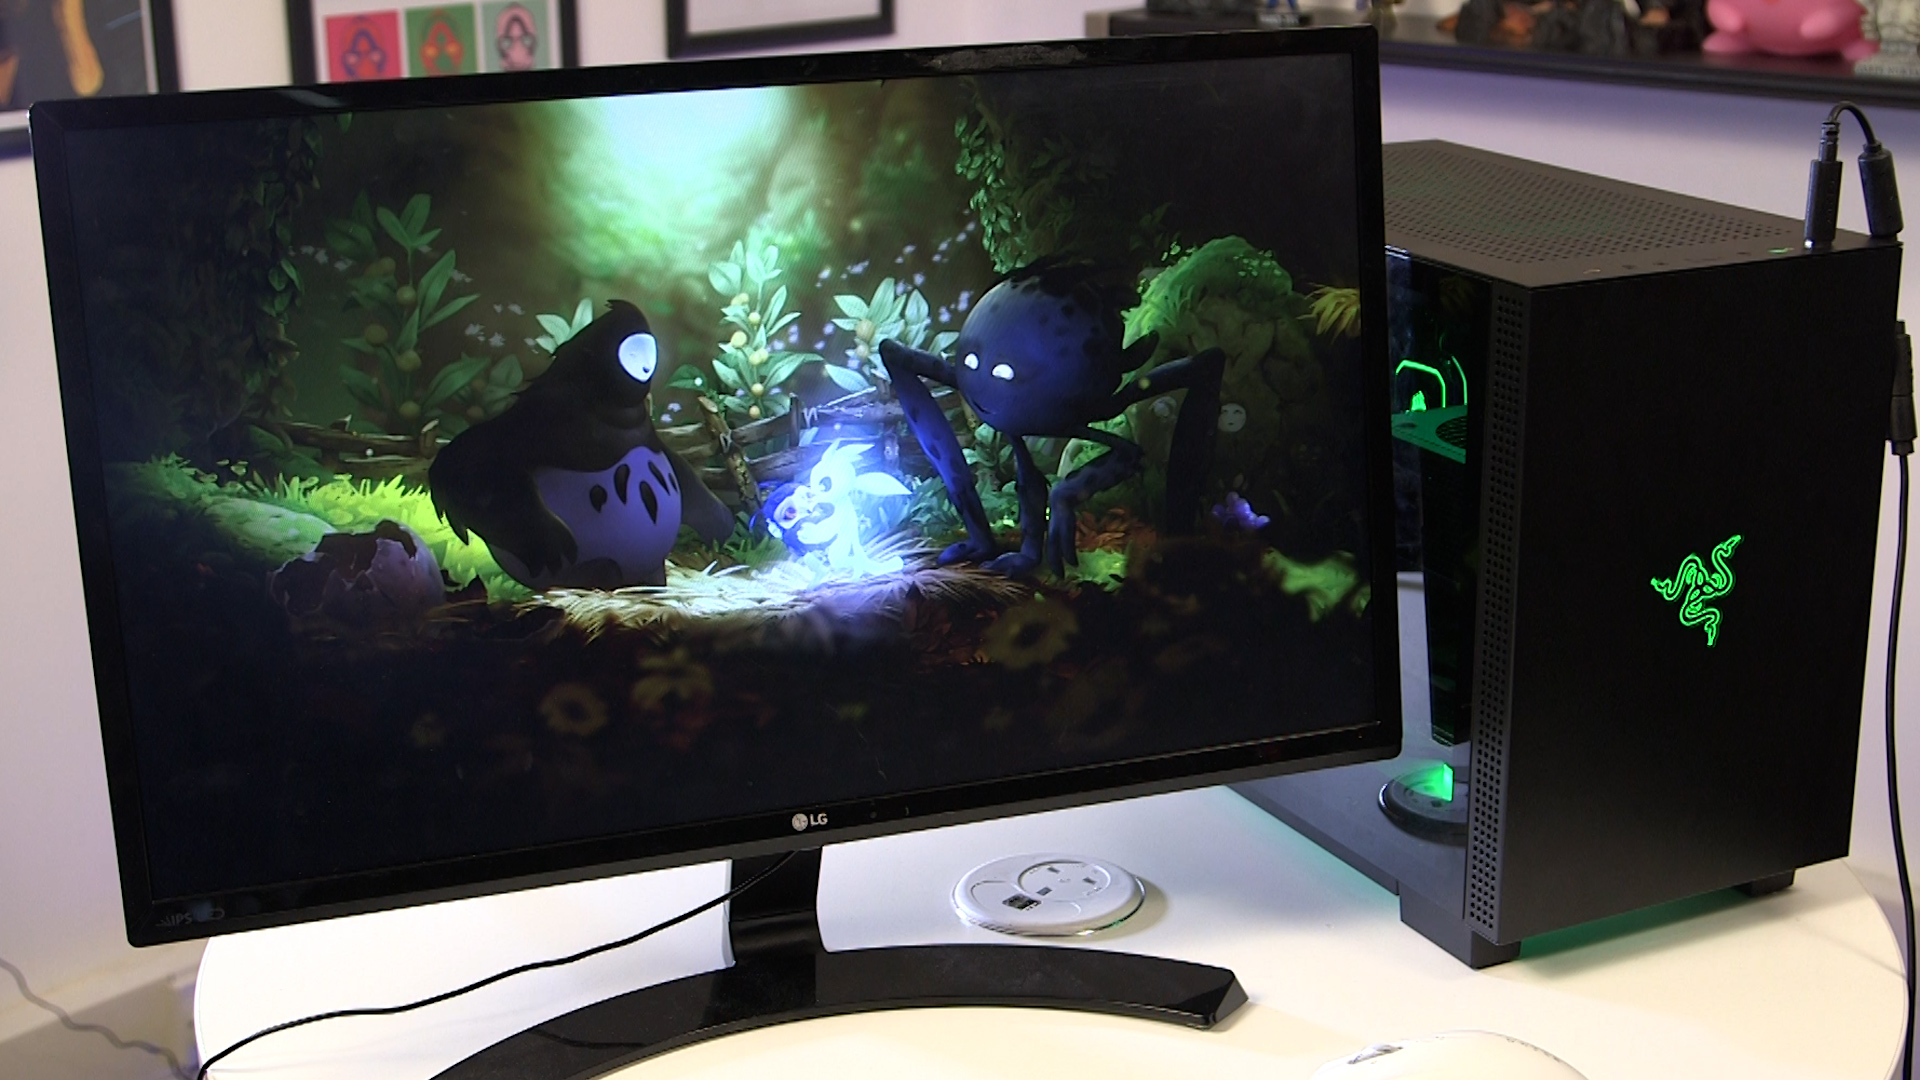
Case: Razer Tomahawk Mini-ITX
PSU: Corsair SF600
Motherboard: MSI MPG B55OI Gaming Edge WiFi
RAM: HyperX FURY DDR4 RGB 16GB
GPU: Nvidia RTX Titan
SSDs: Samsung 980 Pro 1TB Pcie 4.0 NVMe M.2 and XPG Gammix S50 Lite 2TB PCIe 4.0
CPU: AMD Ryzen 7 5800X
CPU cooler: Corsair iCUE H60i RGB PRO XT Liquid CPU Cooler
The finishing touches for a console-like experience
The aim of building this PC (apart from making me age about 15 years and hate the world) was to have a compact PC that would sit in my living room, and give me a console-like experience.
So, with the physical build of the PC done, I needed some peripherals and software to make controlling the PC in a living room more comfortable.
As I’d be sitting on a couch, not at a desk, I would be mainly playing games via controller. Luckily, I already had an Xbox One controller for my gaming PC, so I brought that downstairs, along with a wired Razer Wolverine V2 controller for some two-player action.
- Check out the best controllers for PC
Windows 10 is still an operating system that is designed for use with keyboard and mouse, so I connected up the wireless Razer Pro Type and Razer Pro Click keyboard and mouse. This would allow me to control the PC, enter in passwords, and more.
However, I really wanted to set up the PC so that I would rarely have to touch the keyboard and mouse, and just use the controller.
To do this, I first made it so that Windows 10 would automatically sign into my account.
To do this, I typed in ‘Users’ in the search box in the taskbar, then clicked Enter on the keyboard. In the window that appeared, I clicked ‘Sign-in options’. I toggled ‘Require Windows Hello sigh-in for Microsoft accounts’ to ‘Off’, and under ‘Require sign-in’, I selected ‘Never’.
Next, I pressed Windows Key + R on the keyboard and typed in netplwiz. From the screen that opened, I unchecked the box next to ‘Users must enter a username and password to use this computer’, then ‘Apply’. In entered in my username and password, and that was it. The next time the PC booted, I was taken straight to the desktop, rather than having to enter in a password or pin.
Now, this does have some security implications, as if the PC was ever stolen, people could just access the PC without needing to log in. However, I will only be using the PC for gaming, so there will be no personal information stored on the PC. If it were to be stolen, changing the passwords for Steam and other game stores will at least protect me.

I also installed Playnite. This is a free, open-source video game library manager, that gathers all your games from various services, such as Steam, Epic Games Store and more, and displays them in one library. It can be used to launch the games, and it has a full screen mode that lays your games out in an attractive interface that can be navigated by a controller.
After hooking up my accounts and importing my games, I set Playnite to launch in full screen mode when Windows 10 starts. Now, when I turn on the PC, after a few moments (thanks, speedy SSDs), I’m presented by an easy-to-navigate interface will all my games. Clicking on one will launch the game, or install it if it’s not been installed already. I don’t have to touch the keyboard or mouse once. Closing the games takes me back to Playnite, and from there I can launch another game, or turn the system off.
It works brilliantly, and looks great on a big screen TV.

The last thing to do was sort out sound. Due to my aging AV receiver, it can’t pass through 4K footage on all HDMI ports, so instead, I need to hook the PC up to the TV directly via HDMI, then connect the PC to the AV receiver via optical cable.
Now, here’s the fun thing about PCs (warning: this isn’t fun). All PCs usually come with built-in soundcards on their motherboards, so they usually have an optical out port, as mine did. However, this optical out port only transmits stereo sound through Windows 10, not surround sound. It’s an incredibly annoying situation, probably due to licencing. The PC I build is too small to fit in an internal dedicated sound card, so instead, I used a Sound Blaster X3 external sound card. This connects to the PC via USB, then to the AV receiver via Optical. The soundcard then transcodes the audio and transmits it in surround sound. After yet more tweaking, it worked. I now had surround sound coming through my living room speakers from my PC.
And that was it. After a LOT of hard work and frustration, I’ve ended up with a compact PC that can power through any new game, and yet fits under my TV and easily hidden away.
It was one of the hardest builds I’ve done, but in the end the most rewarding. It was genuinely fun to research and plan the build – it’s just a shame that there were some difficulties along the way. Some of it was my fault, such as trying to put such powerful components in a smaller case, but there were also some issues that were out of my control. The AMD Ryzen 7 5800X is a great CPU in many ways, but it gave me some real grief as well. The fact that I had to go into the BIOS and mess around with voltages to get it stable – something I’ve not had to do with Intel builds – annoyed me, and from looking on the internet I’m not the only one to experience those issues.
But, at the end of the day, I’m now able to play my huge backlog of games on my TV downstairs. Now, if only I could stop myself waking up in the middle of the night shouting “WHEA Uncorrectable Error!” life would be good again.
- We show you how to build your own gaming PC

Matt is TechRadar's Managing Editor for Core Tech, looking after computing and mobile technology. Having written for a number of publications such as PC Plus, PC Format, T3 and Linux Format, there's no aspect of technology that Matt isn't passionate about, especially computing and PC gaming. He’s personally reviewed and used most of the laptops in our best laptops guide - and since joining TechRadar in 2014, he's reviewed over 250 laptops and computing accessories personally.